Maple Syrup Granola Bars Healthy Snack Idea
Looking for a tasty and healthy snack? Maple syrup granola bars are just what you need! Packed with wholesome ingredients, these bars are easy to make and full of flavor. In this article, I’ll share simple steps, health benefits, and tips to customize your granola bars. Whether you want a quick bite or a sweet treat, these bars are perfect for you. Let’s dive into the delicious world of maple syrup granola bars!
Ingredients
Overview of Key Ingredients
To make maple syrup granola bars, you need simple and wholesome ingredients. Here’s what you will use:
– 2 cups rolled oats
– 1/2 cup almond butter (or substitute with peanut butter)
– 1/2 cup pure maple syrup
– 1/2 cup mixed chopped nuts (walnuts, pecans, or your favorite)
– 1/2 cup dried fruits (choose cranberries, apricots, or any dried fruit you prefer)
– 1/4 cup seeds (pumpkin or sunflower seeds work well)
– 1/2 teaspoon ground cinnamon
– 1/4 teaspoon salt
– 1/2 teaspoon vanilla extract
These ingredients blend together to create a tasty and chewy snack. The oats form the base, giving you fiber. Nuts and seeds add healthy fats and crunch. Dried fruits bring sweetness and flavor.
Health Benefits of Maple Syrup
Maple syrup is not just sweet; it has health perks too. It is a natural sweetener, unlike refined sugar. It contains antioxidants that help fight free radicals in your body. These antioxidants may lower the risk of chronic diseases. Maple syrup also has vitamins and minerals. It offers manganese, zinc, and calcium, which support your body’s functions. Using maple syrup in your granola bars makes them a healthier choice than many store-bought snacks.
Alternative Ingredients (Nut butters, Dried fruits)
You can customize this recipe based on your tastes or needs. If you have a nut allergy, try sunflower seed butter instead of almond butter. It has a similar texture and flavor. For the dried fruits, you can mix and match. Use raisins, dates, or figs to find your favorite combination. This flexibility makes the recipe personal and fun. You can even add chocolate chips for a treat! Just remember to keep the balance of wet and dry ingredients. This way, your bars will hold together well.
Step-by-Step Instructions
Preparation Steps
First, I preheat my oven to 350°F (175°C). Next, I line an 8×8-inch baking dish with parchment paper. I leave some paper hanging over the sides. This makes it easy to lift the bars out later.
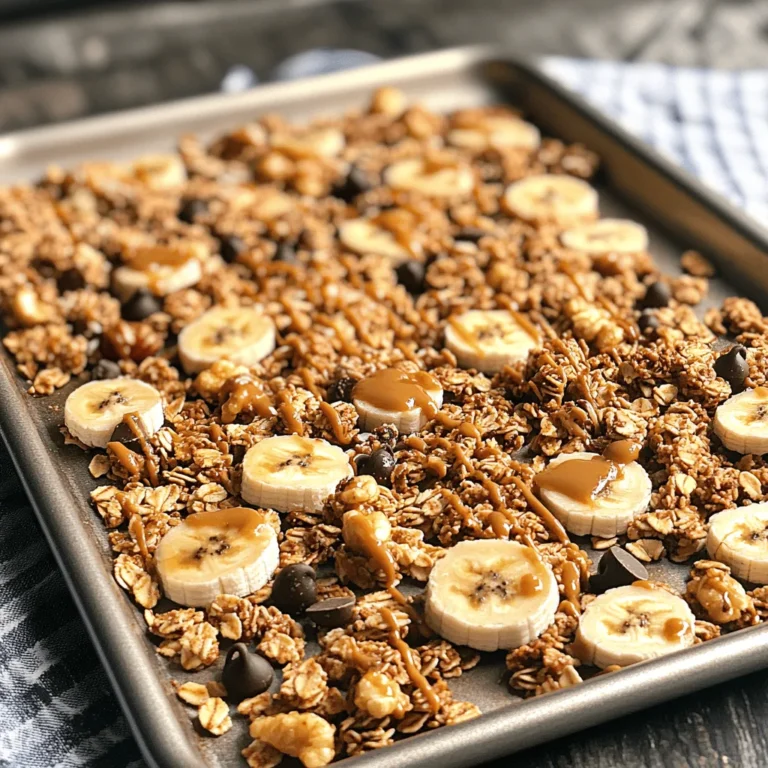
In a large bowl, I mix together the dry ingredients. I add 2 cups of rolled oats, 1/2 cup of chopped nuts, 1/2 cup of dried fruits, and 1/4 cup of seeds. I sprinkle in 1/2 teaspoon of ground cinnamon and 1/4 teaspoon of salt. I stir everything until it is well mixed.
In another bowl, I warm 1/2 cup of almond butter and 1/2 cup of maple syrup in the microwave. I heat it for about 30 seconds. Then, I stir until it is smooth. I add 1/2 teaspoon of vanilla extract and mix again.
Baking Process
Now, I pour the warm almond butter and maple syrup mixture over the dry mix. I stir it all together until every piece of oat is coated. This step is key for flavor.
I transfer this mixture to the lined baking dish. Using my hands or a spatula, I press the mixture down firmly. I want it to be even and flat.
Then, I place the dish in the oven. I bake the bars for about 20-25 minutes. I look for the edges to turn golden brown. The smell in my kitchen is fantastic at this point!
Cooling and Cutting Instructions
After baking, I take the dish out of the oven. I let it cool for about 10 minutes in the pan. Then, I use the parchment paper to lift the granola out. I place it on a cutting board and let it cool completely.
Once cool, I cut the mixture into 12 bars. I find that a sharp knife works best for this. Each bar is now ready to enjoy!
Tips & Tricks
Best Practices for Perfect Bars
To make the best maple syrup granola bars, follow a few key tips. First, measure your ingredients carefully. Too much or too little of any ingredient can change the texture. Next, press the mixture firmly into the pan. A dense bar holds together better. Lastly, let the bars cool completely before cutting. This step helps them firm up nicely.
Common Mistakes to Avoid
Many people make common mistakes when making granola bars. One mistake is not mixing the wet and dry ingredients well. This can lead to uneven flavor. Another issue is overbaking. Keep an eye on the bars and remove them when they are golden brown. Lastly, don’t skip using parchment paper. It helps with easy removal and cleanup.
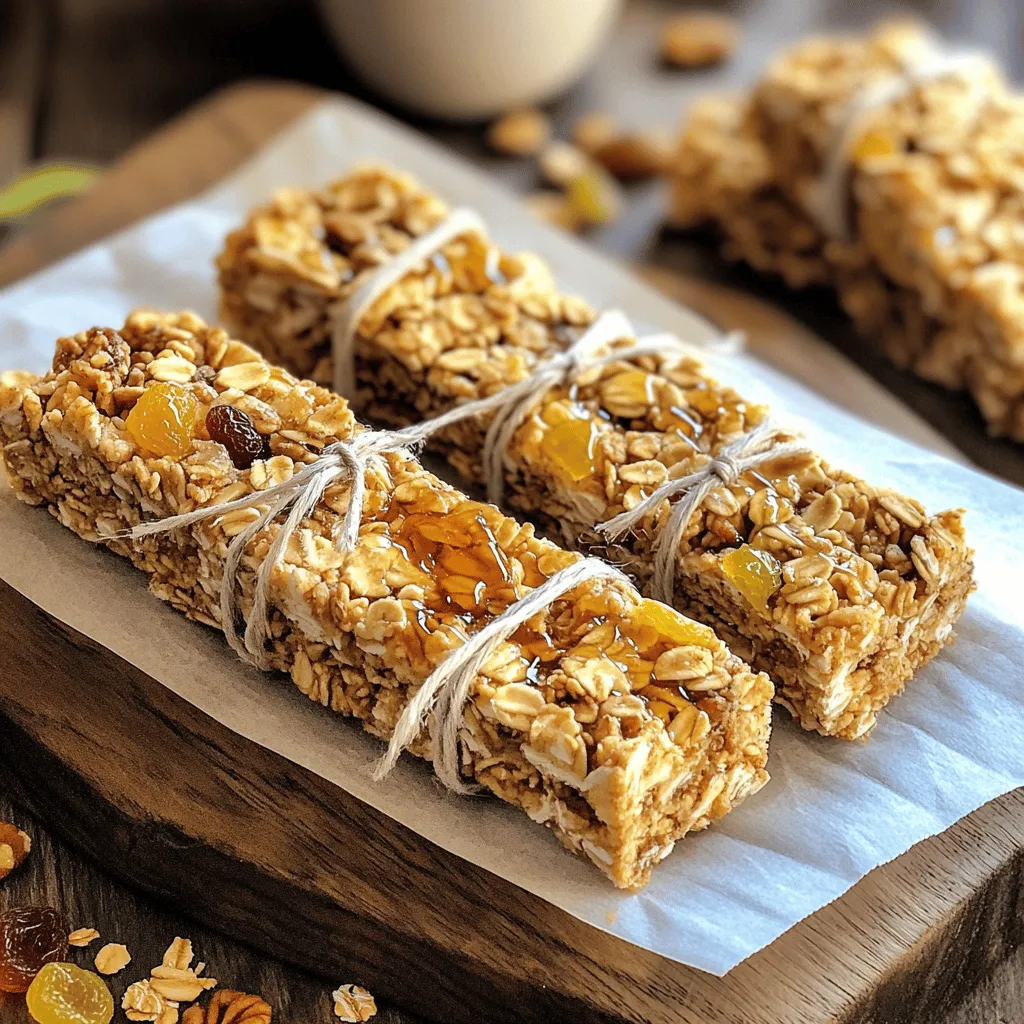
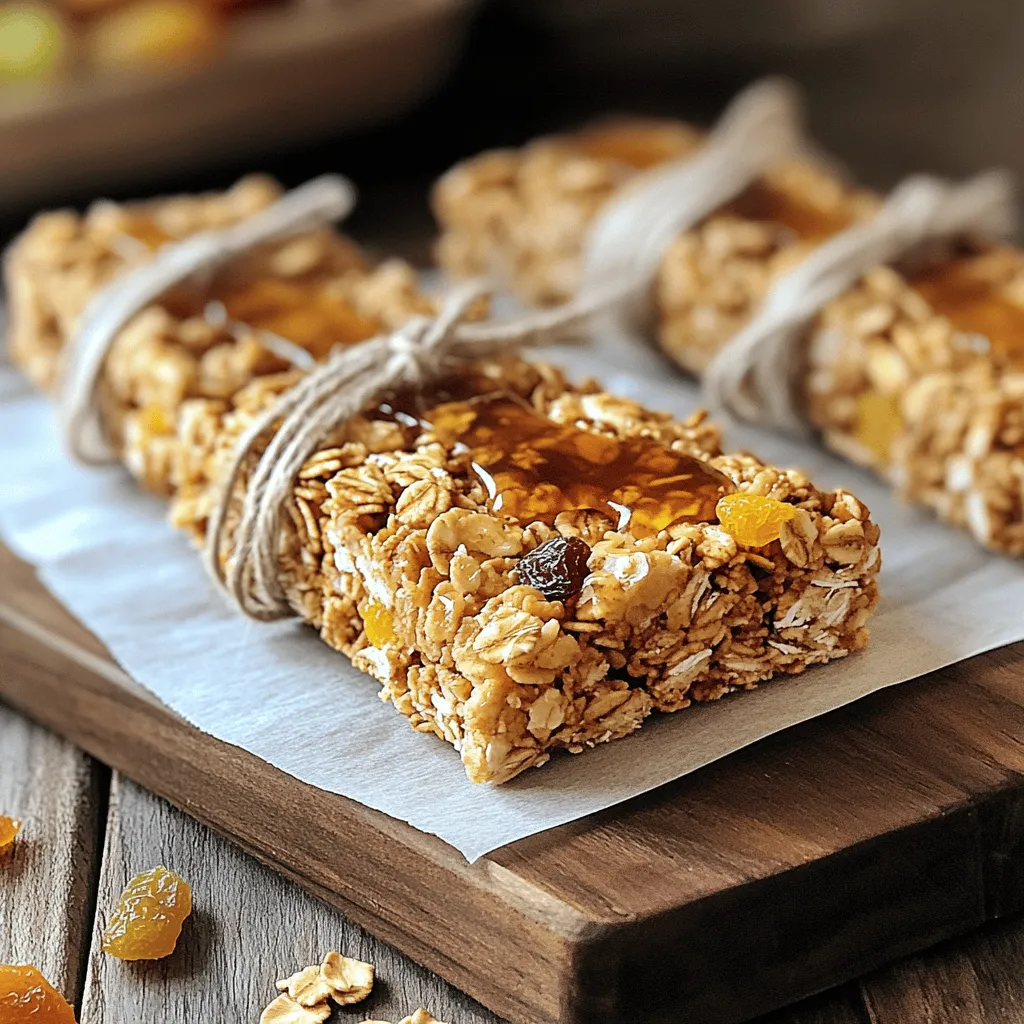
Presentation Suggestions
For a beautiful presentation, wrap each bar in parchment paper. You can tie them with twine for a rustic look. This not only looks nice but also keeps the bars fresh. Alternatively, place the bars in a decorative container. This invites friends and family to grab a snack and enjoy.
Variations
Nut-Free Options
If you want nut-free granola bars, just swap the almond butter. Use sunflower seed butter instead. This keeps the bars crunchy and tasty. You can also skip the mixed nuts. Add more seeds or puffed rice. These options give your bars great texture without nuts.
Flavor Variations (Chocolate, Coconut)
You can spice up your maple syrup granola bars with flavors. For a chocolate twist, mix in dark chocolate chips. Just 1/2 cup will do. If coconut is your jam, fold in 1/2 cup of unsweetened shredded coconut. Both options make your bars more exciting and flavorful.
Customizing for Dietary Needs (Vegan, Gluten-Free)
To make these bars vegan, the current recipe is already perfect. Just use maple syrup and plant-based butter. For gluten-free granola bars, ensure your oats are labeled gluten-free. This way, you can enjoy a healthy snack without any worries. Feel free to adjust the mix-ins based on your dietary needs.
Storage Info
Best Storage Practices
To keep your maple syrup granola bars fresh, store them in an airtight container. This helps keep moisture out and prevents them from getting stale. You can place parchment paper between layers of bars to avoid sticking. Make sure to keep the container in a cool, dry place, like a pantry.
Shelf Life of Granola Bars
These granola bars can last about one week at room temperature. If you store them in the fridge, they can last up to two weeks. The cooler air helps slow down spoilage. Always check for any signs of mold or unusual smells before eating.
Freezing Instructions
If you want to save some bars for later, freezing is a great choice. Wrap each bar in plastic wrap or foil. Then, place them in a freezer-safe bag or container. They can last for about three months in the freezer. When you’re ready to eat, just take them out and let them thaw at room temperature. Enjoy these tasty snacks anytime!
FAQs
How do I make granola bars without baking?
You can make no-bake granola bars easily. Start with rolled oats and nut butter. Mix them with honey or maple syrup. Add nuts, seeds, and dried fruits for flavor. Press the mixture into a pan. Chill it in the fridge until firm. Cut into bars and enjoy!
Can I use honey instead of maple syrup?
Yes, honey works well instead of maple syrup. It adds sweetness and flavor, just like maple syrup. Keep in mind honey has a different taste. Choose a light honey for a milder flavor. This swap may change the texture slightly, but the bars will still be tasty.
Where can I buy pre-made maple syrup granola bars?
You can find pre-made maple syrup granola bars at many grocery stores. Look in the snack aisle or the health food section. Brands like Nature Valley and KIND often have options. You can also shop online for a wider selection. Check for natural ingredients for the best taste.
What are the nutritional facts of these bars?
These bars are packed with nutrients. Each serving has about 200 calories. They provide healthy fats from nuts and protein from nut butter. You get fiber from oats and dried fruits. The bars contain natural sugars from maple syrup. They are great for a quick, healthy snack!
In this post, we explored key ingredients for granola bars, highlighting maple syrup and alternatives. You learned the preparation steps, baking tips, and cooling techniques to create perfect bars. We discussed variations for different diets and gave storage advice for freshness.
Granola bars can be easy and fun to make. With this guide, you can craft snacks that fit your taste and needs. Enjoy your homemade bars, and don’t be afraid to get creative!

![To make this delicious granola, start with these main ingredients: - 3 cups rolled oats - 1 cup nuts (choose from almonds, pecans, or walnuts), coarsely chopped - 1/2 cup mixed seeds (pumpkin seeds and sunflower seeds) These ingredients form the base of your granola. Rolled oats give it the crunch, while nuts and seeds add healthy fats and protein. Next, we need flavoring ingredients to create that chai spice goodness: - 1/2 cup unsweetened coconut flakes - 1/2 cup honey or pure maple syrup - 1/4 cup coconut oil, melted - 2 teaspoons ground cinnamon - 1 teaspoon ground ginger - 1/2 teaspoon ground cardamom - 1/4 teaspoon freshly ground black pepper - 1/4 teaspoon ground cloves - 1/4 teaspoon sea salt These flavorings bring warmth and sweetness. The spices create a cozy chai taste that warms your soul. For extra fun, consider these optional additions: - 1/2 cup dried fruit (options: raisins, cranberries, or chopped apricots), added after baking - 1 teaspoon pure vanilla extract Adding dried fruit gives a sweet burst, while coconut oil helps everything stick together. You can find the full recipe to get started on this tasty treat. First, preheat your oven to 350°F (175°C). This step is key for achieving that perfect crunch. Next, prepare a large baking sheet by lining it with parchment paper. This keeps your granola from sticking and makes cleanup easier. In a spacious mixing bowl, mix the rolled oats, coarsely chopped nuts, mixed seeds, and coconut flakes. Stir gently to blend everything well. This step is crucial to ensure each bite is packed with flavor. In a separate smaller bowl, whisk together the honey (or maple syrup), melted coconut oil, and pure vanilla extract. You want this mixture to be smooth and well combined. This liquid will help bind your granola and add sweetness. Pour this liquid mixture over the dry ingredients. Toss everything together until the dry ingredients are fully coated. This ensures every piece of granola is flavorful and delicious. Now, in another small bowl, mix all the spices: ground cinnamon, ground ginger, ground cardamom, black pepper, ground cloves, and sea salt. Sprinkle this spice blend evenly over the granola mixture. Stir again to coat every piece with those amazing spices. Spread the granola mixture into a single layer on the prepared baking sheet. It should be evenly spread out for consistent baking. Place the baking sheet in your preheated oven. Bake for 20-25 minutes, stirring halfway through. This helps the granola brown evenly. Watch for a nice golden hue to know it's ready. Once done, take the granola out of the oven and let it cool completely on the baking sheet. This cooling step is important to get that delightful crunch. After it cools, gently mix in your choice of dried fruit. Finally, transfer the granola to an airtight container to keep it fresh. Enjoy the crunchy and flavorful delight of your homemade chai spiced granola! For the complete recipe, check out the [Full Recipe]. To get that perfect crunch in your chai spiced granola, let it cool on the baking sheet. Cooling helps it firm up. If you skip this step, your granola may stay soft. Once you take it out of the oven, leave it alone for at least 30 minutes. Don't stir it right away. This is key for that crunchy texture you want. For maximum crunch, spread the mixture in a single layer before baking. If it's too thick, it won't cook evenly. Stir it halfway through baking to brown all sides. Keep an eye on it to avoid burning. You can switch up the nuts and seeds based on what you like. Almonds, pecans, or walnuts are great choices. For seeds, try pumpkin or sunflower seeds. This gives you a chance to mix flavors and textures. If you want to change sweeteners, consider using maple syrup or agave nectar. These options work well for different diets. They can add a unique taste to your granola, too. There are many fun ways to enjoy chai spiced granola. You can eat it plain as a snack. Adding yogurt and fresh fruits makes a lovely breakfast. You can also sprinkle it on smoothies for extra crunch. For a twist, try it over oatmeal or as a topping for desserts. The warm spices will elevate any dish. Enjoy this tasty granola in your own creative ways! For the detailed preparation, check out the Full Recipe. {{image_4}} To make this granola gluten-free, use gluten-free oats. Check the labels to ensure no cross-contamination. You can also use gluten-free sweeteners, like pure maple syrup, instead of honey. This keeps your granola safe for those with gluten allergies. If you need a nut-free granola, simply swap nuts for seeds. Sunflower seeds or pumpkin seeds work well. They add crunch and nutrition, while keeping the flavor intact. You won't miss the nuts, and this version is safe for most schools and events. Want to change the spice level? You can easily tweak the recipe. For more heat, add extra ground ginger or a pinch of cayenne pepper. If you prefer it sweeter, add more honey or maple syrup. Taste as you go to find your perfect blend. To keep your chai spiced granola fresh, store it in an airtight container. This helps keep moisture out. Use glass jars or plastic bins with tight seals. Store in a cool, dark place like a pantry. Avoid exposing your granola to sunlight, as it can affect its flavor. Homemade granola lasts about two to three weeks at room temperature. If you notice any off smells or changes in texture, it may be time to toss it. Signs of spoilage include a stale taste or changes in color. Always check your granola before using it. Freezing is a great way to store granola long-term. To freeze it, let the granola cool completely. Then, place it in a freezer-safe bag or container. Remove as much air as possible to avoid freezer burn. When you want to enjoy it, thaw it in the fridge overnight. You can also use it straight from the freezer in smoothies or yogurt bowls. To make Chai Spiced Granola, follow these steps: 1. Preheat your oven to 350°F (175°C). Line a baking sheet with parchment paper. 2. In a large bowl, mix together rolled oats, chopped nuts, mixed seeds, and coconut flakes. 3. In another bowl, whisk together honey (or maple syrup), melted coconut oil, and vanilla extract. 4. Pour the liquid mixture over the dry ingredients. Toss until everything is well mixed. 5. In a small bowl, combine the spices: cinnamon, ginger, cardamom, black pepper, cloves, and sea salt. 6. Sprinkle the spice blend over the granola mix. Stir again to coat everything evenly. 7. Spread the mixture out on the baking sheet in a single layer. 8. Bake for 20-25 minutes. Stir halfway through for even browning. 9. Once golden, remove from the oven and let it cool completely. 10. Add your choice of dried fruit and store in an airtight container. Yes, you can replace honey with other sweeteners. Here are some great options: - Maple syrup: A good choice for a vegan option. - Agave nectar: Sweet and mild, it works well too. - Brown rice syrup: This is less sweet but can add a nice flavor. - Coconut sugar: Use it for a lower glycemic index. Homemade granola can last for about 2-3 weeks when stored correctly. Here are some tips for storage: - Keep it in an airtight container to keep it fresh. - Store in a cool, dry place to prevent moisture. - Check for any signs of spoilage, like off smells or a change in texture. Chai Spiced Granola is quite healthy! Here are some benefits: - Rolled oats are great for heart health and provide fiber. - Nuts add protein and healthy fats, keeping you full longer. - Seeds give you vitamins and minerals, boosting your nutrition. - The spices like cinnamon and ginger can help with digestion. You can enjoy Chai Spiced Granola in many ways. Here are some ideas: - Serve it with yogurt and fresh fruits for a tasty breakfast. - Add it to smoothies for a crunchy texture. - Use it as a topping on desserts like ice cream or chia pudding. - Pair it with milk or a plant-based drink for a quick snack. For the full recipe, check out the instructions above. Enjoy your flavorful and crunchy granola! You learned how to make delicious Chai Spiced Granola. We covered ingredients, steps, tips, and storage. You can customize it with different nuts, seeds, or spices. Don’t forget to store it properly for freshness. This recipe is a great way to enjoy healthy snacks. Plus, it pairs well with yogurt or smoothies. I hope you try making your own. Enjoy the crunch and flavors of your creation!](https://blissfulmeal.com/wp-content/uploads/2025/07/3a5e7dc9-fb03-4453-a4d8-8ca224184ee9-768x768.webp)