Crispy Baked Chicken Wings Tasty and Easy Recipe
. - Calories per serving: Approximately 350 - Macronutrient breakdown: - Fats: 25g - Proteins: 25g - Carbohydrates: 2g Knowing the nutritional content of your meal is important. Each serving has around 350 calories. You get 25 grams of fat, mostly from the olive oil and wings. There are also 25 grams of protein, which is great for muscle health. The carbohydrates are very low, making this a good option for many diets. - Baking sheet and wire rack - Mixing bowl - Paper towels For this recipe, you need a few tools. A baking sheet and a wire rack are essential. They help the air circulate around the wings. This allows them to cook evenly. You will also need a mixing bowl to combine your seasonings. Lastly, have some paper towels handy. You’ll use these to dry the wings well. Dry wings are key to achieving that perfect crispiness. Preheating the oven is vital for crispy wings. Set it to 250°F (120°C). This lower heat helps melt the fat in the chicken. As the fat renders, it creates a crispy texture. To make tasty wings, start by drying them well. Use paper towels to pat them dry. Removing moisture is crucial. Drier wings will crisp up better in the oven. Mix up the seasoning in a bowl. Combine baking powder, salt, black pepper, garlic powder, onion powder, smoked paprika, and cayenne if you like heat. Add the wings to the bowl and drizzle with olive oil. Toss gently to coat each wing evenly. Next, place the seasoned wings on a wire rack over a baking sheet. This setup allows air to flow around the wings. Bake them at 250°F (120°C) for 30 minutes. This step helps with crispiness. After 30 minutes, raise the oven to 425°F (220°C). Bake the wings for another 40-50 minutes. This higher heat gets them golden brown and crispy. Flip the wings halfway to cook evenly. Once crispy, take the wings out and let them rest for 5 minutes. Then, place them in a large bowl. Toss them in your favorite sauce until they are well coated. Serve on a platter with freshly chopped parsley for color. For the full recipe, check out the [Full Recipe]. To get the best crunch on your wings, use baking powder. It helps draw out moisture. Here’s how to do it right: - Use aluminum-free baking powder: This option keeps the flavor clean. - Pat dry the wings: Moisture is the enemy of crispiness. - Coat evenly: Mix the baking powder with your spices. This helps it stick to the wings. Pair your crispy wings with tasty sides and dips to make it a feast. Here are some ideas: - Celery and carrots: These fresh veggies add crunch. - Dips: Try ranch or blue cheese dressing. They complement the wings well. - Fries or onion rings: These classic sides add more fun to your meal. Here are some common pitfalls when making wings: - Not drying enough: If the wings are damp, they won’t crisp up well. - Overbaking: Keep an eye on the wings. They can burn quickly in the oven. - Crowding the pan: Give the wings space. This allows hot air to circulate for even cooking. For the full recipe, check out the previous section. Happy cooking! {{image_4}} You can change up the flavors of your wings with different sauces. Here are three popular options: - Buffalo: This classic sauce is spicy and tangy. Mix hot sauce with butter for a tasty kick. - Garlic Parmesan: For a savory twist, blend melted butter with minced garlic and grated Parmesan cheese. - Honey Mustard: Combine honey with Dijon mustard for a sweet and tangy glaze. Each sauce adds its own unique taste to the crispy wings. You can easily customize the heat of your wings. If you like it spicy, add more cayenne pepper. For a milder taste, reduce the amount or skip it. You can also try adding different spices, like chili powder or smoked paprika, to change the flavor profile. Just remember to balance heat with other flavors for the best results. You can also cook these wings in different ways. If you have an air fryer, it can give you crispy wings in less time. Simply follow the same seasoning steps and cook at 400°F for about 25-30 minutes. You can also grill the wings for a smoky flavor. Just make sure to watch them closely, so they don’t burn. Explore the [Full Recipe] for more ideas on how to enjoy your crispy baked chicken wings! To keep your crispy baked chicken wings fresh, store them in the fridge. Place the wings in an airtight container. Make sure they cool before sealing. This keeps them from getting soggy. Properly stored, they last up to four days. To reheat wings and keep them crispy, use the oven. Preheat it to 350°F (175°C). Place the wings on a baking sheet. Bake for about 10-15 minutes. You can also use an air fryer. Set it to 350°F (175°C) and cook for about 5-7 minutes. Both methods restore their crunchiness. If you want to freeze cooked wings, let them cool first. Wrap each wing tightly in plastic wrap. Then, place them in a freezer bag. Try to remove as much air as possible. They can stay in the freezer for up to three months. When ready to eat, thaw them in the fridge overnight before reheating. To make chicken wings crispy without frying, I use a simple trick. First, I pat the wings dry. This step is key. Less moisture means more crispness. Next, I coat them with baking powder and seasoning. The baking powder draws out moisture and helps them crisp up in the oven. Lastly, I bake them at two different temperatures. The first low bake renders the fat, while the high bake adds that golden color. Yes, you can use frozen chicken wings! Just make sure to thaw them first. I recommend placing them in the fridge overnight. This helps them defrost evenly. If you’re short on time, you can use the microwave. Just be careful not to cook them. Once thawed, follow the usual steps in the Full Recipe. Cooked chicken wings last about 3 to 4 days in the fridge. Store them in an airtight container. This keeps them fresh and safe to eat. If you want to keep them longer, consider freezing them instead. The best temperature for baking chicken wings is 425°F (220°C). This high heat makes them crispy and golden. The initial lower bake at 250°F (120°C) helps render the fat. Then, the high temperature finishes the wings perfectly. Yes, you can make these wings in advance! Bake them ahead of time and let them cool. Store them in the fridge for up to 4 days. When you're ready to serve, reheat them in the oven. This keeps them crispy and delicious. In this post, we covered how to make crispy chicken wings with simple steps. We discussed key ingredients, nutritional facts, and essential equipment. I shared tips for an extra crispy finish and various sauce options. Remember to dry the wings well and watch the baking time. With these methods, your wings will impress everyone. Feel free to experiment with flavors and make them your own. Enjoy your tasty creations, and don't forget to share your results!](https://blissfulmeal.com/wp-content/uploads/2025/06/ed333c64-6079-4357-a84c-029a35705909.webp)
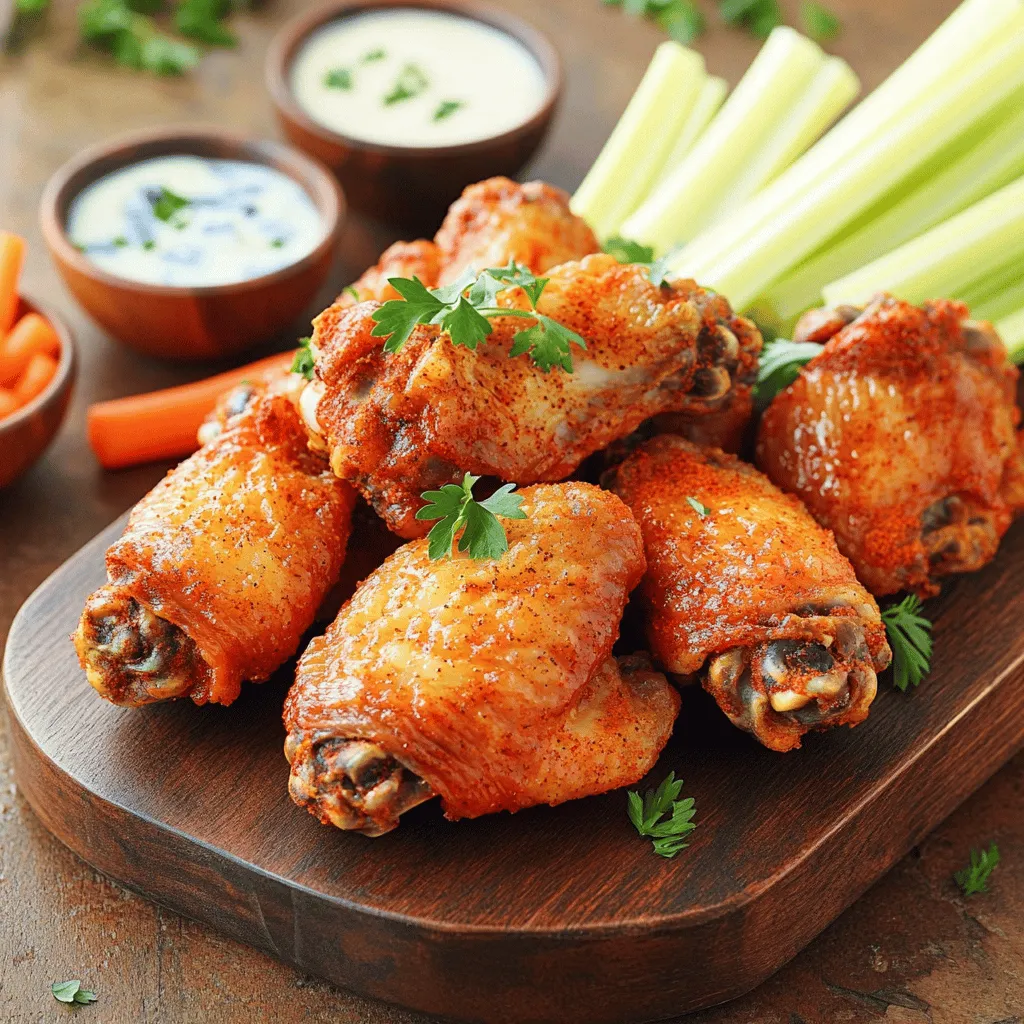
Are you ready for a game-changer for your next meal? These Crispy Baked Chicken Wings are not just tasty; they’re easy to make! With simple ingredients and a few clear steps, you can impress family and friends. Forget frying—this method gives you that perfect crunch without the guilt. Join me as I guide you through this fun and mouthwatering recipe that’s sure to satisfy your cravings!
Ingredients
List of Essential Ingredients
– 2 pounds chicken wings
– 1 tablespoon baking powder
– 1 teaspoon salt
– 1 teaspoon freshly ground black pepper
– 1 teaspoon garlic powder
– 1 teaspoon onion powder
– ½ teaspoon smoked paprika
– ½ teaspoon cayenne pepper (optional)
– 3 tablespoons olive oil
– Freshly chopped parsley (for garnish)
– Your favorite wing sauce
To make crispy baked chicken wings, you need some key ingredients. Start with 2 pounds of chicken wings. The baking powder is vital; it helps the skin get crispy. Use 1 tablespoon of it.
Next, season the wings. You will need 1 teaspoon each of salt, black pepper, garlic powder, and onion powder. The smoked paprika adds a nice flavor. Use ½ teaspoon of it. If you like heat, add ½ teaspoon of cayenne pepper. Finally, toss the wings with 3 tablespoons of olive oil.
Don’t forget to garnish with freshly chopped parsley before serving. And, of course, have your favorite wing sauce ready for tossing after baking.
Nutritional Information
– Calories per serving: Approximately 350
– Macronutrient breakdown:
– Fats: 25g
– Proteins: 25g
– Carbohydrates: 2g
Knowing the nutritional content of your meal is important. Each serving has around 350 calories. You get 25 grams of fat, mostly from the olive oil and wings. There are also 25 grams of protein, which is great for muscle health. The carbohydrates are very low, making this a good option for many diets.
Recommended Equipment
– Baking sheet and wire rack
– Mixing bowl
– Paper towels
For this recipe, you need a few tools. A baking sheet and a wire rack are essential. They help the air circulate around the wings. This allows them to cook evenly.
You will also need a mixing bowl to combine your seasonings. Lastly, have some paper towels handy. You’ll use these to dry the wings well. Dry wings are key to achieving that perfect crispiness.
Step-by-Step Instructions
Preheat the Oven
Preheating the oven is vital for crispy wings. Set it to 250°F (120°C). This lower heat helps melt the fat in the chicken. As the fat renders, it creates a crispy texture.
Prepare the Wings
To make tasty wings, start by drying them well. Use paper towels to pat them dry. Removing moisture is crucial. Drier wings will crisp up better in the oven.
Season the Wings
Mix up the seasoning in a bowl. Combine baking powder, salt, black pepper, garlic powder, onion powder, smoked paprika, and cayenne if you like heat. Add the wings to the bowl and drizzle with olive oil. Toss gently to coat each wing evenly.
First Bake
Next, place the seasoned wings on a wire rack over a baking sheet. This setup allows air to flow around the wings. Bake them at 250°F (120°C) for 30 minutes. This step helps with crispiness.
Increase Temperature
After 30 minutes, raise the oven to 425°F (220°C). Bake the wings for another 40-50 minutes. This higher heat gets them golden brown and crispy. Flip the wings halfway to cook evenly.
Toss in Sauce and Serve
Once crispy, take the wings out and let them rest for 5 minutes. Then, place them in a large bowl. Toss them in your favorite sauce until they are well coated. Serve on a platter with freshly chopped parsley for color.
Tips & Tricks
Achieving Maximum Crispiness
To get the best crunch on your wings, use baking powder. It helps draw out moisture. Here’s how to do it right:
– Use aluminum-free baking powder: This option keeps the flavor clean.
– Pat dry the wings: Moisture is the enemy of crispiness.
– Coat evenly: Mix the baking powder with your spices. This helps it stick to the wings.
Serving Suggestions
Pair your crispy wings with tasty sides and dips to make it a feast. Here are some ideas:
– Celery and carrots: These fresh veggies add crunch.
– Dips: Try ranch or blue cheese dressing. They complement the wings well.
– Fries or onion rings: These classic sides add more fun to your meal.
Common Mistakes to Avoid
Here are some common pitfalls when making wings:
– Not drying enough: If the wings are damp, they won’t crisp up well.
– Overbaking: Keep an eye on the wings. They can burn quickly in the oven.
– Crowding the pan: Give the wings space. This allows hot air to circulate for even cooking.Happy cooking!
Variations
Sauce Variations
You can change up the flavors of your wings with different sauces. Here are three popular options:
– Buffalo: This classic sauce is spicy and tangy. Mix hot sauce with butter for a tasty kick.
– Garlic Parmesan: For a savory twist, blend melted butter with minced garlic and grated Parmesan cheese.
– Honey Mustard: Combine honey with Dijon mustard for a sweet and tangy glaze.
Each sauce adds its own unique taste to the crispy wings.
Spice Adjustments
You can easily customize the heat of your wings. If you like it spicy, add more cayenne pepper. For a milder taste, reduce the amount or skip it. You can also try adding different spices, like chili powder or smoked paprika, to change the flavor profile. Just remember to balance heat with other flavors for the best results.
Cooking Methods
You can also cook these wings in different ways. If you have an air fryer, it can give you crispy wings in less time. Simply follow the same seasoning steps and cook at 400°F for about 25-30 minutes. You can also grill the wings for a smoky flavor. Just make sure to watch them closely, so they don’t burn.
Storage Info
Storing Leftovers
To keep your crispy baked chicken wings fresh, store them in the fridge. Place the wings in an airtight container. Make sure they cool before sealing. This keeps them from getting soggy. Properly stored, they last up to four days.
Reheating Tips
To reheat wings and keep them crispy, use the oven. Preheat it to 350°F (175°C). Place the wings on a baking sheet. Bake for about 10-15 minutes. You can also use an air fryer. Set it to 350°F (175°C) and cook for about 5-7 minutes. Both methods restore their crunchiness.
Freezing Instructions
If you want to freeze cooked wings, let them cool first. Wrap each wing tightly in plastic wrap. Then, place them in a freezer bag. Try to remove as much air as possible. They can stay in the freezer for up to three months. When ready to eat, thaw them in the fridge overnight before reheating.
FAQs
How to make chicken wings crispy without frying?
To make chicken wings crispy without frying, I use a simple trick. First, I pat the wings dry. This step is key. Less moisture means more crispness. Next, I coat them with baking powder and seasoning. The baking powder draws out moisture and helps them crisp up in the oven. Lastly, I bake them at two different temperatures. The first low bake renders the fat, while the high bake adds that golden color.
Can I use frozen chicken wings?
Yes, you can use frozen chicken wings! Just make sure to thaw them first. I recommend placing them in the fridge overnight. This helps them defrost evenly. If you’re short on time, you can use the microwave. Just be careful not to cook them.
How long do cooked chicken wings last in the refrigerator?
Cooked chicken wings last about 3 to 4 days in the fridge. Store them in an airtight container. This keeps them fresh and safe to eat. If you want to keep them longer, consider freezing them instead.
What is the best temperature for baking chicken wings?
The best temperature for baking chicken wings is 425°F (220°C). This high heat makes them crispy and golden. The initial lower bake at 250°F (120°C) helps render the fat. Then, the high temperature finishes the wings perfectly.
Can I make these wings in advance?
Yes, you can make these wings in advance! Bake them ahead of time and let them cool. Store them in the fridge for up to 4 days. When you’re ready to serve, reheat them in the oven. This keeps them crispy and delicious.
In this post, we covered how to make crispy chicken wings with simple steps. We discussed key ingredients, nutritional facts, and essential equipment. I shared tips for an extra crispy finish and various sauce options. Remember to dry the wings well and watch the baking time. With these methods, your wings will impress everyone. Feel free to experiment with flavors and make them your own. Enjoy your tasty creations, and don’t forget to share your results!
. - Calories per serving: Approximately 350 - Macronutrient breakdown: - Fats: 25g - Proteins: 25g - Carbohydrates: 2g Knowing the nutritional content of your meal is important. Each serving has around 350 calories. You get 25 grams of fat, mostly from the olive oil and wings. There are also 25 grams of protein, which is great for muscle health. The carbohydrates are very low, making this a good option for many diets. - Baking sheet and wire rack - Mixing bowl - Paper towels For this recipe, you need a few tools. A baking sheet and a wire rack are essential. They help the air circulate around the wings. This allows them to cook evenly. You will also need a mixing bowl to combine your seasonings. Lastly, have some paper towels handy. You’ll use these to dry the wings well. Dry wings are key to achieving that perfect crispiness. Preheating the oven is vital for crispy wings. Set it to 250°F (120°C). This lower heat helps melt the fat in the chicken. As the fat renders, it creates a crispy texture. To make tasty wings, start by drying them well. Use paper towels to pat them dry. Removing moisture is crucial. Drier wings will crisp up better in the oven. Mix up the seasoning in a bowl. Combine baking powder, salt, black pepper, garlic powder, onion powder, smoked paprika, and cayenne if you like heat. Add the wings to the bowl and drizzle with olive oil. Toss gently to coat each wing evenly. Next, place the seasoned wings on a wire rack over a baking sheet. This setup allows air to flow around the wings. Bake them at 250°F (120°C) for 30 minutes. This step helps with crispiness. After 30 minutes, raise the oven to 425°F (220°C). Bake the wings for another 40-50 minutes. This higher heat gets them golden brown and crispy. Flip the wings halfway to cook evenly. Once crispy, take the wings out and let them rest for 5 minutes. Then, place them in a large bowl. Toss them in your favorite sauce until they are well coated. Serve on a platter with freshly chopped parsley for color. For the full recipe, check out the [Full Recipe]. To get the best crunch on your wings, use baking powder. It helps draw out moisture. Here’s how to do it right: - Use aluminum-free baking powder: This option keeps the flavor clean. - Pat dry the wings: Moisture is the enemy of crispiness. - Coat evenly: Mix the baking powder with your spices. This helps it stick to the wings. Pair your crispy wings with tasty sides and dips to make it a feast. Here are some ideas: - Celery and carrots: These fresh veggies add crunch. - Dips: Try ranch or blue cheese dressing. They complement the wings well. - Fries or onion rings: These classic sides add more fun to your meal. Here are some common pitfalls when making wings: - Not drying enough: If the wings are damp, they won’t crisp up well. - Overbaking: Keep an eye on the wings. They can burn quickly in the oven. - Crowding the pan: Give the wings space. This allows hot air to circulate for even cooking. For the full recipe, check out the previous section. Happy cooking! {{image_4}} You can change up the flavors of your wings with different sauces. Here are three popular options: - Buffalo: This classic sauce is spicy and tangy. Mix hot sauce with butter for a tasty kick. - Garlic Parmesan: For a savory twist, blend melted butter with minced garlic and grated Parmesan cheese. - Honey Mustard: Combine honey with Dijon mustard for a sweet and tangy glaze. Each sauce adds its own unique taste to the crispy wings. You can easily customize the heat of your wings. If you like it spicy, add more cayenne pepper. For a milder taste, reduce the amount or skip it. You can also try adding different spices, like chili powder or smoked paprika, to change the flavor profile. Just remember to balance heat with other flavors for the best results. You can also cook these wings in different ways. If you have an air fryer, it can give you crispy wings in less time. Simply follow the same seasoning steps and cook at 400°F for about 25-30 minutes. You can also grill the wings for a smoky flavor. Just make sure to watch them closely, so they don’t burn. Explore the [Full Recipe] for more ideas on how to enjoy your crispy baked chicken wings! To keep your crispy baked chicken wings fresh, store them in the fridge. Place the wings in an airtight container. Make sure they cool before sealing. This keeps them from getting soggy. Properly stored, they last up to four days. To reheat wings and keep them crispy, use the oven. Preheat it to 350°F (175°C). Place the wings on a baking sheet. Bake for about 10-15 minutes. You can also use an air fryer. Set it to 350°F (175°C) and cook for about 5-7 minutes. Both methods restore their crunchiness. If you want to freeze cooked wings, let them cool first. Wrap each wing tightly in plastic wrap. Then, place them in a freezer bag. Try to remove as much air as possible. They can stay in the freezer for up to three months. When ready to eat, thaw them in the fridge overnight before reheating. To make chicken wings crispy without frying, I use a simple trick. First, I pat the wings dry. This step is key. Less moisture means more crispness. Next, I coat them with baking powder and seasoning. The baking powder draws out moisture and helps them crisp up in the oven. Lastly, I bake them at two different temperatures. The first low bake renders the fat, while the high bake adds that golden color. Yes, you can use frozen chicken wings! Just make sure to thaw them first. I recommend placing them in the fridge overnight. This helps them defrost evenly. If you’re short on time, you can use the microwave. Just be careful not to cook them. Once thawed, follow the usual steps in the Full Recipe. Cooked chicken wings last about 3 to 4 days in the fridge. Store them in an airtight container. This keeps them fresh and safe to eat. If you want to keep them longer, consider freezing them instead. The best temperature for baking chicken wings is 425°F (220°C). This high heat makes them crispy and golden. The initial lower bake at 250°F (120°C) helps render the fat. Then, the high temperature finishes the wings perfectly. Yes, you can make these wings in advance! Bake them ahead of time and let them cool. Store them in the fridge for up to 4 days. When you're ready to serve, reheat them in the oven. This keeps them crispy and delicious. In this post, we covered how to make crispy chicken wings with simple steps. We discussed key ingredients, nutritional facts, and essential equipment. I shared tips for an extra crispy finish and various sauce options. Remember to dry the wings well and watch the baking time. With these methods, your wings will impress everyone. Feel free to experiment with flavors and make them your own. Enjoy your tasty creations, and don't forget to share your results!](https://blissfulmeal.com/wp-content/uploads/2025/06/ed333c64-6079-4357-a84c-029a35705909-300x300.webp)
![- Ripe avocados - Sweet corn - Cherry tomatoes - Red onion - Jalapeño pepper - Fresh limes - Fresh cilantro - Salt and pepper - Smoked paprika (optional) Choosing the right ingredients is key to a great dish. Start with ripe avocados. They should feel slightly soft when you gently press them. A good avocado adds creaminess to the salsa. Next, select sweet corn. Fresh corn on the cob is best, but canned corn works too. If you use canned corn, drain it well. Fresh corn has a crisp bite that enhances the texture. Cherry tomatoes add a burst of flavor and color. Look for bright, firm tomatoes. They should be juicy and sweet. Slice them in half for easy mixing. Red onion gives a nice crunch and mild flavor. Pick a small onion for this recipe. Chop it finely so it blends well with other ingredients. If you like a kick, add a jalapeño pepper. Remove the seeds for less heat. Mince it finely to spread the spice evenly. Adjust the amount to suit your taste. Fresh limes are a must for bright flavor. Squeeze the juice right before mixing to keep it fresh. You can also use bottled lime juice, but fresh tastes best. Cilantro brings freshness to this recipe. Choose bright green, fragrant leaves. Chop it finely to mix well with the other ingredients. Season your salsa with salt and pepper to taste. Adjust these based on your preference. Smoked paprika adds a nice touch if you want a hint of smokiness. In summary, gathering fresh and quality ingredients makes your Zesty Avocado Corn Salsa shine. For the full recipe, check out the links provided. 1. Start with a large bowl. Add the diced avocados, sweet corn, halved cherry tomatoes, and chopped red onion. Use a spatula to combine them gently. You want to keep the avocado chunks intact. 2. Now, it’s time for some heat! Add the minced jalapeño. Adjust the amount based on how spicy you like it. If you want a mild salsa, use less. 3. Squeeze the juice of two fresh limes over the mixture. Gently fold everything together. This step adds a bright flavor and keeps the avocados fresh. 4. Next, mix in the chopped cilantro. Season with salt, freshly ground black pepper, and smoked paprika if you want a smoky flavor. Taste and adjust the seasoning to your liking. 5. Let the salsa sit for about 10 minutes. This resting time allows the flavors to blend nicely. - Serve this vibrant salsa in a colorful bowl. A ceramic or glass bowl works well. - For an attractive touch, garnish with a sprig of cilantro and a lime wedge. - Enjoy it with crispy tortilla chips. This combination makes for a perfect snack or side dish. For the complete recipe, check the [Full Recipe]. To make your salsa even better, adjust the seasoning to fit your taste. Start with salt and pepper. Add more if needed. You can also try extra herbs. Fresh parsley or basil can add a nice twist. If you want more heat, add more jalapeño. You can also use other spices. A pinch of cumin or coriander can bring new life to your salsa. To keep your avocados green, store them with the pit. You can also spritz some lime juice on them before mixing. This helps slow browning. Once you mix your salsa, cover it tightly with plastic wrap. Press the wrap against the surface. This cuts off air and helps keep it fresh. If you do see browning, a quick stir will help mix things up again. Enjoy your Zesty Avocado Corn Salsa at its best! {{image_4}} You can give your Zesty Avocado Corn Salsa a kick by adding more jalapeño. If you love heat, try using different peppers too, like serrano or habanero. Each pepper brings its own unique flavor. You can also add spices like cumin or coriander for warmth and depth. These spices enhance the taste and make your salsa stand out. Don’t hesitate to swap ingredients based on your taste. You can use black beans or chickpeas instead of corn for added protein. Mixing in different veggies, like bell peppers or diced cucumbers, also works well. If you're not a fan of cilantro, try fresh parsley or basil. These changes can create a whole new flavor profile while keeping the dish fresh and exciting. For the full recipe, check out Zesty Avocado Corn Salsa. To keep your leftover salsa fresh, use an airtight container. Glass or plastic containers work well. Make sure to press a piece of plastic wrap directly on top of the salsa before sealing the lid. This method helps prevent air from getting in and keeps the flavors intact. Store the salsa in the refrigerator right after serving. If you leave it out for more than two hours, it is best to toss it. The cold will help keep your salsa tasting great. Zesty avocado corn salsa can last in the fridge for about 3 to 5 days. After that, the taste and texture may change. You can tell if the salsa is bad by looking for a change in color or a sour smell. If the avocados turn brown or mushy, it’s time to say goodbye to your leftovers. Always trust your senses. If it looks or smells off, do not eat it. Keeping track of your salsa's freshness helps you enjoy this tasty dish to the fullest. For the full recipe, check out the Zesty Avocado Corn Salsa section. To prevent browning, use lime juice right away. The acid from the lime slows down oxidation. You can also keep the pit of one avocado in the salsa. This can help keep it fresh longer. Cover the salsa tightly with plastic wrap, pressing it to touch the surface. This minimizes air exposure. Yes, you can make this salsa ahead of time. It tastes great after sitting for a bit. However, to keep the avocado fresh, add it just before serving. You can mix all other ingredients and chill them. Then, fold in the avocado right before you enjoy it. This salsa pairs well with many foods. You can serve it with grilled chicken or fish. It also works great as a topping for tacos or burritos. Try it with quesadillas or even on a salad for a fresh twist. You can freeze avocado salsa, but the texture may change. To freeze, scoop the salsa into a freezer-safe bag. Remove as much air as possible. When ready to eat, thaw it in the fridge overnight. Note that the avocado may become mushy, so it’s best to use it in cooked dishes or as a spread. For fresh taste, check out the Full Recipe. In this blog post, we explored fresh ingredients for a delicious salsa. We discussed how to pick ripe avocados, and the right veggies to use. You learned step-by-step instructions for making your salsa and tips for storage. Remember, you can adjust the flavors to suit your taste. Use these ideas to create your perfect Zesty Avocado Corn Salsa. Enjoy it fresh, and get creative with variations to keep things exciting!](https://blissfulmeal.com/wp-content/uploads/2025/06/b0a7d42c-6ea0-45f8-bec4-4ac90b3470dc-768x768.webp)