Maple Glazed Carrots Flavorful Side Dish Recipe
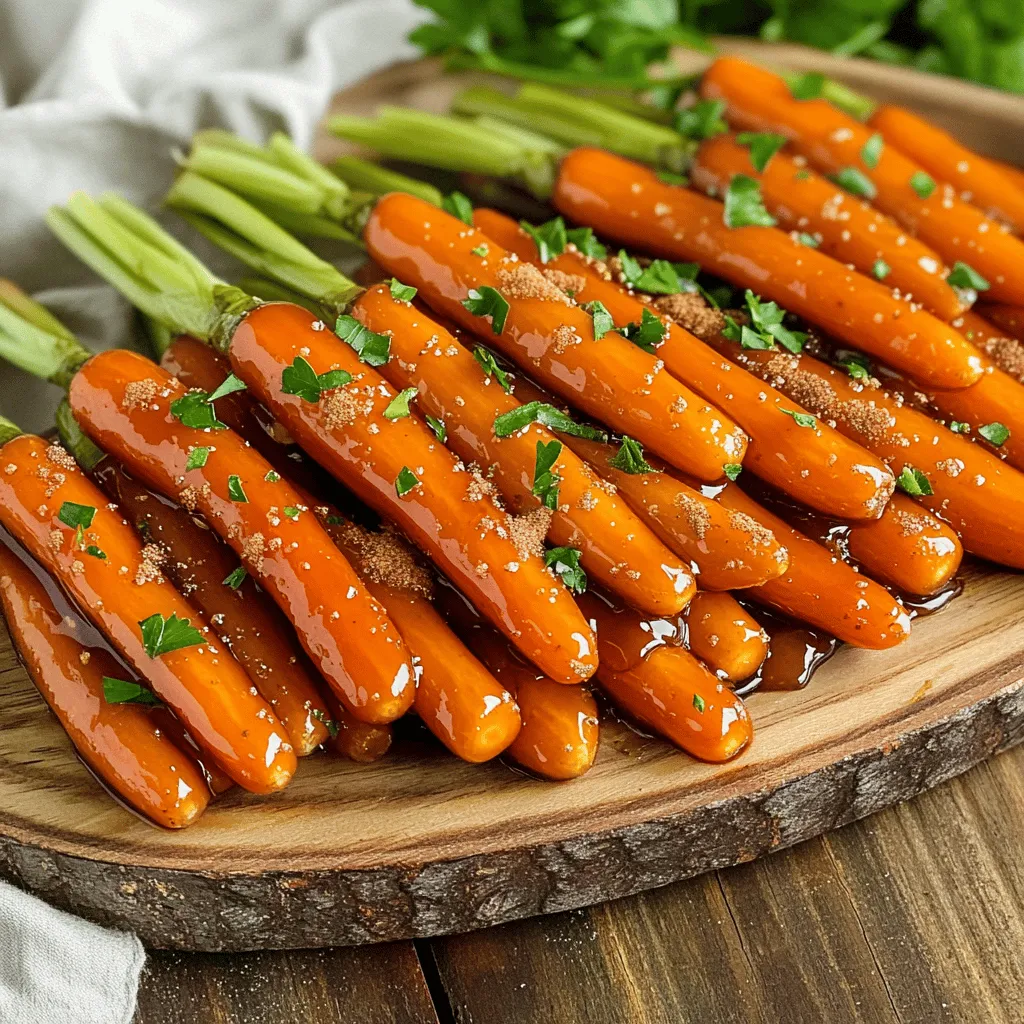
Looking to elevate your dinner table with a simple yet delicious side? Maple glazed carrots are the answer! This recipe brings sweet and savory together in a way that enhances any meal. With just a few fresh ingredients and easy steps, you’ll have a dish that’s both healthy and full of flavor. Let’s dive into the delightful world of maple glazed carrots and make your next dinner unforgettable!
Ingredients
List of Ingredients
– Baby carrots or regular carrots
– Pure maple syrup
– Unsalted butter
– Ground cinnamon
– Freshly grated nutmeg
– Salt and black pepper
– Fresh parsley (for garnish)
When preparing maple glazed carrots, choose your main ingredient first. Baby carrots are sweet and easy to use. If you prefer, slice up regular carrots into sticks. This recipe shines with pure maple syrup. It adds a rich sweetness that pairs well with the carrots. Use unsalted butter for a creamy texture that helps the glaze stick.
Spices play a big role in this dish. Ground cinnamon brings warmth, while freshly grated nutmeg adds a unique flavor. Don’t forget to season with salt and black pepper. This balance enhances every bite. Finally, fresh parsley adds a pop of color and freshness when you serve.
Optional Ingredients
– Additional spices (ginger, cloves)
– Honey or brown sugar as a substitute
– Other vegetables to mix in
Feel free to experiment! You can add spices like ginger or cloves for a twist. If you want a different sweetener, honey or brown sugar works well. You might also try mixing in other vegetables. Peas or sweet potatoes can add more color and taste. Enjoy the process and make it your own!
Step-by-Step Instructions
Preparing the Carrots
To start, wash your carrots well. If you choose regular carrots, peel them and cut them into sticks. Aim for uniform sizes, so they cook evenly. If you prefer baby carrots, you can leave them whole. This saves time and makes prep easy.
Cooking Instructions
Now, let’s cook the carrots. First, blanch them. Fill a medium pot with water and add a pinch of salt. Bring it to a boil. Carefully add the carrots and blanch for about 4-5 minutes. You want them tender but still crisp. Drain them once done and set aside.
Next, melt the butter in a large skillet over medium heat. Wait until it’s bubbly and fragrant. Then, add the blanched carrots. Make sure they are all coated in the melted butter. Use a spatula to toss them gently.
It’s time to add the sweetness. Pour the maple syrup over the carrots. Sprinkle the ground cinnamon and freshly grated nutmeg on top. Mix everything well. This will ensure every carrot gets coated in the sweet mix.
Now, let’s glaze the carrots. Cook them for another 5-7 minutes. Stir occasionally. This allows the maple syrup to thicken and create a beautiful glaze around the carrots.
Season the dish with salt and freshly cracked black pepper. Do this to taste. Once the carrots look glossy and tender, remove the skillet from the heat.
Serving Suggestions
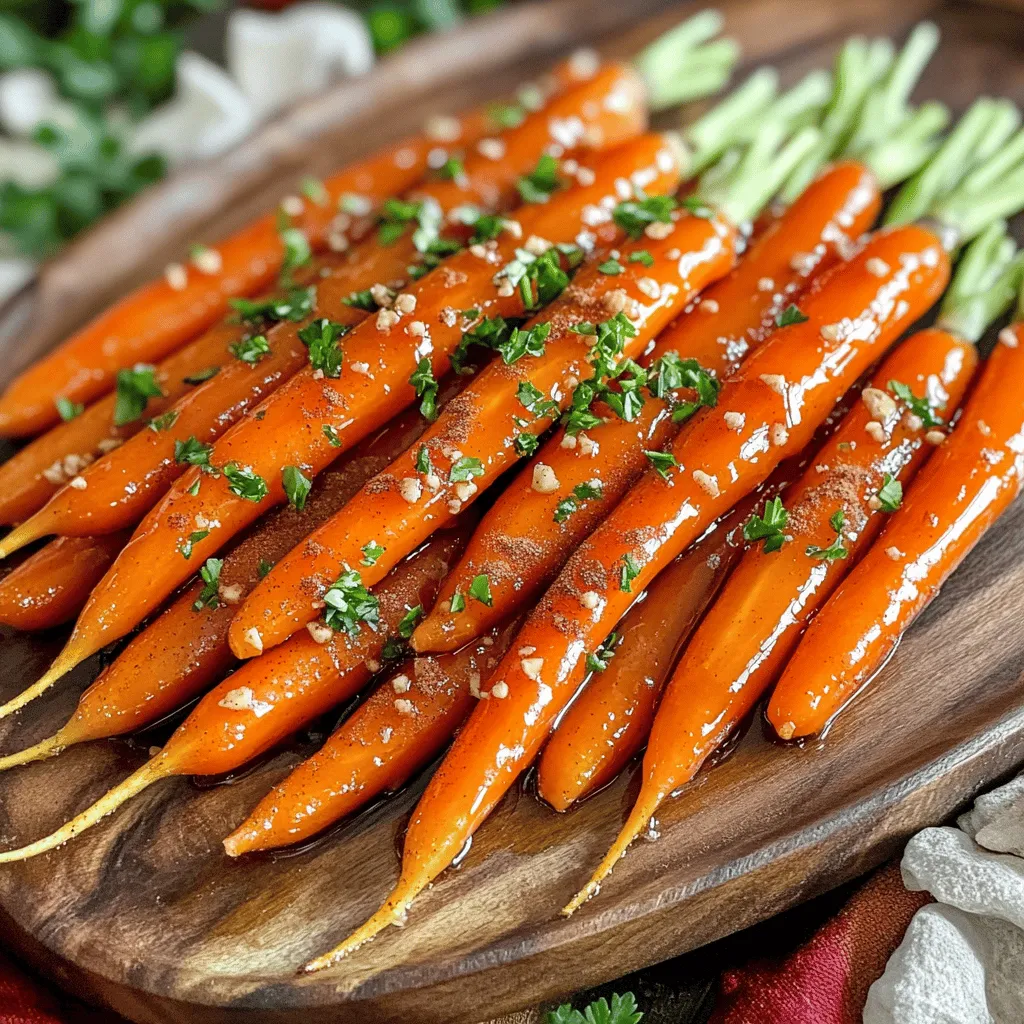
To serve, transfer the glazed carrots to a nice platter. For a pop of color, garnish them with finely chopped fresh parsley. This adds freshness and makes the dish look great.
You can pair these maple glazed carrots with roasted chicken or pork. They also go well with a hearty grain dish. Enjoy this delightful side dish that balances the sweet maple flavor with warm spices.
Tips & Tricks
Common Mistakes to Avoid
– Overcooking the carrots: This will make them mushy. Keep them slightly firm for the best texture.
– Skipping the blanching step: Blanching helps the carrots cook evenly and keeps their bright color.
Enhancing Flavor
– Suggestions for additional herbs: Fresh thyme or dill can add a nice touch. Just add a pinch while cooking.
– Using flavored syrups: Try maple-vanilla syrup for a fun twist. It adds layers of flavor that taste amazing.
Equipment Recommendations
– Best cookware for even cooking: A heavy-bottomed skillet works well. It helps heat distribute evenly for perfect glazing.
– Recommended utensils for stirring and serving: Use a wooden spoon for stirring. It won’t scratch your pan and gives you control. A slotted spoon is great for serving.
Variations
Alternative Sweeteners
You can switch up the maple syrup for other sweet options. Agave syrup works well and has a light flavor. Honey can also add a nice touch. If you want a deeper taste, try using brown sugar. It gives a rich caramel flavor that pairs nicely with the carrots. Just mix it in as you would the maple syrup.
Vegetable Additions
Feel free to get creative with your vegetables! Root veggies like parsnips or sweet potatoes blend beautifully with the carrots. Chop them into similar sizes for even cooking. You can also mix in some peas or greens. They add color and extra nutrients to your dish. Just toss them in during the last few minutes of cooking.
Flavor Profile Changes
Want to switch up the taste? You can add savory elements like garlic or fresh herbs. Thyme or rosemary can enhance the flavor profile nicely. If you want a spicy kick, consider adding a pinch of cayenne pepper or cinnamon. These changes can make your maple glazed carrots perfect for different seasons or special occasions.
Storage Info
Refrigeration Guidelines
To store leftover glazed carrots, let them cool first. Place the carrots in an airtight container. This keeps them fresh and stops them from drying out. You can enjoy them for up to 4 days in the fridge. Glass or plastic containers work well. Choose a size that fits your leftovers snugly.
Freezing Carrots
If you want to freeze glazed carrots, first pack them in freezer-safe bags. Remove as much air as you can before sealing. They can stay fresh for up to 3 months in the freezer. When you’re ready to eat them, thaw them in the fridge overnight. For reheating, you can use a microwave or a skillet. Heat them slowly to keep them tender.
Shelf Life
Glazed carrots can last about 4 days in the fridge. After this time, they may spoil. Look for signs like an off smell or a slimy texture. If you see any of these, it’s best to throw them away. Always trust your senses to know when food is safe to eat.
FAQs
Can I make maple glazed carrots ahead of time?
Yes, you can prepare maple glazed carrots ahead of time. Here are my tips:
– Blanch the Carrots: Blanch the carrots and cool them down.
– Store: Keep them in an airtight container in the fridge for up to two days.
– Reheat: When you’re ready, warm them up in a skillet with the glaze. This way, you keep the flavor and texture.
What can I serve with maple glazed carrots?
Maple glazed carrots pair well with many dishes. Here are some ideas:
– Roast Chicken: The sweet glaze complements savory chicken nicely.
– Grilled Steak: The flavors balance well with beef dishes.
– Pork Chops: Maple and pork make a classic combo.
– Vegetarian Meals: They also fit perfectly with grain bowls or salads.
How do I make the glaze thicker?
To thicken the glaze, try these tips:
– Cook Longer: Allow the carrots to cook longer in the syrup to reduce the liquid.
– Add Cornstarch: Mix a little cornstarch with water. Stir this mix into the glaze while cooking. It will help thicken the mixture.
– Stir Often: Stirring helps the glaze coat the carrots evenly and thickens it faster.
Is there a vegan option for this recipe?
Yes, you can make this dish vegan. Here are my substitutions:
– Butter Substitute: Use coconut oil or vegan butter instead of unsalted butter.
– Syrup Swap: Most maple syrup is vegan, but always check the label.
– Extra Flavor: Adding a pinch of smoked salt can enhance the flavors.
In this article, we explored how to make delicious maple glazed carrots. We covered the key ingredients, like carrots and maple syrup, and detailed easy steps for preparation and cooking. We shared tips to avoid common mistakes and ideas for enhancing flavors. Lastly, we discussed storage options and variations to keep the dish exciting.
Try out these methods for the best results. With some practice, you will impress everyone at the table. Enjoy your cooking journey!