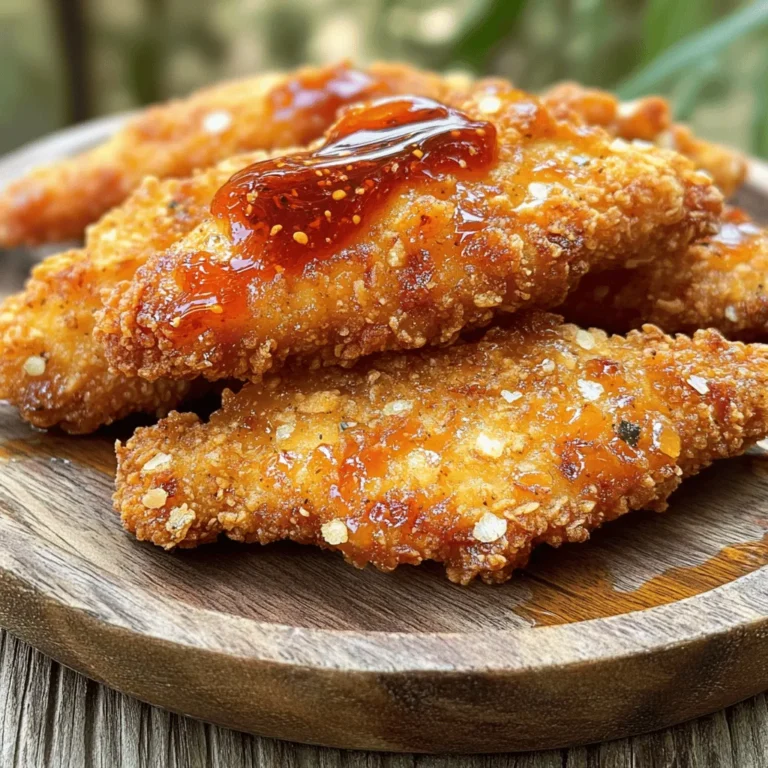
Oven Baked Chicken Tenders Crispy and Juicy Recipe

- 1 pound chicken breast - 1 cup buttermilk or plain yogurt - 1 cup breadcrumbs - 1/2 cup grated Parmesan cheese The chicken breast is the heart of this dish. It needs to be cut into strips. Using buttermilk or yogurt helps tenderize the chicken. It also adds a nice tangy flavor. Breadcrumbs and Parmesan cheese give the outer layer a tasty crunch. Panko breadcrumbs work great if you want extra crispiness. - 1 teaspoon garlic powder - 1 teaspoon onion powder - 1 teaspoon paprika - 1/2 teaspoon cayenne pepper (optional) - Salt and pepper to taste The spices make a big difference in flavor. Garlic powder and onion powder add depth. Paprika gives it a lovely color and slight warmth. If you like heat, cayenne pepper can add a kick. Always season with salt and pepper to enhance all the flavors. - 1/4 cup all-purpose flour - Cooking spray or olive oil The all-purpose flour helps the coating stick to the chicken. A light dusting is all you need. A spray of cooking spray or a drizzle of olive oil on top makes the tenders crispy. These small details can elevate your dish to the next level. For the full recipe, check out the link provided. - Preheat the Oven: Start by setting your oven to 400°F (200°C). This high heat helps to make the chicken crispy. - Soak Chicken Strips in Buttermilk: Take your chicken strips and put them in a medium bowl filled with buttermilk. Let them soak for at least 30 minutes. For the best results, you can refrigerate them for up to 2 hours. The buttermilk makes the chicken tender and juicy. - Create Dredging Station: Set up three shallow dishes. Place all-purpose flour in one, the buttermilk-soaked chicken in the second, and mix breadcrumbs with spices in the last. This will help with a smooth breading process. - Coat Chicken Strips: Take each chicken strip from the buttermilk. Let any extra buttermilk drip off. First, coat the strip in flour, then back in the buttermilk, and finally press it into the breadcrumb mix. Make sure each piece is well covered for the best crunch. - Arrange on Baking Sheet: Place the breaded chicken tenders on a baking sheet lined with parchment paper. For extra crispiness, lightly spray or drizzle olive oil on top. - Bake Chicken Tenders: Put the baking sheet in the preheated oven. Bake for 20 to 25 minutes. Flip the tenders halfway through for even cooking. They should be golden brown and reach an internal temperature of 165°F (75°C) when done. Now you have delicious, crispy, oven-baked chicken tenders ready to serve! For more details, check out the Full Recipe. Importance of Soaking Soaking chicken strips in buttermilk makes them juicy. Buttermilk has acid that tenderizes meat. This step is key for a great texture. Let the chicken sit for at least 30 minutes. For the best results, refrigerate for up to 2 hours. Using Panko Breadcrumbs Panko breadcrumbs give your chicken tenders a crispy bite. They are lighter and airier than regular breadcrumbs. This makes your tenders extra crunchy. Make sure to coat them well for maximum crunch. Additional Seasoning Ideas Spice up your chicken with fun flavors. Try adding Italian herbs like oregano and basil. You can also use spices like cumin or coriander for a twist. Always adjust salt and pepper to your taste. Marination Tips For more flavor, marinate the chicken overnight. Mix your favorite spices with buttermilk. This gives the chicken a deeper taste. Just remember to keep it in the fridge. Recommended Baking Time Bake your chicken tenders at 400°F (200°C). Bake them for 20-25 minutes. Keep an eye on the color; they should be golden brown. Checking for Doneness Use a meat thermometer to check if your chicken is done. The internal temperature should reach 165°F (75°C). This ensures the chicken is safe to eat and perfectly cooked. {{image_4}} For a gluten-free version, you can swap out regular breadcrumbs for gluten-free breadcrumbs. You can also use crushed cornflakes or almond flour for a crunchy coating. These options give you that crispy texture without the gluten. When substituting flour, use almond flour or a gluten-free all-purpose blend. Both work well for coating. This way, you can still enjoy crispy chicken tenders without any gluten. To spice things up, try making spicy chicken tenders. Just add more cayenne pepper or some hot sauce to the buttermilk. This adds heat and flavor to your dish. For an herb-infused take, mix dried herbs like thyme or oregano into your breadcrumb mixture. Fresh herbs like parsley or basil can also be added for bright, fresh notes. These variations make your chicken tenders unique and delicious. Dipping sauces can elevate your chicken tenders. Consider honey mustard, ranch, or a creamy garlic sauce. Each brings its own flavor to the meal. Pair your chicken tenders with tasty side dishes. Crispy sweet potato fries, a fresh salad, or steamed veggies complement the dish well. These sides make for a balanced, fun meal. For the full recipe, check out the Crispy Oven-Baked Chicken Tenders section. Best Practices for Refrigeration To keep your chicken tenders fresh, place them in an airtight container. This helps prevent moisture loss. Store them in the fridge for up to three days. If you want them to last longer, freezing is a good option. Freezing Instructions To freeze, first let the chicken tenders cool completely. Then, wrap them in plastic wrap and place them in a freezer-safe bag. Remove as much air as possible. You can keep them frozen for up to three months. When ready to eat, thaw them in the fridge overnight. Oven vs. Microwave The oven is the best way to reheat chicken tenders. Preheat it to 375°F (190°C). Place the tenders on a baking sheet and heat for about 10-15 minutes. This keeps them crispy. The microwave is faster, but it can make them soggy. Maintaining Crispiness To keep your chicken tenders crispy, avoid covering them while reheating. Covering traps steam and makes them soft. If you use the microwave, try placing a paper towel on the plate to absorb moisture. How Long Can You Keep Them? Cooked chicken tenders last for three days in the fridge. If frozen, they stay safe for up to three months. Always check for signs of spoilage before eating. If they look or smell off, it's best to toss them out. Bake chicken tenders for 20 to 25 minutes at 400°F (200°C). This time will help them become golden brown and delicious. Always check that they reach an internal temperature of 165°F (75°C). Use a meat thermometer for accuracy. Flipping the tenders halfway through cooking promotes even baking. Yes, you can use frozen chicken. However, it is best to thaw it first. Thawing ensures even cooking and better texture. If you're in a hurry, you can bake them from frozen. Just add 10 to 15 minutes to the baking time. Make sure to check the internal temperature is still 165°F (75°C). To make chicken tenders crispy, follow these tips: - Soak the chicken in buttermilk. This step tenderizes the meat. - Use panko breadcrumbs. They create a crunchier texture than regular breadcrumbs. - Lightly spray the breaded tenders with cooking spray or drizzle with olive oil. This adds extra crispiness. - Bake at a high temperature. The heat helps to crisp the outside while keeping the inside juicy. Yes, this recipe is great for meal prep. You can make a batch and store it for later. Here are some tips: - Cool the chicken tenders completely before storing. - Use airtight containers for refrigeration. They help keep the tenders fresh. - You can freeze them for up to three months. Just reheat in the oven for best results. This keeps them crispy. Check out the Full Recipe for more details on preparation. This article covered how to make delicious oven-baked chicken tenders. We explored key ingredients, including chicken breast and spices, along with the steps to prepare, bread, and bake them. You learned tips for achieving a crispy texture and tasty variations for everyone. Finally, we discussed storage and reheating so leftovers stay tasty. With these insights, you can now create your own perfect chicken tenders at home! Enjoy cooking and experimenting with flavors!

WANT TO SAVE THIS RECIPE?

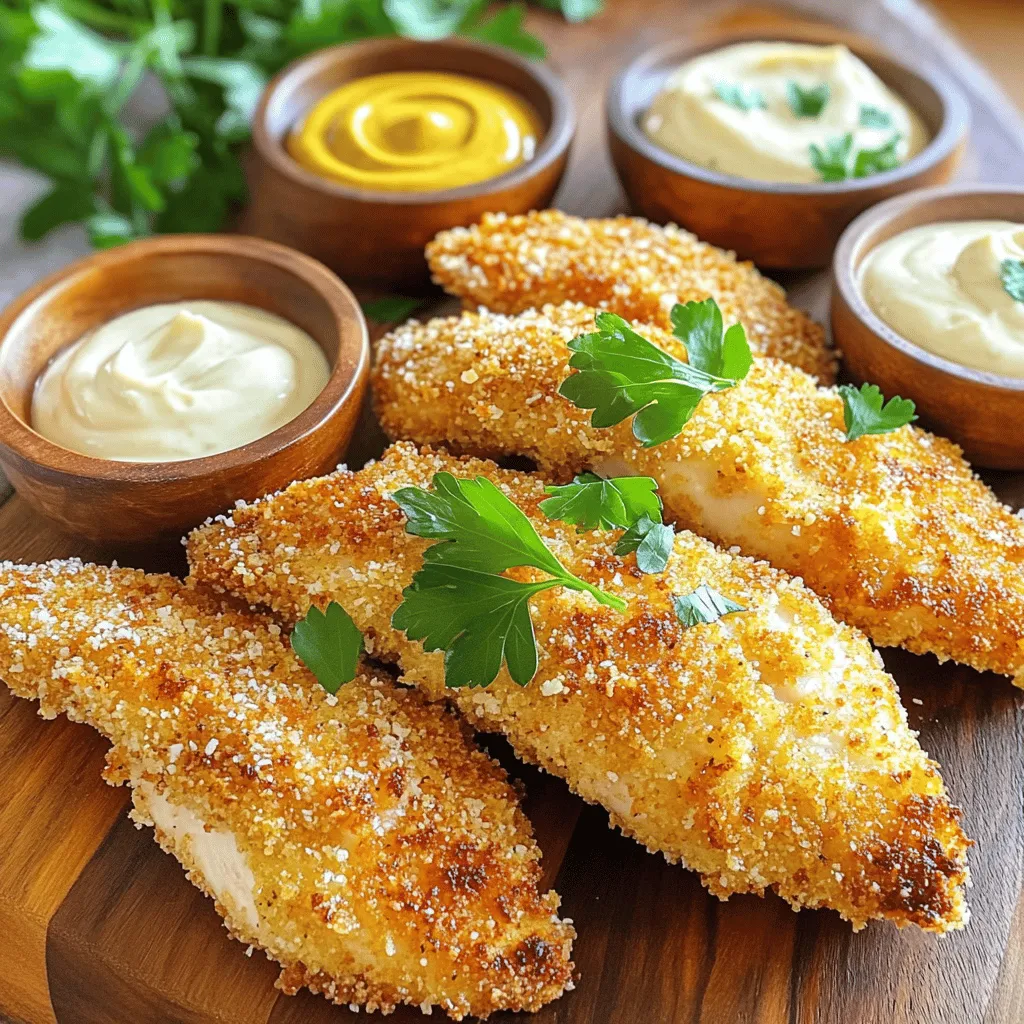
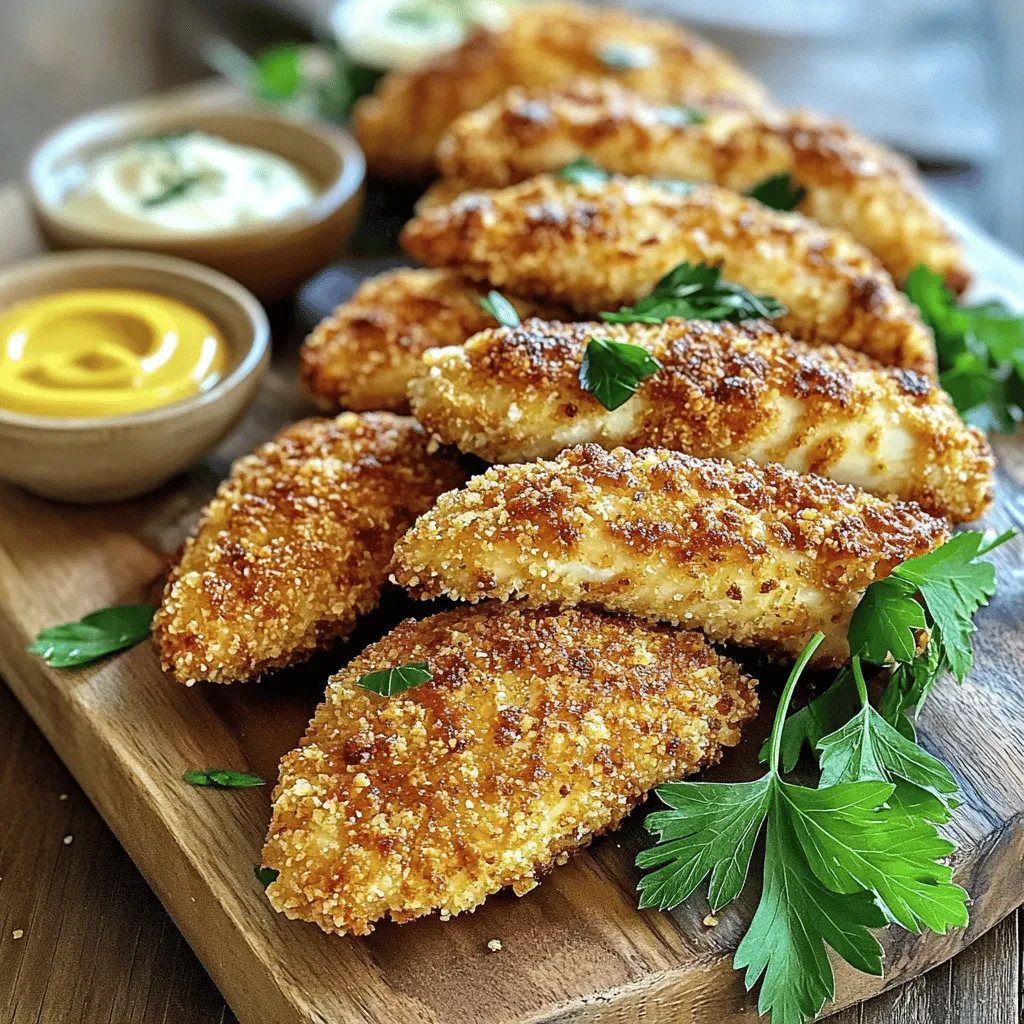
Craving a delicious meal that’s both crispy and juicy? You’re in luck! This Oven Baked Chicken Tenders recipe is easy to make and full of flavor. With simple ingredients like chicken breast and a tasty breadcrumb mix, you’ll impress everyone at the table. Follow my step-by-step guide to create tender, crunchy bites that are perfect for dinner or meal prep. Let’s dive into making these mouthwatering chicken tenders!

Ingredients

Main Ingredients

– 1 pound chicken breast

– 1 cup buttermilk or plain yogurt

– 1 cup breadcrumbs

– 1/2 cup grated Parmesan cheese

The chicken breast is the heart of this dish. It needs to be cut into strips. Using buttermilk or yogurt helps tenderize the chicken. It also adds a nice tangy flavor. Breadcrumbs and Parmesan cheese give the outer layer a tasty crunch. Panko breadcrumbs work great if you want extra crispiness.

Spices and Seasonings

– 1 teaspoon garlic powder

– 1 teaspoon onion powder

– 1 teaspoon paprika

– 1/2 teaspoon cayenne pepper (optional)

– Salt and pepper to taste

The spices make a big difference in flavor. Garlic powder and onion powder add depth. Paprika gives it a lovely color and slight warmth. If you like heat, cayenne pepper can add a kick. Always season with salt and pepper to enhance all the flavors.

Additional Components

– 1/4 cup all-purpose flour

– Cooking spray or olive oil

The all-purpose flour helps the coating stick to the chicken. A light dusting is all you need. A spray of cooking spray or a drizzle of olive oil on top makes the tenders crispy. These small details can elevate your dish to the next level.

For the full recipe, check out the link provided.

Step-by-Step Instructions

Preparation Steps

Preheat the Oven: Start by setting your oven to 400°F (200°C). This high heat helps to make the chicken crispy.

Soak Chicken Strips in Buttermilk: Take your chicken strips and put them in a medium bowl filled with buttermilk. Let them soak for at least 30 minutes. For the best results, you can refrigerate them for up to 2 hours. The buttermilk makes the chicken tender and juicy.

Breading Process

Create Dredging Station: Set up three shallow dishes. Place all-purpose flour in one, the buttermilk-soaked chicken in the second, and mix breadcrumbs with spices in the last. This will help with a smooth breading process.

Coat Chicken Strips: Take each chicken strip from the buttermilk. Let any extra buttermilk drip off. First, coat the strip in flour, then back in the buttermilk, and finally press it into the breadcrumb mix. Make sure each piece is well covered for the best crunch.

Baking Instructions

Arrange on Baking Sheet: Place the breaded chicken tenders on a baking sheet lined with parchment paper. For extra crispiness, lightly spray or drizzle olive oil on top.

Bake Chicken Tenders: Put the baking sheet in the preheated oven. Bake for 20 to 25 minutes. Flip the tenders halfway through for even cooking. They should be golden brown and reach an internal temperature of 165°F (75°C) when done.

Now you have delicious, crispy, oven-baked chicken tenders ready to serve! For more details, check out the Full Recipe.

Tips & Tricks

Achieving Crispy Texture

Importance of Soaking

Soaking chicken strips in buttermilk makes them juicy. Buttermilk has acid that tenderizes meat. This step is key for a great texture. Let the chicken sit for at least 30 minutes. For the best results, refrigerate for up to 2 hours.

Using Panko Breadcrumbs

Panko breadcrumbs give your chicken tenders a crispy bite. They are lighter and airier than regular breadcrumbs. This makes your tenders extra crunchy. Make sure to coat them well for maximum crunch.

Flavor Enhancements

Additional Seasoning Ideas

Spice up your chicken with fun flavors. Try adding Italian herbs like oregano and basil. You can also use spices like cumin or coriander for a twist. Always adjust salt and pepper to your taste.

Marination Tips

For more flavor, marinate the chicken overnight. Mix your favorite spices with buttermilk. This gives the chicken a deeper taste. Just remember to keep it in the fridge.

Cooking Time and Temperature

Recommended Baking Time

Bake your chicken tenders at 400°F (200°C). Bake them for 20-25 minutes. Keep an eye on the color; they should be golden brown.

Checking for Doneness

Use a meat thermometer to check if your chicken is done. The internal temperature should reach 165°F (75°C). This ensures the chicken is safe to eat and perfectly cooked.

Variations

Gluten-Free Options

For a gluten-free version, you can swap out regular breadcrumbs for gluten-free breadcrumbs. You can also use crushed cornflakes or almond flour for a crunchy coating. These options give you that crispy texture without the gluten.

When substituting flour, use almond flour or a gluten-free all-purpose blend. Both work well for coating. This way, you can still enjoy crispy chicken tenders without any gluten.

Flavor Variations

To spice things up, try making spicy chicken tenders. Just add more cayenne pepper or some hot sauce to the buttermilk. This adds heat and flavor to your dish.

For an herb-infused take, mix dried herbs like thyme or oregano into your breadcrumb mixture. Fresh herbs like parsley or basil can also be added for bright, fresh notes. These variations make your chicken tenders unique and delicious.

Serving Suggestions

Dipping sauces can elevate your chicken tenders. Consider honey mustard, ranch, or a creamy garlic sauce. Each brings its own flavor to the meal.

Pair your chicken tenders with tasty side dishes. Crispy sweet potato fries, a fresh salad, or steamed veggies complement the dish well. These sides make for a balanced, fun meal.

For the full recipe, check out the Crispy Oven-Baked Chicken Tenders section.

Storage Info

Storing Leftovers

Best Practices for Refrigeration

To keep your chicken tenders fresh, place them in an airtight container. This helps prevent moisture loss. Store them in the fridge for up to three days. If you want them to last longer, freezing is a good option.

Freezing Instructions

To freeze, first let the chicken tenders cool completely. Then, wrap them in plastic wrap and place them in a freezer-safe bag. Remove as much air as possible. You can keep them frozen for up to three months. When ready to eat, thaw them in the fridge overnight.

Reheating Tips

Oven vs. Microwave

The oven is the best way to reheat chicken tenders. Preheat it to 375°F (190°C). Place the tenders on a baking sheet and heat for about 10-15 minutes. This keeps them crispy. The microwave is faster, but it can make them soggy.

Maintaining Crispiness

To keep your chicken tenders crispy, avoid covering them while reheating. Covering traps steam and makes them soft. If you use the microwave, try placing a paper towel on the plate to absorb moisture.

Shelf Life

How Long Can You Keep Them?

Cooked chicken tenders last for three days in the fridge. If frozen, they stay safe for up to three months. Always check for signs of spoilage before eating. If they look or smell off, it’s best to toss them out.

FAQs

How long to bake chicken tenders?

Bake chicken tenders for 20 to 25 minutes at 400°F (200°C). This time will help them become golden brown and delicious. Always check that they reach an internal temperature of 165°F (75°C). Use a meat thermometer for accuracy. Flipping the tenders halfway through cooking promotes even baking.

Can I use frozen chicken for this recipe?

Yes, you can use frozen chicken. However, it is best to thaw it first. Thawing ensures even cooking and better texture. If you’re in a hurry, you can bake them from frozen. Just add 10 to 15 minutes to the baking time. Make sure to check the internal temperature is still 165°F (75°C).

What’s the best way to make chicken tenders crispy?

To make chicken tenders crispy, follow these tips:

– Soak the chicken in buttermilk. This step tenderizes the meat.

– Use panko breadcrumbs. They create a crunchier texture than regular breadcrumbs.

– Lightly spray the breaded tenders with cooking spray or drizzle with olive oil. This adds extra crispiness.

– Bake at a high temperature. The heat helps to crisp the outside while keeping the inside juicy.

Is this recipe suitable for meal prep?

Yes, this recipe is great for meal prep. You can make a batch and store it for later. Here are some tips:

– Cool the chicken tenders completely before storing.

– Use airtight containers for refrigeration. They help keep the tenders fresh.

– You can freeze them for up to three months. Just reheat in the oven for best results. This keeps them crispy. Check out the Full Recipe for more details on preparation.

This article covered how to make delicious oven-baked chicken tenders. We explored key ingredients, including chicken breast and spices, along with the steps to prepare, bread, and bake them. You learned tips for achieving a crispy texture and tasty variations for everyone. Finally, we discussed storage and reheating so leftovers stay tasty. With these insights, you can now create your own perfect chicken tenders at home! Enjoy cooking and experimenting with flavors!

- 1 pound chicken breast - 1 cup buttermilk or plain yogurt - 1 cup breadcrumbs - 1/2 cup grated Parmesan cheese The chicken breast is the heart of this dish. It needs to be cut into strips. Using buttermilk or yogurt helps tenderize the chicken. It also adds a nice tangy flavor. Breadcrumbs and Parmesan cheese give the outer layer a tasty crunch. Panko breadcrumbs work great if you want extra crispiness. - 1 teaspoon garlic powder - 1 teaspoon onion powder - 1 teaspoon paprika - 1/2 teaspoon cayenne pepper (optional) - Salt and pepper to taste The spices make a big difference in flavor. Garlic powder and onion powder add depth. Paprika gives it a lovely color and slight warmth. If you like heat, cayenne pepper can add a kick. Always season with salt and pepper to enhance all the flavors. - 1/4 cup all-purpose flour - Cooking spray or olive oil The all-purpose flour helps the coating stick to the chicken. A light dusting is all you need. A spray of cooking spray or a drizzle of olive oil on top makes the tenders crispy. These small details can elevate your dish to the next level. For the full recipe, check out the link provided. - Preheat the Oven: Start by setting your oven to 400°F (200°C). This high heat helps to make the chicken crispy. - Soak Chicken Strips in Buttermilk: Take your chicken strips and put them in a medium bowl filled with buttermilk. Let them soak for at least 30 minutes. For the best results, you can refrigerate them for up to 2 hours. The buttermilk makes the chicken tender and juicy. - Create Dredging Station: Set up three shallow dishes. Place all-purpose flour in one, the buttermilk-soaked chicken in the second, and mix breadcrumbs with spices in the last. This will help with a smooth breading process. - Coat Chicken Strips: Take each chicken strip from the buttermilk. Let any extra buttermilk drip off. First, coat the strip in flour, then back in the buttermilk, and finally press it into the breadcrumb mix. Make sure each piece is well covered for the best crunch. - Arrange on Baking Sheet: Place the breaded chicken tenders on a baking sheet lined with parchment paper. For extra crispiness, lightly spray or drizzle olive oil on top. - Bake Chicken Tenders: Put the baking sheet in the preheated oven. Bake for 20 to 25 minutes. Flip the tenders halfway through for even cooking. They should be golden brown and reach an internal temperature of 165°F (75°C) when done. Now you have delicious, crispy, oven-baked chicken tenders ready to serve! For more details, check out the Full Recipe. Importance of Soaking Soaking chicken strips in buttermilk makes them juicy. Buttermilk has acid that tenderizes meat. This step is key for a great texture. Let the chicken sit for at least 30 minutes. For the best results, refrigerate for up to 2 hours. Using Panko Breadcrumbs Panko breadcrumbs give your chicken tenders a crispy bite. They are lighter and airier than regular breadcrumbs. This makes your tenders extra crunchy. Make sure to coat them well for maximum crunch. Additional Seasoning Ideas Spice up your chicken with fun flavors. Try adding Italian herbs like oregano and basil. You can also use spices like cumin or coriander for a twist. Always adjust salt and pepper to your taste. Marination Tips For more flavor, marinate the chicken overnight. Mix your favorite spices with buttermilk. This gives the chicken a deeper taste. Just remember to keep it in the fridge. Recommended Baking Time Bake your chicken tenders at 400°F (200°C). Bake them for 20-25 minutes. Keep an eye on the color; they should be golden brown. Checking for Doneness Use a meat thermometer to check if your chicken is done. The internal temperature should reach 165°F (75°C). This ensures the chicken is safe to eat and perfectly cooked. {{image_4}} For a gluten-free version, you can swap out regular breadcrumbs for gluten-free breadcrumbs. You can also use crushed cornflakes or almond flour for a crunchy coating. These options give you that crispy texture without the gluten. When substituting flour, use almond flour or a gluten-free all-purpose blend. Both work well for coating. This way, you can still enjoy crispy chicken tenders without any gluten. To spice things up, try making spicy chicken tenders. Just add more cayenne pepper or some hot sauce to the buttermilk. This adds heat and flavor to your dish. For an herb-infused take, mix dried herbs like thyme or oregano into your breadcrumb mixture. Fresh herbs like parsley or basil can also be added for bright, fresh notes. These variations make your chicken tenders unique and delicious. Dipping sauces can elevate your chicken tenders. Consider honey mustard, ranch, or a creamy garlic sauce. Each brings its own flavor to the meal. Pair your chicken tenders with tasty side dishes. Crispy sweet potato fries, a fresh salad, or steamed veggies complement the dish well. These sides make for a balanced, fun meal. For the full recipe, check out the Crispy Oven-Baked Chicken Tenders section. Best Practices for Refrigeration To keep your chicken tenders fresh, place them in an airtight container. This helps prevent moisture loss. Store them in the fridge for up to three days. If you want them to last longer, freezing is a good option. Freezing Instructions To freeze, first let the chicken tenders cool completely. Then, wrap them in plastic wrap and place them in a freezer-safe bag. Remove as much air as possible. You can keep them frozen for up to three months. When ready to eat, thaw them in the fridge overnight. Oven vs. Microwave The oven is the best way to reheat chicken tenders. Preheat it to 375°F (190°C). Place the tenders on a baking sheet and heat for about 10-15 minutes. This keeps them crispy. The microwave is faster, but it can make them soggy. Maintaining Crispiness To keep your chicken tenders crispy, avoid covering them while reheating. Covering traps steam and makes them soft. If you use the microwave, try placing a paper towel on the plate to absorb moisture. How Long Can You Keep Them? Cooked chicken tenders last for three days in the fridge. If frozen, they stay safe for up to three months. Always check for signs of spoilage before eating. If they look or smell off, it's best to toss them out. Bake chicken tenders for 20 to 25 minutes at 400°F (200°C). This time will help them become golden brown and delicious. Always check that they reach an internal temperature of 165°F (75°C). Use a meat thermometer for accuracy. Flipping the tenders halfway through cooking promotes even baking. Yes, you can use frozen chicken. However, it is best to thaw it first. Thawing ensures even cooking and better texture. If you're in a hurry, you can bake them from frozen. Just add 10 to 15 minutes to the baking time. Make sure to check the internal temperature is still 165°F (75°C). To make chicken tenders crispy, follow these tips: - Soak the chicken in buttermilk. This step tenderizes the meat. - Use panko breadcrumbs. They create a crunchier texture than regular breadcrumbs. - Lightly spray the breaded tenders with cooking spray or drizzle with olive oil. This adds extra crispiness. - Bake at a high temperature. The heat helps to crisp the outside while keeping the inside juicy. Yes, this recipe is great for meal prep. You can make a batch and store it for later. Here are some tips: - Cool the chicken tenders completely before storing. - Use airtight containers for refrigeration. They help keep the tenders fresh. - You can freeze them for up to three months. Just reheat in the oven for best results. This keeps them crispy. Check out the Full Recipe for more details on preparation. This article covered how to make delicious oven-baked chicken tenders. We explored key ingredients, including chicken breast and spices, along with the steps to prepare, bread, and bake them. You learned tips for achieving a crispy texture and tasty variations for everyone. Finally, we discussed storage and reheating so leftovers stay tasty. With these insights, you can now create your own perfect chicken tenders at home! Enjoy cooking and experimenting with flavors!

Oven Baked Chicken Tenders

Say goodbye to fried foods and hello to Crispy Oven-Baked Chicken Tenders! Enjoy easy prep and a delicious crunch without the guilt. Marinate tender chicken strips in buttermilk, coat them in a flavorful breadcrumb mixture, and bake to perfection. Perfect for dinner or a party platter, these bites are a hit with everyone. Click through for the full recipe and surprise your taste buds with this healthier alternative!

Ingredients
  

1 pound chicken breast, cut into strips

1 cup buttermilk (or substitute with plain yogurt)

1 cup breadcrumbs (panko for an extra crunch)

1/2 cup grated Parmesan cheese

1 teaspoon garlic powder

1 teaspoon onion powder

1 teaspoon paprika

1/2 teaspoon cayenne pepper (optional, for a touch of heat)

Salt and pepper, to taste

1/4 cup all-purpose flour

Cooking spray or a drizzle of olive oil for added crispiness

Instructions
 

Begin by preheating your oven to 400°F (200°C). Line a baking sheet with parchment paper to prevent sticking and ensure easy cleanup.

    In a medium-sized bowl, immerse the chicken strips in buttermilk. Allow them to soak for at least 30 minutes, or for optimal tenderness and flavor, refrigerate for up to 2 hours.

      In a shallow dish, combine the breadcrumbs, grated Parmesan cheese, garlic powder, onion powder, paprika, cayenne pepper (if using), and a pinch of salt and pepper. Mix well to create an even coating.

        Set up a dredging station for efficient breading: Place the all-purpose flour in a separate shallow dish, followed by the bowl of buttermilk-soaked chicken strips, and finally the breadcrumb mixture.

          Take each chicken strip from the buttermilk, allowing any excess to drip off. Dredge it in the flour to create a light dusting, then return it to the buttermilk for another coat. Finally, press the strip into the breadcrumb mixture, ensuring it is fully coated for that desired crunch.

            Arrange the breaded chicken tenders on your prepared baking sheet. For an extra crispy finish, lightly spray or drizzle them with cooking spray or olive oil.

              Bake the chicken tenders in the preheated oven for 20-25 minutes, or until they are golden brown and reach an internal temperature of 165°F (75°C). For even cooking, flip the tenders halfway through the baking process.

                Prep Time, Total Time, Servings: 30 mins | 50 mins | 4 servings

                  - Presentation Tips: Serve the chicken tenders elegantly on a wooden board or a stylish plate, accompanied by a variety of dipping sauces like honey mustard, creamy garlic aioli, or zesty BBQ sauce. Sprinkle fresh parsley over the top for a vibrant pop of color and added freshness!

                    WANT TO SAVE THIS RECIPE?

                    Related Posts