No-Bake Key Lime Pie Fresh and Easy Dessert Recipe
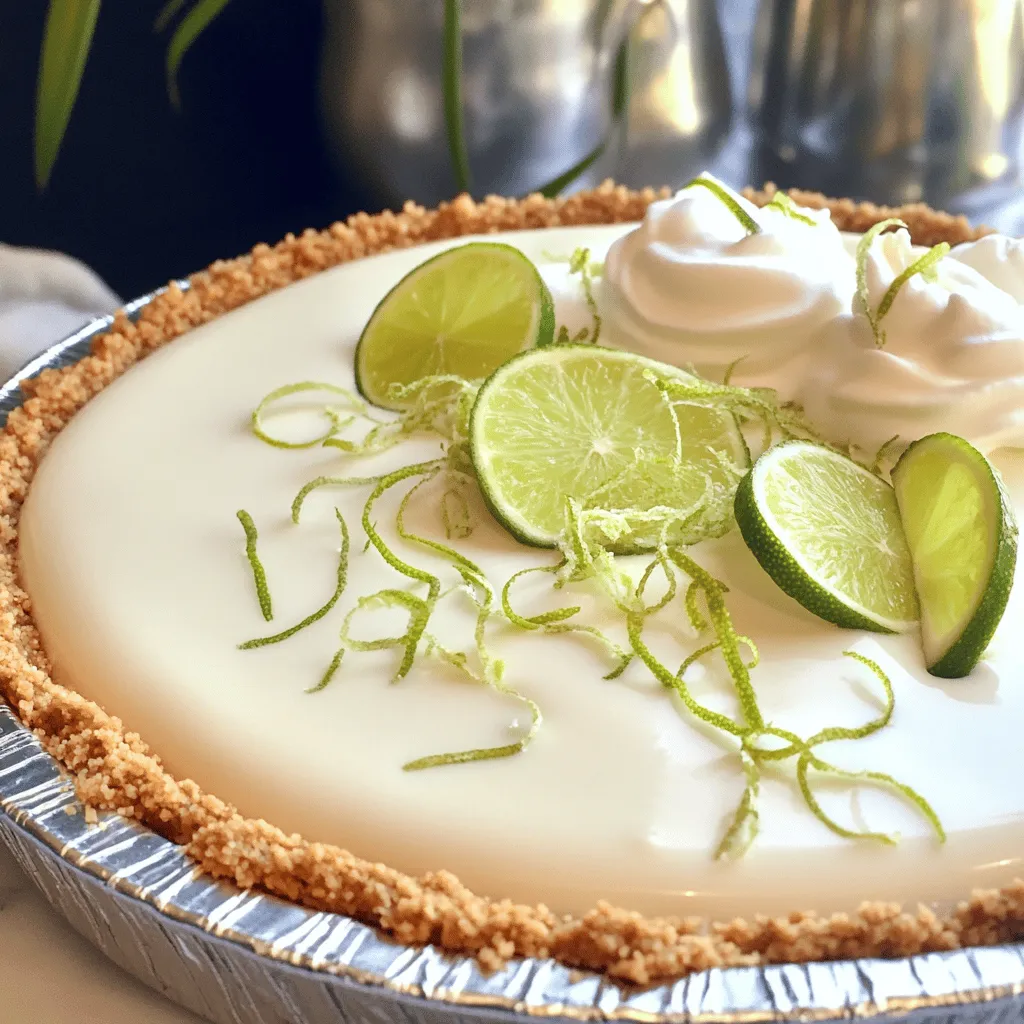
Are you ready to whip up a delicious No-Bake Key Lime Pie that’s easy and fresh? This zesty dessert is perfect for any occasion. You’ll love how quick it is to make, with simple ingredients and no oven required. I’ll guide you through each step, ensuring your pie is perfectly tangy and creamy. Let’s get started on creating a dessert that will impress your friends and family!
Ingredients
Essential Ingredients for No-Bake Key Lime Pie
To make a tasty no-bake key lime pie, you need some key ingredients. Here’s what you’ll need:
– 1 ½ cups graham cracker crumbs
– ⅓ cup granulated sugar
– ⅓ cup melted butter
– 1 (14-ounce) can sweetened condensed milk
– ½ cup key lime juice (freshly squeezed is ideal)
– 1 tablespoon lime zest
– 1 cup heavy whipping cream
– 2 tablespoons powdered sugar
– Lime slices and additional zest for garnish
Each ingredient plays an important role. The graham cracker crumbs give the pie its crunchy crust. The sweetened condensed milk adds creaminess, and the key lime juice brings that tangy flavor we love.
Optional Ingredients for Extra Flavor
You can enhance your pie with a few optional ingredients. Consider adding:
– A pinch of salt to balance sweetness
– A splash of vanilla extract for depth
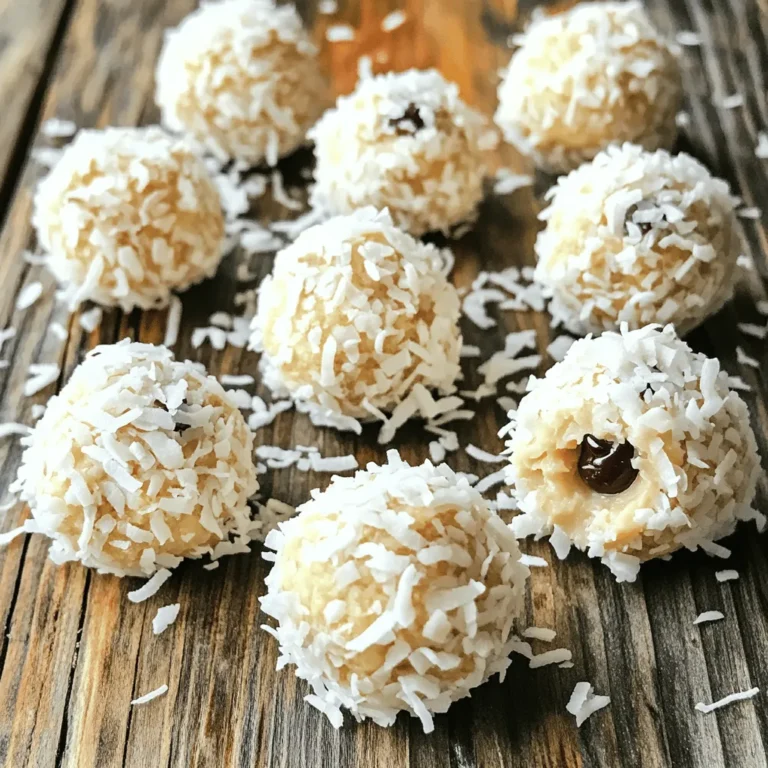
– Coconut flakes for a tropical twist
These extras can boost the flavor and make your pie stand out even more.
Tips for Selecting Fresh Key Limes
Choosing fresh key limes makes a big difference. Here are some tips:
– Look for limes that feel heavy for their size.
– Choose limes that are firm and smooth.
– Avoid any limes with blemishes or soft spots.
Fresh limes will give your pie a bright, zesty taste. Remember, the quality of your ingredients will shine through in the final dish.
Step-by-Step Instructions
Preparing the Graham Cracker Crust
Start by gathering your ingredients. You need graham cracker crumbs, sugar, and melted butter. In a medium bowl, mix the graham cracker crumbs and sugar. Pour in the melted butter and stir until it looks like wet sand.
Next, take a 9-inch pie pan. Press the crumb mixture firmly into the bottom and up the sides. Use a measuring cup or your fingers to make it even. Chill this crust in the fridge while you make the filling.
Making the Key Lime Filling
In a separate bowl, combine sweetened condensed milk, freshly squeezed key lime juice, and lime zest. Whisk these together until the mixture is smooth and free of lumps. It should smell fresh and zesty!
Now, in another bowl, whip the heavy cream. Use an electric mixer until soft peaks appear. Gradually add powdered sugar while whipping until stiff peaks form. This will create a light and fluffy texture.
Folding and Assembling the Pie
Carefully fold the whipped cream into the lime mixture. Use a spatula for this step. Make sure to keep the cream’s lightness. Once mixed, pour this filling into the chilled graham cracker crust. Smooth the top with a spatula.
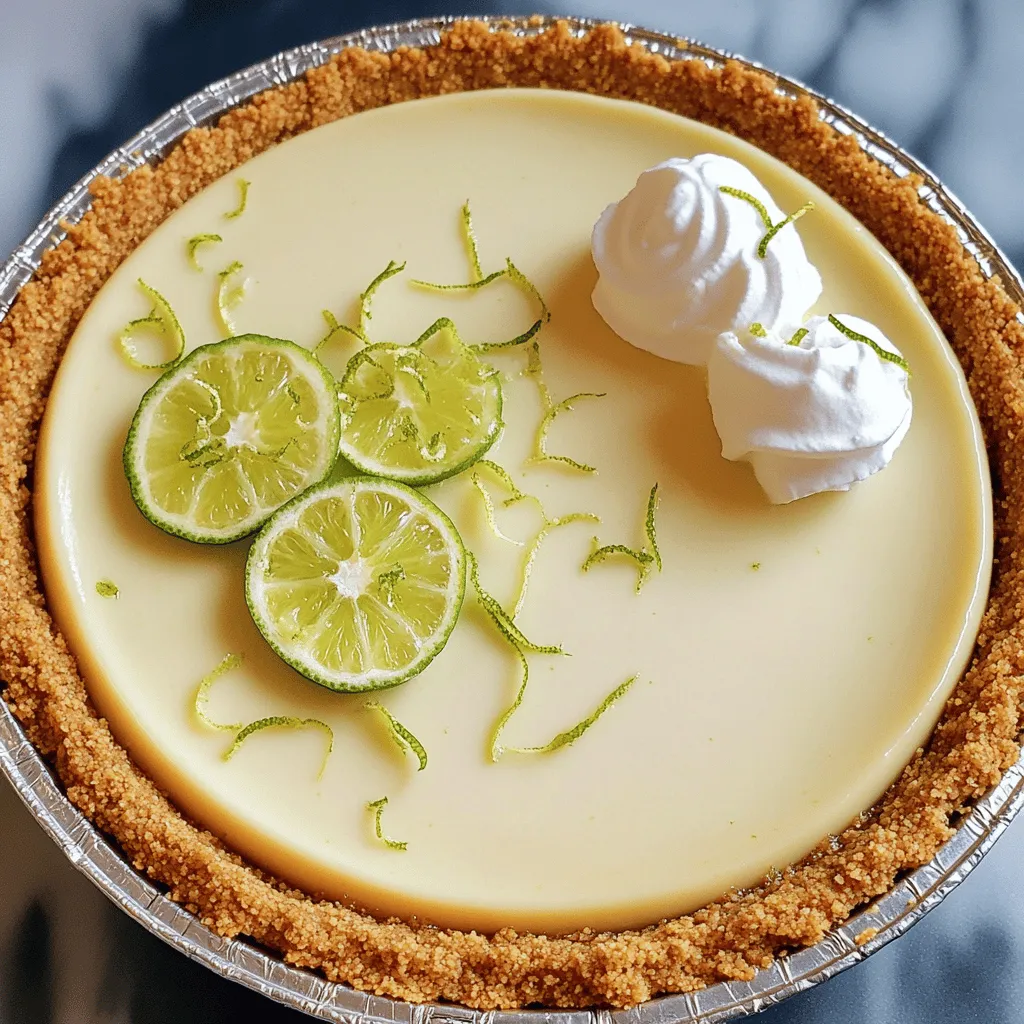
Cover your pie with plastic wrap and refrigerate for at least 4 hours. If you can, let it chill overnight. This helps the flavors meld and the filling set. When ready to serve, add lime slices and zest for a colorful finish.
Tips & Tricks
How to Achieve the Perfect Texture
To get the best texture for your no-bake key lime pie, the key is the whipped cream. When you whip the cream, stop when you see soft peaks. This keeps your pie light. Then, gently fold the whipped cream into the lime mixture. Use a spatula, and don’t stir too hard. You want to keep air in the mix. This makes the pie fluffy.
Common Mistakes to Avoid
One common mistake is over-mixing the filling. If you mix too hard, the pie can become dense. Also, make sure to chill your pie for at least four hours. This helps it set properly. Skipping this step can lead to a runny pie. Lastly, always use fresh lime juice. Bottled juice can lack flavor and freshness.
Enhancing Flavor with Garnishes
Garnishes can make your pie even better. Lime slices add color and a fresh touch. A sprinkle of lime zest on top gives extra zing. You can also add a dollop of whipped cream for creaminess. Fresh mint leaves can provide a nice contrast. These simple additions make your pie look and taste gourmet.
Variations
Making a Coconut Key Lime Pie
To make a coconut key lime pie, you can add shredded coconut. Mix in about one cup of sweetened shredded coconut into the key lime filling. This adds a nice chew and a tropical twist. You can also sprinkle some coconut on top before serving. The coconut pairs well with the tangy lime. The result is a dessert that feels bright and summery.
Vegan Version of No-Bake Key Lime Pie
For a vegan version, you can swap out some key ingredients. Use coconut cream instead of heavy cream. This gives a rich texture without dairy. Replace sweetened condensed milk with a mixture of coconut milk and maple syrup. You can also use a vegan graham cracker crust or make one from nuts and dates. This version is creamy and has the same zesty flavor, making it a great choice for everyone.
Different Crust Options
You can explore various crust options for your pie. A chocolate cookie crust adds a rich flavor. Just crush chocolate cookies and mix with melted butter, similar to the graham cracker crust. A nut crust, made from almonds or pecans, is also a tasty choice. It gives a crunchy texture and a nutty taste. You can even use a fruit-based crust made from dates and nuts for a healthy twist. These crusts bring their unique flavor and make each pie a new experience.
Storage Info
Best Practices for Storing Leftovers
To keep your no-bake key lime pie fresh, store it in the fridge. Use an airtight container or cover the pie with plastic wrap. This method keeps the flavors intact. Make sure to slice the pie before storing. This way, you can grab a bite anytime!
Freezing No-Bake Key Lime Pie
You can freeze this pie for longer storage. First, let it chill in the fridge for a few hours. Then, cover it well with plastic wrap and foil. This helps prevent freezer burn. When you are ready to eat it, let it thaw in the fridge overnight. Enjoy it cold for a refreshing treat!
How Long Does it Last in the Fridge?
In the fridge, your no-bake key lime pie lasts about 3 to 4 days. The texture stays nice and creamy during this time. If you notice any changes in smell or appearance, it’s best to toss it out. Enjoy it fresh for the best taste!
FAQs
Can I Use Bottled Key Lime Juice?
Yes, you can use bottled key lime juice. However, fresh juice has a brighter taste. If you want great flavor, I recommend using fresh key limes. They give the pie a zesty kick that really shines through. Remember, not all bottled juices are created equal. Some can taste flat or too sweet. Always check the label for quality.
Is It Necessary to Chill the Pie Overnight?
Chilling the pie overnight is best for flavor and texture. This step allows the filling to set properly and meld together. If you’re short on time, chilling for at least four hours works too. Just know that the pie might not be as firm if you don’t chill it long enough. A well-chilled pie is the key to a perfect slice.
What Can I Pair with No-Bake Key Lime Pie?
You can pair this pie with many delicious items. Fresh whipped cream adds a creamy touch. A sprig of mint gives a refreshing look. You might also enjoy it with fresh fruit like berries or mango. For a fun twist, serve it with a scoop of vanilla ice cream. Each option complements the pie’s tangy flavor nicely.
In this blog post, we explored how to make a no-bake key lime pie. We covered essential and optional ingredients, along with tips for choosing fresh key limes. I shared step-by-step instructions for the crust and filling. You learned about common mistakes and how to enhance flavor. We also looked at fun variations, storage tips, and answered common questions.
No-bake key lime pie is simple and delicious. With these tips, you can make this treat perfectly every time. Enjoy creating your own pie!

![To make these delicious cinnamon roll pancakes, you'll need the following: - 1 cup all-purpose flour - 2 tablespoons granulated sugar - 2 teaspoons baking powder - 1/2 teaspoon baking soda - 1/4 teaspoon fine sea salt - 1 cup buttermilk, at room temperature - 1 large egg - 2 tablespoons unsalted butter, melted and cooled slightly - 1 teaspoon pure vanilla extract The cinnamon swirl adds a delightful twist. Gather these: - 1/4 cup packed light brown sugar - 1 tablespoon ground cinnamon - 2 tablespoons unsalted butter, softened to room temperature This glaze makes the pancakes even better. You will need: - 1/2 cup cream cheese, softened - 1/4 cup powdered sugar - 1 tablespoon milk, plus more as needed - 1/2 teaspoon pure vanilla extract These ingredients come together to create a warm, comforting dish that feels like a hug in the morning. When you follow the Full Recipe, you will see how easy it is to make these pancakes at home. Start by making the cinnamon swirl. In a small bowl, mix together the packed light brown sugar, ground cinnamon, and softened butter. Use a fork to blend until smooth and creamy. This should take about a minute. Set the mixture aside. Let it cool slightly so it firms up a bit. This helps the swirl hold its shape when you cook the pancakes. Next, prepare the pancake batter. In a large bowl, whisk together the all-purpose flour, granulated sugar, baking powder, baking soda, and fine sea salt. Mix these dry ingredients well. In another bowl, combine the buttermilk, large egg, melted butter, and vanilla extract. Stir these wet ingredients together. Pour the wet mix into the dry mix. Gently stir until just combined. Don’t worry if there are a few lumps. This batter is ready when it looks slightly lumpy. Now, it's time to cook! Preheat a non-stick skillet or griddle over medium heat. Lightly grease the surface with butter or a spray. For each pancake, pour about 1/4 cup of batter onto the skillet. Take a teaspoon of your cinnamon swirl mixture. Drizzle it over the batter in a spiral pattern. Use a toothpick or the back of a spoon to create the swirl. Cook until bubbles form on the surface, about 2 to 3 minutes. Then, flip the pancake and cook for another 1 to 2 minutes until golden brown. Repeat this process until all the batter is cooked. While the pancakes are cooking, let's make the cream cheese glaze. In a medium bowl, blend the softened cream cheese, powdered sugar, milk, and vanilla extract. You can use a hand mixer or a whisk. Mix until the glaze is smooth and creamy. If you want a thinner glaze, add a teaspoon of milk until you reach your desired consistency. When the pancakes are ready, stack them on a serving plate. Drizzle the cream cheese glaze generously over the top. Let the glaze run down the sides for a beautiful look. For extra flair, sprinkle some cinnamon sugar or finely chopped nuts on top. Fresh berries also add color and freshness. Enjoy your delightful cinnamon roll pancakes! For the full recipe, check out the earlier section. To get fluffy pancakes, mix your batter gently. Overmixing makes the pancakes tough. Aim for some lumps in your batter; they will go away when cooked. Use room temperature buttermilk for a lighter texture. It helps the pancakes rise well. When cooking, keep the heat medium. This ensures golden brown pancakes inside and out. If you want to switch up the flour, try whole wheat flour. It adds a nutty flavor and more fiber. You can also use almond flour for a gluten-free option. Just remember, almond flour can make pancakes a bit denser. Mixing different flours can give you unique textures and tastes. For the best swirl, use a toothpick or the back of a spoon. Right after pouring the batter, add a teaspoon of your cinnamon mixture. Swirl it gently to create a spiral pattern. Don’t mix it in fully; keep some of that cinnamon layer. This gives you that delicious cinnamon roll taste in each bite. Follow these tips for the perfect cinnamon roll pancakes! You can find the full recipe above. {{image_4}} You can make these pancakes even better! Adding chocolate chips or nuts can bring new flavors. For chocolate lovers, sprinkle a handful of mini chocolate chips into the batter. They melt nicely and add sweetness. If you like crunch, try adding chopped nuts, like pecans or walnuts. Mix them in just before you cook the pancakes. This adds a tasty twist to your cinnamon roll pancakes. Want to make a healthier version? You can swap some ingredients. Use whole wheat flour instead of all-purpose flour. This adds fiber and nutrients. You can also use almond milk or oat milk instead of buttermilk. If you want to cut sugar, try using honey or maple syrup in the batter. These changes keep the flavor but make the dish a bit lighter. Seasonal flavors can change your pancakes too. In fall, add pumpkin puree and a pinch of nutmeg for a warm taste. In winter, try adding crushed peppermint candies for a festive touch. During summer, mix in fresh berries like blueberries or strawberries. These add color and a burst of flavor. Each season brings new ideas to keep your pancakes exciting. For the full recipe and more tips, check out the [Full Recipe]. After making your cinnamon roll pancakes, you might have some left over. To store them properly, let the pancakes cool down to room temperature. Then, stack them with a piece of parchment paper in between each pancake. This will help prevent sticking. Place the stack in an airtight container. You can keep them in the fridge for up to three days. When you are ready to enjoy your leftover pancakes, you can easily reheat them. The microwave is the quickest way. Just place one pancake on a microwave-safe plate and heat it for about 15 to 30 seconds. If you want them to be crispy, use a skillet. Heat the skillet over medium heat and warm each pancake for about one minute on each side. This method keeps them fluffy and delicious. Freezing pancakes is a great way to keep them fresh longer. Once your pancakes are cool, stack them with parchment paper in between. Then, wrap the stack tightly in plastic wrap. Place the wrapped pancakes in a freezer-safe bag or container. You can freeze them for up to two months. When you're ready to eat them, thaw the pancakes in the fridge overnight. Then, use the reheating techniques to enjoy them warm. Yes, you can make these pancakes gluten-free. Use a gluten-free flour blend instead of all-purpose flour. Many blends work well, like almond or coconut flour. Just check the package for best results. Adjust the liquid if needed, since some gluten-free flours absorb more moisture. To get that perfect swirl, use a squeeze bottle or a piping bag. Fill it with the cinnamon swirl mixture. Gently squeeze it on top of the batter in a spiral. Start from the center and move outward. Practice makes it easier, so don’t worry if it’s not perfect at first! You can top your pancakes with many tasty options. Try maple syrup for a classic touch. Fresh fruit like strawberries or bananas adds color and flavor. Whipped cream or a sprinkle of nuts gives it a nice crunch. Get creative with toppings you love! Yes, you can prepare the batter ahead of time. Just mix the dry and wet ingredients separately. Combine them just before cooking. This way, your pancakes stay fluffy. If you make the batter the night before, store it in the fridge. Give it a good stir before cooking. Cinnamon roll pancakes are a fun twist on breakfast. We covered the key ingredients and detailed steps. You learned how to mix the swirl and batter, cook the pancakes, and prepare the glaze. I also shared tips for the perfect texture and creative variations. Don’t forget about storage options for leftovers. Enjoying these pancakes can become a delicious family tradition. Try them out and find your favorite flavors! They’re sure to make your mornings brighter!](https://blissfulmeal.com/wp-content/uploads/2025/06/58adda25-98e6-46aa-b11b-812fbe89b844-768x768.webp)