Zucchini and Corn Quesadillas Tasty and Simple Dish
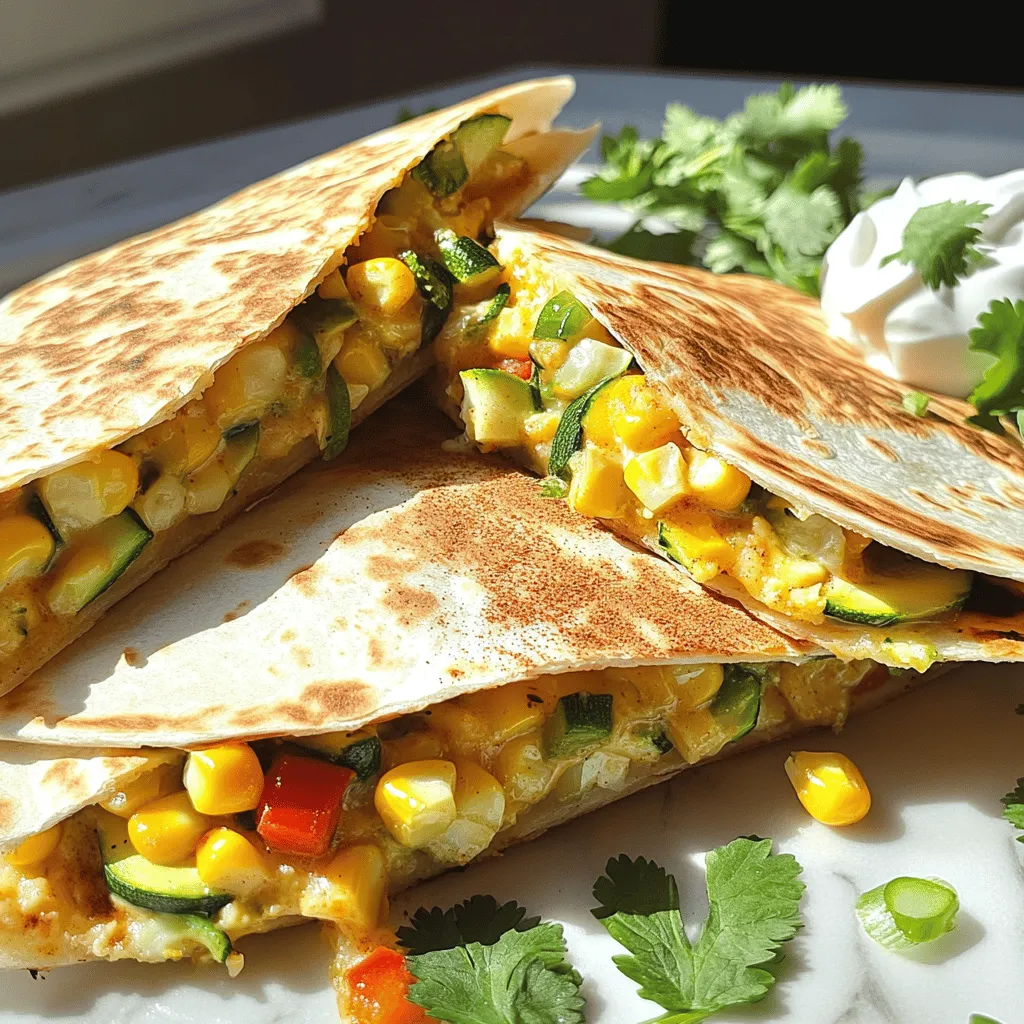
Looking for a quick and tasty meal? Zucchini and Corn Quesadillas are your answer. With crispy tortillas and fresh fillings, they make a simple yet delicious dish. Whether you’re cooking for yourself or a crowd, these quesadillas offer tasty options for everyone. Join me as I explore easy recipes, helpful tips, and fun variations to make this dish a hit. Let’s dive in and create something special!
Ingredients
Detailed List of Ingredients
To make tasty zucchini and corn quesadillas, gather the following ingredients:
– 2 medium zucchinis, grated
– 1 cup fresh corn kernels (or frozen, thawed)
– 1 cup shredded cheese (choose cheddar or Monterey Jack)
– ½ cup diced red bell pepper
– 2 green onions, finely sliced
– 1 teaspoon ground cumin
– 1 teaspoon paprika
– ½ teaspoon garlic powder
– Salt and pepper to taste
– 4 large flour tortillas
– 2 tablespoons olive oil
– Fresh cilantro, chopped, for garnish
– Sour cream or Greek yogurt, for serving
Substitute Options for Ingredients
You can swap some ingredients if you need to. Here are some options:
– Zucchini: Try yellow squash or eggplant for a different taste.
– Cheese: Use mozzarella for a milder flavor or pepper jack for some heat.
– Bell pepper: Any color works, or try jalapeño for spice.
– Tortillas: Corn tortillas are a great gluten-free option.
Importance of Fresh Produce
Using fresh produce makes your quesadillas taste better. Fresh zucchini and corn bring sweetness and crunch. They also pack nutrients. Fresh ingredients help you enjoy a healthy meal. Always look for vibrant colors and firm textures. Fresh herbs, like cilantro, add flavor too. They brighten the dish and make it look appealing. Trust me, fresh is always best!
Step-by-Step Instructions
Preparation of the Filling
Start by grating the zucchinis. Use a box grater or food processor. This makes the zucchini soft and easy to mix. Grab a large bowl and add the grated zucchini. Next, add the fresh corn kernels. If you use frozen corn, make sure it is thawed first. Then, add the shredded cheese, diced red bell pepper, and sliced green onions.
Now, it’s time to spice things up. Sprinkle in the ground cumin, paprika, and garlic powder. These spices add flavor and warmth. Add a pinch of salt and pepper to taste. Stir all the ingredients well until they are mixed evenly. This filling is the heart of your quesadillas.
Cooking the Quesadillas
Heat a large skillet over medium heat. Add one tablespoon of olive oil and let it warm up. Once the oil shimmers, spoon half of the filling into the skillet. Spread it evenly across the pan.
Place a tortilla on top of the filling. Press down gently with a spatula. This helps the tortilla stick to the filling. Cook for about 3-4 minutes. You want the bottom tortilla golden brown and the cheese to start melting.
Carefully flip the quesadilla using a large spatula. Add another tablespoon of olive oil around the edges of the skillet. Cook the second side for another 3-4 minutes. It should be golden brown and crispy.
Repeat this process with the remaining filling and tortillas. Make sure to add more oil to the skillet as needed.
Serving Suggestions and Presentation Tips
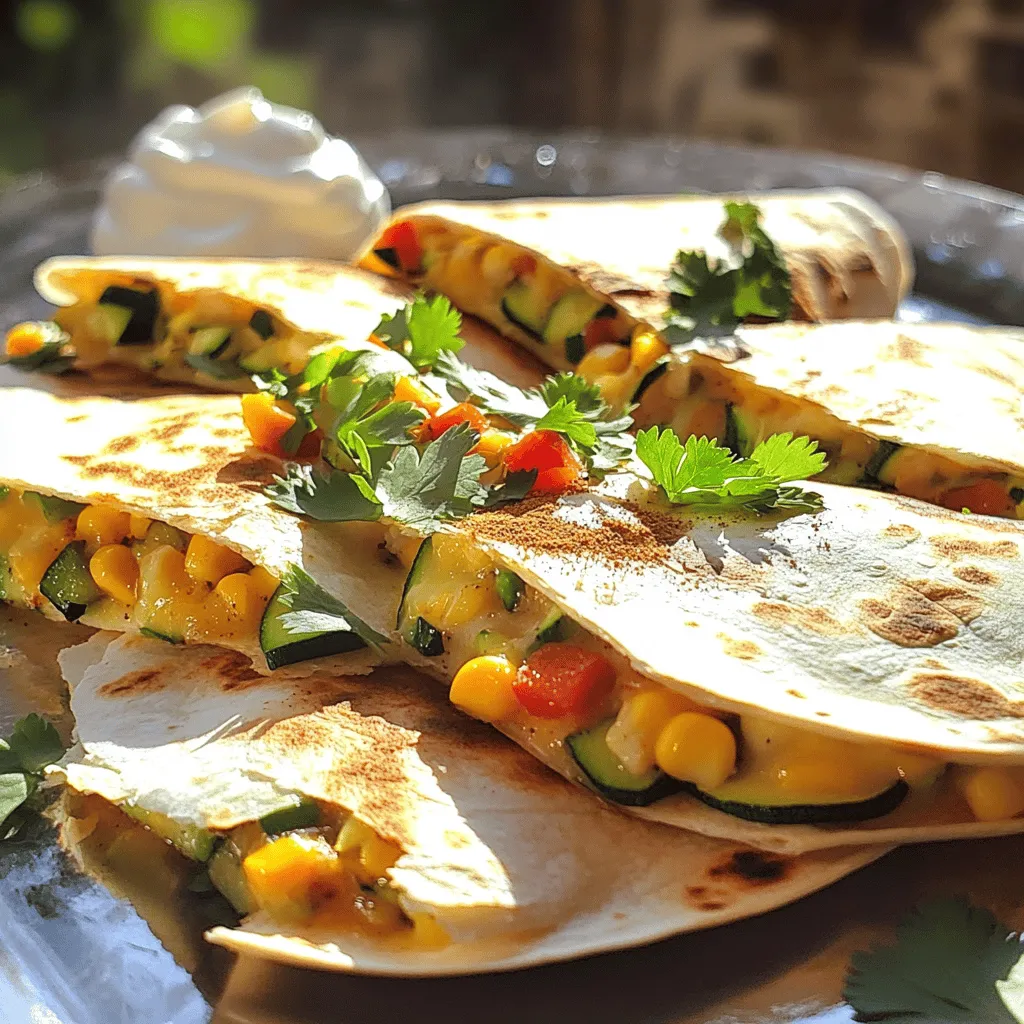
Once cooked, transfer the quesadillas to a cutting board. Cut each quesadilla into wedges. Serve them warm for the best taste.
For a nice touch, arrange the wedges in a circular pattern on a platter. Sprinkle extra cilantro on top for color. Place a small bowl of sour cream or Greek yogurt in the center. This makes for an easy dipping option and looks great on the table. Enjoy your tasty zucchini and corn quesadillas!
Tips & Tricks
How to Achieve the Perfect Crispiness
To get that perfect crispiness, use medium heat. Too high heat can burn the tortillas. Use enough olive oil to coat the skillet. This helps the tortillas brown evenly. Press down gently with a spatula while cooking. This ensures the filling sticks well. Flip the quesadilla carefully to avoid spills. Let each side cook for 3-4 minutes until golden brown.
Cheese Recommendations for Optimal Flavor
For the best flavor, I recommend using cheddar or Monterey Jack. Both melt well and have a nice taste. Cheddar offers a sharp bite, while Monterey Jack is creamy. You can mix cheeses for added depth. Try adding a bit of pepper jack for a spicy kick. Always shred your own cheese. Pre-shredded cheese often has additives that affect melting.
Common Mistakes to Avoid
One common mistake is overstuffing the quesadilla. This can lead to spills and uneven cooking. Another mistake is not letting the skillet heat enough. A hot skillet helps achieve that crispy texture. Avoid using cold fillings; let them warm up first. Lastly, don’t rush the cooking time. Patience is key to a tasty quesadilla.
Variations
Vegetarian Options
If you want to keep your quesadillas vegetarian, there are many options. You can add more veggies like spinach, mushrooms, or bell peppers. These add great flavor and color. Try mixing in some black beans for extra fiber and protein. They will make your meal heartier and more filling.
Adding Proteins (Chicken, Beans, etc.)
Adding proteins can transform your quesadillas. Cooked chicken works well. Shred it and mix it with the filling. You can also use cooked beans like pinto or kidney beans for a tasty twist. Beans add protein and fiber. Both options make this dish more satisfying.
Different Cheese Blends and Flavors
Cheese is key to a great quesadilla. While cheddar and Monterey Jack are classic, you can mix it up. Try using pepper jack for some spice. Or add a bit of feta for a tangy kick. Mixing different cheeses can create new flavors. Experiment to find your perfect blend.
Storage Info
Best Practices for Storing Leftovers
To keep your zucchini and corn quesadillas fresh, store them in an airtight container. Place parchment paper between layers to prevent sticking. They stay good for up to three days in the fridge. Always allow them to cool completely before storing. This helps maintain their texture and flavor.
Reheating Tips for Quesadillas
When you’re ready to enjoy your leftovers, reheat them in a skillet. Heat the skillet over medium heat. Add a little olive oil for crispness. Place the quesadilla in the pan and cover it with a lid. Heat for about 3-5 minutes on each side. This method keeps the quesadilla crispy and warm.
Freezing and Thawing Instructions
If you want to save quesadillas for later, freezing is a great option. First, let them cool completely. Wrap each quesadilla in plastic wrap, then place them in a freezer bag. They can last up to three months in the freezer. To thaw, move them to the fridge overnight. Reheat as described above. Enjoy the tasty goodness anytime!
FAQs
Can I make zucchini and corn quesadillas ahead of time?
Yes, you can make these quesadillas ahead of time. Prepare the filling and store it in the fridge. You can assemble and cook them when you are ready to eat. They will stay fresh for about two days. Just make sure to cover the filling well.
What other vegetables can be used?
You can use many other veggies in these quesadillas. Bell peppers, mushrooms, spinach, or onions work well. You can mix and match based on what you have. Just remember to chop them finely. This helps them cook evenly and blend nicely with the cheese.
How do I make them gluten-free?
To make zucchini and corn quesadillas gluten-free, use gluten-free tortillas. Many brands offer great options. Always check the label to ensure they are certified gluten-free. The filling is naturally gluten-free, so you can enjoy this dish without worry.
To wrap up, we’ve explored the key ingredients and their substitutes for tasty quesadillas. We discussed step-by-step cooking methods to create perfect, crispy dishes and covered fun variations. I offered tips to prevent common mistakes and shared the best ways to store leftovers.
Remember, fresh produce adds flavor. With these facts, you can make great quesadillas at home. Enjoy experimenting and sharing these delicious meals with others!