Skip to content
About
Contact
Cookie Policy
Copyright Policy
Disclaimer
Search
Home
Dinner
Appetizer
Desserts
Drinks
About
Contact
Privacy Policy
Toggle Menu
Home
/
Appetizer
- Page 11
Appetizer
Savory Honey Mustard Chicken Tenders Easy and Crisp
Roasted Garlic Green Beans Easy and Flavorful Dish
Savory Spinach Artichoke Dip Easy and Delicious Recipe
Garlic Butter Smashed Potatoes Delightful Side Dish
Mango Blackberry Fruit Salad Refreshing Summer Treat
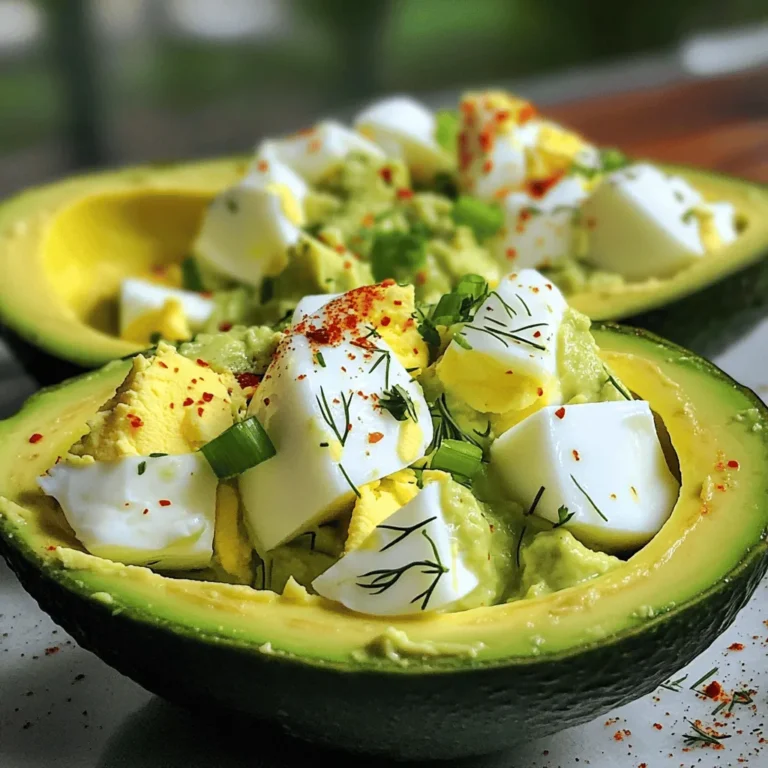
Avocado Egg Salad Flavorful and Satisfying Recipe
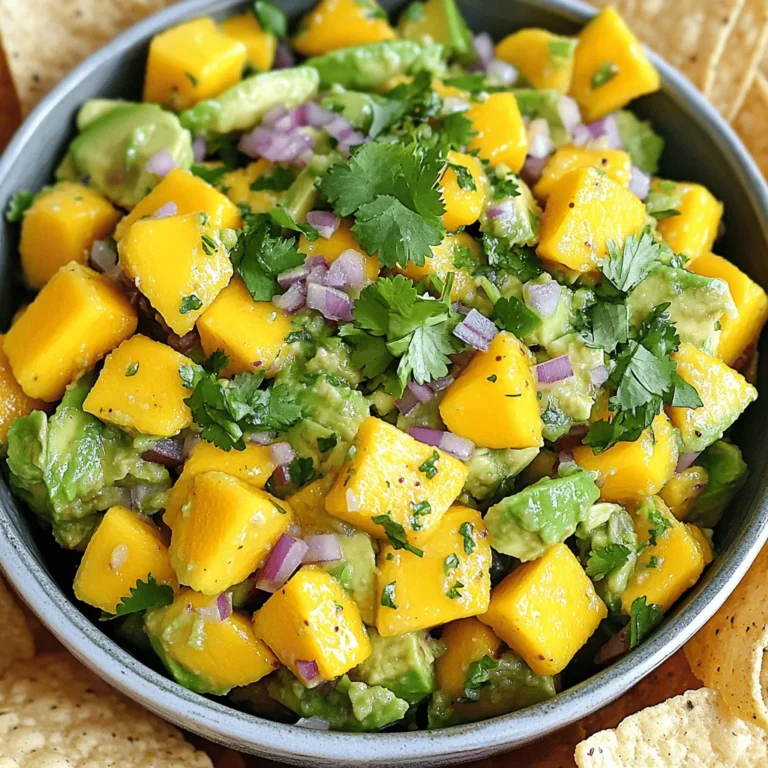
Avocado Mango Salsa Flavorful and Fresh Dip Recipe
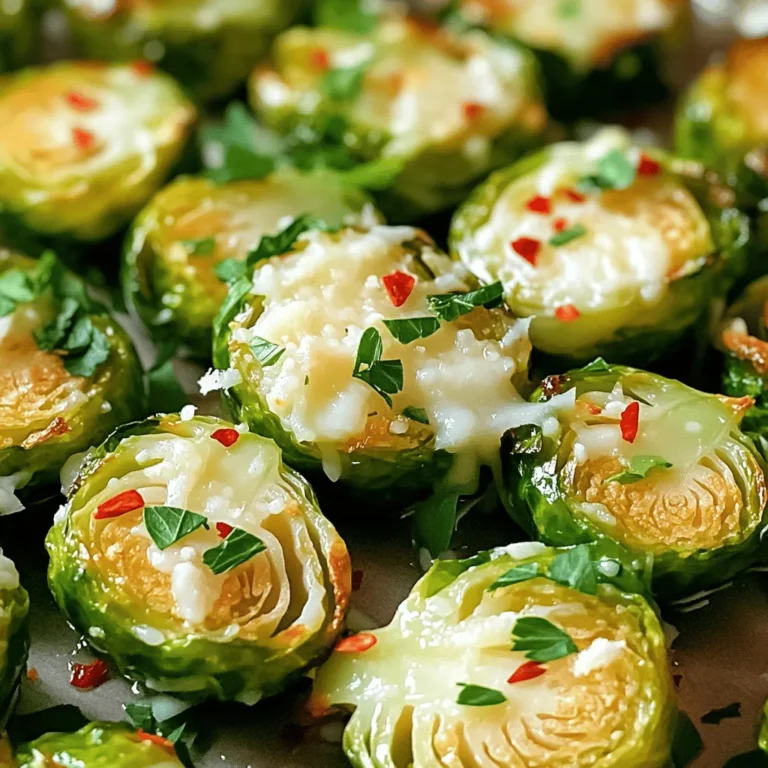
Garlic Parmesan Brussels Sprouts Flavorful Side Dish
Spicy Sriracha Cauliflower Wings Tasty and Crisp Snack
Zesty Lemon Garlic Asparagus Flavorful and Fresh Dish
Page navigation
Previous Page
Previous
1
…
9
10
11
12
13
…
23
Next Page
Next
Home
Dinner
Appetizer
Desserts
Drinks
About
Contact
Privacy Policy
Toggle Menu Close
Search for:
Search


. This will guide you through each step for perfect roasted garlic green beans. Enjoy the cooking! Roasted garlic green beans are simple yet delicious. You learned about ingredients, instructions, and tips to make them perfect. We discussed variations and how to store leftovers for later. Remember, even roasting gives the best flavor. Try mixing in other veggies to change things up. Use these ideas to enjoy your meals. Keeping it tasty and nutritious is always key. Now, it's time to put this into action and savor your dish!](https://blissfulmeal.com/wp-content/uploads/2025/07/3bd07aee-6465-4f1e-b443-7cdc42cc60b7-768x768.webp)
![To make this savory spinach artichoke dip, you will need the following ingredients: - 2 cups fresh spinach, finely chopped - 1 can (14 oz) artichoke hearts, thoroughly drained and coarsely chopped - 1 cup cream cheese, softened to room temperature - 1/2 cup sour cream - 1/2 cup mayonnaise - 1 cup shredded mozzarella cheese - 1/2 cup grated Parmesan cheese - 2 cloves garlic, minced - 1 teaspoon fresh lemon juice - 1/2 teaspoon red pepper flakes (optional for a spicy kick) - Salt and freshly ground black pepper to taste You can easily swap some ingredients if needed. Here are a few ideas: - Cream cheese: Use Greek yogurt for a lighter option. - Sour cream: Substitute with plain yogurt for a similar taste. - Mayonnaise: Use a vegan mayo for a plant-based version. - Mozzarella: Try cheddar cheese for a sharper flavor. - Artichokes: Fresh artichokes can work if you have them handy. Feel free to mix and match based on what you have at home. Cooking should be fun and flexible! This dip is not only tasty but also provides good nutrition. Here’s the breakdown per serving (based on 8 servings): - Calories: 250 - Protein: 7g - Carbohydrates: 8g - Fat: 22g - Fiber: 1g - Sodium: 320mg This dip can be a great part of your appetizer table, especially when served warm! Remember, it’s all about balance, so enjoy it with some fresh veggies or whole-grain chips. Check the [Full Recipe] for detailed instructions on how to prepare this delightful dish. To start, gather all your ingredients. You will need fresh spinach, artichoke hearts, cream cheese, sour cream, mayonnaise, mozzarella cheese, Parmesan cheese, garlic, lemon juice, and spices. 1. First, preheat your oven to 350°F (175°C). This helps the dip bake evenly. 2. Next, take a large mixing bowl and beat the cream cheese, sour cream, and mayonnaise together. Use a spatula or an electric mixer for this. 3. Once smooth, gently fold in the chopped spinach and artichoke hearts. Add minced garlic and lemon juice to enhance the flavor. 4. If you like it spicy, now's the time to add red pepper flakes. Stir until everything mixes well. Now, let's get to baking! 1. Carefully add the shredded mozzarella and grated Parmesan cheese to the mixture. Fold them in gently. 2. Season with salt and black pepper to taste. 3. Transfer the mixture into an oven-safe dish. Spread it out evenly using your spatula. 4. Place the dish in the preheated oven. Bake for 25-30 minutes. Look for bubbling and a golden brown top. To make your dip truly shine, keep these tips in mind: - Use fresh spinach for the best taste. Frozen spinach can be watery. - Let the cream cheese soften to room temperature for easy mixing. - For a creamier dip, consider adding a bit more sour cream or mayonnaise. - Serve warm with crunchy tortilla chips or fresh veggie sticks for added texture and flavor. By following the steps in this section, you will create a savory spinach artichoke dip that is easy and delicious. Don't forget to check out the Full Recipe for more details! To get a creamier dip, use room-temperature cream cheese. Cold cream cheese will clump. If you want extra creaminess, add more sour cream or mayonnaise. You can also mix in some Greek yogurt for a tangy twist. Blend until smooth, and enjoy a rich texture. Seasonings bring your dip to life. I love adding minced garlic for a bold taste. A squeeze of fresh lemon juice brightens the dip. Don't forget about salt and black pepper to balance flavors. If you want heat, red pepper flakes add a nice kick. Experiment with herbs like dill or parsley for a fresh touch. Serve this dip warm for the best experience. I recommend pairing it with crunchy tortilla chips. Soft pita bread is also a great choice. For a healthy option, serve it with fresh veggie sticks like carrots and celery. For a fun presentation, sprinkle extra Parmesan on top and add a few fresh spinach leaves to impress your guests. Check out the Full Recipe for more details! {{image_4}} You can make a vegetarian version of spinach artichoke dip easily. Just skip the cheese and use cashew cream or a nut-based cheese. This keeps the dip creamy and tasty. For a vegan option, replace sour cream and mayonnaise with dairy-free versions. Look for coconut or almond-based products. They work well and add great flavor. Want some heat? Add more red pepper flakes or diced jalapeños to your mix. This gives the dip a nice kick. You can even mix in some spicy cheese, like pepper jack, for a bold twist. Adjust the spice level to your taste, and enjoy a dip that warms you up! To make a low-carb or keto-friendly dip, swap out the sour cream and mayonnaise with full-fat Greek yogurt. Use a low-carb cream cheese and make sure your cheeses are all full fat. This keeps the dip rich and delicious while lowering the carbs. You can serve it with fresh vegetables instead of chips for a healthy crunch. For the full recipe, check out the Cheesy Spinach Artichoke Delight section. After you enjoy your spinach artichoke dip, cool it down. Place it in a clean, airtight container. Keep it in the fridge for up to three days. If you need to store it longer, freezing works great. To reheat your dip, use an oven or microwave. If using an oven, preheat it to 350°F (175°C). Transfer the dip to an oven-safe dish. Heat for about 15-20 minutes until warm. If using a microwave, heat in short bursts of 30 seconds. Stir in between to warm it evenly. You can freeze this dip for later. First, let it cool completely. Then, place it in a freezer-safe container. It stays fresh for about two months. When ready to eat, thaw it overnight in the fridge. Reheat it as described for best results. Enjoy your creamy spinach artichoke delight anytime! For the full recipe, check out the details above. Yes, you can use frozen spinach. Just make sure to thaw it first. Squeeze out the extra water after thawing. This step helps keep the dip from being too watery. I find that frozen spinach works well if you prepare it right. Spinach artichoke dip lasts about three to four days in the fridge. Store it in an airtight container to keep it fresh. If you notice any change in color or smell, it’s best to toss it out. To enjoy it longer, you can freeze it. Yes, you can make this dip ahead of time. Prepare it a day before your event and store it in the fridge. When you’re ready, just bake it before serving. This method saves you time and lets the flavors meld. For the full recipe, check the earlier section. In this article, we explored how to make a tasty spinach artichoke dip. We covered the key ingredients, simple steps for preparation, and helpful tips for the best flavor. I shared variations to suit different diets and explained how to store and reheat your leftovers. Spinach artichoke dip is easy to make and fun to share. Use this guide to create a delicious treat for your next gathering. Enjoy every bite!](https://blissfulmeal.com/wp-content/uploads/2025/07/e0a2a96a-b163-4e5b-bf7d-8613e52ffdc9-768x768.webp)
. You learned how to make garlic butter smashed potatoes. We covered essential ingredients, fun tools, and easy steps. I shared tips for the best texture and flavor. You can even try variations to fit your taste. Plus, storing and reheating these potatoes is simple. Remember, cooking is fun and allows you to be creative. Enjoy experimenting with this recipe and sharing it with others!](https://blissfulmeal.com/wp-content/uploads/2025/07/90824fbe-a3bb-46cd-98c3-cae883b4ed31-768x768.webp)
. In a large bowl, I start by combining the diced mangoes, fresh blackberries, sliced strawberries, and blueberries. Use ripe mangoes for the best taste. Gently stir the fruits to mix them well. Be careful not to smash the blackberries; they are soft and delicate. Next, I prepare the dressing in a small bowl. I whisk together honey, freshly squeezed lime juice, finely chopped mint leaves, and a pinch of sea salt. This dressing adds a sweet and tangy flavor to the fruits. Make sure it is smooth and well blended. After preparing the dressing, I drizzle it over the mixed fruits in the large bowl. Using a large spoon, I gently toss the fruits to coat them evenly with the dressing. It’s important to keep the berries intact for the best texture and presentation. Finally, I let the salad sit at room temperature for about 10 minutes. This resting period helps the flavors develop and blend together. Just before serving, I give the salad one last gentle toss to ensure every fruit is coated. Enjoy this refreshing treat! For the complete recipe, you can find the [Full Recipe](#). When picking mangoes, look for ones that feel slightly soft. Their skin should have a nice color, too. The riper the mango, the sweeter it is. For blackberries, choose plump, shiny ones. They should not have any mushy spots. Fresh berries should smell sweet and fruity. This ensures they are at their best for your salad. To balance sweetness and acidity, you might want to adjust the honey and lime juice. If you like it sweeter, add more honey. For a zing, squeeze in extra lime juice. You can also try adding a little orange juice for a unique twist. This adds a nice touch to your dressing and enhances the fruit's flavors. Serve the salad in a bright bowl to show off the colors. You can also use jars for a fun look. Layer the fruits in each jar for a lovely display. Top with fresh mint leaves for a pop of green. This makes the salad not only tasty but also a feast for the eyes. To learn more about this recipe, check out the Full Recipe. {{image_4}} To make this salad vegan, you can swap honey for agave syrup or maple syrup. Both options will add sweetness without any animal products. They blend nicely with the lime juice and mint. This change keeps the salad light and fresh while being friendly for all diets. You can boost flavor by adding other fruits in season. Consider diced peaches, juicy watermelon, or ripe kiwi. Each fruit brings its own taste, which enhances the overall mix. Just remember to keep the ratios similar to maintain balance. Experimenting with seasonal fruits can make each salad a new delight! Want to spice things up? Try adding a sprinkle of chili powder or a dash of ginger. These spices can add warmth and a surprising twist to your salad. Fresh herbs like basil or cilantro can also bring a new dimension. Don't be afraid to play around with flavors; you might discover a new favorite! To keep your Mango Blackberry Fruit Salad fresh, store it in the fridge. Use an airtight container to prevent air and moisture from spoiling it. If you have leftovers, avoid adding the dressing until you are ready to eat. This way, the fruits stay crisp and vibrant. You can freeze the fruit salad, but it's best to freeze only the fruits, not the salad itself. Cut the mangoes and wash the blackberries, strawberries, and blueberries. Place the fruits in a single layer on a baking sheet. Freeze them for about two hours, then transfer them to a freezer bag or container. This method helps prevent them from clumping together. In the fridge, the salad lasts about two to three days. The fruits may start to lose their texture after that. If you freeze the fruits, they can last for up to six months. Just remember, thawed fruits may not be as firm as fresh ones, but they'll still be tasty. Enjoy your salad fresh for the best flavor! For the complete recipe, check out the Full Recipe. Yes, you can make this salad ahead of time. To prep in advance, cut the mangoes and berries a few hours before you serve. Store the fruit in the fridge in an airtight container. Mix the dressing just before serving to keep it fresh. This way, the fruits stay firm and tasty. This fruit salad pairs well with many dishes. Serve it with yogurt for a creamy touch. You can also enjoy it alongside grilled chicken or fish for a light meal. For a sweet treat, serve it with pancakes or waffles. The bright fruits add flavor and color to any plate. Absolutely! Mangoes and blackberries are packed with vitamins. They provide vitamin C, which boosts your immune system. The honey adds natural sweetness without refined sugar. Mint leaves offer a fresh flavor and aid digestion. This salad is a great way to enjoy a healthy snack or dessert. For the full recipe, check out the Mango Blackberry Bliss Salad. This fruit salad combines ripe mangoes, fresh berries, and a zesty dressing. We covered how to select the best fruits, make a flavorful dressing, and combine everything for a delicious dish. You can adjust sweetness, add seasonal fruits, and even tweak storage methods. This salad is easy to prepare and healthy, making it a great choice for any occasion. Enjoy your fresh fruit salad and experiment with flavors to keep it fun!](https://blissfulmeal.com/wp-content/uploads/2025/07/561edd91-5298-4743-b037-fbe778dd92b6-768x768.webp)

![- 1 pound fresh asparagus, trimmed - 4 cloves garlic, finely minced - 2 tablespoons extra virgin olive oil - Zest of 1 medium lemon - 2 tablespoons freshly squeezed lemon juice - 1 teaspoon red pepper flakes (optional, for a kick) - Salt and freshly ground black pepper, to taste - ¼ cup finely grated Parmesan cheese (optional, for added richness) - Fresh parsley, chopped, for garnish When measuring ingredients, precise amounts matter. Here are some tips: - For asparagus, choose tender, bright green stalks. - Use a microplane for lemon zest to get fine shavings. - Minced garlic should be small for even flavor. - Measure olive oil with a tablespoon for accuracy. - Adjust salt and pepper based on personal taste. If you lack any ingredient, don't worry! Here are some substitutes: - For asparagus, try green beans or broccoli. - Garlic powder can replace fresh garlic if needed. - Any mild oil works in place of olive oil. - Lemon juice can be swapped with lime juice. - Omit Parmesan for a dairy-free option. By following these ingredient guidelines, your zesty lemon garlic asparagus will shine! For the full recipe, check the main article. Start by preheating your oven to 400°F (200°C). This temperature helps the asparagus roast well. A hot oven makes the asparagus tender and flavorful. In a large bowl, combine the trimmed asparagus, minced garlic, and olive oil. Add the lemon zest, lemon juice, red pepper flakes, salt, and pepper. Toss everything together. Make sure each asparagus spear is well-coated with the mixture. This step is key for a zesty flavor. Line a baking sheet with parchment paper for easy cleanup. Spread the asparagus in a single layer. Avoid crowding the spears; this helps them roast evenly. Place the baking sheet in the oven. Roast for 15 to 20 minutes. Halfway through, toss the asparagus gently. This helps all sides caramelize beautifully. If you want a richer taste, sprinkle Parmesan cheese over the asparagus in the last 5 minutes of roasting. This adds a creamy, salty note that enhances the dish. Once the asparagus is done, take it out of the oven. Transfer it to a serving platter. Finish with a sprinkle of chopped parsley for color and freshness. For an elegant touch, drizzle some extra lemon juice on top. Adding lemon wedges on the side allows guests to squeeze fresh juice to their liking. For the complete recipe, check out the Full Recipe section! To get tender asparagus, choose thin spears. They cook faster and taste better. Trim the ends to remove the tough parts. When mixing, make sure all spears get coated in the lemon-garlic mix. Toss them well so each spear has flavor. Roast at 400°F for 15 to 20 minutes. Keep an eye on them, so they don’t overcook. Don’t stop with just lemon and garlic. Try adding herbs like thyme or basil. They add depth and a fresh taste. You can mix in a teaspoon of dried herbs into your garlic and oil. Fresh herbs can also be sprinkled on after roasting. This will give your dish a vibrant look and taste. Every oven cooks a bit differently. If yours runs hot, check the asparagus early. If it’s cooler, you may need to roast longer. Always test a spear by piercing it with a fork. It should be easy to pierce but still firm. Adjust cooking time based on your oven's quirks to get the best results. For more details, check the Full Recipe to guide you through the steps. {{image_4}} You can make Zesty Lemon Garlic Asparagus even tastier by adding cheese. Parmesan is a classic choice. It gives a rich flavor and a nice texture. You can also try feta or goat cheese. These cheeses add a creamy tang. Just sprinkle your cheese on top in the last few minutes of cooking. This lets it melt slightly and blend with the flavors. Each cheese brings a different twist to the dish. If you like heat, add more red pepper flakes. Start with one teaspoon and adjust to your taste. You can also use other spices like cayenne pepper or chili powder. These spices will give a nice kick. For a different flavor, try adding smoked paprika. This adds warmth and depth. Just remember to balance the spice with the lemon and garlic. This way, you keep the dish bright and zesty. You can cook asparagus in several ways. Grilling gives it a smoky flavor. Toss the asparagus with the lemon and garlic mixture, then place it on a hot grill. Cook for about 5 to 7 minutes, turning often. Sautéing is another great option. Heat olive oil in a pan, add asparagus, and cook for about 8 to 10 minutes. Stir often for even cooking. Both methods keep the asparagus tender and full of flavor. For the full recipe, refer to the main guide. To keep your zesty lemon garlic asparagus fresh, store it in an airtight container. Place it in the fridge within two hours of cooking. This way, it stays crisp and tasty. Consume your leftovers within three to four days for the best flavor. When you are ready to enjoy your leftovers, reheating is simple. You can use the oven or microwave. To reheat in the oven, set it to 350°F (175°C). Spread the asparagus on a baking sheet and heat for about 10 minutes. For the microwave, place the asparagus on a microwave-safe plate and cover it. Heat in 30-second bursts until warm. This keeps the asparagus from getting soggy. If you want to save some for later, you can freeze the asparagus. Start by blanching it in boiling water for two minutes. Then, cool it in ice water. Drain and pat dry. Place the asparagus in a freezer bag, remove as much air as possible, and seal it. It can stay frozen for up to three months. When you are ready to use it, thaw in the fridge overnight before reheating. Enjoy your zesty lemon garlic asparagus anytime! For the complete recipe, check out the Full Recipe. Yes, you can use frozen asparagus. It saves time and is often picked at peak freshness. Just thaw the asparagus and pat it dry before seasoning. You may need to adjust the cooking time, as frozen asparagus usually cooks faster than fresh. To make this dish vegan, simply omit the Parmesan cheese. You can also use nutritional yeast for a cheesy flavor. This keeps the dish light and zesty while still being full of flavor. Zesty Lemon Garlic Asparagus pairs well with grilled chicken, fish, or steak. It also complements pasta dishes or grain bowls. The bright flavors enhance the main dish and add a fresh touch to your meal. Roasting asparagus typically takes about 15 to 20 minutes at 400°F (200°C). The cooking time may vary based on the thickness of the asparagus spears. Thinner spears cook faster, while thicker ones may need a bit more time. You can prep the asparagus mixture ahead of time. Just store it in the fridge for up to 24 hours. Roast it just before serving for the best taste and texture. If you have leftovers, they’ll still taste great the next day! For the full recipe and detailed instructions, check out the [Full Recipe]. In this blog post, we explored how to prepare Zesty Lemon Garlic Asparagus. We covered essential ingredients, measurements, and substitutes. You learned step-by-step instructions, from preheating the oven to optional cheese toppings. I shared tips for perfect tenderness and flavor enhancement. You also discovered variations to suit different tastes, along with storage and reheating advice. Try this recipe for a fresh dish that’s easy to make. You will impress anyone at your table. Enjoy your cooking!](https://blissfulmeal.com/wp-content/uploads/2025/06/0eb390c3-5184-48ba-a511-44252ac7256c-768x768.webp)