Skip to content
About
Contact
Cookie Policy
Copyright Policy
Disclaimer
Search
Home
Dinner
Appetizer
Desserts
Drinks
About
Contact
Privacy Policy
Toggle Menu
Home
/
Appetizer
- Page 9
Appetizer
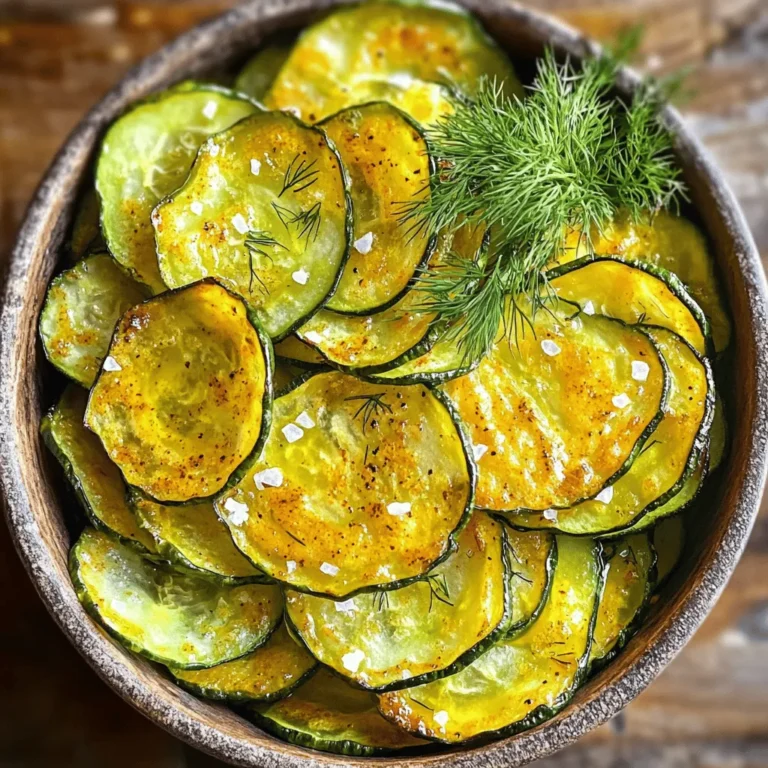
Baked Cucumber Chips Crispy and Healthy Snack Option
Cheesy Zucchini Roll-Ups Irresistible and Simple Recipe
Smoky Roasted Okra Irresistible Flavor Anytime
Zucchini and Corn Quesadillas Tasty and Simple Dish
Crispy Kale Chips Easy Recipe for Healthy Snacking
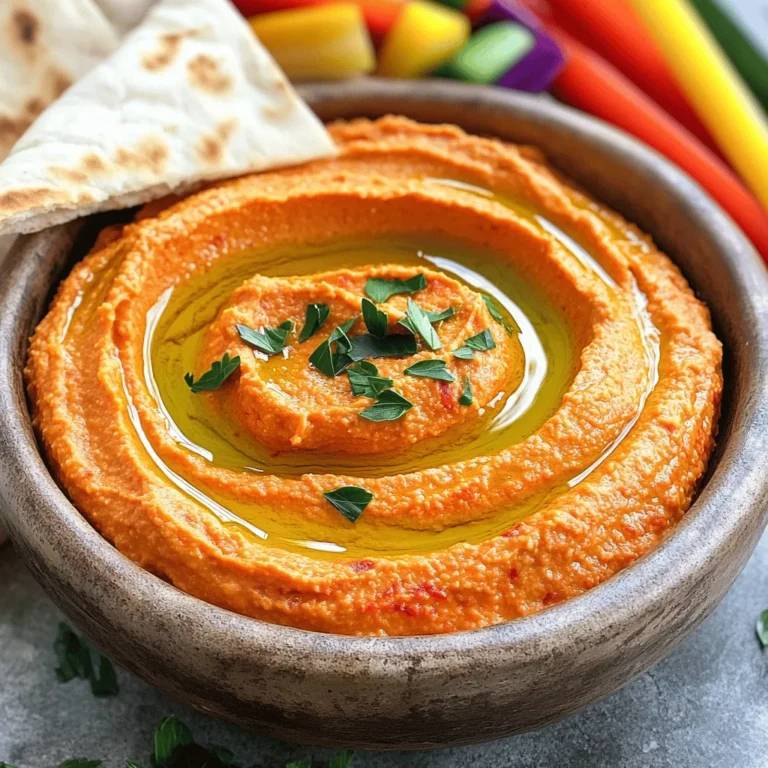
Roasted Red Pepper Hummus Creamy and Flavorful Dip
Easy Chicken Lettuce Wraps Quick and Simple Recipe
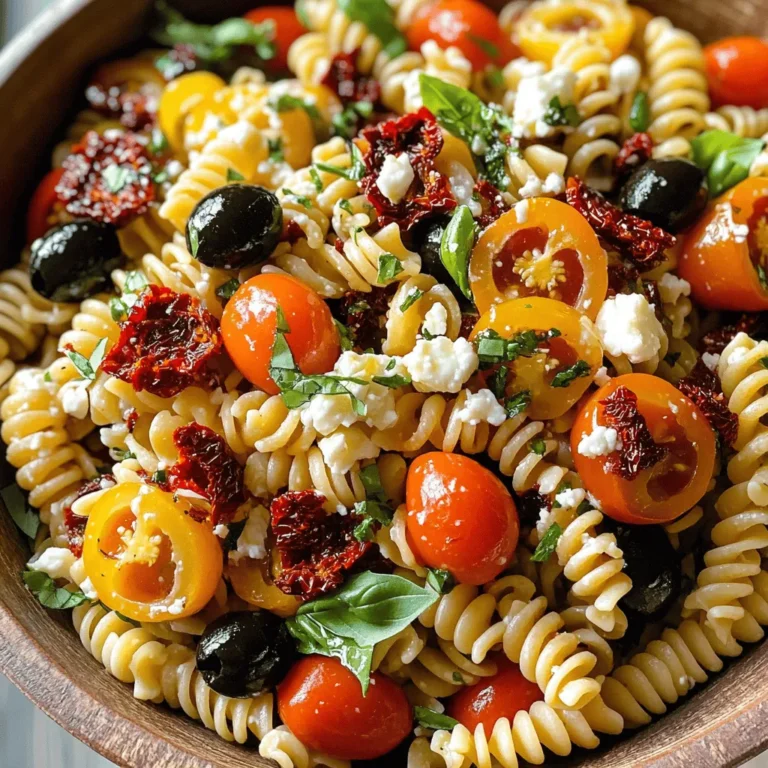
Sun-Dried Tomato Pasta Salad Flavorful and Fresh Delight
Tzatziki Chicken Skewers Flavorful Grill Delight
Avocado Egg Salad Protein-Packed Easy Meal
Page navigation
Previous Page
Previous
1
…
7
8
9
10
11
…
23
Next Page
Next
Home
Dinner
Appetizer
Desserts
Drinks
About
Contact
Privacy Policy
Toggle Menu Close
Search for:
Search

![For Cheesy Zucchini Roll-Ups, you need a few simple items. Here’s what you’ll need: - 2 medium zucchinis, sliced lengthwise into thin strips (about ¼ inch thick) - 1 cup ricotta cheese - 1 cup shredded mozzarella cheese - ½ cup grated Parmesan cheese - 1 large egg, beaten - 2 cloves garlic, minced finely - 1 teaspoon dried oregano - Salt and freshly ground black pepper, to taste These ingredients work well together. Zucchini gives a nice base. The cheeses offer creaminess and flavor. Garlic and oregano add a tasty touch. You’ll want a good sauce to dip your roll-ups. Marinara sauce is perfect for this. It adds a rich, tangy flavor that pairs well with the cheesy goodness. For a fresh touch, you can also add some garnishes. Fresh basil leaves look great and add a nice flavor boost. Just sprinkle them on top before serving. This combination makes your Cheesy Zucchini Roll-Ups even more enjoyable. For the complete instructions on how to make this dish, check the Full Recipe. 1. Preheating the oven: Start by preheating your oven to 400°F (200°C). This ensures the oven is hot enough to cook the roll-ups evenly. 2. Preparing zucchini: Take your zucchini and slice it lengthwise into thin strips, about ¼ inch thick. Place the slices on a clean kitchen towel or paper towels. Lightly sprinkle them with salt and let them sit for about 10 minutes. This step draws out excess moisture. After 10 minutes, pat the slices dry with another towel to remove the salt and moisture. 1. Combining cheese ingredients: In a mixing bowl, add 1 cup of ricotta cheese, 1 cup of shredded mozzarella cheese, ½ cup of grated Parmesan cheese, and 1 large beaten egg. Then, add 2 cloves of finely minced garlic, 1 teaspoon of dried oregano, and a pinch of salt and pepper to taste. Mix everything together until you have a smooth and well-blended filling. 1. Rolling technique: Take one zucchini slice and place a generous spoonful of the cheese mixture at one end. Carefully roll the zucchini slice from the filled end, making sure to keep the filling inside. Roll it tightly but gently to secure the filling. 1. Greasing the baking dish: Lightly grease a baking dish with olive oil or cooking spray. Arrange the zucchini roll-ups seam side down in the dish. They can be close together, but don’t overcrowd them. 2. Baking time and temperature: Place the dish in the preheated oven and bake for 15-20 minutes. Look for the cheese to be bubbly and the zucchini to become tender. The edges should have a slight golden hue. Enjoy your Cheesy Zucchini Roll-Ups with marinara sauce for dipping! For the complete recipe, refer to the [Full Recipe]. To make the best cheesy zucchini roll-ups, start with the zucchinis. Excess moisture can make them soggy. To prevent this, slice the zucchinis thinly, about ¼ inch thick. After slicing, sprinkle salt on them and let them rest for about 10 minutes. The salt pulls out water. After 10 minutes, pat them dry with a towel. This step helps keep your roll-ups firm. Next, focus on the cheese filling. Mix your ricotta, mozzarella, and Parmesan in a bowl. Add a beaten egg, minced garlic, and oregano. Season with salt and pepper. Blend until smooth. A well-mixed filling holds together better while baking. You want creamy goodness in every bite. These roll-ups shine when paired with marinara sauce. The sauce adds a rich, tangy flavor that complements the cheese. You can also try other dips. A creamy ranch or spicy aioli can add a fun twist. Serve the roll-ups warm for a delightful treat. Presentation matters! Garnish your roll-ups with fresh basil leaves. This not only adds color but also fresh flavor. Arrange the roll-ups on a nice platter. Drizzle some marinara sauce around them. It creates an inviting look. For a fun touch, use small bowls for the dips. This makes your dish pop and looks great on any table. For the full recipe, check out the steps above! {{image_4}} You can mix up the cheese in these roll-ups. If you love goat cheese, try it instead of ricotta. It adds a tangy flavor. Cheddar also works well for a sharp bite. You can blend different cheeses, too. This creates a unique taste in every bite. Feel free to experiment with cheese types. Each choice brings a new twist to the dish. Want to boost the nutrition? Think about adding more veggies. Spinach is a great option. It wilts nicely when baked and adds a pop of green. Bell peppers can add sweetness and crunch. Just chop them fine and mix them into the cheese filling. You can also try mushrooms or carrots. The more veggies, the better. They make the roll-ups colorful and tasty. To make your roll-ups even tastier, add some spices. Red pepper flakes give a nice kick if you enjoy heat. Thyme brings an earthy taste that pairs well with zucchini. You can also use fresh herbs like parsley or basil. These add freshness and bright flavor. A sprinkle of lemon zest can brighten up the dish, too. Enjoy the process of making these roll-ups your own. For the full recipe, check out the link. To keep your cheesy zucchini roll-ups fresh, place them in an airtight container. This helps to seal in moisture and flavor. You can store them in the fridge for up to three days. If you want to keep them longer, freezing is a great option. Just make sure they cool down before you pack them away. When it comes to reheating, the oven is the best choice. Preheat it to 350°F (175°C). Place the roll-ups on a baking sheet and cover them with foil. This keeps them moist. Bake for about 15 minutes. If you are short on time, the microwave works too. Just heat them on a plate for 1-2 minutes. However, this may make them a bit soggy. To freeze the roll-ups, assemble them as you normally would. After rolling, place them in a single layer on a baking sheet. Freeze them for about an hour until solid. Then, transfer them to a freezer-safe bag or container. Label it with the date. They can stay frozen for up to three months. When you’re ready to enjoy, bake them straight from the freezer without thawing. Just add a few extra minutes to the baking time. For the full recipe, check the earlier section. If you don't have ricotta cheese, you can use cottage cheese. It offers a similar texture but is slightly more watery. You can also try cream cheese for a richer flavor, but it will change the taste a bit. Another option is goat cheese, which adds a tangy twist. Just remember, each cheese will slightly alter the texture and taste of your roll-ups. Yes, you can prepare these roll-ups ahead of time. Just follow the recipe until you assemble the roll-ups. Then, store them in an airtight container in the fridge for up to 24 hours. When you're ready to bake, you can pop them in the oven. This saves time and makes dinner easy on busy days. You’ll know the roll-ups are done when the cheese is bubbly and golden. Look for a slight browning on the edges of the zucchini, which means they are tender. If you see cheese oozing out, that's a good sign too! Trust your eyes; a perfect roll-up should look inviting and delicious. Yes, Cheesy Zucchini Roll-Ups are gluten-free. The main ingredients are zucchini and cheese, which do not contain gluten. Just make sure your marinara sauce is also gluten-free if you are sensitive. This dish is a great option for anyone avoiding gluten while still enjoying a tasty meal. In this post, we explored the delicious world of Cheesy Zucchini Roll-Ups. We covered key ingredients like zucchini and cheese, as well as helpful tips for preparation and baking. You can mix and match cheeses or add veggies for fun twists. Storing and reheating leftovers is simple too. Remember, these roll-ups are not just tasty; they’re also easy to customize. Enjoy making them your own, and impress your family and friends with a delightful dish that is sure to please!](https://blissfulmeal.com/wp-content/uploads/2025/07/aaa397a0-723d-455b-94ae-2e4eca5c2787-768x768.webp)
![To start, you need fresh okra. Look for firm, green pods that are not too big. Choose about one pound of okra. You will trim the ends and cut them in half. Fresh okra gives the best taste and texture. The right seasonings make this dish sing. Here’s what you need: - 2 tablespoons extra virgin olive oil - 1 teaspoon smoked paprika - 1 teaspoon garlic powder - 1 teaspoon onion powder - 1/2 teaspoon cayenne pepper (optional, for an extra kick) - Salt and freshly cracked black pepper, to taste These seasonings bring out the smoky flavor. Olive oil helps the okra brown nicely. Want to jazz it up? You can add other flavors. Consider these options: - A squeeze of lemon juice for brightness - A dash of cumin for warmth - Parmesan cheese for a savory twist These add-ins can take your roasted okra to the next level. Try them for a fun change! For the full recipe, check the earlier section. Start by preheating your oven to 425°F (220°C). A hot oven is key for crispy okra. It helps the outside get nice and crunchy while keeping the inside tender. This high heat brings out the best flavors. Grab a big mixing bowl. Add 1 pound of trimmed okra halves into it. Pour in 2 tablespoons of extra virgin olive oil. Then, sprinkle in 1 teaspoon of smoked paprika, 1 teaspoon of garlic powder, and 1 teaspoon of onion powder. If you like heat, add 1/2 teaspoon of cayenne pepper too. Finally, season with salt and fresh black pepper to taste. Mix everything well with your hands or a spatula. This step is crucial for that smoky flavor. Each okra piece should be well-coated. Line a baking sheet with parchment paper or grease it lightly. Spread the seasoned okra on the sheet in a single layer. Make sure not to overcrowd them. This helps them roast evenly. Now, place the baking sheet in your preheated oven. Roast for 20-25 minutes. Halfway through, stir the okra to make sure all sides crisp up nicely. You want them tender with a slight crunch on the edges. After roasting, take the baking sheet out and let the okra cool for a bit. Sprinkle with fresh chopped parsley for a bright touch. Enjoy your smoky roasted okra warm for a tasty treat! For the full recipe, check the earlier section. To get that deep smoky taste, use smoked paprika. It adds a warm, rich flavor. Mixing it with garlic powder and onion powder enhances the taste. You can also add cayenne pepper if you love spice. Make sure to coat the okra evenly with the oil and spices. This step is key for that smoky flavor. Even roasting is all about spacing. Spread the okra in a single layer on the baking sheet. If the pieces touch, they will steam instead of roast. Stir the okra halfway through cooking to help it brown evenly. This method gives you crispy edges and tender centers. Presentation matters! Serve the smoky roasted okra on a rustic wooden board. A bright white platter also looks great. Add a wedge of lemon on the side for a pop of color. It adds a fresh touch and a nice zing. Garnish with chopped parsley for a splash of green. This makes the dish look even more appetizing. For the full recipe, check [Full Recipe]. {{image_4}} If you love heat, try adding more cayenne pepper. Use one full teaspoon instead of half. You can also add crushed red pepper for a new twist. This spicy version will tickle your taste buds and warm you up! Mix in fresh herbs for a bright flavor. Try thyme, rosemary, or oregano. Add two teaspoons of your favorite chopped herbs to the oil and spice mix. This will give your okra a fresh and fragrant boost, perfect for summer! This recipe fits many diets. It’s vegan and gluten-free as is. Use a plant-based oil if you want. Olive oil works well, but avocado oil is also great. Feel free to adjust the spices to suit your taste. You can make it as mild or zesty as you like! For the full recipe, check the previous section. To keep your smoky roasted okra tasty, store it in an airtight container. Let it cool first, then place it in the fridge. This method helps maintain flavor and texture. Try to eat the leftovers within three days for the best taste. If you notice any moisture, pat the okra dry before storing. Reheating smoky roasted okra can be tricky. I recommend using an oven or an air fryer. Preheat your oven to 375°F (190°C). Spread the okra on a baking sheet and heat for about 10 minutes. This keeps it crispy. An air fryer works well too, at the same temperature, for about 5-7 minutes. Avoid the microwave, as it makes the okra soggy. If you want to save some for later, freezing is a great option. First, let the roasted okra cool completely. Spread it in a single layer on a baking sheet and freeze for about an hour. Once frozen, transfer the okra to a freezer-safe bag. Remove as much air as possible before sealing. It can last up to three months. When you're ready to use it, just reheat straight from the freezer! When you pick okra, look for bright green pods. They should feel firm and smooth. Avoid okra that has brown spots or looks wilted. Fresh okra bends easily but does not break. This means it is still tender and at its best. Yes, you can use frozen okra. However, fresh okra gives a better texture. Frozen okra can be more watery, which might affect crispness. If you use frozen, thaw it and pat it dry before cooking. This helps reduce moisture for better roasting. To make smoky roasted okra crispy, follow these tips: - Preheat your oven to 425°F (220°C). - Use enough olive oil to coat each piece. - Spread the okra in a single layer on the baking sheet. - Stir them halfway through roasting to allow even cooking. These steps help achieve that crunchy texture. Smoky roasted okra pairs well with many dishes. Try serving it with: - Grilled meats for a hearty meal. - Rice or quinoa for a filling side. - A fresh salad for a lighter option. You can also enjoy it as a snack or appetizer with dips. For the full recipe, check out the Smoky Roasted Okra section. Smoky roasted okra is easy to make and full of flavor. We covered fresh ingredients, essential seasonings, and fun add-ins. You learned step-by-step instructions for oven roasting and tips to get the perfect flavor. We also explored tasty variations for different diets and how to store leftovers properly. In the end, this dish is both versatile and simple. I encourage you to try making it your own!](https://blissfulmeal.com/wp-content/uploads/2025/07/7aacdd89-c614-44a6-bce0-70bf8b4e212e-768x768.webp)

![To make crispy kale chips, start with fresh kale. Look for kale that is bright green and free from brown spots. You will need one bunch of kale. Remove the tough stems and tear the leaves into bite-sized pieces. This helps them bake evenly and get nice and crispy. Next, you will need some olive oil and seasonings. Use two tablespoons of high-quality olive oil. This adds flavor and helps the kale crisp up nicely. For seasoning, you will need: - 1 teaspoon of garlic powder - 1 teaspoon of smoked paprika - Sea salt, to taste - Freshly cracked pepper, to taste These spices give the kale chips a tasty kick. Feel free to add more or less based on your taste. If you want a cheesy flavor, consider adding nutritional yeast. Use one teaspoon as an optional ingredient. It adds a nice flavor boost and is great for those who want a plant-based option. You can also experiment with other spices or herbs to make the chips your own. Follow the [Full Recipe] for a step-by-step guide to making these tasty snacks. Start with a bunch of fresh kale. Remove the tough stems. Tear the leaves into bite-sized pieces. Rinse them well under cool water. This step removes dirt and any grit. Drain the kale thoroughly using a salad spinner or by patting it dry with a clean towel. Dry leaves help achieve crispiness. In a large mixing bowl, add the torn kale. Drizzle two tablespoons of olive oil over it. Next, sprinkle one teaspoon of garlic powder and smoked paprika. If you like a cheesy taste, add one teaspoon of nutritional yeast. Season with sea salt and freshly cracked pepper to your liking. Use clean hands to massage the kale gently for about two to three minutes. This helps the flavors blend well and softens the leaves. Preheat your oven to 350°F (175°C). Line a baking sheet with parchment paper. Spread the seasoned kale evenly on the sheet. Make sure the leaves are not overlapping. This ensures they bake evenly and become crisp. Bake for 10 to 15 minutes, checking often. The edges should turn crispy and slightly brown. Once they are done, let the chips cool on the baking sheet. They will become crunchier as they cool. Taste the chips and adjust seasoning if needed. Enjoy your crispy kale chips as a healthy snack or garnish! You can find the full recipe [here](#). To get the best crispiness from your kale chips, follow a few key steps. First, make sure your kale is very dry. Any water left on the leaves can lead to soggy chips. After washing, use a salad spinner or carefully pat the leaves dry with a towel. Next, don't overcrowd the baking sheet. Spread the kale pieces out in a single layer. This allows hot air to circulate around each leaf, creating that perfect crunch. If your batch is big, split it into two sheets. When it comes to seasoning, less is more. Start with a light drizzle of olive oil. Too much oil can make the chips greasy. I usually use about two tablespoons for one bunch of kale. Sprinkle your spices evenly. I like using garlic powder and smoked paprika. They add great flavor without being overpowering. You can mix the seasonings in a bowl before adding them to the kale for even coverage. One common mistake is baking at too high a temperature. Keep your oven at 350°F (175°C). Baking at a higher heat can brown the chips too quickly, leading to burnt edges. Another mistake is not keeping an eye on the kale as it bakes. Check them around the 10-minute mark. The chips can go from perfect to burnt in just a minute. Finally, avoid using kale that is wilted or brown. Fresh, vibrant leaves will give you the best results. For more details on making these tasty snacks, refer to the Full Recipe. {{image_4}} You can make your kale chips even more fun by trying different flavors. Here are a few ideas: - Spicy: Add cayenne pepper or chili powder for heat. Start with a small amount and taste it. - Cheesy: Use nutritional yeast for a cheesy taste. It adds great flavor without dairy. - Sweet: Try a sprinkle of cinnamon and a bit of maple syrup. This gives a nice twist. Mix and match these flavors to find your favorite! You can cook kale chips in different ways. Here are some options: - Air Fryer: Set your air fryer to 300°F (150°C) and cook for about 5-7 minutes. Check often to avoid burning. - Dehydrator: This method takes longer but keeps the nutrients. Set it to 125°F (52°C) for 1-2 hours. Each method gives a unique texture and flavor. You can experiment to see which you like best! Kale chips are great on their own, but you can add some flair: - Serve them in a bright bowl for a fun look. - Pair them with dips like hummus or guacamole for extra flavor. - Use them as a garnish on soups or salads. Feel free to get creative! You can use these ideas to make your kale chips stand out at your next snack time. For the full recipe, check out the Kale Crunchies section above. To keep your homemade kale chips fresh, let them cool completely. Once cool, place them in a container. You can use a jar, a zip-top bag, or a food storage container. Make sure to seal the container tightly to keep air out. Air can make your chips lose their crispness. Homemade kale chips can last about 5 to 7 days. After that, they may become stale. For the best taste, eat them within the first few days. If you store them well, you can enjoy their crunchy goodness for a week. Choose containers that are airtight. Glass jars work well and look nice on your shelf. Zip-top bags are also great, especially if you want to take them on the go. Just remember to squeeze out as much air as you can before sealing. This helps keep your kale chips crispy longer. For the full recipe of crispy kale chips, check out the detailed instructions above! To make crispy kale chips, follow these steps. First, preheat your oven to 350°F (175°C). Line a baking sheet with parchment paper. Next, tear the kale leaves into bite-sized pieces and place them in a bowl. Add 2 tablespoons of olive oil, 1 teaspoon of garlic powder, 1 teaspoon of smoked paprika, and optional nutritional yeast for a cheesy flavor. Season with sea salt and pepper. Now, massage the kale with your hands for 2-3 minutes. This helps the leaves absorb the oil and spices. Spread the kale on the baking sheet in a single layer. Bake for 10-15 minutes. Keep a close eye on them to avoid burning. The edges should turn crispy and slightly brown. Let them cool for a few minutes before enjoying. This method gives you a tasty and healthy snack. Yes, kale chips are healthy! They are low in calories and high in nutrients. Kale is packed with vitamins A, C, and K. It also has fiber and antioxidants. When you make them at home, you control the oil and salt. This allows you to make a healthier snack than most store-bought options. Kale chips are a great way to enjoy greens. They satisfy your crunch cravings without the guilt. Plus, they are a good source of plant-based nutrients. Eating kale chips can help you feel full and happy. Yes, you can buy ready-made kale chips. Many stores offer them in various flavors. However, check the ingredient list. Some brands add preservatives or extra salt. Homemade kale chips allow you to use fresh ingredients and control the flavor. If you're short on time, store-bought chips can be a quick option. But, for the best taste and health benefits, I recommend making your own. For the full recipe, refer back to the recipe section. This blog post covered how to make great kale chips. We looked at fresh kale, olive oil, and seasonings. I shared steps to prepare, season, and bake for crispness. You learned tips for maximum crunch and common mistakes. We explored tasty flavor variations and cooking methods. Lastly, I provided storage tips to keep your chips fresh. Kale chips are easy and fun to make. With these steps, you can enjoy them anytime. Enjoy your crispy, healthy snack!](https://blissfulmeal.com/wp-content/uploads/2025/07/ce738ab0-af54-4965-961d-726e0a4f794d-768x768.webp)
![- 1 pound ground chicken - 1 tablespoon sesame oil - 2 cloves garlic, minced - 1 inch fresh ginger, grated - 1 red bell pepper, finely diced - 1 cup carrots, julienned - 2 green onions, finely chopped - 1/4 cup low-sodium soy sauce - 1 tablespoon rice vinegar - 1 tablespoon hoisin sauce - 1 teaspoon chili garlic sauce (optional, for a spicy kick) - 1 head of Butter lettuce (or Romaine), carefully separated into leaves - Chopped fresh cilantro for garnish These ingredients work together to create a tasty and vibrant dish. The ground chicken serves as the base, while the fresh veggies add crunch and color. The sauces bring rich flavors that tie everything together. - Skillet - Spatula - Whisk Using the right tools makes cooking smoother. A skillet helps cook the chicken evenly. A spatula breaks up the meat and mixes in the veggies. A whisk combines the sauce ingredients quickly. With these tools in hand, you're ready to create a delicious meal. 1. Start by heating the skillet. Pour in sesame oil and turn the heat to medium. Let it shimmer. 2. Add minced garlic and grated ginger to the skillet. Stir for 30 seconds until fragrant. Watch carefully, so they do not burn. 3. Next, add the ground chicken. Break it apart using a spatula. Cook for 5 to 7 minutes until it turns brown and is fully cooked. 1. Once the chicken is ready, mix in the diced red bell pepper and julienned carrots. Sauté for 3 to 4 minutes. The veggies should be soft yet still crunchy. 2. In a small bowl, whisk the soy sauce, rice vinegar, hoisin sauce, and chili garlic sauce if you like heat. Pour this over the chicken and veggies. Stir well so everything is coated evenly. 1. Remove the skillet from the heat. Fold in the chopped green onions. This adds a fresh taste to your filling. 2. To serve, spoon a generous amount of the chicken mixture into each lettuce leaf. Top with chopped cilantro for a fresh finish. Enjoy your Easy Chicken Lettuce Wraps! For the [Full Recipe], check the ingredients and instructions above. To make your Easy Chicken Lettuce Wraps burst with flavor, focus on the garlic and ginger. Sautéing these ingredients is crucial. Heat the oil and add minced garlic and grated ginger. Cook them for about 30 seconds. This will release their amazing aroma and taste. Next, balance the flavors with your sauces. The mix of soy sauce, rice vinegar, and hoisin sauce creates a rich, savory taste. If you want a kick, add chili garlic sauce. This combination makes each bite exciting. For a beautiful dish, presentation is key. Arrange the filled lettuce wraps on a platter. Drizzle some extra hoisin sauce on top for color. A sprinkle of fresh cilantro adds brightness and aroma. This makes your meal look as good as it tastes. Pair your wraps with simple side dishes. Consider serving them with a light cucumber salad. This adds a nice crunch and freshness. You can also serve rice or quinoa for a heartier meal. Enjoy the balance of flavors and textures! {{image_4}} You can swap the ground chicken for turkey. Turkey has a similar taste and texture. It cooks just as well and keeps the dish light. If you prefer plant-based options, try crumbled tofu. It absorbs flavors well and works nicely in this recipe. Change up the sauces to suit your taste. For a tangy kick, use sweet chili sauce instead of hoisin. You can also try teriyaki sauce for a sweeter flavor. If you want a spicy twist, add some Sriracha or chili paste. Feel free to experiment with spices, too. A sprinkle of five-spice powder adds warmth. You can also mix in fresh herbs like basil or mint for a fresh taste. These small changes can make each meal exciting. For the full recipe, check out the Zesty Chicken Lettuce Wraps. After you enjoy your easy chicken lettuce wraps, saving leftovers is smart. First, let the wraps cool down. This helps keep the flavors fresh. Store the filling and lettuce leaves separately. This keeps the lettuce crisp. Use these best storage containers: - Airtight glass containers for the filling - Plastic bags or wrapped foil for the lettuce leaves Place them in the fridge. Consume the leftovers within three days for the best taste. When you are ready to eat the leftovers, reheating them right is key. Use these optimal methods for reheating: - Microwave: Place the filling in a bowl. Heat for 30-second bursts, stirring in between. This helps warm it evenly. - Skillet: Heat on medium-low heat. Stir the filling for a few minutes until warm. To avoid soggy lettuce, do not microwave it. Instead, serve the filling in fresh lettuce leaves. This keeps your wraps crunchy and delicious. You can now enjoy your tasty meal again! If you want the full recipe, check out the Zesty Chicken Lettuce Wraps. To make your wraps spicy, add chili garlic sauce. You can also use diced jalapeños or crushed red pepper flakes. Start with a small amount, then taste and adjust. This way, you control the heat level. Spice adds fun to the dish and wakes up the flavors. Yes, you can prep the ingredients ahead of time. Chop the vegetables and store them in airtight containers. Keep the ground chicken separate until you are ready to cook. You can also mix the sauce and store it in the fridge. This makes cooking quick and easy on busy days. Butter lettuce is my favorite for wraps. It is soft and has a nice cup shape. Romaine is another good option. It is crisp and holds the filling well. You can also try green leaf lettuce for a different texture. Each type adds a unique touch to your dish. To make the wraps gluten-free, use tamari instead of soy sauce. Tamari tastes similar but has no gluten. Check labels on hoisin sauce, as some brands may contain wheat. You can also make your own hoisin sauce at home. This way, you ensure everything is gluten-free and still delicious. You learned how to make easy chicken lettuce wraps. We covered key ingredients, tools, and cooking steps. I shared tips for flavor and storage. Remember, you can customize with different proteins and sauces. Whether you want a spicy kick or meal prep options, these wraps offer great flexibility. Enjoy making this dish that can wow your family and friends. Now, go ahead and impress them with your tasty creation!](https://blissfulmeal.com/wp-content/uploads/2025/07/08d12c3e-c12c-4a8d-ba38-cf2ff4821d5a-768x768.webp)
![- 1 lb chicken breast, cut into 1-inch cubes - 2 tablespoons olive oil - 2 teaspoons dried oregano - 1 teaspoon garlic powder - Salt and freshly ground black pepper, to taste - 1 cucumber, shredded - 1 cup creamy Greek yogurt - 2 tablespoons freshly squeezed lemon juice - 1 tablespoon fresh dill, finely chopped - 1 clove garlic, minced - Pita bread - An assortment of fresh vegetables (e.g., bell peppers, cherry tomatoes, lettuce) To make the best Tzatziki Chicken Skewers, you need fresh ingredients. The chicken is the star of the dish. Use chicken breast for its mild flavor. Cut it into 1-inch cubes. This size helps the chicken cook evenly on the grill. The marinade adds a lot of flavor. Olive oil keeps the chicken juicy. The dried oregano gives it a nice herb taste. Garlic powder adds depth. Don’t forget salt and pepper. They enhance the chicken's natural taste. For the tzatziki sauce, cucumber is key. Shredding it makes it crisp and fresh. The creamy Greek yogurt adds richness. Squeezing lemon juice brightens the flavors. Fresh dill gives it a lovely herbal note. Minced garlic adds a nice kick. When serving, pair the skewers with warm pita bread. Add fresh vegetables like bell peppers and cherry tomatoes for color and crunch. This creates a fun and tasty meal that everyone will love. For the full recipe, check the [Full Recipe] link and enjoy making these flavorful skewers! - Combine 2 tablespoons of olive oil, 2 teaspoons of dried oregano, 1 teaspoon of garlic powder, salt, and pepper in a mixing bowl. - Add 1 pound of chicken breast, cut into 1-inch cubes, to the bowl. Toss the chicken well until it is fully coated with the marinade. - Cover the bowl with plastic wrap. - Refrigerate for at least 30 minutes. This helps the flavors soak into the chicken. - In a separate bowl, combine 1 shredded cucumber, 1 cup of creamy Greek yogurt, 2 tablespoons of freshly squeezed lemon juice, 1 tablespoon of fresh dill, and 1 clove of minced garlic. - Stir these ingredients together and add salt to taste. Let the mixture sit so the flavors mix well. - Preheat your grill or grill pan to medium-high heat. - Carefully thread the marinated chicken onto skewers, leaving space between each piece. - Cook the skewers on the grill for about 5-7 minutes on each side. Make sure the chicken is cooked through. Use an instant-read thermometer to check for 165°F (75°C) inside. You can find the full recipe in the article. Enjoy your delicious Tzatziki chicken skewers! - Use an instant-read thermometer for accurate cooking (165°F/75°C). - Allow chicken to rest before serving for juiciness. Grilling chicken skewers can be tricky. I always use an instant-read thermometer. This tool helps me know when the chicken is cooked just right. It should reach 165°F (75°C). This step ensures your chicken is safe to eat and still juicy. After grilling, let the chicken rest for a few minutes. This helps keep the juices inside. You’ll enjoy every bite more! - Let the tzatziki sit for a while to meld flavors. - Adjust salt and lemon juice to taste for balance. Tzatziki sauce is the star here. To make it tasty, I let it sit for a bit. This resting time helps the flavors mix well. Always taste it before serving. You might want to add a bit more salt or lemon juice. Finding that perfect balance makes a big difference. Trust me, your guests will notice! - Serve on a platter with tzatziki in the center. - Garnish with additional dill or lemon slices. Presentation matters! I love serving tzatziki chicken skewers on a large platter. I place the tzatziki right in the middle. It looks great and draws everyone in. A sprinkle of fresh dill or a few lemon slices adds a nice touch. This simple step makes the dish feel special. It’s all about the details when you want to impress! For the complete recipe, check out the [Full Recipe]. {{image_4}} You can switch up the main protein in your skewers. Shrimp or tofu works great. For shrimp, just marinate and grill them for a few minutes. Tofu adds a nice texture when grilled. You can also play with different marinade flavors. Lemon herb brings a fresh taste. Spicy chili adds heat and excitement. Mix it up to find your favorite! Tzatziki is tasty, but you can change it too. Add mint for a refreshing twist. If you want creaminess, swap Greek yogurt for sour cream. This change gives a different flavor. Another fun option is to add avocado or roasted red pepper. These ingredients make the sauce richer and more unique. Experiment to find the right mix for you! Tzatziki chicken skewers are versatile. Serve them in a salad for a low-carb meal. Greens and veggies make a fresh base for the skewers. You can also make wraps with the chicken and tzatziki in pita bread. This option is fun and easy to eat. Fill the pita with veggies for extra crunch. For the full recipe, check the main article. To keep your meal fresh, store leftover chicken and tzatziki in airtight containers. This helps prevent drying out and keeps flavors intact. Place the chicken in one container and the tzatziki in another. Refrigerate them right after your meal to ensure safety. When you want to enjoy leftover chicken, reheat it in a microwave or on a grill. The grill adds a nice char and keeps the chicken juicy. Remember, tzatziki is best served cold, so there’s no need to reheat that. Just take it out of the fridge when you’re ready to eat. If you want to save some skewers for later, freeze cooked chicken skewers for up to 3 months. Wrap them well in plastic wrap or use a freezer bag. However, I do not recommend freezing tzatziki sauce. The texture will change when thawed, making it less enjoyable. Stick with fresh tzatziki for the best taste! At least 30 minutes is recommended, but marinating overnight will enhance flavor even more. This extra time allows the chicken to absorb all the tasty herbs and spices. I find that the longer it sits, the better the skewers turn out. If you have time, let the chicken soak up those flavors overnight for a truly delicious bite. Yes, tzatziki can be prepared a day ahead and stored in the fridge to allow flavors to develop. Making it early helps the garlic and dill blend into the yogurt. This way, you’ll save time on cooking day, and the tzatziki will taste even better! Just make sure to store it in an airtight container. Pita bread, fresh vegetables, or a side salad are great options to complement the meal. You can serve the skewers with soft pita for dipping. Crisp veggies like bell peppers or cucumbers also pair well. For a refreshing side, a simple salad with greens and lemon dressing works wonders. The internal temperature should reach 165°F (75°C) for safe consumption. Use a meat thermometer to check the chicken's doneness. Once it hits that magic number, your skewers are ready to shine on the plate! This ensures you serve perfectly cooked, juicy chicken every time. You learned how to make juicy chicken skewers and a fresh tzatziki sauce. Marinating the chicken enhances its flavor. Grilling offers a tasty, smoky finish. Pair your skewers with pita bread and veggies for a complete meal. Try different proteins or add herbs for a twist. Enjoy leftovers by refrigerating them, and remember to reheat as needed. This dish is easy and fun, making meals special. With these tips, you’re ready to impress at your next meal. Enjoy cooking!](https://blissfulmeal.com/wp-content/uploads/2025/07/c5409f5f-e163-401f-b7a9-69295ce546ba-768x768.webp)
![- Ripe avocado - Large eggs - Greek yogurt - Dijon mustard - Fresh lemon juice - Fresh dill - Green onion - Salt and black pepper - Calories per serving: About 200 calories - Breakdown of macronutrients: - Protein: 10g - Carbohydrates: 6g - Fat: 15g This avocado egg salad gives you plenty of healthy protein and fats. Each serving is balanced and satisfying. The ripe avocado adds creaminess, while the eggs provide solid protein. Greek yogurt brings in extra protein and tang. The Dijon mustard and lemon juice add a zesty kick. With this dish, you enjoy a nutrient-rich meal that keeps you full. It's perfect as a lunch or snack, and you can feel good about what you're eating. You can find the full details of this recipe in the Full Recipe section. To start, place the eggs in a medium pot. Cover them with cold water, with about an inch above the eggs. Turn the heat to medium. Bring the water to a gentle boil. Once it boils, cover the pot and take it off the heat. Let the eggs cook in the steam for 12-14 minutes. This method gives you the perfect hard-boiled egg. Next, prepare an ice bath. Fill a large bowl with cold water and ice. This will help cool the eggs quickly and stop the cooking. After the resting time, move the eggs to the ice bath. Let them sit for 5-10 minutes. This step makes peeling easy. Once cooled, tap each egg on a hard surface to crack the shell. Carefully peel off the shell. Then chop the eggs into small pieces. In a large bowl, take your ripe avocado. Use a fork to mash it until smooth and creamy. You can leave some small chunks for texture if you want. Now, add flavorings to the mashed avocado. Mix in the Greek yogurt, Dijon mustard, fresh lemon juice, finely chopped dill, and a pinch of salt and pepper. Stir this mixture until it becomes a creamy, flavorful base. It’s time to combine everything. Gently fold the chopped eggs into the avocado mixture. Use a spatula to mix, but be careful to keep the eggs intact. You want them evenly coated in the creamy avocado mix. After combining, taste your egg salad. Adjust the seasoning with more salt or pepper if needed. This step ensures your dish is just right. For the full recipe, check the detailed instructions above. Enjoy your protein-packed avocado egg salad! Cooking eggs perfectly is key for this recipe. Timing matters a lot. For hard-boiled eggs, let them sit in hot water for 12-14 minutes. This gives you firm yolks without a grey ring. Peeling eggs can be tricky. To make it easy, chill the eggs in an ice bath right after boiling. This stops the cooking and helps the shells come off smoothly. Tap each egg gently on a hard surface to crack the shell. Then, peel it under running water. The water helps remove any stubborn bits of shell. Add some spice to your egg salad! Try mixing in a pinch of smoked paprika or a dash of cayenne. These spices give a nice kick without overpowering the dish. You can also adjust the texture. Want it creamier? Add more Greek yogurt. For a chunkier salad, leave some avocado pieces intact. This creates a fun contrast in the dish. Serving this egg salad is all about style. You can pile it on toasted whole grain bread for a hearty snack. Or, scoop it into crisp lettuce cups for a light option. To make it look even better, garnish with extra dill or sliced green onions. These touches add a pop of color and freshness. For more ideas, check the Full Recipe for tips on how to present your dish beautifully. {{image_4}} You can swap Greek yogurt for other ingredients. For a creamier base, try sour cream. If you want a lighter option, use plain yogurt. For vegan lovers, mashed silken tofu works great. It adds creaminess without eggs or dairy. Want to kick up the flavor? Add in some veggies! Diced bell peppers or cucumbers add crunch. You can also toss in some diced celery for a fresh taste. For a protein boost, mix in shredded chicken or canned tuna. This adds protein and makes the salad heartier. You have many ways to serve this salad. For wraps, spread it in a tortilla. Roll it up with some greens, and you have a tasty lunch. If you prefer sandwiches, use whole grain bread or a bagel. You can also scoop it into lettuce leaves for a low-carb option. Each style offers a fun twist! To keep your avocado egg salad fresh, start by placing it in an airtight container. This helps to prevent air from getting in and keeps it tasty. Store the salad in the fridge right after making it. It’s best to eat it within 3 days. After that, the avocado may brown and the eggs could lose their texture. Can you freeze avocado egg salad? No, I don’t recommend freezing it. The avocado will change in texture when thawed. Instead, enjoy it fresh. If you do have leftovers, eat them within a few days for the best flavor. If you want to reuse any leftovers, just take the salad out of the fridge. Give it a good stir before serving. You can also add a splash of lemon juice to brighten the flavors again. To make the best avocado egg salad, follow these steps: - Cook the eggs: Start with large eggs. Use the boiling method for perfect hard-boiled eggs. After boiling, cool them in an ice bath for easy peeling. - Mash the avocado: Use a ripe avocado. Mash it until smooth, but leave some chunks for texture. - Mix in flavor: Add Greek yogurt, Dijon mustard, fresh lemon juice, dill, salt, and pepper to the mashed avocado. This creates a creamy and flavorful base. - Fold in eggs: Chop the cooled eggs into small pieces. Gently fold them into the avocado mixture. Be careful to keep the eggs intact. - Taste and adjust: Always taste your salad. Adjust with more salt, pepper, or lemon juice as needed. These steps ensure rich flavor and a great texture in your salad. Yes, you can make egg salad ahead of time! - Best timeline: For optimal flavor and freshness, prepare it no more than one day ahead. - Storage: Store the salad in an airtight container in the fridge. This keeps it fresh and safe to eat. - Serving tip: Stir it again before serving. This helps mix the flavors that may have settled. Making it ahead saves time for busy days! You can serve avocado egg salad with many tasty options: - Toast: Spread it on whole grain or sourdough toast. - Lettuce wraps: Use crisp lettuce leaves for a low-carb option. - Veggies: Serve with sliced cucumbers or bell peppers. They add crunch and freshness. - Chips: Pair with tortilla chips for a fun twist. These sides create a complete and satisfying meal. For the full recipe, check out the [Full Recipe]. In this blog post, I shared how to make a tasty avocado egg salad. You learned about the key ingredients, like ripe avocados and eggs, plus their healthy benefits. I covered step-by-step instructions for cooking eggs and preparing the mix. You also got helpful tips for perfecting flavors and presentation. Remember, you can customize this salad with different ingredients and serve it in various ways. Experiment to find your favorite version. Enjoy your delicious creation, and make it your own!](https://blissfulmeal.com/wp-content/uploads/2025/07/eee5fc4b-395f-4a18-8285-720c3b171f78-768x768.webp)