Skip to content
About
Contact
Cookie Policy
Copyright Policy
Disclaimer
Search
Home
Dinner
Appetizer
Desserts
Drinks
About
Contact
Privacy Policy
Toggle Menu
Home
/
Desserts
- Page 11
Desserts
Chocolate Dipped Coconut Macaroons Easy Recipe
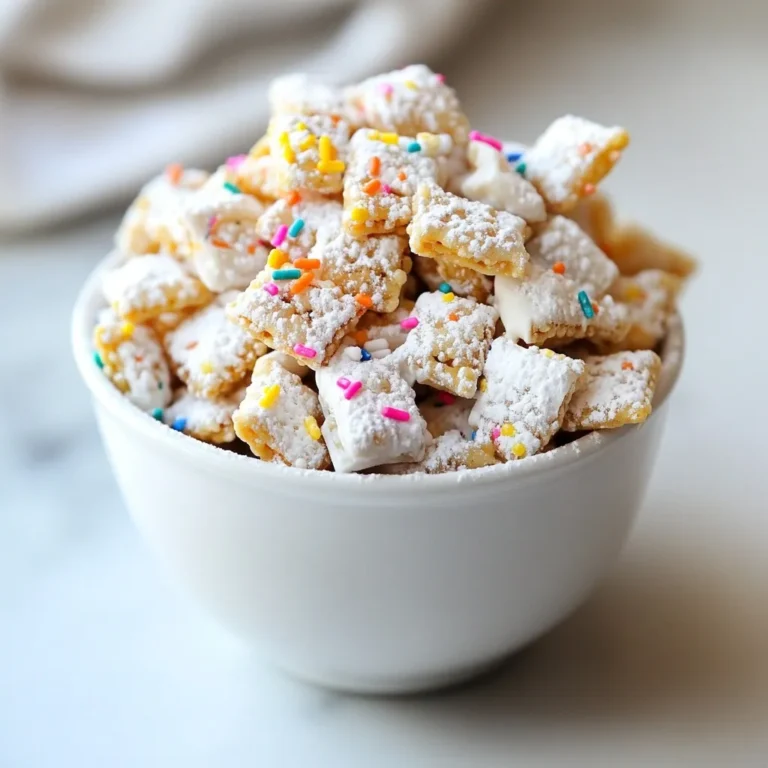
Sugar Cookie Puppy Chow Tasty Sweet Treat Recipe
Vegan Chocolate Avocado Mousse Rich and Creamy Delight
Salted Caramel Pretzel Brownies Simple and Tasty Recipe
Lemon Blueberry Cheesecake Bars Sweet and Simple Treat
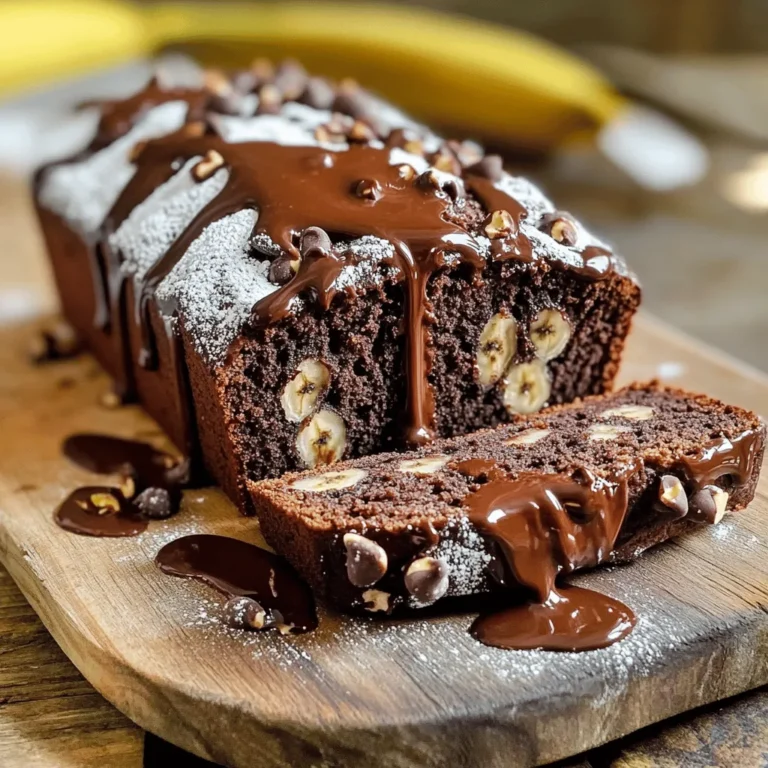
Double Chocolate Banana Bread Rich and Decadent Treat
Chocolate Chip Banana Bread Irresistibly Delicious Treat
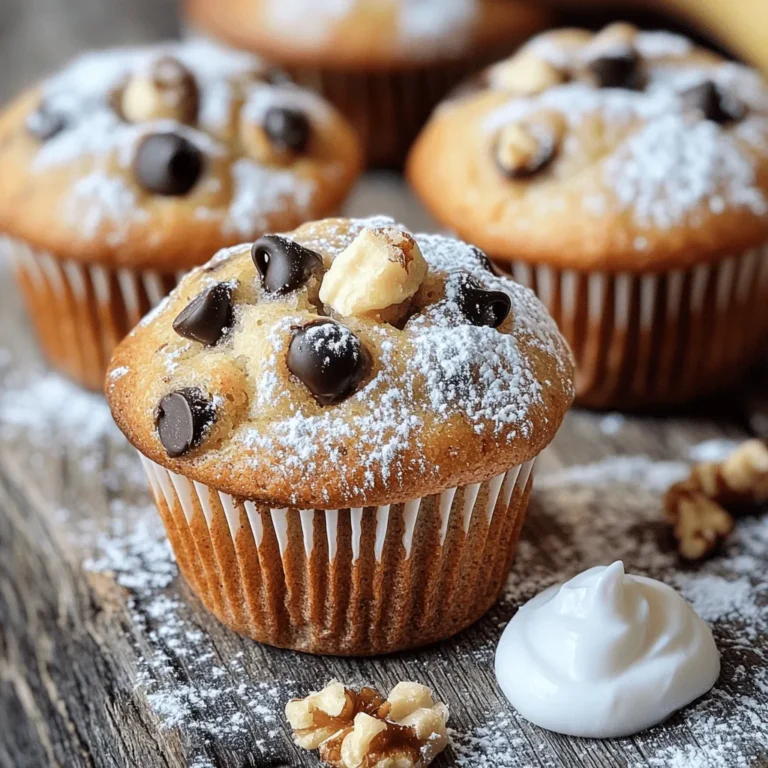
Savory Banana Bread Muffins Easy and Tasty Treat
Peanut Butter Oatmeal Cups Delicious and Healthy Snack
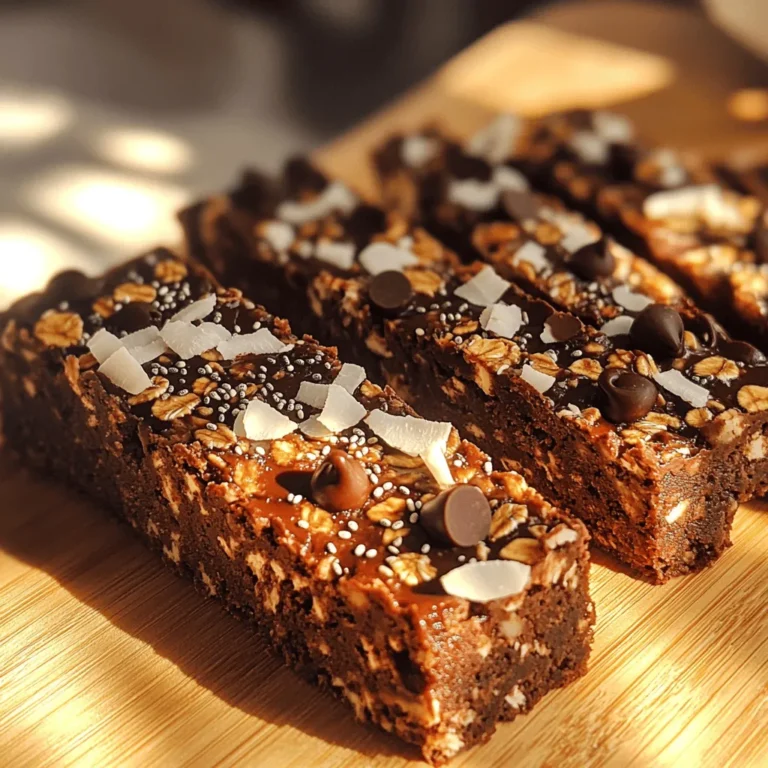
Chocolate Coconut Granola Bars Easy and Healthy Snack
Page navigation
Previous Page
Previous
1
…
9
10
11
12
13
…
27
Next Page
Next
Home
Dinner
Appetizer
Desserts
Drinks
About
Contact
Privacy Policy
Toggle Menu Close
Search for:
Search


![To create a rich and creamy vegan chocolate avocado mousse, gather these key ingredients: - 2 ripe avocados - 1/3 cup unsweetened cocoa powder - 1/4 cup maple syrup (adjust to your preferred sweetness) - 1/4 cup almond milk (or any plant-based milk of your choice) - 1 teaspoon pure vanilla extract - A pinch of fine sea salt - Optional toppings: shredded coconut, fresh berries, or chopped nuts These ingredients work together to create a smooth and delightful mousse that is both healthy and delicious. If you don’t have some ingredients, here are easy swaps: - Use ripe bananas instead of avocados for a different texture and flavor. - Swap maple syrup for agave nectar or date syrup for sweetness. - Choose coconut milk instead of almond milk for a richer taste. - For a nut-free option, use oat milk or soy milk in place of almond milk. These substitutions keep the mousse vegan while allowing you to adjust flavors to your liking. One serving of this vegan mousse (from the full recipe) offers: - Calories: Approximately 220 - Total Fat: 15g - Saturated Fat: 2g - Carbohydrates: 24g - Fiber: 8g - Sugar: 6g - Protein: 3g This dessert is packed with nutrients from avocados, making it a guilt-free treat. Start by choosing ripe avocados. They should feel soft when you gently squeeze them. Slice each avocado in half and remove the pit. Use a spoon to scoop out the creamy green flesh. Place the avocado flesh in a food processor or high-speed blender. This is the base of your mousse. Next, add the unsweetened cocoa powder, maple syrup, almond milk, vanilla extract, and a pinch of sea salt. These ingredients will create a rich chocolate flavor. Blend on high speed until the mixture is smooth and creamy. Stop to scrape down the sides as needed. Taste the mousse for sweetness. If you want it sweeter, add more maple syrup and blend again. Once the mousse is ready, spoon it into bowls or clear glasses. This helps show off the rich color. Cover with plastic wrap or place in an airtight container. Refrigerate for at least 30 minutes for the best texture. Before serving, add toppings like shredded coconut, fresh berries, or chopped nuts. For a beautiful look, layer the mousse and arrange toppings artfully. Enjoy your Vegan Chocolate Avocado Mousse! For the complete recipe, check the Full Recipe section. To get that silky smooth texture, you need ripe avocados. They should yield slightly when you press them. If your avocados are too firm, your mousse may end up chunky. When blending, mix on high speed until everything is creamy. Stop to scrape down the sides of the blender as needed. This ensures all the ingredients blend well together. A smooth mousse feels light and airy, which is what we want. Taste your mousse before serving. If it’s not sweet enough, add more maple syrup. Do this slowly, mixing after each addition. You can also enhance the flavor with a touch of espresso powder or a splash of almond extract. This adds depth to the chocolate flavor. If you enjoy a hint of spice, a pinch of cayenne pepper can bring an exciting kick. One common mistake is using unripe avocados. They will not blend well and can spoil your mousse. Another mistake is adding too much liquid too quickly. Start with the almond milk in small amounts, as you can always add more. Lastly, don’t skip the refrigeration step. Chilling the mousse helps it set and enhances the flavors. For the full recipe, be sure to check the earlier sections! {{image_4}} For a twist on the classic mousse, try adding flavors. Mint gives a fresh taste. Just add a few drops of mint extract to the mix. Espresso adds a rich depth. Simply blend in a tablespoon of instant espresso for a coffee kick. Other options include orange zest for a citrus touch or chili powder for a spicy hint. These small additions can change the whole dessert. Toppings make your mousse even better! Fresh berries like raspberries or strawberries add color and flavor. They contrast nicely with the rich chocolate. Chopped nuts, such as almonds or walnuts, provide a crunchy texture. Shredded coconut offers a tropical vibe. You can mix and match these toppings for a unique look and taste. Need to make this mousse fit your diet? You can easily swap ingredients. For a nut-free option, use oat milk instead of almond milk. If you want it sugar-free, replace maple syrup with a sugar-free sweetener. Check labels to ensure they fit your needs. This mousse can be made for many diets while still tasting amazing. For the full recipe, be sure to check the details provided. To keep your vegan chocolate avocado mousse fresh, use an airtight container. This helps prevent air from drying it out. If you cover the mousse with plastic wrap, make sure it touches the surface. This method stops the mousse from forming a crust. When stored properly, the mousse can last for about 3 to 5 days in the fridge. However, I recommend enjoying it within the first three days for the best flavor and texture. Always check for any changes in smell or color before eating. You can freeze the mousse if you want to save some for later. Just scoop the mousse into a freezer-safe container. It can last for up to 2 months in the freezer. When you're ready to eat it, move the mousse to the fridge overnight to thaw. Stir it well before serving, as it may change in texture. Enjoy your rich and creamy delight! For the complete recipe, check the Full Recipe section. Yes, you can make this mousse ahead of time. I often prepare it the night before. Once blended, store it in airtight containers in the fridge. This gives the flavors time to blend and improve. Just remember to keep it covered to prevent browning. Using frozen avocados works well. Just thaw them before blending. Make sure they are ripe for the best taste. This option is great if you have ripe avocados that you can’t use right away. It also adds a nice chill to the mousse. Vegan chocolate avocado mousse is lighter than traditional mousse. It has healthy fats from avocados. This mousse is also dairy-free and lower in sugar. The cocoa adds antioxidants, making it a smart choice. You can enjoy a rich dessert without the guilt. For a complete look at the recipe, check out the [Full Recipe]. This blog post explored essential ingredients and step-by-step instructions for making avocado mousse. You learned about substitutions, nutritional info, and tips to perfect texture and flavor. We discussed variations and how to store your mousse for later. Making this healthy dessert is easy and fun! Remember to experiment with flavors and toppings. Enjoy your creamy treat and impress your friends with your skills.](https://blissfulmeal.com/wp-content/uploads/2025/07/2c9e8022-22bf-49d2-8dd8-e907e36fa848-768x768.webp)
![To make salted caramel pretzel brownies, gather these simple ingredients: - 1 cup unsalted butter, melted - 1 cup granulated sugar - 1 cup brown sugar, packed - 4 large eggs, at room temperature - 1 teaspoon vanilla extract - 1 cup all-purpose flour - 1 cup unsweetened cocoa powder - 1/2 teaspoon baking powder - 1/2 teaspoon salt - 2 cups mini pretzels, roughly chopped - 1 cup salted caramel sauce (can be store-bought or homemade) - Sea salt flakes, for garnish If you need to make adjustments, here are some ideas: - Use coconut oil instead of unsalted butter for a dairy-free option. - Substitute the granulated and brown sugar with coconut sugar for a lower glycemic index. - For gluten-free brownies, swap all-purpose flour with a gluten-free blend. Choosing the right brands can make a difference in taste. Here are some I trust: - For butter, I recommend Kerrygold or Plugrá for rich flavor. - Use Ghirardelli or Valrhona cocoa powder for a deep chocolate taste. - For caramel, try Smucker's or make your own for the best result. You can find the complete recipe in the [Full Recipe]. Start by preheating your oven to 350°F (175°C). Take a 9x13-inch baking pan and grease it lightly. You can also line it with parchment paper. This makes it easy to lift out the brownies once they bake. In a large mixing bowl, pour in 1 cup of melted unsalted butter. Add 1 cup of granulated sugar and 1 cup of packed brown sugar. Use a whisk to mix these until smooth and creamy. Next, crack in 4 large eggs, one at a time. Whisk well after each egg. Finally, stir in 1 teaspoon of vanilla extract for added flavor. In another bowl, sift together 1 cup of all-purpose flour, 1 cup of unsweetened cocoa powder, 1/2 teaspoon of baking powder, and 1/2 teaspoon of salt. Sifting removes lumps. This step ensures even mixing later on. Now, gradually fold the dry ingredients into the wet mixture. Use a spatula and mix gently until just combined. Be careful not to over-mix; it could ruin the texture. Next, fold in 2 cups of roughly chopped mini pretzels. Reserve a handful for later. Pour half of the brownie batter into your prepared pan. Spread it evenly with a spatula. Drizzle half of the salted caramel sauce over this layer. Then, add the rest of the brownie batter, smoothing it on top. Drizzle the remaining caramel sauce over it and sprinkle the reserved pretzels on top. Add a few sea salt flakes for a nice touch. Bake the brownies for 25 to 30 minutes. Check if they are done by inserting a toothpick; it should come out mostly clean. Once baked, take them out and let them cool in the pan for at least 30 minutes. This helps them set before you slice them into squares. For the full recipe, you can refer to the earlier section. To make fudgy brownies, use melted butter. This gives them a rich texture. Mix the sugars with the melted butter until smooth. Adding eggs one at a time helps keep the mix creamy. When you combine wet and dry ingredients, mix until just blended. Over-mixing makes brownies cake-like instead of fudgy. To avoid over-mixing, use a spatula when folding in dry ingredients. Move gently and don’t rush. Stop when you no longer see dry flour. This keeps the brownies dense and moist. Remember, small lumps are okay. They will bake out during cooking. Quality ingredients make a big difference. Use real unsweetened cocoa powder for deep flavor. Choose fresh eggs for better texture and taste. If you can, pick a rich salted caramel sauce. It adds a wonderful sweet and salty taste. Always use fresh mini pretzels for the best crunch. For the full recipe, check back to ensure you're set for success! {{image_4}} You can make these salted caramel pretzel brownies gluten-free. Replace all-purpose flour with a 1:1 gluten-free flour blend. Ensure it contains xanthan gum for better texture. This swap works well without changing the taste. To make a vegan version, substitute the eggs with flax eggs. Mix one tablespoon of ground flaxseed with three tablespoons of water for each egg. Use plant-based butter and a dairy-free caramel sauce. These changes keep the brownies rich and tasty. You can get creative with toppings! Try adding chopped nuts for crunch or mini marshmallows for a gooey twist. Swirl in some peanut butter for a rich flavor. Drizzle extra caramel sauce on top for added sweetness. Each option adds a unique touch to your brownies! To keep your salted caramel pretzel brownies fresh, store them in an airtight container. This will help prevent them from drying out. If you have leftovers, place a piece of wax paper between layers. This keeps them from sticking together. Store the container at room temperature for up to four days. You can also refrigerate them for longer freshness, but this may change the texture slightly. If you want to save brownies for later, freezing is a great option. First, let the brownies cool completely. Then, cut them into squares. Wrap each piece tightly in plastic wrap. After that, place the wrapped brownies in a freezer bag. They can stay in the freezer for up to three months. When you're ready to eat them, simply thaw them in the fridge overnight. To enjoy your brownies warm, reheat them in the oven. Preheat the oven to 350°F (175°C). Place a brownie on a baking sheet. Heat for about 5 to 10 minutes. You can also microwave them for about 10 to 15 seconds. Just be careful not to overheat, as this can dry them out. Consider drizzling some extra caramel sauce on top for a fresh touch before serving. Yes, you can use store-bought caramel sauce. It saves time and still tastes great. Look for a high-quality brand. This choice makes your baking easier without losing flavor. These brownies stay fresh for about 3 to 5 days at room temperature. Store them in an airtight container. You can also refrigerate them for up to a week. Just remember to bring them to room temperature before serving. These brownies pair well with vanilla ice cream or whipped cream. A drizzle of extra caramel makes them extra special. You can also serve them with fresh fruit like strawberries or raspberries for a fun twist. Check the brownies after 25 minutes of baking. Insert a toothpick in the center. If it comes out with a few moist crumbs, they are done. If it comes out wet, bake for a few more minutes. The goal is to have fudgy brownies, not dry ones. We explored all you need to make fudgy brownies. We covered ingredients, preparation steps, and tips for success. You learned how to adapt recipes for dietary needs and create tasty variations. Proper storage ensures your brownies stay fresh. Remember, quality ingredients make a big difference. Use what you learned to impress everyone with your baking skills. Enjoy every sweet bite!](https://blissfulmeal.com/wp-content/uploads/2025/07/518be44b-9ee9-40d4-8751-9199d6243257-768x768.webp)

![- 3 ripe bananas, finely mashed - 1/2 cup unsalted butter, melted until slightly cool - 1/2 cup light brown sugar, packed - 1/4 cup granulated sugar - 2 large eggs, at room temperature - 1 teaspoon pure vanilla extract - 1 teaspoon baking soda - Pinch of fine salt - 1 1/2 cups all-purpose flour, spooned and leveled - 1 cup semi-sweet chocolate chips, plus extra for topping - 1/2 cup chopped walnuts (optional) Choosing the right ingredients is key for great chocolate chip banana bread. Use ripe bananas for the best flavor. The butter should be melted but not hot. This helps the other ingredients mix well. Brown sugar adds moisture and a rich taste. Granulated sugar gives sweetness and a nice texture. Eggs should be at room temperature to blend easier. Make sure to use pure vanilla extract. It makes a big difference in flavor. Baking soda helps the bread rise. Always add a pinch of salt to enhance the sweetness. For the flour, spoon and level it to avoid packing. Too much flour makes the bread heavy. Chocolate chips are a must for that sweet burst with every bite. If you like nuts, walnuts add a nice crunch. Each slice of this banana bread offers a balance of flavors and nutrients. One slice contains about 200 calories. It has 8 grams of fat, 30 grams of carbs, and 3 grams of protein. This makes it a tasty treat, but enjoy it in moderation. Here’s what you need to make this delicious treat: - Mixing bowls - Measuring cups - Loaf pan - Whisk - Spatula These tools help you mix, measure, and bake easily. Using the right equipment makes your baking experience smooth and fun. You can find the full recipe in my Choco-Banana Delight guide. Preheat your oven to 350°F (175°C). This step warms the oven for even baking. While your oven heats, prepare a 9x5-inch loaf pan. You can grease it lightly with butter or use parchment paper. This will help your bread come out easily. Start by combining the ingredients. In a large bowl, mash three ripe bananas until smooth. Add half a cup of melted butter to the bananas. Mix them well. Then, stir in half a cup of light brown sugar and a quarter cup of granulated sugar. Make sure the sugars dissolve completely. Next, add two large eggs and one teaspoon of pure vanilla extract. Beat the mixture until it is smooth. Now, let's incorporate the dry ingredients. In another bowl, whisk together one teaspoon of baking soda, a pinch of fine salt, and one and a half cups of all-purpose flour. Slowly add the dry mix to the wet mix. Fold gently with a spatula until just combined. Be careful not to over-mix, as that can make the bread tough. Finally, fold in one cup of semi-sweet chocolate chips. If you like, add half a cup of chopped walnuts too. Pour the batter into the prepared loaf pan. Use a spatula to smooth the top. If you want, sprinkle a few extra chocolate chips on top for a nice look. Bake in the oven for 60-65 minutes. To check if it’s done, insert a toothpick into the center. It should come out clean or with a few moist crumbs. Once baked, remove the loaf from the oven. Let it cool in the pan for about 10 minutes. Then, transfer the bread to a wire rack to cool completely. For the full recipe, you can refer back to the ingredients section. To get the best texture in your chocolate chip banana bread, pay close attention to how you mix. Start with ripe bananas that are soft. This helps them blend easily. Use melted butter that is cool, not hot. If the butter is too hot, it can cook the eggs. Mix the wet ingredients first. Then add the dry ones slowly. Fold gently to combine. This keeps your bread light and fluffy. Over-mixing can make it dense, so be careful. To make your banana bread even tastier, try adding spices. Cinnamon adds warmth and depth to the flavor. Nutmeg brings a nice touch of sweetness. You could also add a splash of almond extract for a unique twist. If you want a hint of zest, a little lemon or orange zest can brighten the taste. Each of these ideas can elevate the classic recipe. Serving your chocolate chip banana bread can be fun! Slice it warm and place it on a nice platter. You can sprinkle powdered sugar on top for a sweet finish. For a special treat, spread some butter or peanut butter on each slice. Pair it with coffee or tea for a delightful snack. This makes it not just tasty but also visually appealing. Enjoy sharing it with friends and family! {{image_4}} To make this delicious banana bread gluten-free, you can swap all-purpose flour for gluten-free flour. Brands like Bob's Red Mill and King Arthur Flour work well. Use a 1:1 gluten-free flour blend for easy results. This keeps the taste and texture close to the classic version. If you want a vegan twist, replace the eggs with flaxseed meal. Mix 1 tablespoon of flaxseed meal with 2.5 tablespoons of water for each egg. Let it sit for a few minutes to thicken. You can also use applesauce or mashed banana as a binder. This keeps your banana bread moist and tasty. You can make your banana bread even more fun with mix-ins! Try adding dried fruit, like raisins or cranberries, for a sweet touch. Shredded coconut adds a tropical flair. If you love crunch, chop up some pecans or almonds. These extras make each bite exciting and unique. For the best results, mix in about 1/2 cup of your chosen add-ins. To keep your chocolate chip banana bread fresh, follow these steps: - Let the bread cool completely before storing. - Wrap it tightly in plastic wrap or aluminum foil. - Place it in an airtight container to seal in moisture. This method helps maintain its soft texture and rich flavor. If you have many slices, you can layer them with parchment paper to prevent sticking. Want to save some for later? You can freeze banana bread easily. Here’s how: - First, cool the bread completely. - Wrap it well in plastic wrap, then in foil. - Label it with the date to track how long it’s in the freezer. To defrost, simply take it out and leave it at room temperature for a few hours. You can also microwave a slice for about 15-30 seconds for a quick treat. How long does chocolate chip banana bread last? - At room temperature, it stays fresh for about 3-4 days when stored properly. - In the fridge, it can last up to a week. - If frozen, it can keep its quality for about 3 months. Using these tips, you can enjoy this delicious treat longer! For the full recipe, check out the [Full Recipe]. Yes, you can use frozen bananas! Just thaw them first. Frozen bananas work well because they become very soft. This makes them easy to mash. When you use them, they add extra moisture to your bread. This keeps the banana bread tender. Make sure to drain any excess liquid after thawing. This way, your batter will not be too wet. Dense banana bread can happen for a few reasons. First, you may have over-mixed the batter. This can develop too much gluten, making the bread heavy. Second, using too much flour can lead to density. Always spoon and level flour instead of scooping directly. Lastly, old baking soda may not rise the bread well. Check the expiration date before using. Overripe bananas have many uses beyond banana bread. You can make smoothies or pancakes with them. They are also great in oatmeal or yogurt. Try mashing them and adding to muffins or cookies. You can even freeze them to use later. Just peel them and store in a bag. This way, you can enjoy their sweetness anytime! If you want the full recipe for chocolate chip banana bread, check out the recipe above. You learned the key ingredients for chocolate chip banana bread. We discussed how to mix the batter, bake it, and achieve the right texture. You now have tips for storage, variations, and even answers to common questions. Banana bread is an easy treat you can make your own. Enjoy experimenting with flavors and save your leftovers easily. Happy baking!](https://blissfulmeal.com/wp-content/uploads/2025/07/f052e6f1-d196-44d4-ab03-fd8d7f66889a-768x768.webp)
![To make these Peanut Butter Oatmeal Cups, gather these key ingredients: - 2 cups rolled oats - 1 cup unsweetened apple sauce - 1/2 cup creamy peanut butter These three ingredients form the base of your oatmeal cups. The rolled oats give them structure. The apple sauce adds moisture and natural sweetness. The peanut butter provides rich flavor and protein. You can personalize your oatmeal cups with these optional ingredients: - 1/4 cup honey or maple syrup - 1/2 cup chocolate chips or dried fruit Adding honey or maple syrup boosts the sweetness. Chocolate chips or dried fruit give extra flavor and texture. Feel free to mix and match based on your taste. You’ll also need these baking essentials: - 1 teaspoon vanilla extract - 1 teaspoon baking powder - 1/4 teaspoon salt Vanilla extract enhances the flavor. Baking powder helps the cups rise. Salt balances the sweetness and enriches the taste. This recipe is easy to follow and makes a great snack. For the full recipe, check out the details above. - Preheat oven to 350°F (175°C). - Grease muffin tin or line with paper liners. First, set your oven to 350°F (175°C). This step is key for even baking. Next, grab your muffin tin. Grease each cup well or use paper liners. This helps the cups come out easily later. - Combine rolled oats, baking powder, and salt in a bowl. - Ensure an even distribution for a uniform texture. In a large bowl, mix the rolled oats, baking powder, and salt. This helps your cups rise and taste great. Stir well so every part blends evenly. - Whisk together apple sauce, peanut butter, honey (or maple syrup), and vanilla. - Mix until smooth and well incorporated. Now, take another bowl. Whisk together apple sauce, creamy peanut butter, honey (or maple syrup), and vanilla. Keep mixing until the blend is smooth. This mixture adds flavor and moisture. - Pour the wet mixture into the dry ingredients. - Stir gently, folding in optional chocolate chips or dried fruit. Pour the wet ingredients into the oats. Stir gently to mix. Be careful not to overmix. If you want chocolate chips or dried fruit, fold them in now. This adds a tasty surprise! - Use a spoon to fill muffin cups about 3/4 full. - Allow space for rising during baking. With a spoon, fill each muffin cup about 3/4 full. This keeps your cups from overflowing. Leave room for them to rise nicely. - Place muffin tin in the oven. - Bake for 15-20 minutes until golden brown. Put your muffin tin in the preheated oven. Bake for 15 to 20 minutes. They will turn golden brown when ready. To check, insert a toothpick. If it comes out clean, they’re done. These Peanut Butter Oatmeal Cups are a delightful treat. Enjoy making them with the [Full Recipe]. How can you tell when the oatmeal cups are done? The best way is to look at the color. The tops should turn a nice golden brown. You can also use a toothpick. Insert it into the center. If it comes out clean, they are ready! This means the oatmeal cups have cooked through. Avoiding overmixing is key for an ideal texture. When you mix the wet and dry ingredients, do it gently. Stir just until you see no dry oats. If you mix too much, the cups will be tough. You want a soft and chewy bite. Want to make your oatmeal cups look great? Arrange them on a colorful platter. This adds a nice touch. You can also dust them with powdered sugar. A sprinkle makes them look fancy. Another fun idea is to drizzle extra peanut butter on top. This adds flavor and looks appealing. How can you make these cups healthier? You can use low-sugar or vegan options. For example, you can swap honey with maple syrup. This keeps it sweet but without extra sugar. Using apple sauce over oil or butter has benefits too. Apple sauce adds moisture without extra fat. It makes the cups soft and tasty. Plus, it is a healthier choice. You can enjoy your snack without the guilt! {{image_4}} You can switch up the nut butter in your oatmeal cups for a new taste. Almond butter or sunflower seed butter works great. Each nut butter brings its own flavor and texture. You can also add spices like cinnamon or nutmeg. These spices add warmth and depth to your cups. Just a pinch goes a long way in boosting flavor. Mix in different fruits or nuts for a fun twist. Try diced apples, bananas, or berries. You can also add nuts like walnuts or pecans for crunch. For toppings, consider a dollop of yogurt or fresh fruit on top. This gives extra flavor and makes your cups look pretty. You can even drizzle honey or maple syrup for added sweetness. If you need gluten-free options, use certified gluten-free oats. They taste just as good and work perfectly in this recipe. For dairy-free toppings, use coconut yogurt or almond yogurt. This way, everyone can enjoy these tasty treats. You can easily customize to fit your dietary needs. To keep your peanut butter oatmeal cups fresh, store them in an airtight container. This helps lock in moisture and flavor. Place the cups at room temperature for up to three days. If you want them to last longer, try refrigerating them. They stay fresh in the fridge for about a week. Freezing is a smart way to save these yummy treats. To freeze oatmeal cups, first, let them cool completely. Then, wrap each cup in plastic wrap or place them in a freezer-safe bag. They can stay in the freezer for up to three months. When you’re ready to eat, remove a cup from the freezer and let it thaw in the fridge overnight. For the best texture, heat them in the microwave for 20-30 seconds before enjoying. Reheating is easy and quick! The best method is to use the microwave. Place a cup on a plate, cover it with a damp paper towel, and heat it for about 15-20 seconds. This keeps the cup moist. Alternatively, you can reheat them in the oven. Preheat the oven to 350°F (175°C) and warm them for about 10 minutes. This method gives you a nice crisp outside without drying them out. Peanut Butter Oatmeal Cups last about one week at room temperature. Store them in an airtight container. If you keep them in the fridge, they can last up to two weeks. The cooler air slows down spoilage and keeps them fresh longer. Yes, you can make these cups without peanut butter. Try using almond butter or sunflower seed butter. Each option gives a different taste. You may need to adjust the amount of sweetener based on the nut butter's flavor. Peanut Butter Oatmeal Cups are quite healthy. They are high in fiber from oats and provide protein from peanut butter. The apple sauce adds natural sweetness without extra sugar. This makes them a great snack or breakfast option. You can use quick oats, but they will change the texture. Quick oats create a softer cup. You may also need to reduce baking time by a few minutes to prevent overcooking. If you want to swap honey or maple syrup, try agave nectar or coconut sugar. Both options will keep the sweetness in the recipe. Adjust the amount based on your taste preference. To make this recipe nut-free, use sunflower seed butter instead of peanut butter. This keeps the flavor rich and creamy. Ensure that all other ingredients are nut-free to avoid any cross-contamination. You can create delicious peanut butter oatmeal cups using simple ingredients. This blog covered essential components, from rolled oats to optional add-ins like chocolate chips. Following these easy steps ensures great texture and taste. Remember, you can customize flavors and adjust for dietary needs. Store them properly to keep your treats fresh. With these tips, baking becomes fun and rewarding. Enjoy your creation and share it with friends and family!](https://blissfulmeal.com/wp-content/uploads/2025/07/3e3f1ed7-062c-42d7-a66e-8914556af6a9-768x768.webp)