Skip to content
About
Contact
Cookie Policy
Copyright Policy
Disclaimer
Search
Home
Dinner
Appetizer
Desserts
Drinks
About
Contact
Privacy Policy
Toggle Menu
Home
/
Desserts
- Page 12
Desserts
Chunky Monkey Granola Energizing Breakfast Delight
Chai Spiced Granola Crunchy and Flavorful Delight
Pumpkin Spice Candied Almonds Flavorful Fall Treat
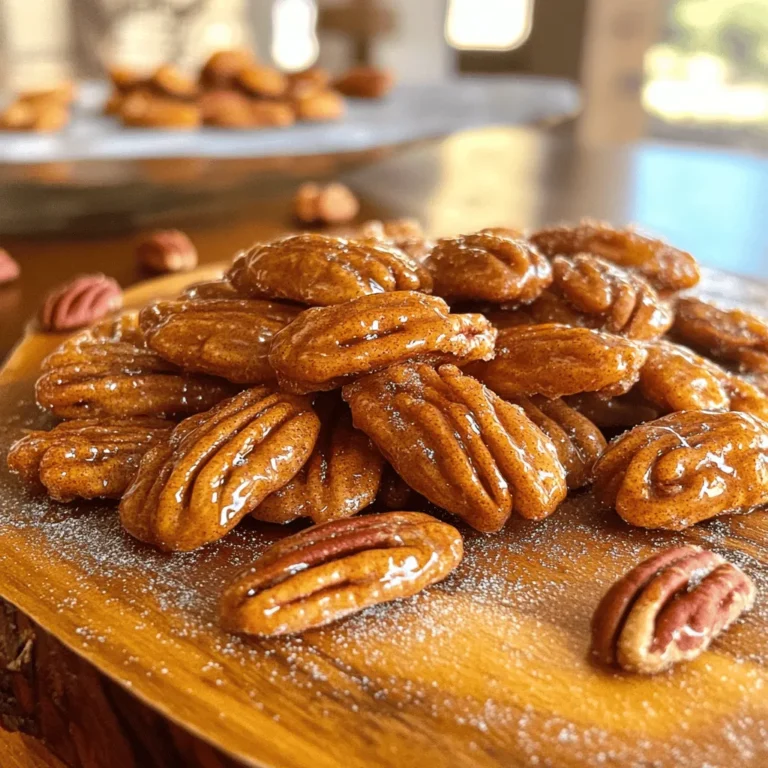
Cinnamon Sugar Candied Pecans Irresistible Snack Treat
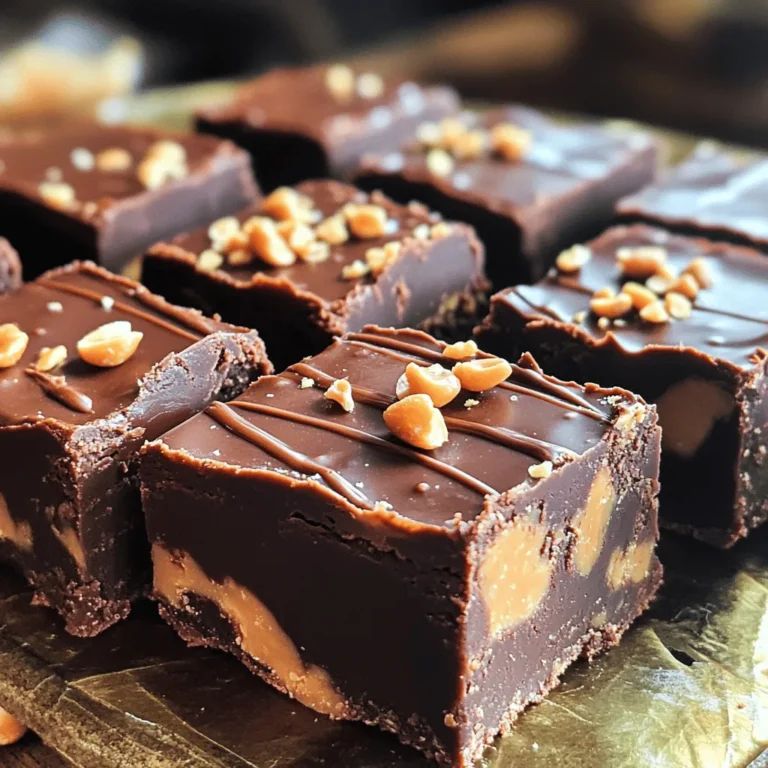
Chocolate Peanut Butter Fudge Decadent and Easy Treat
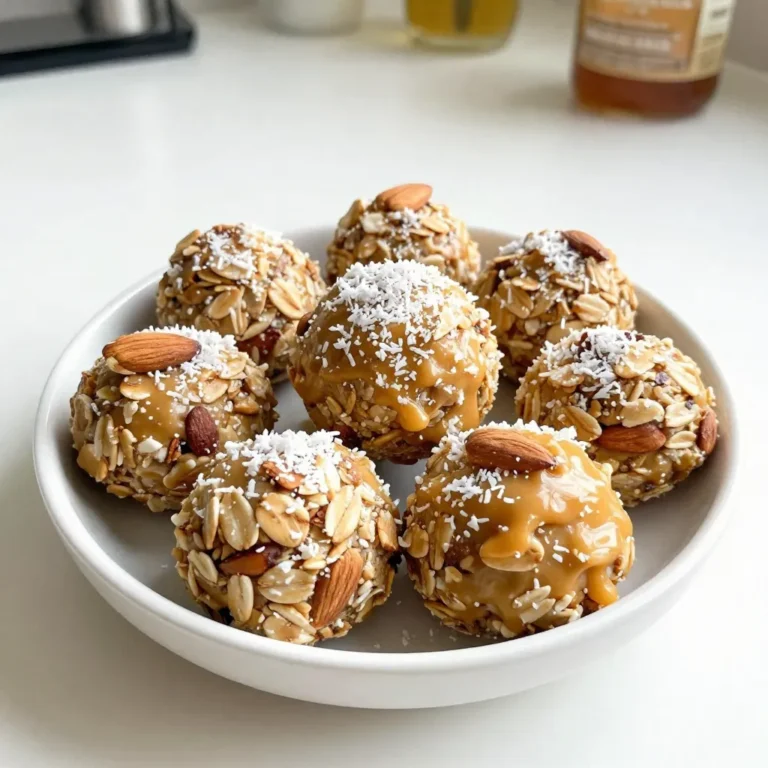
Nutritious Vanilla Almond Energy Bites Easy Recipe
Easy Pumpkin Roll Cake Delightful and Simple Recipe
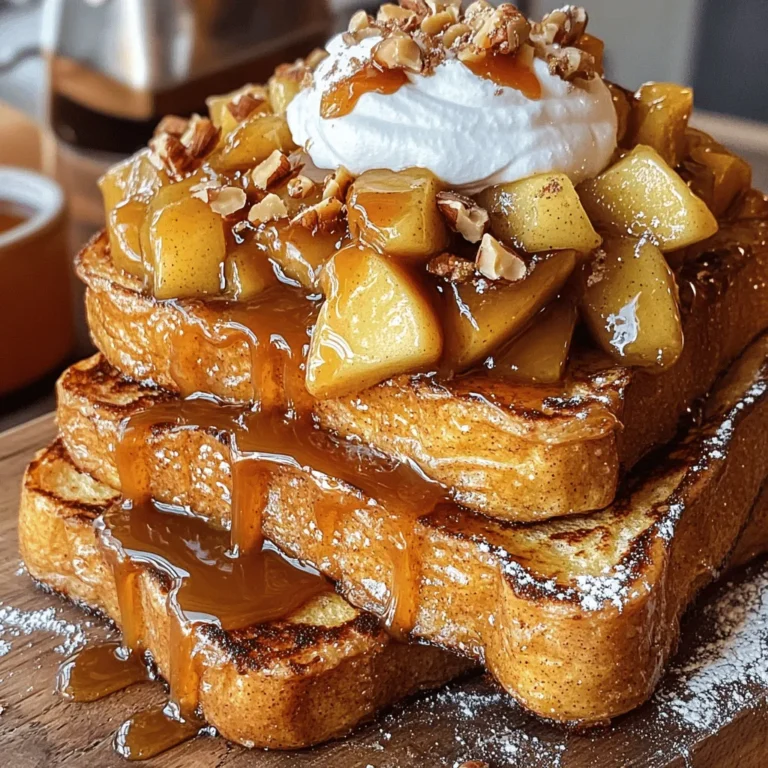
Caramel Apple French Toast Irresistible Breakfast Treat
Brown Butter Pumpkin Blondies Tasty Fall Dessert
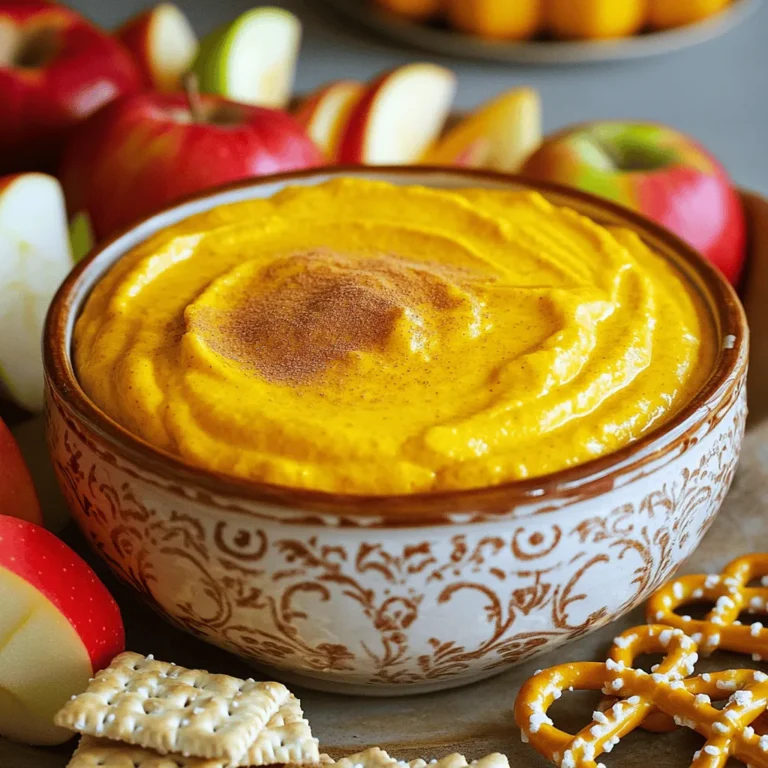
Pumpkin Cheesecake Dip Irresistible Fall Treat
Page navigation
Previous Page
Previous
1
…
10
11
12
13
14
…
27
Next Page
Next
Home
Dinner
Appetizer
Desserts
Drinks
About
Contact
Privacy Policy
Toggle Menu Close
Search for:
Search

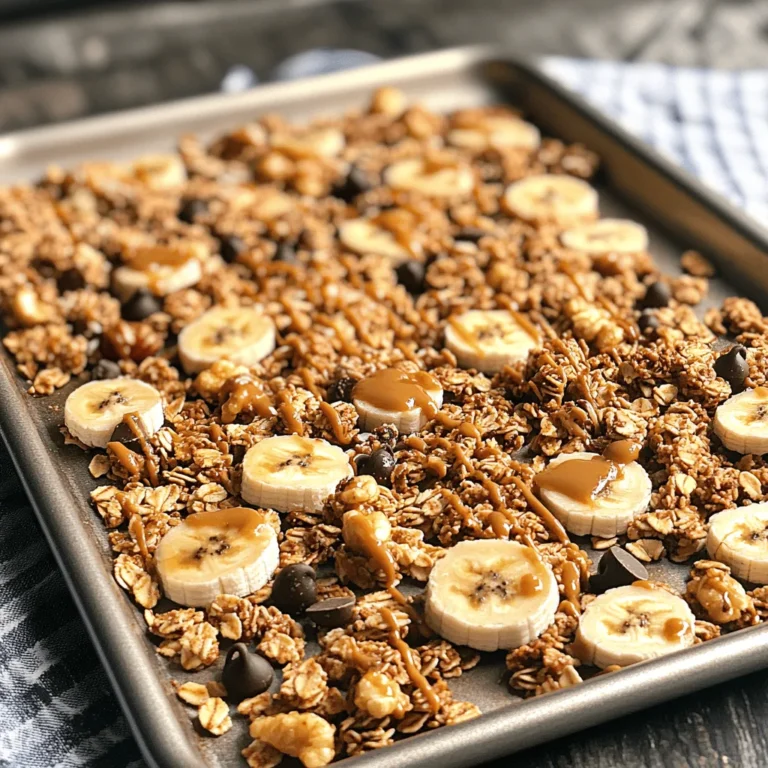
![To make this delicious granola, start with these main ingredients: - 3 cups rolled oats - 1 cup nuts (choose from almonds, pecans, or walnuts), coarsely chopped - 1/2 cup mixed seeds (pumpkin seeds and sunflower seeds) These ingredients form the base of your granola. Rolled oats give it the crunch, while nuts and seeds add healthy fats and protein. Next, we need flavoring ingredients to create that chai spice goodness: - 1/2 cup unsweetened coconut flakes - 1/2 cup honey or pure maple syrup - 1/4 cup coconut oil, melted - 2 teaspoons ground cinnamon - 1 teaspoon ground ginger - 1/2 teaspoon ground cardamom - 1/4 teaspoon freshly ground black pepper - 1/4 teaspoon ground cloves - 1/4 teaspoon sea salt These flavorings bring warmth and sweetness. The spices create a cozy chai taste that warms your soul. For extra fun, consider these optional additions: - 1/2 cup dried fruit (options: raisins, cranberries, or chopped apricots), added after baking - 1 teaspoon pure vanilla extract Adding dried fruit gives a sweet burst, while coconut oil helps everything stick together. You can find the full recipe to get started on this tasty treat. First, preheat your oven to 350°F (175°C). This step is key for achieving that perfect crunch. Next, prepare a large baking sheet by lining it with parchment paper. This keeps your granola from sticking and makes cleanup easier. In a spacious mixing bowl, mix the rolled oats, coarsely chopped nuts, mixed seeds, and coconut flakes. Stir gently to blend everything well. This step is crucial to ensure each bite is packed with flavor. In a separate smaller bowl, whisk together the honey (or maple syrup), melted coconut oil, and pure vanilla extract. You want this mixture to be smooth and well combined. This liquid will help bind your granola and add sweetness. Pour this liquid mixture over the dry ingredients. Toss everything together until the dry ingredients are fully coated. This ensures every piece of granola is flavorful and delicious. Now, in another small bowl, mix all the spices: ground cinnamon, ground ginger, ground cardamom, black pepper, ground cloves, and sea salt. Sprinkle this spice blend evenly over the granola mixture. Stir again to coat every piece with those amazing spices. Spread the granola mixture into a single layer on the prepared baking sheet. It should be evenly spread out for consistent baking. Place the baking sheet in your preheated oven. Bake for 20-25 minutes, stirring halfway through. This helps the granola brown evenly. Watch for a nice golden hue to know it's ready. Once done, take the granola out of the oven and let it cool completely on the baking sheet. This cooling step is important to get that delightful crunch. After it cools, gently mix in your choice of dried fruit. Finally, transfer the granola to an airtight container to keep it fresh. Enjoy the crunchy and flavorful delight of your homemade chai spiced granola! For the complete recipe, check out the [Full Recipe]. To get that perfect crunch in your chai spiced granola, let it cool on the baking sheet. Cooling helps it firm up. If you skip this step, your granola may stay soft. Once you take it out of the oven, leave it alone for at least 30 minutes. Don't stir it right away. This is key for that crunchy texture you want. For maximum crunch, spread the mixture in a single layer before baking. If it's too thick, it won't cook evenly. Stir it halfway through baking to brown all sides. Keep an eye on it to avoid burning. You can switch up the nuts and seeds based on what you like. Almonds, pecans, or walnuts are great choices. For seeds, try pumpkin or sunflower seeds. This gives you a chance to mix flavors and textures. If you want to change sweeteners, consider using maple syrup or agave nectar. These options work well for different diets. They can add a unique taste to your granola, too. There are many fun ways to enjoy chai spiced granola. You can eat it plain as a snack. Adding yogurt and fresh fruits makes a lovely breakfast. You can also sprinkle it on smoothies for extra crunch. For a twist, try it over oatmeal or as a topping for desserts. The warm spices will elevate any dish. Enjoy this tasty granola in your own creative ways! For the detailed preparation, check out the Full Recipe. {{image_4}} To make this granola gluten-free, use gluten-free oats. Check the labels to ensure no cross-contamination. You can also use gluten-free sweeteners, like pure maple syrup, instead of honey. This keeps your granola safe for those with gluten allergies. If you need a nut-free granola, simply swap nuts for seeds. Sunflower seeds or pumpkin seeds work well. They add crunch and nutrition, while keeping the flavor intact. You won't miss the nuts, and this version is safe for most schools and events. Want to change the spice level? You can easily tweak the recipe. For more heat, add extra ground ginger or a pinch of cayenne pepper. If you prefer it sweeter, add more honey or maple syrup. Taste as you go to find your perfect blend. To keep your chai spiced granola fresh, store it in an airtight container. This helps keep moisture out. Use glass jars or plastic bins with tight seals. Store in a cool, dark place like a pantry. Avoid exposing your granola to sunlight, as it can affect its flavor. Homemade granola lasts about two to three weeks at room temperature. If you notice any off smells or changes in texture, it may be time to toss it. Signs of spoilage include a stale taste or changes in color. Always check your granola before using it. Freezing is a great way to store granola long-term. To freeze it, let the granola cool completely. Then, place it in a freezer-safe bag or container. Remove as much air as possible to avoid freezer burn. When you want to enjoy it, thaw it in the fridge overnight. You can also use it straight from the freezer in smoothies or yogurt bowls. To make Chai Spiced Granola, follow these steps: 1. Preheat your oven to 350°F (175°C). Line a baking sheet with parchment paper. 2. In a large bowl, mix together rolled oats, chopped nuts, mixed seeds, and coconut flakes. 3. In another bowl, whisk together honey (or maple syrup), melted coconut oil, and vanilla extract. 4. Pour the liquid mixture over the dry ingredients. Toss until everything is well mixed. 5. In a small bowl, combine the spices: cinnamon, ginger, cardamom, black pepper, cloves, and sea salt. 6. Sprinkle the spice blend over the granola mix. Stir again to coat everything evenly. 7. Spread the mixture out on the baking sheet in a single layer. 8. Bake for 20-25 minutes. Stir halfway through for even browning. 9. Once golden, remove from the oven and let it cool completely. 10. Add your choice of dried fruit and store in an airtight container. Yes, you can replace honey with other sweeteners. Here are some great options: - Maple syrup: A good choice for a vegan option. - Agave nectar: Sweet and mild, it works well too. - Brown rice syrup: This is less sweet but can add a nice flavor. - Coconut sugar: Use it for a lower glycemic index. Homemade granola can last for about 2-3 weeks when stored correctly. Here are some tips for storage: - Keep it in an airtight container to keep it fresh. - Store in a cool, dry place to prevent moisture. - Check for any signs of spoilage, like off smells or a change in texture. Chai Spiced Granola is quite healthy! Here are some benefits: - Rolled oats are great for heart health and provide fiber. - Nuts add protein and healthy fats, keeping you full longer. - Seeds give you vitamins and minerals, boosting your nutrition. - The spices like cinnamon and ginger can help with digestion. You can enjoy Chai Spiced Granola in many ways. Here are some ideas: - Serve it with yogurt and fresh fruits for a tasty breakfast. - Add it to smoothies for a crunchy texture. - Use it as a topping on desserts like ice cream or chia pudding. - Pair it with milk or a plant-based drink for a quick snack. For the full recipe, check out the instructions above. Enjoy your flavorful and crunchy granola! You learned how to make delicious Chai Spiced Granola. We covered ingredients, steps, tips, and storage. You can customize it with different nuts, seeds, or spices. Don’t forget to store it properly for freshness. This recipe is a great way to enjoy healthy snacks. Plus, it pairs well with yogurt or smoothies. I hope you try making your own. Enjoy the crunch and flavors of your creation!](https://blissfulmeal.com/wp-content/uploads/2025/07/3a5e7dc9-fb03-4453-a4d8-8ca224184ee9-768x768.webp)
![- 2 cups raw almonds - 1 cup granulated sugar - 1/2 cup water - 1 tablespoon pumpkin spice mix - 1/2 teaspoon fine sea salt - 1 teaspoon pure vanilla extract - 1 tablespoon vegetable oil When making Pumpkin Spice Candied Almonds, each ingredient plays a key role. The raw almonds provide a crunchy base and healthy fats. Granulated sugar adds sweetness and helps create the candy coating. Water helps dissolve the sugar, forming a smooth syrup. The pumpkin spice mix brings that cozy fall flavor we all love. Fine sea salt balances the sweetness. Pure vanilla extract adds depth to the flavor. Finally, vegetable oil prevents the almonds from sticking together. - Alternative Nut Options: You can swap almonds for pecans or walnuts if you prefer. Each nut gives a unique taste and texture. - Sugar Substitutes: For a healthier option, use coconut sugar or a sugar alternative like stevia. Adjust the amount based on sweetness. - Homemade Pumpkin Spice Blend: If you lack pumpkin spice mix, you can make your own. Combine 1 teaspoon ground cinnamon, 1 teaspoon ground nutmeg, 1/2 teaspoon ground ginger, and 1/4 teaspoon ground cloves. This mix can bring fresh flavors to your almonds. For the full recipe and to make these tasty treats, refer to the complete directions above. Preheating the Oven First, preheat your oven to 350°F (175°C). This step is key to ensure even baking. A hot oven helps the almonds become golden and crisp. Preparing the Baking Sheet Next, line a baking sheet with parchment paper. This will keep the almonds from sticking. It makes cleanup easy and keeps your almonds intact. Creating the Syrup In a large saucepan, mix 1 cup of granulated sugar with 1/2 cup of water over medium heat. Stir gently until the sugar dissolves. This will create a smooth syrup. Coating the Almonds Now, add 1 tablespoon of pumpkin spice mix, 1/2 teaspoon of fine sea salt, and 1 teaspoon of pure vanilla extract to the syrup. Mix well to blend the flavors. Gradually stir in 2 cups of raw almonds. Make sure each almond gets a nice coating of syrup. Baking and Cooling Process Keep cooking the mixture for about 5-7 minutes. Stir constantly until the syrup thickens and coats the almonds. Remove the pan from heat and stir in 1 tablespoon of vegetable oil. This helps the almonds not stick together. Quickly spread the almonds on the prepared baking sheet in a single layer. Bake for 10-15 minutes, stirring halfway through. Once golden brown, take them out and let them cool completely on the baking sheet. They will become crisp as they cool. After cooling, break apart any clusters and store them in an airtight container. Follow the [Full Recipe] for more details and tips! To get a nice coating on your almonds, stir them well. Mix the almonds in the syrup until they look shiny and sticky. This way, every almond gets its share of flavor. Use a spatula to lift them and make sure they are all coated evenly. If you see some dry spots, keep stirring! Clumping can happen easily with candied almonds. After adding the vegetable oil, spread the almonds out on the baking sheet. Use a spatula to separate them right away. This will help them bake without sticking together. Keep an eye on them while baking, too. A gentle stir halfway through keeps them from clumping up. Want a bolder taste? Feel free to mix in more spices. A pinch of cinnamon or nutmeg can add depth. You can also try cardamom or allspice for new layers of flavor. Just remember to adjust the amount to your taste. A little goes a long way! Flavored extracts can make your almonds pop. Instead of plain vanilla, try almond or maple extract. They bring a unique twist to the taste. Add a few drops when mixing the syrup to give it a special touch. This simple change can elevate your pumpkin spice candied almonds. For the full recipe, check out the detailed steps above! {{image_4}} You can change the classic pumpkin spice flavor in many fun ways. One option is to make chocolate-covered pumpkin spice almonds. Simply melt dark or milk chocolate, then dip your finished almonds into it. Let them cool on parchment paper. This mix of sweet and warm spices makes for a delightful treat. Another tasty choice is spicy maple candied almonds. Replace the pumpkin spice mix with a blend of cayenne pepper and cinnamon. Add maple syrup instead of granulated sugar. This option gives a sweet and spicy twist that is perfect for fall. Adding dried fruits can elevate your pumpkin spice almonds. Try mixing in dried cranberries or raisins after baking. This adds a chewy texture and a burst of sweetness. You can also use chopped dried apples for a true autumn feel. Another great idea is adding sea salt for contrast. Just sprinkle a little fine sea salt over the hot almonds right after baking. The salt balances the sweetness and enhances the overall flavor. This simple addition makes your snack even more enjoyable. For the full recipe, you can refer to the details above. To keep your pumpkin spice candied almonds fresh, use an airtight container. Glass jars or plastic containers work well. Make sure they seal tightly to keep out air and moisture. Store them in a cool, dry place. This helps maintain their crunchy texture and flavor. - Shelf Life Information These almonds can last up to two weeks when stored properly. If you keep them in the fridge, they may last a bit longer. Just remember to let them come back to room temperature before enjoying. If your almonds lose their crunch, you can restore their crispiness. - Restoring Crispiness Preheat your oven to 350°F (175°C). Spread the almonds on a baking sheet. Bake for about 5 minutes or until they feel crisp again. Keep an eye on them to avoid burning. - Using the Oven vs. Microwave The oven is better for reheating. It warms them evenly, keeping that great texture. The microwave can make them chewy, which is not what you want. So, stick with the oven for the best results. Can I use different nuts for this recipe? Yes, you can use other nuts! Pecans and walnuts work well. They absorb flavors nicely and give a unique twist. How do I know when the almonds are done baking? Look for a golden-brown color. The almonds should smell fragrant and feel crispy. Stir them halfway through baking for even toasting. Can I make these in bulk for gifting? Absolutely! This recipe is perfect for making large batches. Just double or triple the ingredients. What’s the best way to package them for gifts? Use clear bags or jars. Add a nice ribbon or tag. This makes them look festive and special. Caloric Count One serving of these almonds has about 200 calories. They are a tasty snack, but watch the portions! Nutritional Benefits of Almonds Almonds offer healthy fats, protein, and fiber. They can help keep your heart healthy and support brain function. Can I make this recipe vegan? Yes! Just skip the vanilla extract or use a plant-based option. The rest of the ingredients are naturally vegan-friendly. What is the best way to enjoy candied almonds? Enjoy them as a snack on their own, or sprinkle them on salads. They also taste great with yogurt or as a topping for desserts. For the full recipe, check the previous sections. You learned how to make pumpkin spice candied almonds. We covered ingredients, steps, and tips to enhance flavor. With some simple swaps, you can customize these treats to your liking. Store them in airtight containers for freshness. Enjoy them yourself or share them as gifts! These almonds are perfect for snacking or as a festive treat. Try out the variations to find your favorite! Happy cooking!](https://blissfulmeal.com/wp-content/uploads/2025/07/2ccd6595-4e99-4fd0-b83a-b672d04ecddc-768x768.webp)
![- 3/4 cup all-purpose flour - 1 cup granulated sugar - 1 cup canned pumpkin puree The main ingredients bring the classic pumpkin flavor. All-purpose flour gives the cake structure. Granulated sugar adds sweetness, while canned pumpkin puree keeps it moist and flavorful. - 8 oz cream cheese, softened - 1/4 cup unsalted butter, softened - 1 cup powdered sugar The filling makes the pumpkin roll special. Cream cheese adds a rich taste. Unsalted butter gives a smooth texture, and powdered sugar sweetens the filling just right. - 15x10 inch jelly roll pan - Electric mixer - Parchment paper Using the right tools makes cooking easier. The jelly roll pan is perfect for baking the cake evenly. An electric mixer saves time and effort when mixing. Don't forget parchment paper to prevent sticking and make cleanup simple. For the full recipe, check out the complete instructions to make this delightful pumpkin roll cake! 1. Preheat the Oven: First, heat your oven to 375°F (190°C). This step is key for even baking. 2. Prepare the Pan: Take a 15x10-inch jelly roll pan. Line it with parchment paper and lightly grease it. This helps the cake come out easily. 3. Mix Dry Ingredients: In a medium bowl, sift together: - 3/4 cup all-purpose flour - 1 teaspoon baking powder - 1/2 teaspoon baking soda - 1/2 teaspoon ground cinnamon - 1/4 teaspoon ground nutmeg - 1/4 teaspoon ground ginger - 1/4 teaspoon salt Set this mixture aside for later. 4. Beat Eggs and Sugar: In a large bowl, combine: - 3 large eggs - 1 cup granulated sugar Use an electric mixer to beat this on medium speed for about 3-4 minutes. You want it light and fluffy. 5. Incorporate Pumpkin: Add 1 cup canned pumpkin puree and 1 teaspoon vanilla extract. Stir gently until smooth. 6. Combine Mixtures: Slowly mix the dry ingredients into the pumpkin mixture. Be careful not to overmix. Just stir until combined. 7. Bake the Cake: Pour the batter into your prepared jelly roll pan. Spread it evenly. Bake for 13-15 minutes. The cake is done when it springs back when touched. 8. Roll the Cake: As soon as you take it out, dust the top with powdered sugar. Place a clean kitchen towel on top and flip the cake onto the towel. Carefully peel off the parchment. 9. Cool the Rolled Cake: Starting from one edge of the towel, roll the cake tightly. This helps shape it. Let it cool completely while rolled. Follow these steps to create your easy pumpkin roll cake. For the full recipe, check out the details above. Enjoy the process and the delicious outcome! To make your pumpkin roll cake a hit, avoid common mistakes. One key issue is overmixing the batter. Mix just until combined. This keeps the cake fluffy. Another mistake is cooling the cake incorrectly. After baking, roll it up in the towel right away. This helps it keep its shape. Garnishing your cake adds charm. Dust the top with powdered sugar for a sweet touch. You can also sprinkle some ground cinnamon. For a crunch, add a few toasted pecans. Serve the slices on a decorative platter. This makes your dessert look inviting and festive. Prep time is about 30 minutes. To save time, measure all your ingredients first. This way, you won’t search for items while mixing. When baking, use the oven timer. It helps you stay focused. After baking, rolling the cake while it’s warm speeds up the process. Follow these strategies for an efficient baking session. For the full recipe, check out the [Full Recipe]. {{image_4}} You can easily change the taste of your pumpkin roll cake. Adding spices can give it a new twist. Try using allspice or cloves for a warm flavor. You can also mix in nuts or chocolate chips. Walnuts or pecans add crunch. Chocolate chips make it sweet and fun. These small changes make a big difference in your cake. If you need to adjust for diet, there are great options. For a gluten-free version, use gluten-free flour. It works well in the recipe. If you want it dairy-free, swap the cream cheese for a dairy-free alternative. Coconut cream or a nut-based spread can be good choices. These swaps help everyone enjoy the cake without worry. Let’s get creative with themes! A Halloween-themed pumpkin roll can be fun. Add some orange and black sprinkles on top. You can also use spooky shapes when serving. For Thanksgiving, make it a centerpiece dessert. Serve it on a nice platter with cinnamon sticks. Both ideas make your pumpkin roll special for the occasion. For more details, check out the Full Recipe. To keep your pumpkin roll cake fresh, store it in the fridge. Wrap it tightly in plastic wrap or aluminum foil. This helps prevent it from drying out. Place it in an airtight container for extra protection. If you plan to eat it within a few days, refrigeration is best. If you want to save it for later, freezing is a great option. First, wrap the cake tightly in plastic wrap. Then, wrap it in foil to keep it safe from freezer burn. Label the package with the date, so you remember when you froze it. It can stay fresh in the freezer for about three months. When stored properly, the pumpkin roll cake can last about 4 to 5 days in the fridge. If you freeze it, it stays good for about three months. Always check for signs of spoilage before eating. Signs your cake may be bad include mold growth or an off smell. If it feels dry or hard, it’s also best to toss it. Enjoy your cake while it’s fresh for the best taste! For the full recipe, check out the earlier section. How do I fix a cracked pumpkin roll cake? If your pumpkin roll cake cracks, don’t worry! You can fix it with some frosting. Spread the cream cheese filling over the cracks. This way, no one will notice. You can also serve it with the cracks facing down. It can hide any flaws! Can I make this recipe ahead of time? Yes, you can make this pumpkin roll cake ahead of time! Prepare the cake and let it cool. Then, wrap it tightly in plastic wrap. Store it in the fridge for up to three days. You can also freeze it for up to three months. Just thaw it in the fridge before serving. Can I substitute fresh pumpkin for canned? You can use fresh pumpkin! Just cook and blend it until smooth. Make sure to drain any extra moisture. Canned pumpkin is often thicker, so fresh pumpkin may change the cake's texture a bit. How can I adjust the sweetness? To adjust the sweetness, you can add or reduce sugar. Start by reducing the sugar by 1/4 cup. Taste the batter before baking. If you want it sweeter, add a bit more sugar. You can also try a sugar substitute for a healthier option. What beverages pair well with pumpkin roll cake? Pumpkin roll cake goes well with many drinks. A warm cup of spiced chai or coffee is perfect. You can also serve it with apple cider for a cozy fall feel. Can I serve it with ice cream or whipped cream? Yes, serving pumpkin roll cake with ice cream or whipped cream is a great idea! A scoop of vanilla ice cream adds creaminess. Whipped cream on top can enhance the cake’s flavors. Try both for a delightful treat! This blog post covered everything you need for a pumpkin roll cake. We explored the key ingredients, from flour to pumpkin puree. You learned how to prepare, mix, and bake the cake, plus tips to make it perfect. Variations can add flavor and fit different diets, while storage info ensures freshness. Enjoy making your pumpkin roll cake, and remember, each step counts. Happy baking!](https://blissfulmeal.com/wp-content/uploads/2025/07/fe64c80d-4ceb-4f63-85a8-023edf94a42b-768x768.webp)
![To make these brown butter pumpkin blondies, you need a mix of simple and tasty ingredients. Here’s what you will need: - 1 cup unsalted butter - 1 cup packed brown sugar - 1/2 cup granulated sugar - 2 large eggs - 1 teaspoon pure vanilla extract - 1 cup pumpkin puree - 2 cups all-purpose flour - 1 teaspoon baking powder - 1 teaspoon baking soda - 1 teaspoon ground cinnamon - 1/2 teaspoon ground nutmeg - 1/2 teaspoon sea salt - Optional: 1 cup white chocolate chips, 1/2 cup chopped walnuts or pecans These ingredients come together to create a warm and cozy treat. The brown butter gives the blondies a rich, nutty flavor. Pumpkin puree adds moisture and a hint of fall spice. You can also add white chocolate chips or nuts for extra texture and sweetness. For the full recipe, check the section above. - Preheat the oven to 350°F (175°C). - Prepare a 9x13 inch baking pan by greasing it lightly. Line the bottom with parchment paper for easy removal. - Melt 1 cup of unsalted butter in a medium saucepan over medium heat. - Stir constantly and watch for browning. It takes about 5-7 minutes. - The butter will foam and turn a golden-brown color. - Remove it from heat and let cool slightly before using. - In a large bowl, pour in the cooled brown butter. - Add 1 cup packed brown sugar and 1/2 cup granulated sugar. - Whisk together until smooth. - Add 2 large eggs one at a time, whisking well after each. - Stir in 1 teaspoon pure vanilla extract and 1 cup pumpkin puree. - Mix until the batter is creamy and smooth. - In a separate bowl, sift together 2 cups all-purpose flour, 1 teaspoon baking powder, 1 teaspoon baking soda, 1 teaspoon ground cinnamon, 1/2 teaspoon ground nutmeg, and 1/2 teaspoon sea salt. - Gradually fold this dry mix into the wet mixture. - Be careful not to overmix; stir just until combined for a tender texture. - If you like, fold in 1 cup white chocolate chips and 1/2 cup chopped walnuts or pecans. - Carefully pour the batter into the prepared baking pan. - Use a spatula to smooth the top. - Place the pan in the preheated oven and bake for 25-30 minutes. - Check doneness with a toothpick; it should come out clean. - Let the blondies cool in the pan for about 15 minutes. - Then, transfer them to a wire rack to cool completely. - Once cool, slice into squares and serve. - For extra flair, dust the tops with powdered sugar or serve with whipped cream. For the full recipe, click [Full Recipe]. To make your blondies soft, mix gently. Overmixing makes them tough. Stir until the flour disappears. If you use a glass pan, lower the oven to 325°F. This helps your blondies bake evenly. Want more autumn vibes? Add spices! A pinch of ginger or allspice boosts the flavor. You can also mix in chopped apples or dried cranberries. For toppings, think about adding nuts or drizzling caramel sauce. For a lovely presentation, dust the tops with powdered sugar. Pair each piece with whipped cream. You can also create a dessert platter. Add cookies, fruit, or mini pastries for a fun spread. Try out the full recipe for an easy way to impress your guests! {{image_4}} You can make these blondies gluten-free. Just swap the all-purpose flour for a gluten-free flour blend. Look for blends that work well in baking. They usually mix well and keep the texture nice. This change will still give you that lovely, soft bite. Want a vegan treat? You can replace the eggs with flax eggs. To make a flax egg, mix one tablespoon of ground flaxseed with three tablespoons of water. Let it sit until it thickens. For the butter, use a plant-based butter. This will keep your blondies rich and tasty without any animal products. Get creative with spices! Adding ginger or cloves can give a fun twist to the flavor. You can also try using different types of chocolate. Dark chocolate chips can add a deeper taste, while milk chocolate offers sweetness. Consider adding nuts like pecans or almonds for extra crunch. Each change can make your blondies special and unique. To keep your Brown Butter Pumpkin Blondies fresh, store them in an airtight container. This helps them stay moist and flavorful. Avoid stacking them if possible, as that can make them stick together. If you want to gift them, use a decorative box lined with parchment paper. This adds a nice touch and keeps them safe during transport. Freezing blondies is simple. Start by slicing them into squares. Place each square on a baking sheet in a single layer. Freeze them for about an hour until solid. Then, wrap each blondie in plastic wrap and place them in a freezer bag. This method prevents freezer burn. To reheat, remove a blondie from the bag and let it thaw at room temperature for about 30 minutes. For a warm treat, heat it in the microwave for about 10-15 seconds. Brown Butter Pumpkin Blondies can last up to five days at room temperature. Keep them in a cool, dry place. If you refrigerate them, they can last up to seven days. The cool air helps keep them fresh for longer. Just remember, blondies may dry out slightly in the fridge, so enjoy them sooner for the best taste! For the full recipe, check out the details above. To cut blondies cleanly, use a sharp knife. Here are some tips: - Cool completely: Let the blondies cool in the pan. - Use a ruler: Measure to make even squares. - Wipe the knife: Clean the knife between cuts to reduce crumbs. - Score before cutting: Lightly mark where you will cut. These steps help you get neat, beautiful blondies. Yes, you can make blondies ahead of time. Here’s how: - Bake and cool: Bake as usual and let them cool completely. - Store in an airtight container: This keeps them fresh. - Refrigerate or freeze: They last longer when stored this way. You can enjoy your blondies for days! To check if your blondies are done, look for these signs: - Golden edges: The edges should be lightly browned. - Set center: The center should not jiggle when you shake the pan. - Toothpick test: Insert a toothpick in the center; it should come out clean. If you see these signs, your blondies are ready! Yes, you can substitute pumpkin puree. Here are some options: - Applesauce: Use the same amount for moisture. - Sweet potato puree: This gives a different flavor but works well. - Mashed banana: This adds sweetness and moisture. Choose based on your taste! Blondies can be both! Here’s how to get each texture: - For chewy blondies: Use less flour and don’t overmix the batter. - For cakey blondies: Add a bit more flour and mix well. Experiment to find your favorite texture! For the full recipe, check out the Brown Butter Pumpkin Blondies. This blog post covered everything you need to make delicious pumpkin blondies. We explored key ingredients, step-by-step instructions, and tips for achieving the perfect texture. You can even try variations for gluten-free and vegan options. In closing, these blondies are perfect for any fall gathering. Use the techniques shared to impress your friends and family. Enjoy baking, experimenting, and sharing these delightful treats!](https://blissfulmeal.com/wp-content/uploads/2025/07/e40eac7c-6e96-4c1b-88f9-4ac0da3c90ba-768x768.webp)