Skip to content
About
Contact
Cookie Policy
Copyright Policy
Disclaimer
Search
Home
Dinner
Appetizer
Desserts
Drinks
About
Contact
Privacy Policy
Toggle Menu
Home
/
Desserts
- Page 14
Desserts
Pumpkin Chocolate Chip Muffins Soft and Tasty Treat
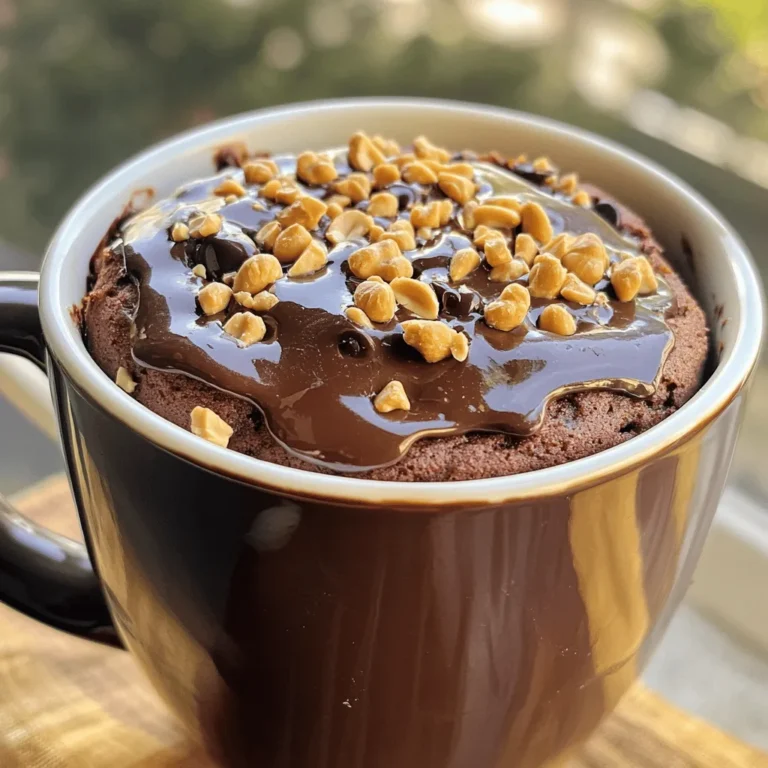
Chocolate Peanut Butter Mug Cake Quick and Easy Treat
Peanut Butter Oatmeal Energy Bars Healthy Snack Choice
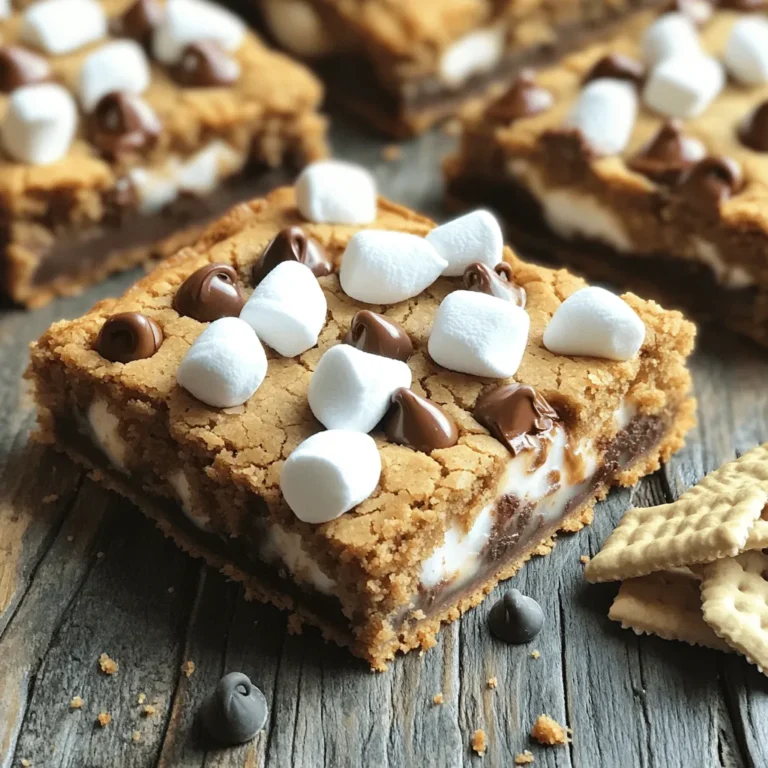
S’mores Cookie Bars Irresistible and Easy Treat
Pumpkin Cream Cheese Muffins Delightful Fall Treat
Lemon Poppy Seed Muffins Tasty and Simple Treat
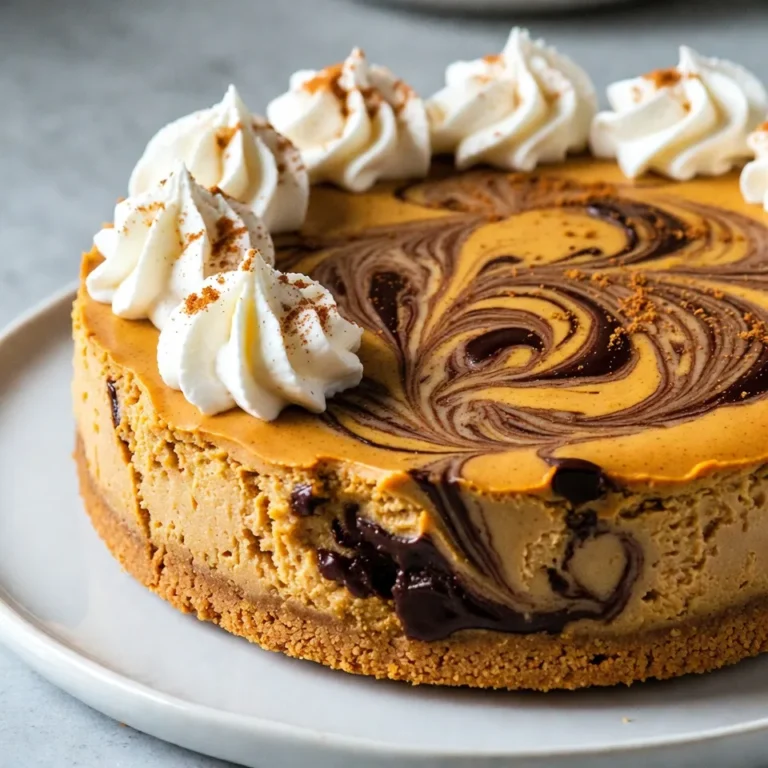
Chocolate Swirl Pumpkin Cheesecake Irresistible Recipe
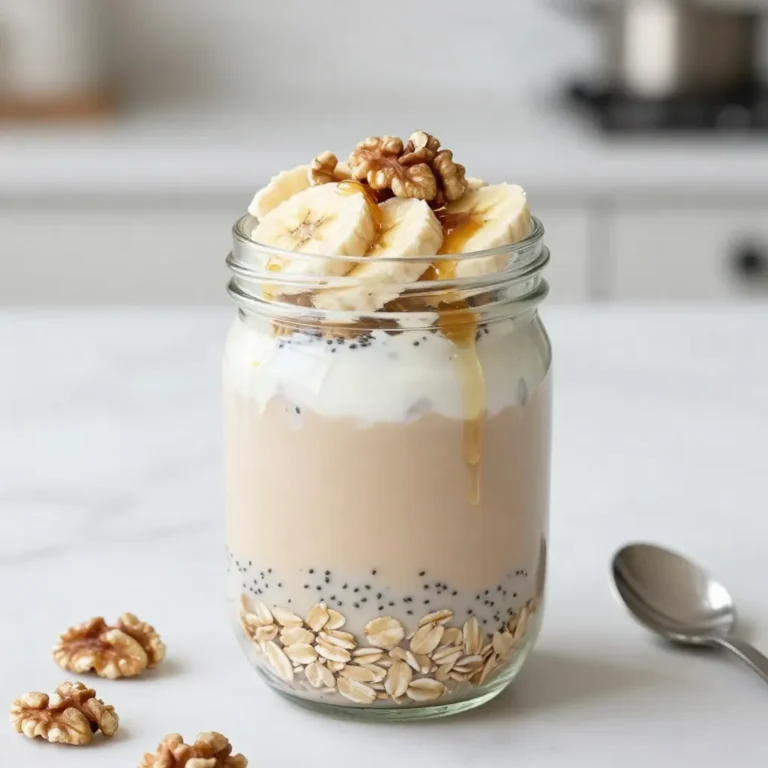
Vanilla Chai Latte Overnight Oats Easy Breakfast Recipe
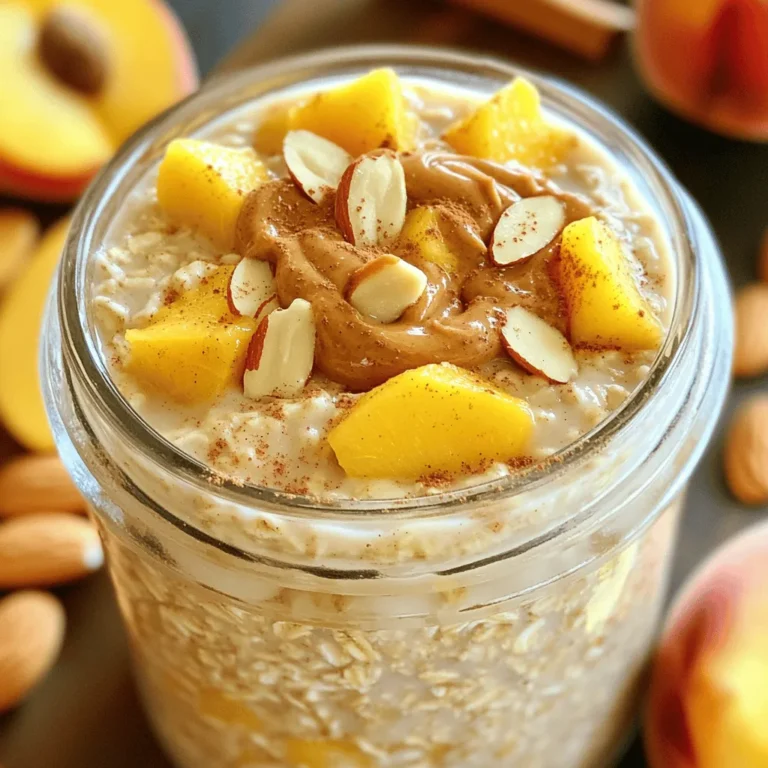
Peach Almond Overnight Oats Nourishing Morning Boost
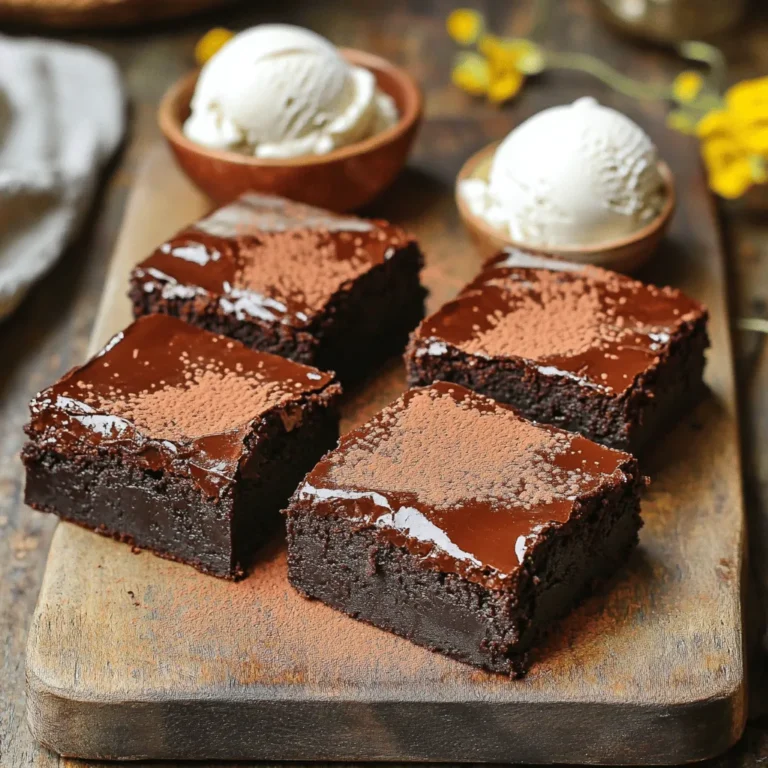
Vegan Zucchini Brownies Rich and Decadent Treat
Page navigation
Previous Page
Previous
1
…
12
13
14
15
16
…
27
Next Page
Next
Home
Dinner
Appetizer
Desserts
Drinks
About
Contact
Privacy Policy
Toggle Menu Close
Search for:
Search

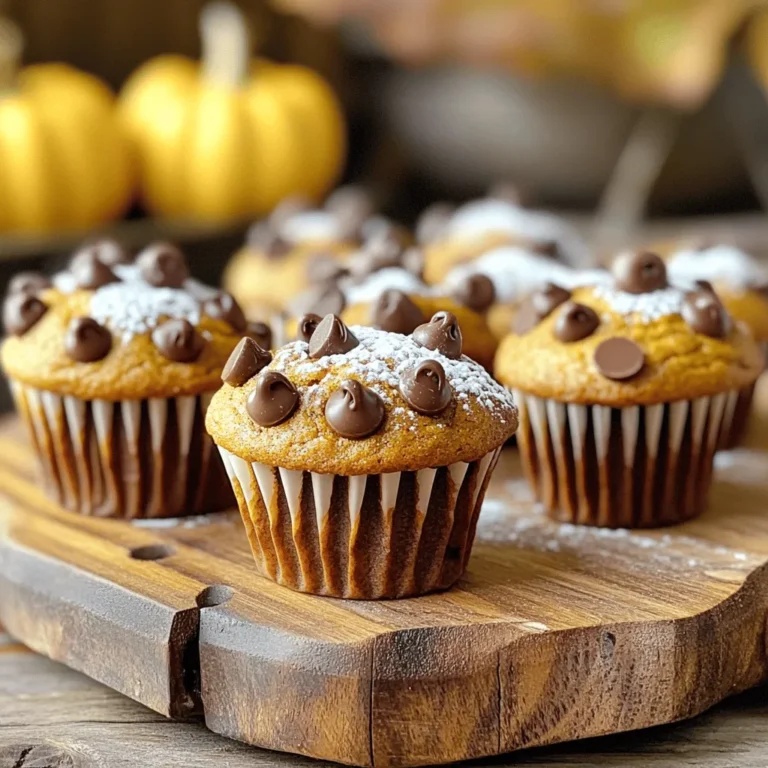

![To make delicious pumpkin cream cheese muffins, gather these ingredients: - 1 cup pumpkin puree - 1/2 cup cream cheese, softened to room temperature - 1/2 cup vegetable oil - 1 cup packed brown sugar - 1/2 cup granulated sugar - 2 large eggs, at room temperature - 2 cups all-purpose flour - 1 teaspoon baking soda - 1 teaspoon baking powder - 1 teaspoon ground cinnamon - 1/2 teaspoon ground nutmeg - 1/2 teaspoon salt - 1 teaspoon vanilla extract - 1/2 cup chopped nuts (optional, such as walnuts or pecans) These ingredients help create a moist and fluffy muffin. Feel free to add nuts for a nice crunch. You can also swap in chocolate chips for a sweet twist. This recipe is flexible, so you can get creative! For the full recipe, check out the complete instructions later in this article. First, preheat your oven to 350°F (175°C). This step is key for even baking. Next, prepare your muffin tin. You can line it with paper liners or grease each cup lightly. This will help the muffins come out easily. Now, let’s prepare our ingredients. Gather everything you need. Make sure your cream cheese is soft. This helps it mix well with the other wet ingredients. In a large mixing bowl, use an electric mixer to beat the cream cheese. Mix it until it’s creamy and smooth. Next, add the pumpkin puree, vegetable oil, brown sugar, granulated sugar, eggs, and vanilla extract. Mix all these together until they are fully combined. This step is essential for a uniform batter. In a different bowl, whisk together the flour, baking soda, baking powder, ground cinnamon, ground nutmeg, and salt. Make sure there are no lumps. Gradually add this dry mix to your wet ingredients. Stir gently to combine. Be careful not to overmix. The batter should be a bit lumpy. If you want to add nuts, fold them in gently now. Now you can fill your muffin tin. Use a spoon or an ice cream scoop to add the batter. Fill each cup about two-thirds full. This allows room for the muffins to rise while baking. Put the muffin tin in the preheated oven and bake for 18-22 minutes. To check for doneness, insert a toothpick into the center of a muffin. If it comes out clean, your muffins are ready. Once baked, take them out of the oven. Let them cool in the pan for about 5 minutes. After that, transfer the muffins to a wire rack to cool completely. Enjoy the delightful aroma as they cool! For the full recipe, refer to the earlier section. Using room temperature ingredients is key to making moist muffins. Cold eggs or cream cheese can affect how well they mix. Take them out ahead of time. This simple step ensures a smooth batter that rises evenly. Choosing the right oil also matters. I prefer vegetable oil for its neutral taste. It keeps the muffins light and fluffy. Other oils, like olive oil, can alter the flavor. Stick with vegetable oil for classic taste. To boost the flavor of your muffins, consider adding spices. Ground ginger or allspice can give a warm kick. You can also mix in extras like chocolate chips or dried fruits for a fun twist. These small changes make each batch unique. Different nuts can change the texture and taste. Walnuts and pecans add crunch and a rich flavor. You can toast them lightly for extra depth. Feel free to experiment with what you have on hand. For a beautiful display, use a decorative platter. Arrange the muffins neatly and consider dusting them with powdered sugar. This adds a touch of elegance. A cream cheese glaze can also enhance the look and taste. Try creative topping options too. A sprinkle of cinnamon or even a few chocolate shavings can delight your guests. Serve them warm for the best experience. Your friends and family will love these treats! For the complete recipe, check the [Full Recipe]. {{image_4}} You can still enjoy these muffins if you are dairy-free. For cream cheese, use a dairy-free cream cheese. Many brands offer great alternatives that taste creamy and rich. Instead of regular milk, try almond milk or oat milk. These swaps keep the muffins moist and tasty. If you need gluten-free muffins, substitute all-purpose flour with gluten-free flour blends. Look for blends that include xanthan gum to help the muffins rise. Almond flour or coconut flour can also work, but adjust the liquid in the recipe, as these flours absorb more moisture. Get creative by adding seasonal flavors. Dried cranberries add a nice tartness that pairs well with pumpkin. You could also mix in chocolate chips for a sweet twist. Both options add fun and unique tastes to your muffins. Try them out and see what you like best! For the full recipe, check out the earlier section. To keep your pumpkin cream cheese muffins fresh, store them in an airtight container. This helps maintain moisture and flavor. You can keep them at room temperature for up to three days. If you want to keep them longer, placing them in the fridge is a good option. Just remember to let them cool completely before storing. For long-term storage, freezing is best. Wrap each muffin in plastic wrap or foil. Then place them in a freezer-safe bag. They can last up to three months in the freezer. When you want to eat one, simply take it out and let it thaw at room temperature. You can also heat them in the microwave for a quick treat. To restore moisture and flavor, you can reheat your muffins easily. The microwave works well for this. Heat each muffin for about 15-20 seconds. Check to see if it's warm enough. You can also use a toaster oven. This gives a nice crisp outside while warming the inside. Enjoy your muffins warm for the best taste! You can check if your muffins are done by using a toothpick. Insert it into the center of a muffin. If it comes out clean, your muffins are ready. The tops will also look golden brown and will spring back when you touch them. Yes, you can use fresh pumpkin! You should cook and puree the pumpkin first. Make sure to drain excess moisture. This helps keep your muffins moist and flavorful. You can use applesauce or flaxseed meal. For applesauce, use 1/4 cup for each egg. For flaxseed, mix 1 tablespoon of flaxseed meal with 2.5 tablespoons of water. Let it sit for a few minutes before adding to the mix. If your muffins turn out dry, you can fix them by adding moisture. Brush them with melted butter or a simple syrup made from equal parts sugar and water. You can also serve them warm with cream cheese spread on top for extra creaminess. In this post, we explored the essential ingredients and clear steps for baking perfect muffins. I shared tips for keeping them moist and ways to enhance flavor with spices and nuts. You learned about tasty variations and how to store your muffins right. These insights help you create delicious treats that everyone will enjoy. Remember, baking is both a science and an art. Enjoy the process and share your tasty results!](https://blissfulmeal.com/wp-content/uploads/2025/07/7e8654b8-b7fb-46b9-8c47-6459fa13e5b3-768x768.webp)
![To create these delightful lemon poppy seed muffins, you will need the following ingredients: - 1 ½ cups all-purpose flour - ½ cup granulated sugar - 2 tablespoons poppy seeds - 1 tablespoon baking powder - ½ teaspoon salt - 1 large egg - ½ cup whole milk - ⅓ cup vegetable oil - Zest of 1 lemon - 2 tablespoons fresh lemon juice - 1 teaspoon vanilla extract - Optional Glaze: 1 cup powdered sugar + 2 tablespoons lemon juice These ingredients work together to create a soft, fluffy muffin packed with bright lemon flavor. The poppy seeds add a nice crunch and visual appeal. You can find the full recipe above to guide you through the process. Enjoy the fresh taste of lemon in every bite! Preheat the Oven Start by preheating your oven to 350°F (175°C). This is key for even baking. Line a 12-cup muffin tin with paper liners. This keeps the muffins from sticking. Combine Dry Ingredients In a large mixing bowl, whisk together the all-purpose flour, granulated sugar, poppy seeds, baking powder, and salt. Mix well to ensure everything blends nicely. This helps the muffins rise evenly. Mix Wet Ingredients In another bowl, crack the large egg and beat it lightly. Add the whole milk, vegetable oil, lemon zest, fresh lemon juice, and vanilla extract. Whisk together until smooth. This adds moisture and flavor to your muffins. Combine Wet and Dry Mixtures Pour the wet mixture into the dry ingredients. Use a spatula or wooden spoon to gently stir. Mix just until combined; some lumps are okay. Overmixing can make the muffins tough. Fill Muffin Cups Using a spoon or an ice cream scoop, fill each muffin cup about ⅔ full. This gives them space to rise. Make sure they are all even, so they bake well. Bake Place the muffin tin in your preheated oven. Bake for about 18-20 minutes. Check their doneness by inserting a toothpick into a muffin. It should come out clean or with a few moist crumbs. Cool the Muffins Once baked, let the muffins cool in the tin for about 5 minutes. Then, transfer them to a wire rack. This prevents sogginess and keeps them fluffy. Prepare Glaze (Optional) If you want a glaze, mix the powdered sugar and lemon juice in a small bowl until smooth. Drizzle it over the cooled muffins. This adds a sweet and tangy finish. For more details, check out the [Full Recipe]. When making lemon poppy seed muffins, the key is to mix gently. Overmixing can make the muffins tough. When you combine the wet and dry ingredients, stir just until you see no flour. It’s okay to leave some lumps in the batter. This keeps your muffins light and fluffy. Make sure your oven is set to 350°F (175°C) before baking. An oven thermometer can help if your oven runs hot or cold. A consistent temperature ensures your muffins rise properly and bake evenly. To check if your muffins are done, use a toothpick. Insert it into the center of a muffin. If it comes out clean or with a few moist crumbs, your muffins are ready. If there’s wet batter on the toothpick, they need more time. Presentation makes your muffins look even more tempting. Arrange them on a tiered cake stand or a pretty platter. Garnish with thin lemon slices and a sprinkle of extra poppy seeds for a fresh touch. This small detail can impress your family and friends. For the full recipe, check the detailed section above! {{image_4}} You can make your lemon poppy seed muffins even better with fun add-ins. Try adding chocolate chips for a sweet twist. Dried fruit like cranberries or blueberries can add a nice chew. Nuts, such as walnuts or almonds, give a crunchy texture. You can even mix in fresh herbs like basil or mint for a unique flavor. Each addition changes the taste and makes the muffins special. If you need a gluten-free option, swap the all-purpose flour with a gluten-free blend. Many blends work well in baking. Look for a blend that contains xanthan gum, as it helps bind the ingredients. Almond flour also works, but you may need to adjust the liquid. Using gluten-free flour keeps the muffins light and fluffy without gluten. To make these muffins a bit healthier, use whole wheat flour instead of all-purpose flour. This adds fiber and nutrients. You can also cut down on sugar by using honey or maple syrup. Replace half of the oil with unsweetened applesauce to reduce fat. These changes keep the muffins tasty while adding some health benefits. For a lighter option, you can even use non-fat yogurt instead of oil. To keep your lemon poppy seed muffins fresh, store them in an airtight container. You can use a plastic bag or a cake dome. Place parchment paper between layers to avoid sticking. Keep them at room temperature for the best taste and texture. Freezing muffins is simple and effective. First, let them cool completely. Then, wrap each muffin tightly in plastic wrap. Place the wrapped muffins in a freezer-safe bag or container. They will stay fresh for up to three months in the freezer. When ready to eat, just thaw them at room temperature. You can also warm them in the oven for a few minutes. Lemon poppy seed muffins last for about three days at room temperature. If stored in the fridge, they can last for a week. However, for the best flavor, enjoy them fresh. If you see any signs of mold or a change in texture, it's best to toss them. Yes, you can use almond milk in place of whole milk. It works well in this recipe. The muffins will still be moist and tasty. Just make sure to choose an unsweetened version for the best flavor. If you do not have poppy seeds, try using sesame seeds or chia seeds. Both will add a nice crunch. You can also skip them if you prefer plain lemon muffins. To make lemon glaze, mix 1 cup of powdered sugar with 2 tablespoons of lemon juice. Stir until smooth. Drizzle it over your cooled muffins for a sweet and tangy touch. Yes, these muffins freeze well. Let them cool completely before storing. Place them in an airtight container or freezer bag. They can last up to three months in the freezer. Overbaked muffins will have a dry texture and dark edges. They may also crack on the top. To avoid this, keep an eye on them while baking. A toothpick should come out clean or with a few crumbs for perfect muffins. - 1 ½ cups all-purpose flour - ½ cup granulated sugar - 2 tablespoons poppy seeds - 1 tablespoon baking powder - ½ teaspoon salt - 1 large egg - ½ cup whole milk - ⅓ cup vegetable oil - Zest of 1 lemon - 2 tablespoons fresh lemon juice - 1 teaspoon vanilla extract - Optional Glaze: 1 cup powdered sugar + 2 tablespoons lemon juice To make these tasty lemon poppy seed muffins, start by preheating your oven to 350°F (175°C). Line a muffin tin with paper liners. Then, mix the dry ingredients in one bowl. In another bowl, whisk your wet ingredients. Combine wet and dry ingredients gently. Fill the muffin cups about two-thirds full. Bake for 18-20 minutes. Check if they’re done with a toothpick. After cooling, feel free to drizzle on the optional glaze if you want extra sweetness! For more detailed steps and techniques, check the article above for the full recipe. This blog post shared a simple muffin recipe using lemon and poppy seeds. You learned about the key ingredients and how to mix them. The step-by-step instructions guide you from prep to baking. Helpful tips ensure your muffins turn out great every time. You can even try fun variations to fit your taste. Now, you’re ready to bake. Enjoy these muffins fresh or share them with friends. Happy baking with your new recipe!](https://blissfulmeal.com/wp-content/uploads/2025/07/182286e1-11bc-4cc6-98bc-9b3ea35b254a-768x768.webp)