Skip to content
About
Contact
Cookie Policy
Copyright Policy
Disclaimer
Search
Home
Dinner
Appetizer
Desserts
Drinks
About
Contact
Privacy Policy
Toggle Menu
Home
/
Desserts
- Page 19
Desserts
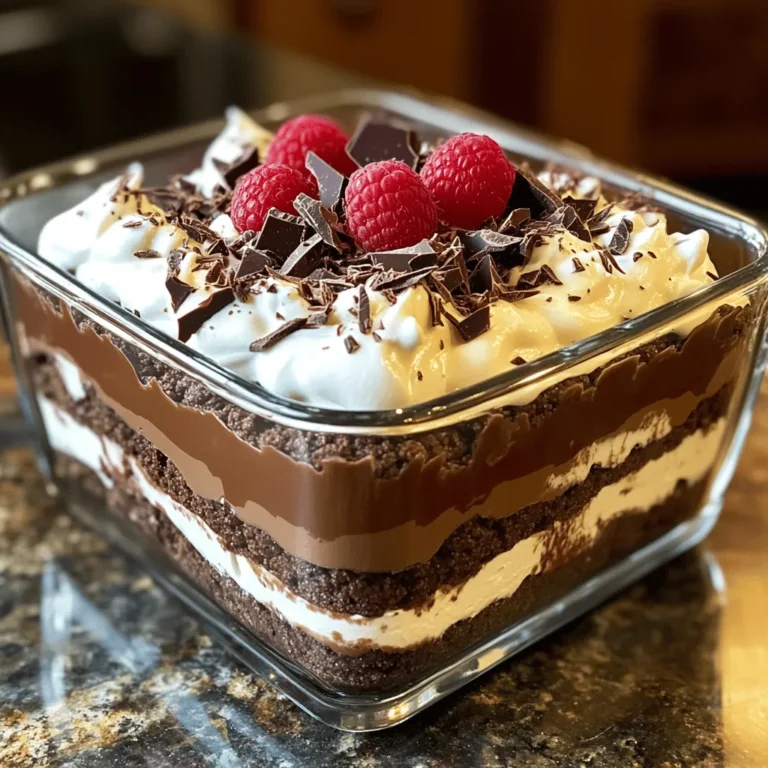
No Bake Chocolate Lasagna Easy and Delicious Recipe
Peach Tartlets Delightful and Easy Dessert Recipe
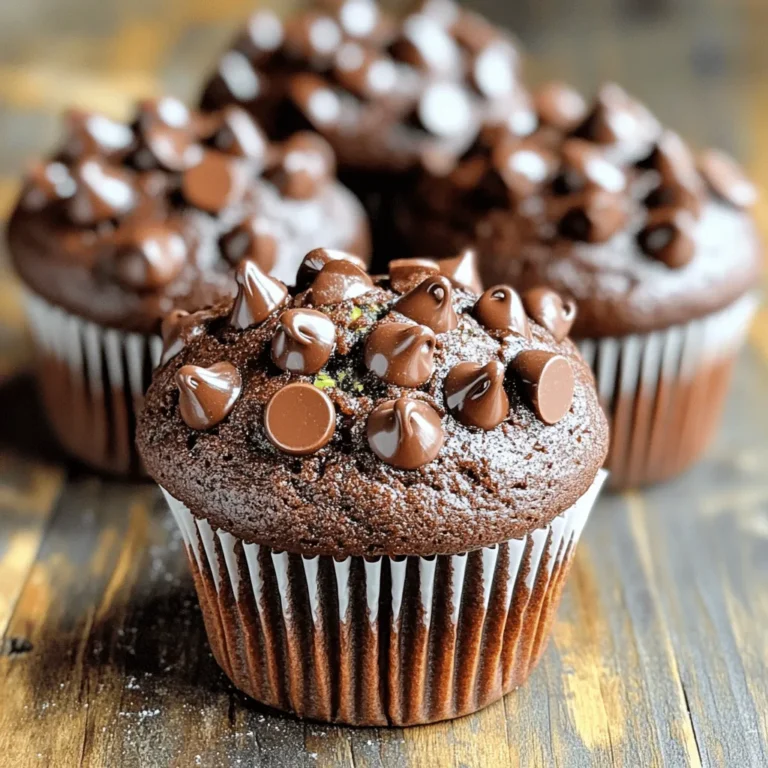
Zucchini Chocolate Muffins Rich and Decadent Treat
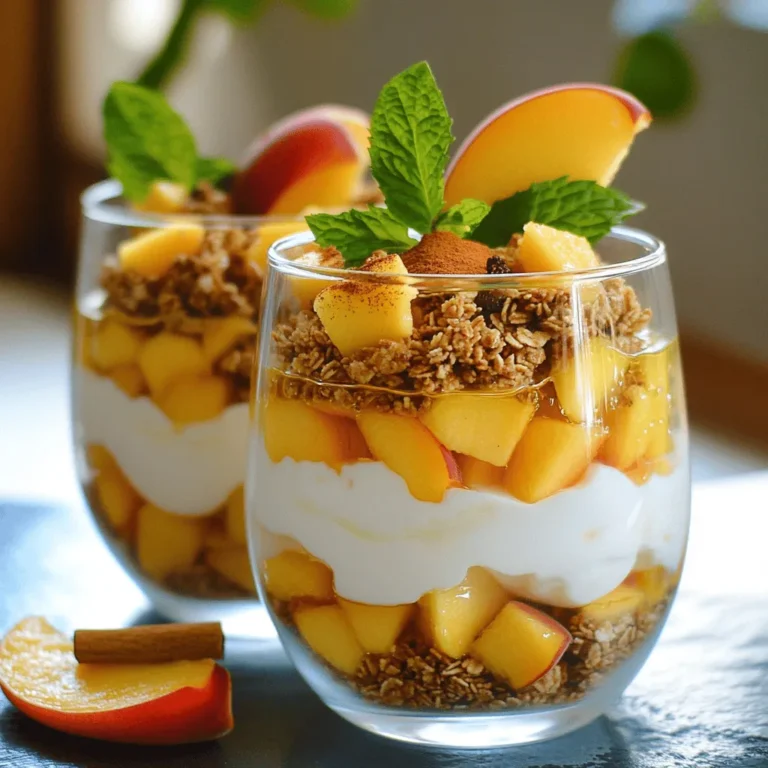
Peach Yogurt Parfait Easy and Delicious Recipe
Irresistible Peach Cobbler Pancakes Delightful Breakfast
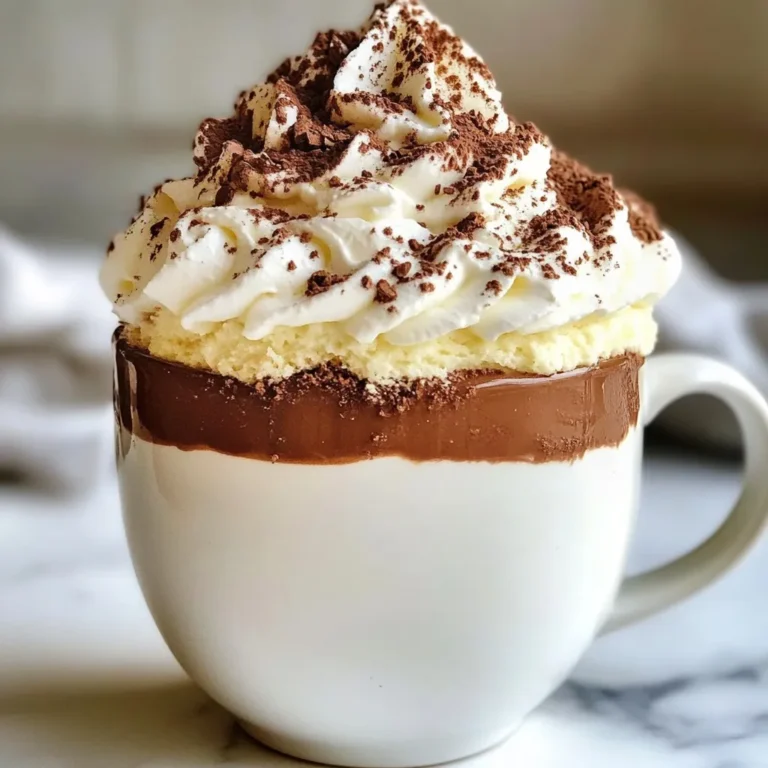
Triple Chocolate Mug Cake Decadent and Easy Dessert
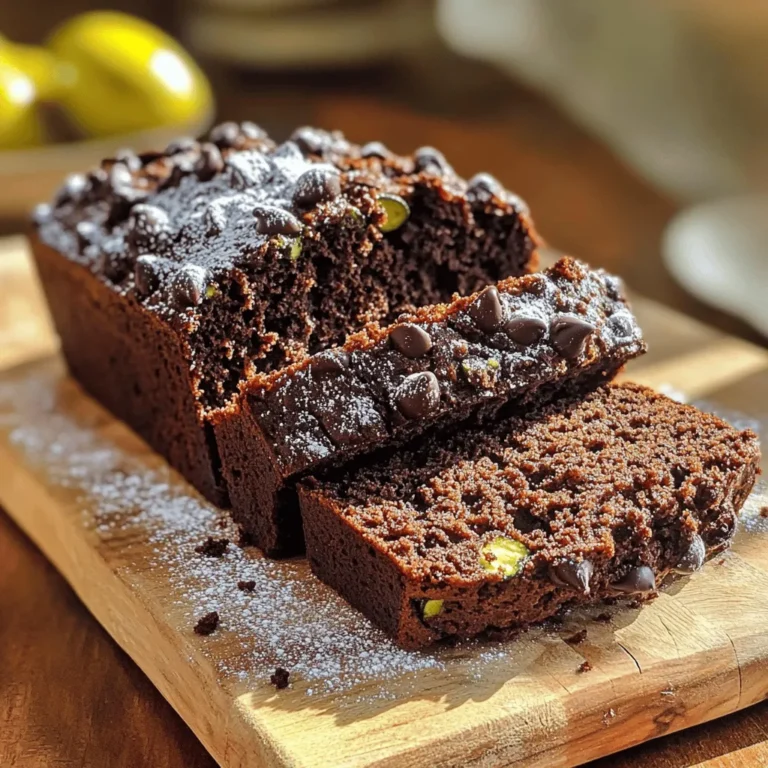
Double Chocolate Zucchini Bread Rich and Moist Recipe
Strawberry Cheesecake Ice Cream Creamy and Dreamy Treat
Peanut Butter Oatmeal Energy Balls Nutritious Snack
Homemade Funfetti Cupcakes Delightful Sweet Treat
Page navigation
Previous Page
Previous
1
…
17
18
19
20
21
…
27
Next Page
Next
Home
Dinner
Appetizer
Desserts
Drinks
About
Contact
Privacy Policy
Toggle Menu Close
Search for:
Search

![To make peach tartlets, gather these key items: - 1 cup all-purpose flour - 1/4 cup unsalted butter, softened - 1/4 cup granulated sugar - 1/4 teaspoon salt - 1/4 teaspoon vanilla extract - 1 tablespoon ice-cold water - 2 ripe peaches, pitted and thinly sliced - 1 tablespoon brown sugar - 1 teaspoon ground cinnamon - 1 tablespoon cornstarch - 1 tablespoon freshly squeezed lemon juice These ingredients create a sweet and flaky crust, paired with juicy peaches. You can add a few fun touches to your tartlets: - Fresh mint leaves - A dusting of powdered sugar - A scoop of vanilla ice cream Each garnish adds flavor and looks great on your plate. Here are the tools you will need: - Mixing bowls - Pastry cutter or your fingers - Mini tartlet pans - Spoon for filling - Wire rack for cooling Having the right tools makes the process easy and fun. For the full recipe, check out the detailed instructions. Start by preheating your oven to 375°F (190°C). This step helps the crust bake evenly. In a medium bowl, mix the all-purpose flour, softened unsalted butter, granulated sugar, and salt. Use a pastry cutter or your fingers to blend the mix until it looks like coarse crumbs. Next, add the vanilla extract for flavor. Slowly mix in ice-cold water, one tablespoon at a time. Keep mixing until the dough forms a ball. If it feels dry, add a bit more water. Now, divide the dough into 6 equal parts. Roll each part into a small ball. Press each ball into the bottom and sides of mini tartlet pans. Make sure the crust is even all around. In a separate bowl, take your ripe peaches and slice them thinly. Combine the peach slices with brown sugar, ground cinnamon, cornstarch, and lemon juice. Gently toss the mixture, ensuring each peach slice is coated. This mix adds sweetness and flavor to your tartlets. Fill each tartlet crust with the peach mixture. Distribute the slices evenly for a nice look. Place the tartlet pans in the oven. Bake for 20 to 25 minutes. Keep an eye on them! When the crust is golden brown and the peaches are bubbling, they are ready. Once baked, take the tartlets out and let them cool for about 5 minutes in the pans. Then, carefully move them to a wire rack. Let them cool completely. If you like, add fresh mint leaves on top before serving for a pop of color. Enjoy your peach tartlets! Get the dough right for perfect tartlets. Start with cold butter. Your dough should feel soft but not sticky. Mix the flour, butter, and sugar until it looks like crumbs. If it crumbles too much, add a bit of cold water. Add just one tablespoon at a time. This keeps your crust flaky and light. Choose ripe peaches for the best flavor. Look for peaches that are slightly soft when you press them. They should smell sweet and fragrant. If they are too hard, let them sit on the counter for a few days. Use ripe peaches to get that juicy goodness in every bite. Baking temperature is key for a golden crust. Always preheat your oven to 375°F (190°C). Bake your tartlets for 20-25 minutes. Keep an eye on them. The crust should be golden brown, and the peaches should bubble. This shows they are cooked perfectly. For the full recipe, you can check the detailed instructions above. {{image_4}} You can switch peaches for other fruits in tartlets. Try using ripe strawberries, sweet cherries, or tart apples. Each fruit brings its unique taste. For example, strawberries add a bright flavor. Cherries offer a deep, rich sweetness. Apples give a nice crunch. Just remember to adjust the sugar based on the fruit's sweetness. While the classic crust is tasty, you can explore new options. Use almond flour for a nutty twist. A graham cracker crust can add a sweet crunch. For a gluten-free option, try a crust made from oats. Mix oats with coconut oil and a touch of honey for a simple base. These crusts will give your tartlets a fresh feel. Spices and extracts can elevate your peach tartlets. Add a dash of nutmeg or ginger for warmth. You can also mix in a bit of almond extract for depth. Vanilla extract enhances the natural sweetness. Don’t be afraid to experiment! A little spice can change your dessert into something special. Check out the Full Recipe for more ideas on enhancing flavors. Store your leftover peach tartlets in a cool place. Use an airtight container to keep them fresh. If you plan to eat them within two days, leave them at room temperature. For longer storage, place them in the fridge. They will stay tasty for up to four days in the fridge. You can freeze peach tartlets for later enjoyment. First, let them cool completely. Then, wrap each tartlet in plastic wrap tightly. Place the wrapped tartlets in a freezer-safe bag or container. They can last up to three months in the freezer. When you're ready to eat, just thaw them in the fridge overnight. To enjoy your peach tartlets warm, preheat your oven to 350°F (175°C). Place the tartlets on a baking sheet. Heat them for about 10 to 15 minutes, or until they are warm all the way through. This method keeps the crust crispy. You can also use a microwave, but this may make the crust softer. Enjoy your delightful peach tartlets from the [Full Recipe] any time! Yes, you can prepare Peach Tartlets ahead of time. You can make the crust and filling in advance. Store the dough wrapped in plastic in the fridge for up to two days. The peach filling can stay fresh in the fridge for one day. On the day you want to serve them, simply assemble and bake. The best peaches for tartlets are ripe, juicy, and sweet. Look for yellow peaches or freestone peaches. They have great flavor and are easy to slice. Avoid peaches that are hard or have blemishes. They won’t taste as good in your tartlets. Serve Peach Tartlets on a pretty platter for special occasions. You can dust them with powdered sugar for a fancy touch. Add a scoop of vanilla ice cream on the side to make it even better. Fresh mint leaves can also add color and flavor. This makes your dessert look and taste amazing! For the full recipe, check out the details above. Making peach tartlets is fun and rewarding. We covered ingredients, tools, and the complete process. You learned tips for perfect consistency and how to choose ripe peaches. Variations allow you to get creative with flavors and crusts. Always store leftovers right to keep them fresh. Remember, these tartlets shine at any gathering. Enjoy experimenting and sharing your tasty creations!](https://blissfulmeal.com/wp-content/uploads/2025/06/1d8c01cb-eb34-4ace-8ddc-9e4e1742b134-768x768.webp)
![To make these tasty peach cobbler pancakes, you need some simple ingredients. Here’s what you'll need: - 1 cup all-purpose flour - 1 tablespoon baking powder - 1 tablespoon granulated sugar - 1/2 teaspoon fine sea salt - 1 cup buttermilk (room temperature) - 1 large egg (lightly beaten) - 1 tablespoon pure vanilla extract - 2 tablespoons unsalted butter (melted) - 1 cup fresh peaches (peeled and diced into small pieces) - 1 teaspoon ground cinnamon - 1/4 cup brown sugar (for sprinkling) - Whipped cream (for serving) These ingredients create a delicious mix of flavors. The fresh peaches bring sweetness. The cinnamon adds warmth. Together, they make breakfast feel special. You can find the full recipe at the end, which guides you through each step in detail. Start by gathering your dry ingredients. In a large bowl, sift together: - 1 cup all-purpose flour - 1 tablespoon baking powder - 1 tablespoon granulated sugar - 1/2 teaspoon fine sea salt Sifting helps mix the ingredients well and removes lumps. It also ensures your pancakes are light and fluffy. Now let's mix the wet ingredients. In a separate bowl, beat together: - 1 cup buttermilk (room temperature) - 1 large egg (lightly beaten) - 1 tablespoon pure vanilla extract - 2 tablespoons unsalted butter (melted) Mix them until smooth. The buttermilk adds a nice tang and helps the pancakes rise. Next, pour the wet mixture into the dry ingredients. Gently stir using a spatula or whisk. It's okay if the batter is slightly lumpy; this will make your pancakes fluffy. Then fold in: - 1 cup fresh peaches (peeled and diced) - 1 teaspoon ground cinnamon The peaches and cinnamon will bring out the warm, sweet flavors. Preheat a non-stick skillet or griddle over medium heat. Lightly grease it with a bit of butter. For each pancake, pour about 1/4 cup of batter onto the skillet. Cook for 2-3 minutes. Wait for bubbles to form on top. Then, flip them and cook for another 1-2 minutes until golden brown. As soon as you flip the pancakes, sprinkle a thin layer of brown sugar on top. This will caramelize and add a delightful finish. Serve the pancakes warm. Top them generously with whipped cream. You can add extra peach slices for a fresh touch. A light dusting of ground cinnamon is a great final touch. Stack the pancakes on a plate and enjoy the delicious flavors of peach cobbler in every bite! For the full recipe, check out the [Full Recipe]. To get the best pancake texture, mix your ingredients carefully. Overmixing makes pancakes tough. You want lumps in your batter. This keeps them fluffy and light. Use a spatula to fold in the peaches gently. This helps maintain that perfect texture. Select ripe, juicy peaches for the best flavor. Look for peaches that yield slightly when you press them. Avoid hard or overly soft ones. Fresh peaches enhance the taste and add sweetness. If you can't find ripe peaches, consider using canned peaches in juice. Just drain them well before adding to the batter. Presentation matters when serving Peach Cobbler Pancakes. Stack pancakes high on a round plate. Top with a generous dollop of whipped cream. Arrange extra peach slices around the base. Dust with cinnamon for a nice touch. A sprinkle of brown sugar adds sparkle and flavor. These small steps make your dish look restaurant-quality. Try these tips for a delightful breakfast that impresses! For the full recipe, check out the details above. {{image_4}} You can customize your peach cobbler pancakes with fun add-ins. Try adding chopped nuts like pecans or walnuts for a crunchy bite. Dark chocolate chips create a sweet twist. You can mix in spices too, like nutmeg or ginger, to enhance the flavor. A dash of almond extract can give it a unique taste. Experiment with these options to find your favorite. If peaches are not your favorite, many fruits work well in these pancakes. Fresh blueberries add a burst of flavor and color. Ripe bananas bring sweetness and softness. You could also use diced apples, which pair well with cinnamon. For a tropical twist, try crushed pineapple. Each fruit adds its own charm to the pancakes. To make these pancakes gluten-free, use a gluten-free flour blend. This swap keeps the texture light and fluffy. For a vegan version, replace buttermilk with almond milk mixed with vinegar. Use a flax egg instead of a regular egg: mix one tablespoon of ground flaxseed with three tablespoons of water. These options let everyone enjoy this tasty treat. For the full recipe, check out the instructions above. If you have leftover pancakes, store them in an airtight container. They stay fresh in the fridge for about 3 days. Make sure they cool completely before you seal them. This prevents moisture buildup, which can make them soggy. To reheat pancakes, use a skillet over low heat for the best results. Just place the pancakes in the skillet for about 1-2 minutes on each side. This warms them up nicely. You can also use a microwave. Heat them for about 20-30 seconds. But, they might not be as fluffy when reheated this way. You can freeze pancakes for a quick breakfast. Stack the cooled pancakes with parchment paper between each one. Then, place them in a freezer-safe bag. They can last up to 2 months in the freezer. When you want to eat them, just reheat directly from the freezer. Enjoy this tasty treat any day! For the full recipe, check out the details above. Yes, you can use frozen peaches. Just thaw them first. Drain excess juice to avoid soggy pancakes. Frozen peaches may cook faster, so watch them closely. For fluffier pancakes, avoid overmixing the batter. Mixing too much can make pancakes tough. Another tip is to let the batter rest for about 5 minutes before cooking. This helps the baking powder work better. You can top your pancakes with various items. Try vanilla ice cream for a sweet treat. Fresh berries or chopped nuts also add great flavor. A drizzle of maple syrup can enhance the taste. Each serving has about 250 calories. This includes 8 grams of fat and 4 grams of protein. The pancakes also have around 30 grams of carbs. Adjust toppings for different nutritional values. To make buttermilk, use regular milk. Add 1 tablespoon of vinegar or lemon juice to 1 cup of milk. Let it sit for about 5 to 10 minutes. It will thicken and curdle slightly, creating a perfect substitute for buttermilk. Making Peach Cobbler Pancakes is easy and fun. We covered all the main steps: gathering ingredients, mixing dry and wet, cooking, and serving. I shared tips to make them soft and tasty. Try out different fruits or toppings for more flavor. Store extras in the fridge or freezer for a quick treat. Enjoy these pancakes warm with whipped cream. They are a delicious way to start your day!](https://blissfulmeal.com/wp-content/uploads/2025/06/b77e1913-60af-4680-bcc8-8ad0f2778214-768x768.webp)
. First, we need to make the strawberries shine. Start with 2 cups of fresh strawberries. Hull and slice them, then put them in a medium bowl. Add 1 tablespoon of granulated sugar and 1 teaspoon of lemon juice. Stir gently and let them sit for about 10 minutes. This process is called macerating. It draws out the juice and makes the strawberries sweeter. After 10 minutes, transfer the strawberries to a blender. Blend them until you have a smooth puree. If you want some texture, save a few slices to add later. Next, we create a creamy base. Take 1 cup of cream cheese that is softened. In a large mixing bowl, use an electric mixer to beat it until smooth. This step is key for a lump-free texture. Then, slowly add 1 cup of heavy cream, 3/4 cup of sweetened condensed milk, and 1 teaspoon of pure vanilla extract. Keep mixing until everything is well combined and the mixture is velvety smooth. Now it's time to bring it all together. Gently fold in the strawberry puree you made earlier. If you saved some strawberry slices, add them now for fun bits of fruit. Next, mix in 1/2 cup of graham cracker crumbs. This gives your ice cream that classic cheesecake flavor. Pour the mixture into an airtight container. Smooth the top with a spatula. Freeze it for 4-6 hours or until it is firm. When ready to serve, let it sit for about 5 minutes at room temperature. This makes it easier to scoop. Enjoy your homemade strawberry cheesecake ice cream! For the full recipe, check out [Full Recipe]. To start, softening cream cheese is key. Cold cream cheese makes lumps. Let it sit out for 30 minutes. This makes mixing easy and gives a nice, smooth base. To avoid an icy texture, use heavy cream and sweetened condensed milk. These ingredients add creaminess. They help create a smooth, rich ice cream. Another tip is to mix well. This helps incorporate air into the mixture, giving it a light feel. When serving strawberry cheesecake ice cream, use chilled bowls. This keeps the ice cream from melting too fast. Scoop the ice cream high for a pretty look. For garnishes, fresh strawberries are a must! Add a slice or two on top. A sprinkle of graham cracker crumbs adds a nice touch. You can even drizzle some strawberry puree for extra flair. If your ice cream is too hard, try this: let it sit out for a few minutes. If it’s still tough, use a spoon to break it up. You can add a splash of milk to help soften it. Adjusting sweetness is easy. If it’s too sweet, add a pinch of salt. This balances the flavor. If it’s not sweet enough, mix in a bit of sugar or honey. Taste as you go for the best results. Making strawberry cheesecake ice cream is fun and simple. Follow these tips for a creamy and dreamy treat. For the complete recipe, check out the Full Recipe section. {{image_4}} You can make your strawberry cheesecake ice cream even tastier. Try adding other fruits like blueberries or raspberries. These fruits mix well with strawberries and add a pop of color. You can also infuse flavors with extracts. Almond or lemon extracts give a nice twist. Just a tiny bit can change the whole taste. If you want a lighter version, use Greek yogurt instead of cream cheese. It still gives creaminess but with fewer calories. For those who cannot have dairy, there are great dairy-free options. Use coconut cream or almond milk. Both work well and keep the ice cream creamy. Serving strawberry cheesecake ice cream can be fun! Make ice cream sandwiches with cookies. Use chocolate chip cookies or graham crackers for that cheesecake feel. You can also layer the ice cream with cake in a dessert parfait. This creates a stunning treat that looks great for any occasion. Feel free to explore these variations to make your dessert unique. Check out the Full Recipe for more tips! To keep your strawberry cheesecake ice cream fresh, use the right containers. Choose airtight containers. Glass or plastic containers work well. They prevent freezer burn, which can ruin the taste. You can also use freezer bags. Squeeze out the air to reduce ice crystals. When you freeze layers, use parchment paper. Cut pieces to fit the container. Place a layer of parchment on top of the ice cream. This helps keep the flavors fresh. You can add more layers, too. Just keep separating them with paper. You can enjoy your ice cream for about two weeks. After that, the flavor may fade, and the texture might change. To keep it at its best, store it in the back of the freezer. This area stays the coldest. If the ice cream seems hard, you can revive it. Take it out and let it sit for a few minutes. This helps soften it up for a creamy texture. Stirring it gently can also help bring back the smoothness. If you thaw your ice cream, be careful when re-freezing. Always thaw it in the fridge, not on the counter. This keeps bacteria from growing. After thawing, the texture might change. Ice crystals can form, making it less creamy. To help, stir the ice cream well before refreezing. Want to make your ice cream journey easier? Check out the Full Recipe to create this creamy delight at home! You can make this ice cream without an ice cream maker. First, follow the recipe steps until you blend the cream cheese base. After mixing in the strawberry puree and graham cracker crumbs, pour the mixture into a shallow dish. Use a spatula to spread it evenly. Place it in the freezer. Every 30 minutes, stir it with a fork for about 2 to 3 hours. This helps create a smooth texture without an ice cream maker. Yes, you can use frozen strawberries. If you choose frozen, thaw them first. Drain any extra liquid before blending. This helps avoid a watery texture. You might want to add a bit more sugar if the strawberries are not sweet enough. Frozen berries can give a different taste, but they still work well in this recipe. This ice cream has about 200 calories per serving. It usually contains 12 grams of fat and 15 grams of sugar. The exact numbers can change based on the brands you use. Check the labels on your ingredients to get precise values. You can also adjust the sugar to make it a little healthier. You can use low-fat cream cheese, but it may change the taste and texture. Low-fat options may not be as rich or creamy. The flavor might be less bold. If you want a lighter version, try using Greek yogurt instead. This will keep some creaminess while cutting down on fat. You now have all the tools to make delicious strawberry cheesecake ice cream. We discussed the main and additional ingredients, the essential equipment, and how to prepare, mix, and freeze your treat. I shared tips for perfecting the texture and ways to troubleshoot common issues. You can even explore fun variations or storage tips to keep your ice cream fresh. Enjoy your homemade treat! It’s perfect for sharing.](https://blissfulmeal.com/wp-content/uploads/2025/06/68ff4d34-2dce-4ecb-80c0-54b90951f97a-768x768.webp)
![Peanut Butter Oatmeal Energy Balls need simple, wholesome ingredients. Here’s what you need: - 1 cup rolled oats - 1/2 cup peanut butter (smooth or chunky) - 1/3 cup honey or maple syrup - 1/4 cup chocolate chips (dark or semi-sweet) - 1/4 cup ground flaxseed (optional) - 1/2 teaspoon vanilla extract - A pinch of sea salt - 1/3 cup shredded coconut (optional) These ingredients work together to make a tasty snack. Each ingredient brings unique benefits: - Rolled oats: These provide fiber, which helps keep you full. - Peanut butter: This is rich in protein and healthy fats. It fuels your body. - Honey or maple syrup: Both sweeteners offer quick energy. They add natural sweetness. - Chocolate chips: These give a touch of sweetness and can lift your mood. - Ground flaxseed: This adds omega-3 fatty acids, good for heart health. - Vanilla extract: This enhances flavor and aroma, making it more enjoyable. - Sea salt: Just a pinch balances flavors and can boost hydration. - Shredded coconut: This adds a tropical flair and healthy fats. Together, these ingredients create a balanced snack. You can adapt this recipe based on your taste or needs. Here are some ideas: - Nut butter: Swap peanut butter for almond, cashew, or sunflower seed butter. - Sweeteners: Use agave syrup or brown rice syrup instead of honey. - Chocolate chips: Try dried fruit, like raisins or cranberries, for a fruity twist. - Flaxseed: Chia seeds work well as an alternative for added nutrition. - Coconut: Omit shredded coconut if you prefer a different texture or taste. These substitutions keep the energy balls delicious while fitting your diet. For the full recipe, check out the Peanut Butter Oatmeal Energy Balls 🥜 section. To start, gather your ingredients. You will need rolled oats, peanut butter, honey, and more. In a large bowl, combine 1 cup rolled oats, 1/4 cup ground flaxseed (if you choose), and a pinch of sea salt. Mix these dry items well. This step sets a strong base for flavor and texture. Next, melt the peanut butter and honey together. Put 1/2 cup peanut butter and 1/3 cup honey in a microwave-safe bowl. Heat for 20-30 seconds. After melting, pour it into the dry mix. Add 1/2 teaspoon vanilla extract and 1/4 cup chocolate chips. If you want, you can add 1/3 cup shredded coconut too. Use your hands or a spatula to mix everything. The mix should feel sticky but blend well together. Now, take small amounts of the mix and roll them into balls. Aim for about a tablespoon in size. Put each ball on a lined baking sheet, leaving space between them. This helps them not stick together. Finally, place the baking sheet in the fridge. Let the energy balls chill for at least 30 minutes. This will help them firm up nicely. Once they are set, store them in an airtight container or a ziplock bag. Enjoy as you need! For more details, check the Full Recipe. To achieve the best texture, mix your dry and wet ingredients well. Each energy ball should feel sticky but not too wet. If the mix is too dry, add a splash of water or more honey. If it's too wet, add a bit more oats. This balance ensures they hold together well. Store your energy balls in an airtight container. They will stay fresh in the fridge for about one week. For longer storage, freeze them in a ziplock bag. This way, you can grab a quick snack anytime. Just let them thaw for a few minutes before eating. Make your energy balls look great! Drizzle melted chocolate over the tops for a sweet touch. You can also roll them in shredded coconut for added flair. Serve them on a pretty plate to impress friends or family. These simple ideas make your snack both tasty and fun! For the complete recipe, check out the full recipe. {{image_4}} You can change the flavor of your energy balls easily. Try adding cinnamon for warmth. You can use almond butter instead of peanut butter for a nutty twist. How about a touch of cocoa powder? It adds rich chocolate flavor. You could also mix in dried fruits like cranberries or apricots for sweetness and chewiness. Each change gives a new taste to your snack! If you follow a vegan diet, swap honey for maple syrup. This keeps it plant-based and delicious. For a gluten-free version, ensure your oats are certified gluten-free. This way, everyone can enjoy these energy balls! You can also make them nut-free by using sunflower seed butter instead. This way, kids at school can enjoy them too! You can boost the nutrition of your energy balls with some easy add-ins. Consider mixing in chia seeds or hemp seeds for extra fiber and protein. You can also add protein powder for a post-workout snack. Ground flaxseed is a great addition too; it’s already in the recipe. It gives healthy fats and helps keep you full. These small changes can make a big difference in nutrition! For the full recipe, check out the details above. To keep your Peanut Butter Oatmeal Energy Balls fresh, store them in an airtight container. You can use a glass jar or a ziplock bag. Make sure to separate layers with parchment paper to avoid sticking. Keeping them cool helps maintain taste and texture. If you want to enjoy these energy balls later, freezing is a great option. Simply place the energy balls in a single layer on a baking sheet. Freeze them for about an hour until solid. Then transfer them to a ziplock bag. Remove as much air as possible to prevent freezer burn. In the fridge, these energy balls stay fresh for up to one week. If you freeze them, they can last up to three months. Always label your containers with the date. This way, you will know when you made them and use them at their best. Enjoy these snacks anytime! For the full recipe, check the [Full Recipe]. Peanut Butter Oatmeal Energy Balls stay fresh for about one week in the fridge. Store them in an airtight container. For longer storage, you can freeze them. They can last for up to three months in the freezer. Just thaw before eating! Yes, you can make these energy balls vegan. Use maple syrup instead of honey. Choose natural peanut butter that contains only peanuts. This way, your energy balls will be fully plant-based and just as tasty! If you need a substitute for peanut butter, try almond butter or sunflower seed butter. These options work well and add different flavors. They also provide similar nutrition, keeping your energy balls healthy. I recommend enjoying two to three energy balls as a snack. They are filling, thanks to the oats and nut butter. Listen to your body and adjust based on your hunger! You can definitely customize the ingredients! Add nuts, seeds, or dried fruit for extra flavor and nutrition. You can also change the sweetener to fit your taste. Get creative and make these energy balls your own! For the full recipe, check out the details above. In this article, I covered the key parts of making Peanut Butter Oatmeal Energy Balls. We looked at the important ingredients and their benefits. I shared step-by-step instructions for perfecting your mix. Tips helped you with storage and presentation. I also offered great variations and answers to common questions. Now, you have the tools to make tasty snacks at home. Enjoy making and sharing your energy balls!](https://blissfulmeal.com/wp-content/uploads/2025/06/20e3613d-61be-4491-a909-a9822bfd6b71-768x768.webp)
![- 1 ½ cups all-purpose flour - 1 cup granulated sugar - ½ cup unsalted butter, softened - 2 large eggs - 1 teaspoon pure vanilla extract - 1 teaspoon baking powder - ½ teaspoon baking soda - ¼ teaspoon fine sea salt - ½ cup whole milk, at room temperature - ½ cup rainbow sprinkles (plus extra for topping) - Optional: 1 cup cream cheese frosting To make my homemade Funfetti cupcakes, I gather these key ingredients. The flour gives the cupcakes body. The sugar sweetens them up. Softened butter adds rich flavor and moistness. Eggs help bind everything together. Vanilla extract brings warmth and depth. I also rely on leavening agents to make my cupcakes rise. Baking powder and baking soda help create that soft, fluffy texture. A pinch of fine sea salt balances the sweetness. For extra creaminess, I use whole milk. The rainbow sprinkles are what make these cupcakes special. They add color and joy to each bite. If you want to make them even more delicious, I suggest cream cheese frosting. It complements the sweetness perfectly. This simple list of ingredients creates a delightful treat. You can use the [Full Recipe] for detailed steps. - Preheat oven to 350°F (175°C). - Line a cupcake pan with liners. Before you start mixing, make sure your oven is ready. Set it to 350°F (175°C) so it heats while you prep. Grab your cupcake pan and line it with fun cupcake liners. This step helps the cupcakes pop out easily after baking. - Cream together butter and sugar. - Incorporate eggs and vanilla extract. - Combine dry ingredients separately. In a big bowl, cream the softened butter and sugar. Use an electric mixer on medium speed. Mix for about 3-4 minutes until it's creamy. Next, add the eggs one at a time. Make sure each egg mixes in well before adding the next. Now, pour in the pure vanilla extract for extra flavor. In another bowl, whisk the flour, baking powder, baking soda, and sea salt together. This helps the leavening agents mix well. - Gradually mix dry ingredients with wet. - Fold in rainbow sprinkles. Now it’s time to combine! Slowly mix the dry ingredients into the butter mixture. Alternate adding the flour mix and the whole milk. Start and end with the flour mix. Mix just until combined; don’t over-mix! Next, gently fold in the rainbow sprinkles. This adds the funfetti effect! - Fill liners with batter. - Bake for 18-20 minutes and check for doneness. Carefully fill each cupcake liner with batter. Fill them about two-thirds full. This lets the cupcakes rise without spilling over. Place the pan in the oven and bake for 18-20 minutes. To check if they are done, insert a toothpick into the center. If it comes out clean, they are ready! - Cool in the pan for 5 minutes. - Transfer to wire rack and cool completely. - Frost and decorate. Let the cupcakes cool in the pan for about 5 minutes. Afterward, transfer them to a wire rack. This helps them cool completely. Once cool, frost them with cream cheese frosting. Don’t forget to add extra rainbow sprinkles on top for a festive look! For the full recipe, check out the details earlier in this article. To make your Funfetti cupcakes light and fluffy, avoid over-mixing the batter. When you mix too much, you develop gluten. This can lead to dense cupcakes, which no one wants. Mix just until you see no dry flour. Make sure your ingredients are at room temperature. This helps them blend better. Cold butter or eggs can make your batter lumpy. Warm ingredients create a smooth mix that rises well. What should you do if your cupcakes rise too much? If they dome too high, they can crack. To fix this, try reducing the baking time slightly. Start checking them a minute early next time. If your cupcakes turn out dense, it often means you mixed too much. You can also check your baking powder. If it's old, it may not rise properly. Always use fresh leavening agents for best results. Get creative with frosting your cupcakes. You can use a piping bag for swirls or a simple knife for a smooth finish. Adding fun toppings makes them pop. Consider using different sprinkles, crushed cookies, or even fruit for added flair. A drizzle of chocolate or caramel sauce also adds a fun touch. Play around with colors and textures to make your cupcakes stand out. For the full recipe of these delightful treats, check out the complete guide! {{image_4}} You can have fun with flavors in your Funfetti cupcakes. For a twist, try chocolate Funfetti cupcakes. Just add ¼ cup of unsweetened cocoa powder to your dry mix. This change gives a rich taste and pairs well with the sweet sprinkles. The chocolate will make the cupcakes extra special. Another option is lemon Funfetti cupcakes. Replace half the milk with fresh lemon juice and add lemon zest. This brightens the flavor and adds a nice zing. Both of these variations keep the fun sprinkle surprise while changing the taste. If you need gluten-free Funfetti options, use a gluten-free flour blend. Make sure it has binding agents like xanthan gum. This will help the cupcakes rise and stay fluffy. Gluten-free cupcakes can still be moist and tasty. For dairy-free substitutes, swap the butter for coconut oil or a dairy-free spread. Use almond milk or oat milk instead of whole milk. This way, you can enjoy cupcakes that fit your diet while still tasting great. Get creative with mix-ins and toppings! You can add nut butters like peanut or almond for a rich flavor. Just fold in a few tablespoons into the batter before baking. This adds a nutty taste and pairs wonderfully with the sweetness. You can also add fresh fruits like mashed bananas or diced strawberries. They add moisture and a burst of flavor. For sprinkles, don’t feel limited to rainbow ones. Try themed sprinkles for holidays, like red and green for Christmas. Or use pastel shades for spring. Each choice brings a unique look and feel to your cupcakes. These variations and adjustments make your Funfetti cupcakes your own. You can mix and match to create something special for any occasion. For the full recipe, check the Full Recipe section above. To keep your funfetti cupcakes fresh, store them in an airtight container at room temperature. This helps maintain their moisture and texture. If you have frosted cupcakes, it’s better to keep them in the fridge. This prevents the frosting from melting or getting sticky. For unfrosted cupcakes, you can leave them on the counter. Just make sure they are cool before you store them. If you cover them too soon, they can get soggy. A simple trick is to place a paper towel inside the container to absorb moisture. Freezing cupcakes is easy and perfect for later enjoyment. Start by allowing the cupcakes to cool completely. Then, wrap each cupcake in plastic wrap. After that, place them in a freezer bag or container. This keeps them safe from freezer burn. To thaw, take them out and let them sit at room temperature for about an hour. If you want to frost them afterward, wait until they are fully thawed. This helps the frosting stick better. When ready, add your cream cheese frosting and extra sprinkles for that festive look. For the full recipe, you can check the earlier section. To make your Funfetti cupcakes pop with color, try a few mixing techniques. Use fresh, high-quality sprinkles for the best results. You can also add food coloring to your batter. Just a few drops will brighten the mix. When you fold in the sprinkles, do this gently to keep colors vibrant. Avoid over-mixing; this keeps sprinkles from bleeding and fading. Yes, you can use cupcake mix, but there are pros and cons. A mix saves time and effort. It can taste good, too, but it may lack the homemade feel. The texture might not be as light and fluffy as from scratch. If you want a fun flavor, try adding extra sprinkles or a splash of vanilla. This can elevate a mix into something special. Homemade Funfetti cupcakes last about three days at room temperature. Keep them in an airtight container to stay fresh. If you add frosting, store them in the fridge to avoid spoilage. For longer storage, freeze them. They can last up to three months frozen. Just remember to wrap them well to prevent freezer burn. Cream cheese frosting pairs perfectly with Funfetti cupcakes. Its tangy flavor complements the sweet cake. You can also use vanilla buttercream for a classic taste. If you like chocolate, try chocolate ganache. Each option adds a fun twist. Feel free to mix and match frostings for more flavor fun! For more ideas, check out the Full Recipe for inspiration. Funfetti cupcakes are fun to make and even more fun to eat. We covered the main ingredients, from flour and sugar to rainbow sprinkles. I shared step-by-step instructions for a easy baking process. Plus, I offered tips for fluffiness and decorating ideas. Remember, you can mix flavors and adjust for dietary needs. Store them properly or freeze for later. Enjoy this treat at any time. Happy baking!](https://blissfulmeal.com/wp-content/uploads/2025/06/92ebd519-e56c-44b6-8e82-f3ac392a4264-768x768.webp)