Skip to content
About
Contact
Cookie Policy
Copyright Policy
Disclaimer
Search
Home
Dinner
Appetizer
Desserts
Drinks
About
Contact
Privacy Policy
Toggle Menu
Home
/
Desserts
- Page 20
Desserts
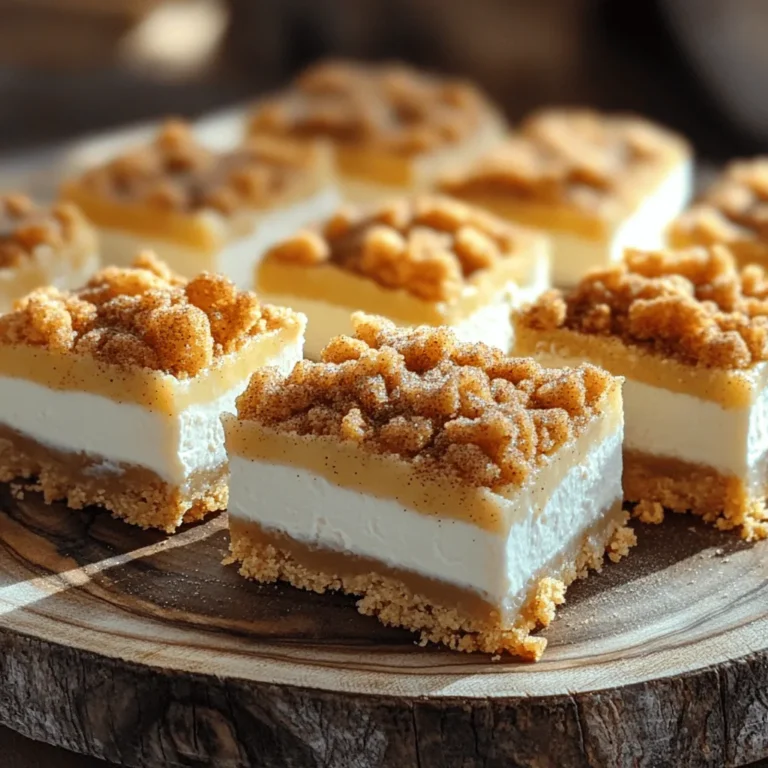
Churro Cheesecake Bars Irresistible Sweet Treat
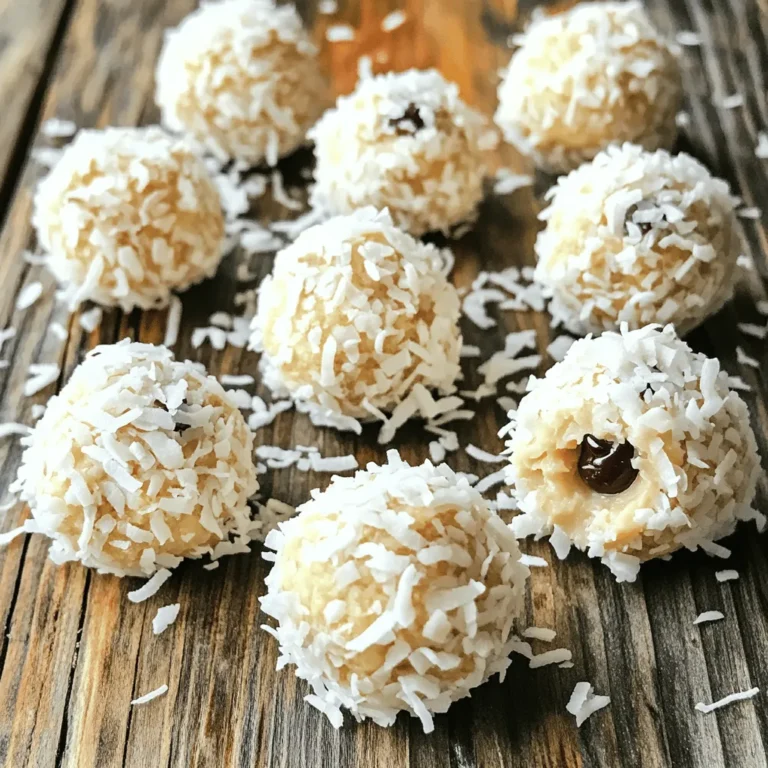
Powerful No-Bake Coconut Energy Bites Recipe Guide
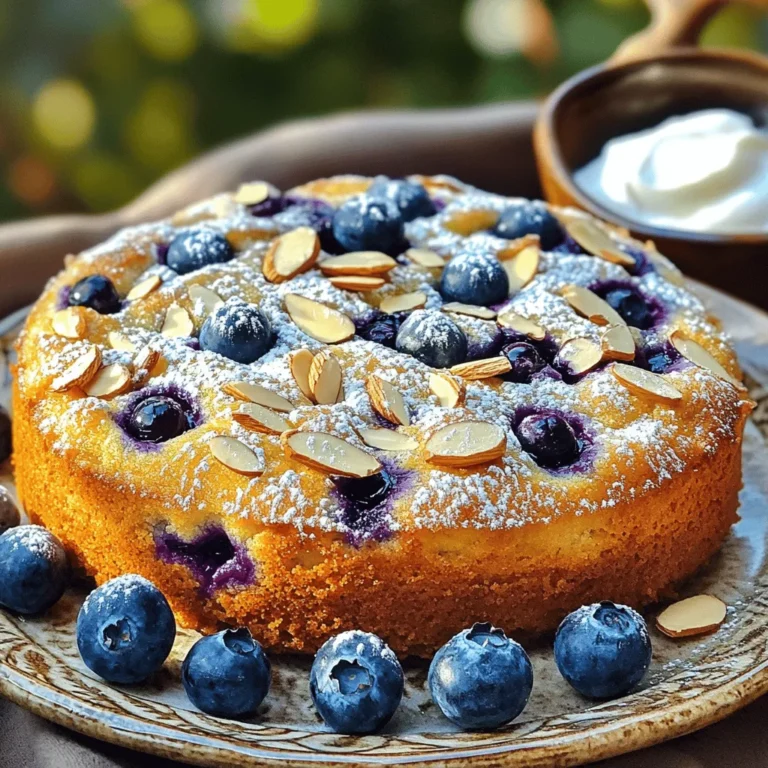
Blueberry Almond Breakfast Cake Simple and Tasty Treat
Peanut Butter Chocolate Chip Cookies Irresistible Treat
Cinnamon Roll Pancakes Fluffy and Flavorful Delight
Blueberry Almond Overnight Oats Flavorful and Easy Recipe
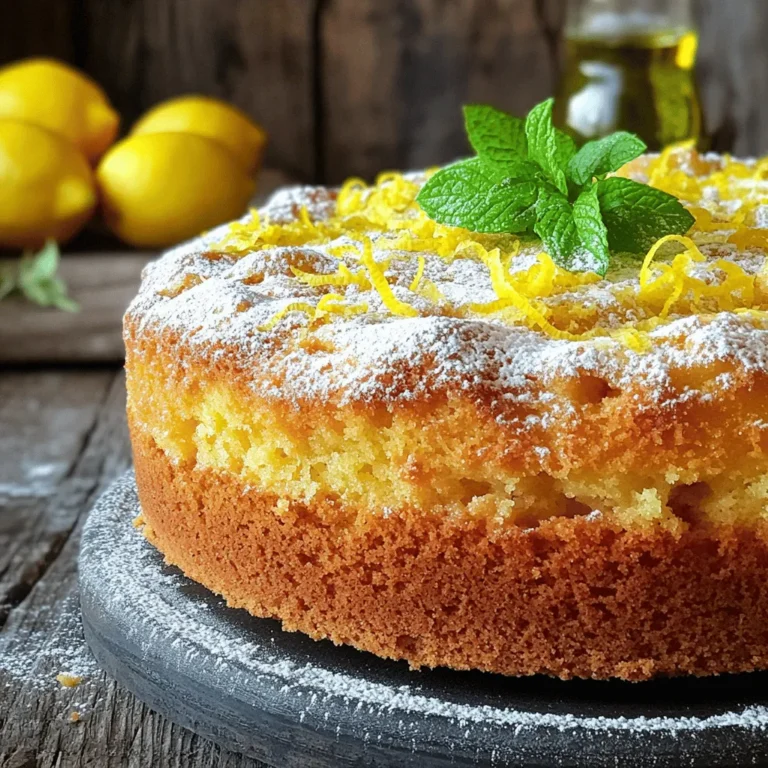
Lemon Olive Oil Cake Delightfully Moist and Tangy
Chocolate Dipped Strawberries Delightful Easy Recipe
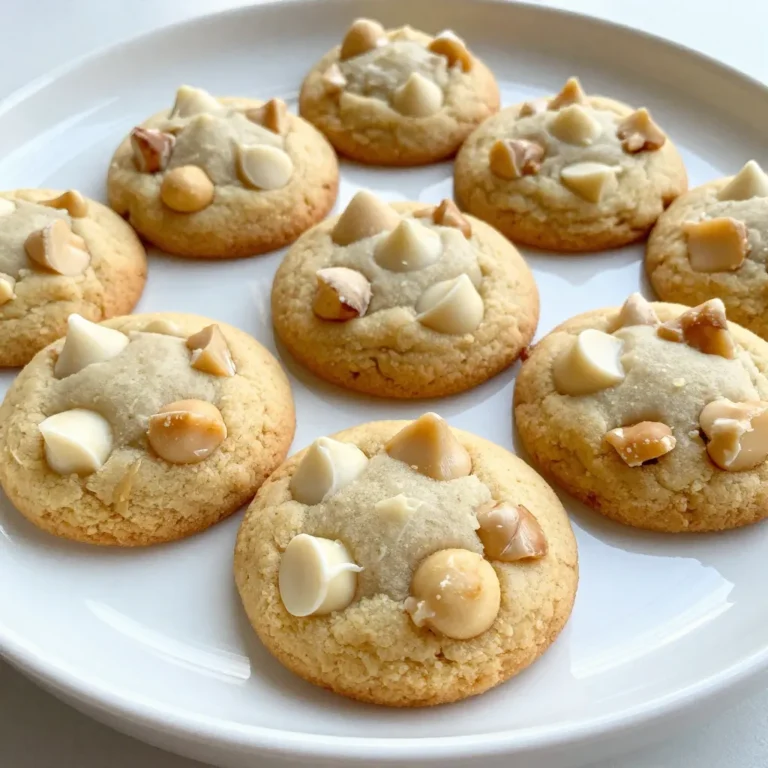
White Chocolate Macadamia Nut Cookies Delightfully Soft
Maple Syrup Granola Bars Healthy Snack Idea
Page navigation
Previous Page
Previous
1
…
18
19
20
21
22
…
27
Next Page
Next
Home
Dinner
Appetizer
Desserts
Drinks
About
Contact
Privacy Policy
Toggle Menu Close
Search for:
Search


![To make these delicious cinnamon roll pancakes, you'll need the following: - 1 cup all-purpose flour - 2 tablespoons granulated sugar - 2 teaspoons baking powder - 1/2 teaspoon baking soda - 1/4 teaspoon fine sea salt - 1 cup buttermilk, at room temperature - 1 large egg - 2 tablespoons unsalted butter, melted and cooled slightly - 1 teaspoon pure vanilla extract The cinnamon swirl adds a delightful twist. Gather these: - 1/4 cup packed light brown sugar - 1 tablespoon ground cinnamon - 2 tablespoons unsalted butter, softened to room temperature This glaze makes the pancakes even better. You will need: - 1/2 cup cream cheese, softened - 1/4 cup powdered sugar - 1 tablespoon milk, plus more as needed - 1/2 teaspoon pure vanilla extract These ingredients come together to create a warm, comforting dish that feels like a hug in the morning. When you follow the Full Recipe, you will see how easy it is to make these pancakes at home. Start by making the cinnamon swirl. In a small bowl, mix together the packed light brown sugar, ground cinnamon, and softened butter. Use a fork to blend until smooth and creamy. This should take about a minute. Set the mixture aside. Let it cool slightly so it firms up a bit. This helps the swirl hold its shape when you cook the pancakes. Next, prepare the pancake batter. In a large bowl, whisk together the all-purpose flour, granulated sugar, baking powder, baking soda, and fine sea salt. Mix these dry ingredients well. In another bowl, combine the buttermilk, large egg, melted butter, and vanilla extract. Stir these wet ingredients together. Pour the wet mix into the dry mix. Gently stir until just combined. Don’t worry if there are a few lumps. This batter is ready when it looks slightly lumpy. Now, it's time to cook! Preheat a non-stick skillet or griddle over medium heat. Lightly grease the surface with butter or a spray. For each pancake, pour about 1/4 cup of batter onto the skillet. Take a teaspoon of your cinnamon swirl mixture. Drizzle it over the batter in a spiral pattern. Use a toothpick or the back of a spoon to create the swirl. Cook until bubbles form on the surface, about 2 to 3 minutes. Then, flip the pancake and cook for another 1 to 2 minutes until golden brown. Repeat this process until all the batter is cooked. While the pancakes are cooking, let's make the cream cheese glaze. In a medium bowl, blend the softened cream cheese, powdered sugar, milk, and vanilla extract. You can use a hand mixer or a whisk. Mix until the glaze is smooth and creamy. If you want a thinner glaze, add a teaspoon of milk until you reach your desired consistency. When the pancakes are ready, stack them on a serving plate. Drizzle the cream cheese glaze generously over the top. Let the glaze run down the sides for a beautiful look. For extra flair, sprinkle some cinnamon sugar or finely chopped nuts on top. Fresh berries also add color and freshness. Enjoy your delightful cinnamon roll pancakes! For the full recipe, check out the earlier section. To get fluffy pancakes, mix your batter gently. Overmixing makes the pancakes tough. Aim for some lumps in your batter; they will go away when cooked. Use room temperature buttermilk for a lighter texture. It helps the pancakes rise well. When cooking, keep the heat medium. This ensures golden brown pancakes inside and out. If you want to switch up the flour, try whole wheat flour. It adds a nutty flavor and more fiber. You can also use almond flour for a gluten-free option. Just remember, almond flour can make pancakes a bit denser. Mixing different flours can give you unique textures and tastes. For the best swirl, use a toothpick or the back of a spoon. Right after pouring the batter, add a teaspoon of your cinnamon mixture. Swirl it gently to create a spiral pattern. Don’t mix it in fully; keep some of that cinnamon layer. This gives you that delicious cinnamon roll taste in each bite. Follow these tips for the perfect cinnamon roll pancakes! You can find the full recipe above. {{image_4}} You can make these pancakes even better! Adding chocolate chips or nuts can bring new flavors. For chocolate lovers, sprinkle a handful of mini chocolate chips into the batter. They melt nicely and add sweetness. If you like crunch, try adding chopped nuts, like pecans or walnuts. Mix them in just before you cook the pancakes. This adds a tasty twist to your cinnamon roll pancakes. Want to make a healthier version? You can swap some ingredients. Use whole wheat flour instead of all-purpose flour. This adds fiber and nutrients. You can also use almond milk or oat milk instead of buttermilk. If you want to cut sugar, try using honey or maple syrup in the batter. These changes keep the flavor but make the dish a bit lighter. Seasonal flavors can change your pancakes too. In fall, add pumpkin puree and a pinch of nutmeg for a warm taste. In winter, try adding crushed peppermint candies for a festive touch. During summer, mix in fresh berries like blueberries or strawberries. These add color and a burst of flavor. Each season brings new ideas to keep your pancakes exciting. For the full recipe and more tips, check out the [Full Recipe]. After making your cinnamon roll pancakes, you might have some left over. To store them properly, let the pancakes cool down to room temperature. Then, stack them with a piece of parchment paper in between each pancake. This will help prevent sticking. Place the stack in an airtight container. You can keep them in the fridge for up to three days. When you are ready to enjoy your leftover pancakes, you can easily reheat them. The microwave is the quickest way. Just place one pancake on a microwave-safe plate and heat it for about 15 to 30 seconds. If you want them to be crispy, use a skillet. Heat the skillet over medium heat and warm each pancake for about one minute on each side. This method keeps them fluffy and delicious. Freezing pancakes is a great way to keep them fresh longer. Once your pancakes are cool, stack them with parchment paper in between. Then, wrap the stack tightly in plastic wrap. Place the wrapped pancakes in a freezer-safe bag or container. You can freeze them for up to two months. When you're ready to eat them, thaw the pancakes in the fridge overnight. Then, use the reheating techniques to enjoy them warm. Yes, you can make these pancakes gluten-free. Use a gluten-free flour blend instead of all-purpose flour. Many blends work well, like almond or coconut flour. Just check the package for best results. Adjust the liquid if needed, since some gluten-free flours absorb more moisture. To get that perfect swirl, use a squeeze bottle or a piping bag. Fill it with the cinnamon swirl mixture. Gently squeeze it on top of the batter in a spiral. Start from the center and move outward. Practice makes it easier, so don’t worry if it’s not perfect at first! You can top your pancakes with many tasty options. Try maple syrup for a classic touch. Fresh fruit like strawberries or bananas adds color and flavor. Whipped cream or a sprinkle of nuts gives it a nice crunch. Get creative with toppings you love! Yes, you can prepare the batter ahead of time. Just mix the dry and wet ingredients separately. Combine them just before cooking. This way, your pancakes stay fluffy. If you make the batter the night before, store it in the fridge. Give it a good stir before cooking. Cinnamon roll pancakes are a fun twist on breakfast. We covered the key ingredients and detailed steps. You learned how to mix the swirl and batter, cook the pancakes, and prepare the glaze. I also shared tips for the perfect texture and creative variations. Don’t forget about storage options for leftovers. Enjoying these pancakes can become a delicious family tradition. Try them out and find your favorite flavors! They’re sure to make your mornings brighter!](https://blissfulmeal.com/wp-content/uploads/2025/06/58adda25-98e6-46aa-b11b-812fbe89b844-768x768.webp)
![To make blueberry almond overnight oats, gather the following ingredients: - 1 cup rolled oats - 1 cup almond milk (or any milk of choice) - 1/2 cup Greek yogurt (either plain or vanilla for added sweetness) - 1 cup fresh blueberries (or thawed frozen blueberries) - 2 tablespoons maple syrup (or substitute with honey) - 1/4 teaspoon almond extract - 1 tablespoon chia seeds - 1/4 cup sliced almonds - A pinch of salt Each ingredient plays a key role in the dish. The oats are the base, giving it texture. Almond milk adds creaminess without dairy. Greek yogurt boosts protein and richness. Blueberries bring natural sweetness and color. Maple syrup or honey offers extra sweetness. Almond extract enhances the nutty taste. Chia seeds help thicken the mixture and add nutrition. Sliced almonds give a nice crunch. Finally, a pinch of salt balances the flavors. For more details, check out the full recipe. To start, grab a medium-sized mixing bowl. Combine 1 cup of rolled oats, 1 cup of almond milk, and 1/2 cup of Greek yogurt. Stir well until the oats soak up the creamy mix. Next, add in 2 tablespoons of maple syrup, 1/4 teaspoon of almond extract, 1 tablespoon of chia seeds, and a pinch of salt. This mix brings sweetness and flavor to the oats. Now, gently fold in 1 cup of fresh blueberries. Remember to set aside a few blueberries for topping later. The blueberries add a burst of flavor and color to your oats. Next, portion the oat mixture into two airtight containers or jars. Make sure each layer is packed well. Don’t forget to sprinkle 1/4 cup of sliced almonds on top. This adds a nice crunch. Seal the containers tightly and place them in the fridge. Let them chill overnight or for at least 4 hours. This soaking time makes the oats soft and tasty. For the full recipe, check out the [Full Recipe]. Enjoy your delicious blueberry almond overnight oats! To make your oats creamier, add extra almond milk. This small change can transform your breakfast. If you find the oats too bland, adjust the sweetness. You can add more maple syrup or honey. Taste as you go to find your perfect balance. I recommend soaking your oats overnight. This lets them absorb all the flavors. The oats soften and become nice and creamy. Resting them also allows the chia seeds to thicken the mix. You’ll get a better texture in the morning. Serving in clear jars makes your dish visually appealing. You can see the layers of oats, blueberries, and almonds. It looks great and tastes even better! For a fun touch, add mint leaves on top. They add color and a fresh flavor that brightens your dish. {{image_4}} You can easily change the fruit in your overnight oats. Try strawberries, bananas, or peaches. Each fruit adds a unique taste. If you want a creamy twist, swap almond milk for coconut milk. You can also use regular milk or oat milk. Adding flavored yogurt, like vanilla, can boost the taste too. If you love nuts, explore different types. You can use walnuts, cashews, or pecans. Nut butter, like almond or peanut, adds richness. If you prefer seeds, consider hemp seeds or pumpkin seeds. They add crunch and nutrition without nuts. Adjust the sweetness to fit your taste. You can try agave or stevia instead of maple syrup. Honey is a great substitute too. Remember, you can always add less sweetener at first. Taste the mixture and add more if needed. It’s all about making it perfect for you. Check out the full recipe for all the details! To keep your blueberry almond overnight oats fresh, store them in airtight containers. This helps lock in moisture and flavor. Place them in the refrigerator as soon as you make them. Your oats will stay fresh for up to five days. If you want them to taste their best, eat them within three days. You can freeze your overnight oats for later. Use freezer-safe containers or jars. Leave some space at the top to allow for expansion. When you want to enjoy them, move them to the fridge overnight to thaw. You can also microwave them for a quick reheat. Just remember to stir well after heating. Look for signs that your oats are no longer fresh. If they smell sour or have an off-color, it's best to toss them out. Mold or a strange texture are also clear signs of spoilage. Always use clean utensils to avoid cross-contamination. Keeping your storage areas clean helps ensure safety. Yes, you can use regular oats. However, rolled oats give a better texture. They soften well overnight. Regular oats may turn mushy or lose their shape. If you use regular oats, watch the soaking time. You might need less time for them to soften. These oats can last up to five days in the fridge. Store them in airtight jars. The oats stay fresh and tasty. After five days, they may lose flavor and texture. Always check for any signs of spoilage before eating. Absolutely! Meal prepping is a great idea. You can make several jars at once. Just follow the Full Recipe for each jar. This way, your breakfast is ready for days. Keep them in the fridge for easy access. Most rolled oats are gluten-free. However, some may be processed in a facility with gluten. Always check the label. If you need a gluten-free option, choose certified gluten-free oats. This way, you can enjoy your oats worry-free. You can use regular yogurt, dairy-free yogurt, or cottage cheese. Each option offers different flavors and textures. If you're looking for a vegan option, choose coconut or almond yogurt. These substitutes keep your oats creamy and delicious. In this post, we explored how to make blueberry almond overnight oats. You learned about the simple ingredients, step-by-step instructions, and helpful tips. I highlighted variations for taste and how to store these oats effectively. These oats offer a nutritious start to your day. Experiment with flavors to find your favorite. Enjoy making this easy and healthy breakfast that fits your needs. Remember, overnight oats are quick, versatile, and great for meal prep. Get creative and have fun with your meals!](https://blissfulmeal.com/wp-content/uploads/2025/06/f021ab2b-46c8-4474-aa34-0a4afddedc64-768x768.webp)