Skip to content
About
Contact
Cookie Policy
Copyright Policy
Disclaimer
Search
Home
Dinner
Appetizer
Desserts
Drinks
About
Contact
Privacy Policy
Toggle Menu
Home
/
Dinner
- Page 11
Dinner
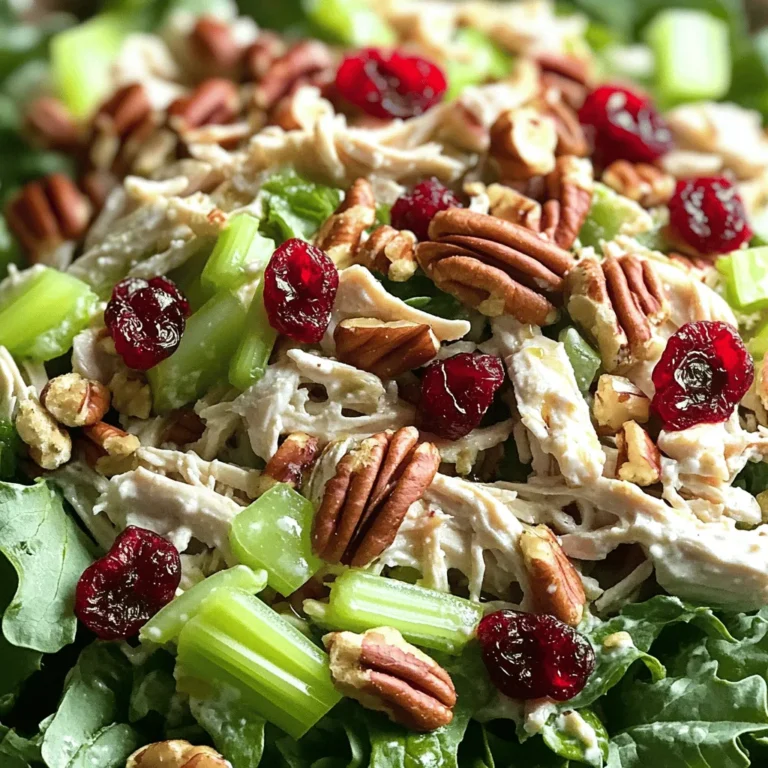
Cranberry Pecan Chicken Salad Tasty and Light Meal
Pineapple Teriyaki Meatballs Flavorful and Simple Recipe
One-Pot Cheeseburger Soup Hearty and Simple Meal
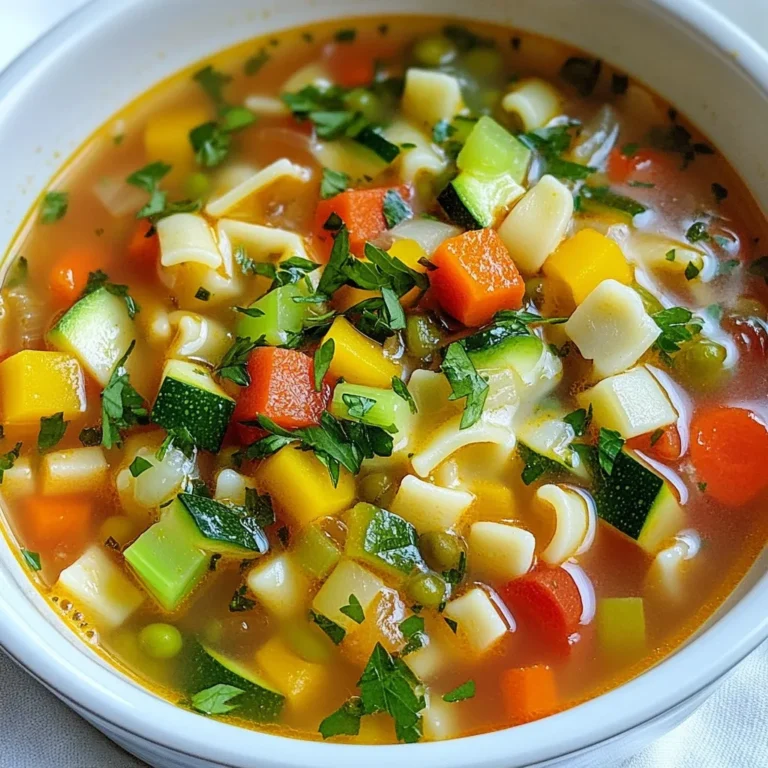
Instant Pot Minestrone Soup Flavorful and Easy Recipe
Creamy Roasted Red Pepper Pasta Delightful Dish
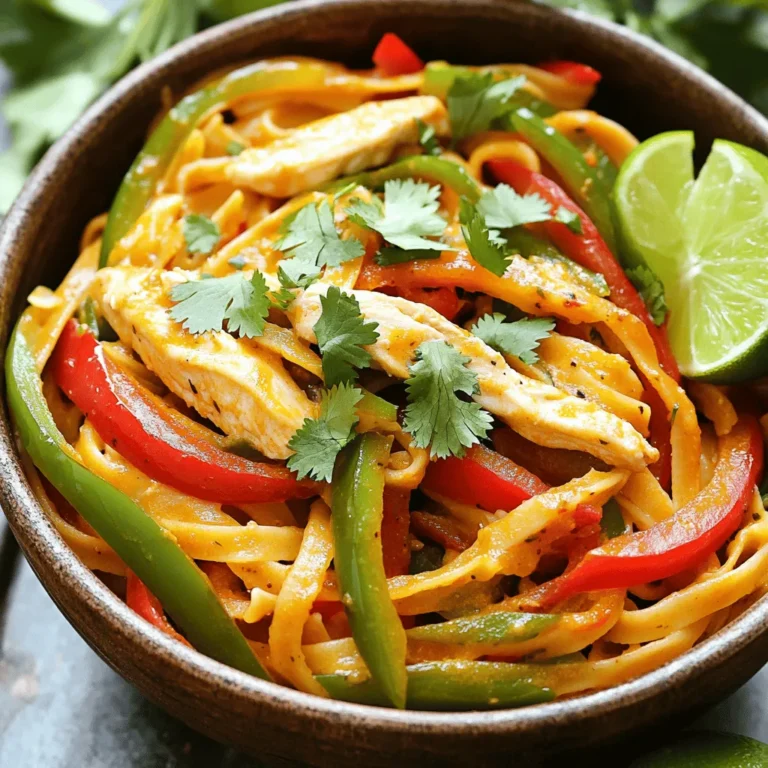
One-Pot Chicken Fajita Pasta Flavorful Dinner Delight
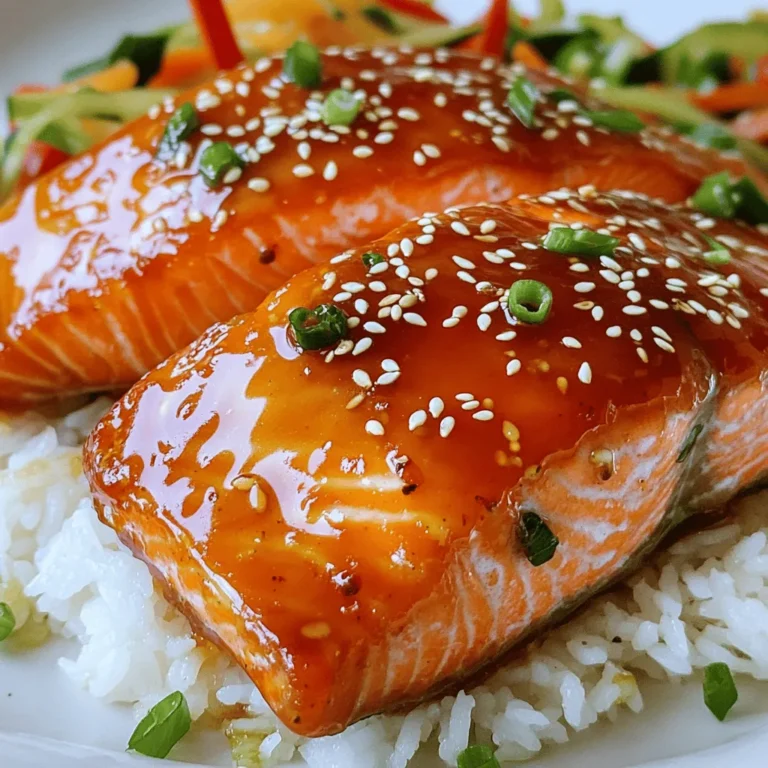
Honey Sriracha Glazed Salmon Tasty and Simple Recipe
Cilantro Lime Rice Flavorful and Easy Side Dish
Sesame Ginger Chicken Stir-Fry Flavorful Easy Meal
Classic Chicken Pot Pie Comfort Dish You’ll Love
Page navigation
Previous Page
Previous
1
…
9
10
11
12
13
…
38
Next Page
Next
Home
Dinner
Appetizer
Desserts
Drinks
About
Contact
Privacy Policy
Toggle Menu Close
Search for:
Search

 for more ideas on how to customize your Pineapple Teriyaki Meatballs! To store your leftover Pineapple Teriyaki Meatballs, let them cool first. Place them in an airtight container. This keeps them fresh and safe. You can keep them in the fridge for up to three days. Make sure to label your container with the date. This helps you remember when you made them. When ready to enjoy your leftovers, reheating them is easy. You can use a microwave or stovetop. For the microwave, place the meatballs on a microwave-safe plate. Cover them with a damp paper towel. Heat for about one to two minutes. Stir halfway through to warm them evenly. On the stovetop, add a splash of water to a pan. Heat over low until warm, stirring gently. This keeps the meatballs moist. Freezing is a great way to save Pineapple Teriyaki Meatballs for later. To do this, let them cool completely. Place the meatballs in a single layer on a baking sheet. Freeze them for about two hours. Once frozen, transfer them to a freezer-safe bag. Remove as much air as possible before sealing. You can freeze them for up to three months. When ready to eat, thaw in the fridge overnight and reheat. For the full recipe, check the main section of this article. To make Pineapple Teriyaki Meatballs gluten-free, simply swap regular breadcrumbs for gluten-free ones. You can find these at most grocery stores. Also, choose a gluten-free soy sauce. This keeps all the great flavors but makes it safe for those with gluten issues. Yes, you can use different meats for this recipe. Ground turkey and chicken work great, but you can also try ground beef or pork. Just remember that different meats may change the flavor a bit. Feel free to experiment with whatever you like best. Pineapple Teriyaki Meatballs go well with many side dishes. Here are a few ideas: - Steamed rice - Sautéed vegetables - Noodles, such as udon or rice noodles - A green salad with light dressing - Grilled pineapple for a sweet touch These sides will make your meal colorful and tasty! For the full recipe of Pineapple Teriyaki Meatballs, check out the detailed steps above. In this post, we covered how to make Pineapple Teriyaki Meatballs. We looked at key ingredients and the steps for cooking. I also shared tips to perfect your meatballs and sauce. You learned healthy options and how to store leftovers. I hope you feel ready to create this tasty dish. Enjoy the flavors and make it your own!](https://blissfulmeal.com/wp-content/uploads/2025/07/c0f1f39d-d727-4045-a9b6-e214b0624408-768x768.webp)
![To make One-Pot Cheeseburger Soup, gather the following ingredients: - 1 lb ground beef (or ground turkey for a leaner alternative) - 1 medium onion, diced - 2 cloves garlic, minced - 3 medium potatoes, diced - 4 cups beef broth (or vegetable broth for a lighter option) - 1 cup carrots, diced - 1 cup celery, diced - 1 teaspoon Italian seasoning - 1 tablespoon Worcestershire sauce - Salt and black pepper, to taste - 1 cup sharp cheddar cheese, shredded - 1 tablespoon olive oil - 1/2 cup heavy cream (optional, for added creaminess) - Fresh parsley, chopped, for garnish Each ingredient plays a key role. The ground beef or turkey gives the soup its hearty flavor. The vegetables—onion, garlic, potatoes, carrots, and celery—add texture and nutrients. Beef broth serves as the soup's base, while Italian seasoning and Worcestershire sauce elevate the taste. Shredded cheddar cheese brings in creaminess and richness, and heavy cream makes it even more decadent. A sprinkle of fresh parsley brightens the dish and adds color. For the full recipe, check the instructions to create this delicious dish. 1. Sautéing the onion and garlic Start by heating olive oil in a large pot over medium heat. Add diced onion and minced garlic. Sauté for about 3-4 minutes until the onion is soft and fragrant. 2. Browning the ground meat Next, add the ground beef or turkey to the pot. Cook it for 5-7 minutes. Break up the meat as it cooks. If there’s extra fat, drain it carefully. 3. Adding vegetables and broth Now, mix in diced potatoes, carrots, and celery. Stir well to combine everything. Pour in the beef broth. Sprinkle Italian seasoning and Worcestershire sauce over the top. Season with salt and pepper to taste. 1. Bringing the mixture to a boil Turn up the heat to bring the soup to a gentle boil. Once it starts bubbling, reduce the heat to low. 2. Simmering for tenderness Let the soup simmer uncovered for about 20 minutes. This helps the potatoes and carrots become fork-tender. 3. Incorporating dairy for creaminess If you want extra creaminess, stir in heavy cream after the vegetables are tender. Gradually add the shredded cheddar cheese. Stir until it melts and makes the soup rich and creamy. 1. Adjusting seasoning Taste the soup. Adjust the seasoning if needed. Add more salt or pepper to suit your taste. 2. Garnishing before serving Ladle the hot soup into bowls. Finish with a sprinkle of fresh parsley on top. This adds color and fresh flavor to your meal. For the full recipe, refer to the earlier sections for precise measurements and cooking times. Enjoy your hearty and simple One-Pot Cheeseburger Soup! To keep your One-Pot Cheeseburger Soup from being greasy, start by draining excess fat after browning the meat. Use lean ground beef or turkey for a lighter soup. This small step makes a big difference in taste and texture. When chopping vegetables, invest in a sharp knife. A sharp knife makes cutting easy and safe. For even-sized pieces, try to chop all the veggies to about the same size. This ensures they cook evenly. To enhance your meal, serve the soup with crusty bread or a fresh side salad. The bread soaks up the tasty broth, while the salad adds a fresh crunch. For a perfect bowl of soup, use rustic bowls to elevate your presentation. A light drizzle of extra virgin olive oil on top adds a nice touch. Finish with a sprinkle of parsley for color. Enjoy your warm, hearty meal! If you're curious about the full recipe, check the [Full Recipe]. {{image_4}} You can easily swap ingredients in One-Pot Cheeseburger Soup. Instead of ground beef, try ground turkey or chicken. These options make the soup lighter while still tasty. You can also explore cheese choices. Instead of sharp cheddar, use pepper jack for a spicy kick or mozzarella for a milder flavor. To make the soup gluten-free, use certified gluten-free broth. You can also replace regular Worcestershire sauce with a gluten-free version. If you want a vegetarian option, use plant-based proteins. Lentils or chickpeas work well here. They add texture and protein without meat. Boost the flavor by adding spices. A pinch of cayenne pepper or smoked paprika adds warmth. You can also throw in more vegetables or beans. Consider adding corn, bell peppers, or black beans. These additions make the soup even heartier and more colorful. For the full recipe, check out the [Full Recipe]. To keep your One-Pot Cheeseburger Soup fresh, store it properly. Place leftovers in an airtight container. - Refrigeration tips: Your soup can last in the fridge for up to 3 days. Make sure it cools down before sealing. - Freezing guidelines: If you want to store it longer, freeze the soup for up to 3 months. Use a freezer-safe container, leaving some space for expansion. When you're ready to enjoy your soup again, here’s how to reheat it. - Best practices for reheating: Use the microwave or stovetop. If using the microwave, heat in short bursts. Stir after each burst for even heating. On the stovetop, warm it over low heat, stirring often. - Avoiding overcooking when reheating: Keep an eye on the temperature. You want it hot, not boiling. This keeps the flavors fresh and prevents the cheese from separating. How long does One-Pot Cheeseburger Soup last in the fridge? One-Pot Cheeseburger Soup lasts about 3 to 4 days in the fridge. Store it in an airtight container. Always cool it down before putting it in the fridge. Can I freeze One-Pot Cheeseburger Soup? Yes, you can freeze One-Pot Cheeseburger Soup. Just let it cool completely. Pour it into freezer-safe bags or containers. It will stay good for about 2 to 3 months. How can I make it spicier? To add spice, mix in some red pepper flakes or hot sauce. You can also add diced jalapeños while cooking. Start with a little and taste as you go. What to do if the soup is too thick or too thin? If the soup is too thick, stir in more broth or water. Add it slowly until you reach your desired thickness. If it’s too thin, let it simmer longer without a lid. This will help it thicken up. How to enhance flavors if it tastes bland? If the soup tastes bland, try adding more salt or pepper first. You can also mix in a splash of Worcestershire sauce or a bit of garlic powder. Fresh herbs like parsley or chives will add a nice touch too. This blog post covered everything you need to create a delicious One-Pot Cheeseburger Soup. We discussed essential ingredients, straightforward steps, and valuable tips for the best results. You can customize the recipe with different meats and flavors to suit your taste. Remember, good storage and reheating methods ensure your leftovers stay tasty. Experiment with this recipe, and you’ll find your perfect bowl. Enjoy each spoonful, and don’t hesitate to share your delicious results!](https://blissfulmeal.com/wp-content/uploads/2025/07/8f18fd92-c2f0-48b2-87e4-72a55ef99d21-768x768.webp)

![- 1 cup long-grain rice - 2 cups vegetable broth (or water) - 1 tablespoon olive oil - 1 lime (for zest and juice) - 1/2 cup fresh cilantro, finely chopped - 1 teaspoon garlic powder - 1/2 teaspoon onion powder - 1/2 teaspoon salt - 1/4 teaspoon black pepper To make cilantro lime rice, gather your ingredients first. I love using long-grain rice because it cooks up fluffy and separates well. Vegetable broth adds great flavor. You can also use water if you prefer. Olive oil is perfect for sautéing the rice. The lime gives a fresh, zesty taste. Make sure to zest the lime before cutting it. Fresh cilantro brings a bright color and taste to the dish. Garlic and onion powders help boost the flavors. Finally, salt and black pepper add just the right seasoning. This combination creates a simple, yet tasty side dish that complements various meals. For the complete recipe, check out the Full Recipe section. - Rinse the long-grain rice Start by rinsing the rice under cold water. This step is key. It removes extra starch. Rinse until the water runs clear. Drain the rice well and set it aside. - Sauté the rinsed rice in olive oil In a medium saucepan, heat some olive oil over medium heat. Once warm, add in the rinsed rice. Sauté for 2-3 minutes. Stir frequently until the rice looks slightly clear. - Add vegetable broth and bring to a boil Carefully pour in the vegetable broth or water. Turn up the heat to bring it to a boil. Watch closely as it will bubble quickly. - Reduce heat and cover to simmer After boiling, lower the heat. Cover the saucepan tightly. Let it simmer for 15-18 minutes. The rice should be tender and absorb all the liquid. - Let rice sit after cooking When the rice is done, remove it from heat. Keep the lid on and let it sit for 5 minutes. This helps the rice become fluffy. - Fluff the rice and mix in seasoning After sitting, use a fork to fluff the rice gently. This separates the grains nicely. Now stir in lime juice, lime zest, chopped cilantro, garlic powder, onion powder, salt, and black pepper. - Adjust seasoning to taste Taste your rice to check the flavors. If you want more zing, add extra lime juice or salt. Adjust until it tastes just right. For the full recipe, check out the [Full Recipe]. Rinsing rice is a must. It helps remove excess starch. This step prevents the rice from becoming sticky. Rinsing also leads to a cleaner taste. The key to fluffy rice is using the right water ratio. For this recipe, I use two cups of vegetable broth for one cup of rice. This balance gives you soft and tender grains. Letting the rice sit after cooking is crucial. After you remove it from heat, keep it covered for five minutes. This resting time helps the rice finish cooking and absorb any remaining moisture. For garnishing, I love to sprinkle extra cilantro on top. It adds a fresh touch and bright color. You can also add a lime wedge for an extra zest. When serving, choose a decorative bowl. This makes the dish look more inviting. Place the rice in the center and surround it with lime wedges and cilantro leaves. This not only looks great but also lets guests add more lime if they like. {{image_4}} To make your cilantro lime rice even better, consider these simple tweaks: - Add jalapeños for a spicy kick: If you love heat, chop some fresh jalapeños. Mix them in while cooking for a nice zing. - Incorporate other herbs like parsley: For a fresh twist, try adding chopped parsley. This will give the rice a different flavor profile. Cilantro lime rice pairs well with many dishes. Here are some ideas: - Pairing with tacos and burritos: This rice complements the bold flavors of tacos and burritos perfectly. - Using as a base for protein bowls: Spoon the rice into a bowl, then top with grilled chicken, shrimp, or veggies. It's a satisfying meal. - Adding to salads for extra flavor: You can mix the rice into salads. It adds texture and a burst of flavor. These variations make the dish more exciting and allow you to tailor it to your taste. Enjoy experimenting! To store your leftover cilantro lime rice, choose an airtight container. Glass or plastic containers work great. Make sure to let the rice cool down before sealing it. This keeps it fresh longer. Place it in the fridge right away. It will stay good for about 3 to 5 days. If you want to store it for longer, freeze it. Just scoop it into freezer bags and remove as much air as possible. This method keeps the rice tasty for up to 2 months. When you’re ready to enjoy your leftover rice, you need to reheat it well. The best way is to use the stovetop. Add a splash of water in a pot and heat it on low. Stir the rice often to avoid sticking. This keeps the rice moist and fluffy. You can also use a microwave if you’re short on time. Add a little water to the rice in a bowl. Cover it with a damp paper towel and heat it in short bursts. Stir and check for warmth. For serving after reheating, you can add a squeeze of fresh lime juice. This really brings the flavors back to life. Serve it alongside your favorite dishes, like tacos or grilled chicken. Enjoy your meal! Can I use brown rice instead? Yes, you can use brown rice in this recipe. Brown rice takes longer to cook, about 40-45 minutes. Adjust the water to 2.5 cups for better results. How can I make it vegan? To make cilantro lime rice vegan, simply use water instead of broth. The flavor will still be great with lime and cilantro. What other dishes pair well with cilantro lime rice? Cilantro lime rice goes well with tacos, burritos, and grilled chicken. It also complements fish and beans nicely. Can I substitute lime with lemon? Yes, lemon works as a good substitute for lime. It adds a different but fresh flavor to the rice. What is the best way to increase the recipe yield? To increase the yield, simply double the ingredients. Use 2 cups of rice and 4 cups of broth for a larger batch. Is cilantro lime rice healthy? Yes, cilantro lime rice can be healthy. It is low in fat and provides good carbs. The fresh herbs add nutrients too. What are the calorie counts per serving? One serving of cilantro lime rice has about 180 calories. This can vary based on the specific ingredients used in the recipe. For the Full Recipe, check the details above. This blog post shared a complete guide for making cilantro lime rice. You learned the ingredients needed, from rice to fresh cilantro. I also offered easy steps for cooking, tips for perfect rice, and ways to store leftovers. You can enhance this dish with flavors, or serve it with tacos and bowls. Always feel free to adapt the recipe to fit your tastes. Enjoy making your cilantro lime rice and impress your family and friends!](https://blissfulmeal.com/wp-content/uploads/2025/07/df1e15ca-c255-476a-b8f5-f79f1d6c80b8-768x768.webp)

