Skip to content
About
Contact
Cookie Policy
Copyright Policy
Disclaimer
Search
Home
Dinner
Appetizer
Desserts
Drinks
About
Contact
Privacy Policy
Toggle Menu
Home
/
Dinner
- Page 14
Dinner
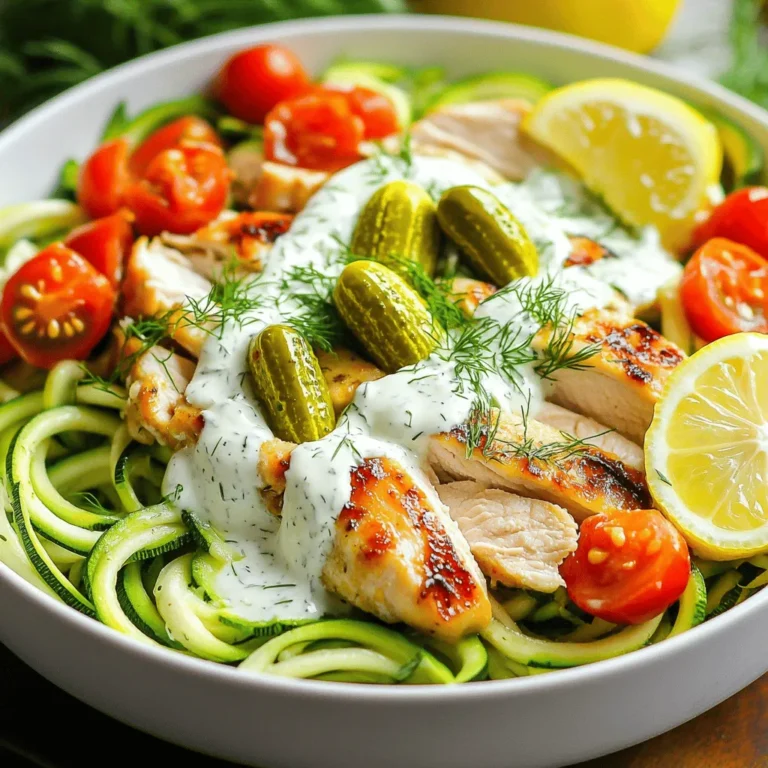
Pickle Ranch Chicken Zoodle Bowls Flavorful Dinner Meal
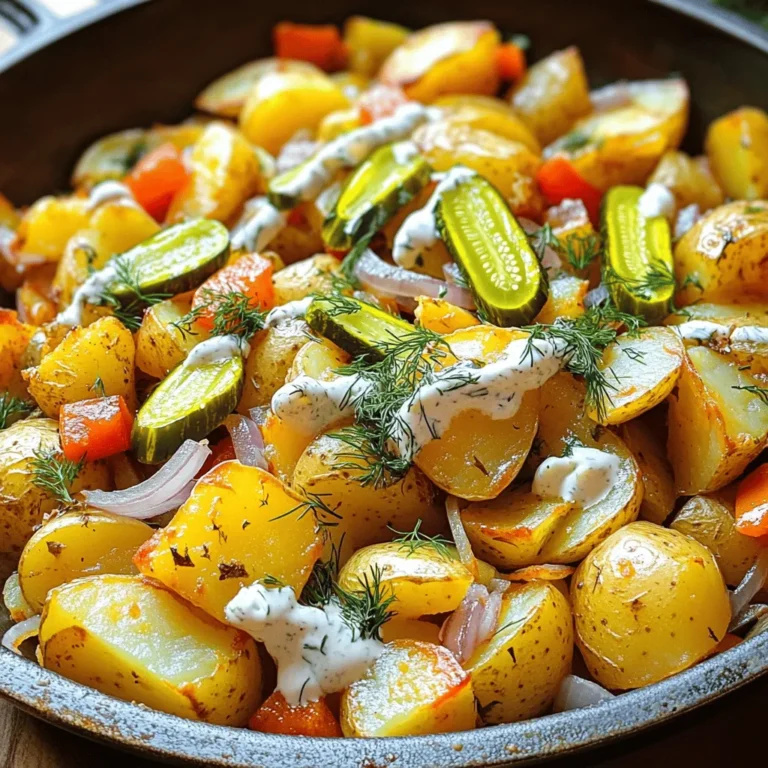
Pickle Ranch Potato Hash Flavorful and Satisfying Dish
Pickle Ranch Chicken Tenders Crispy and Flavorful Treat
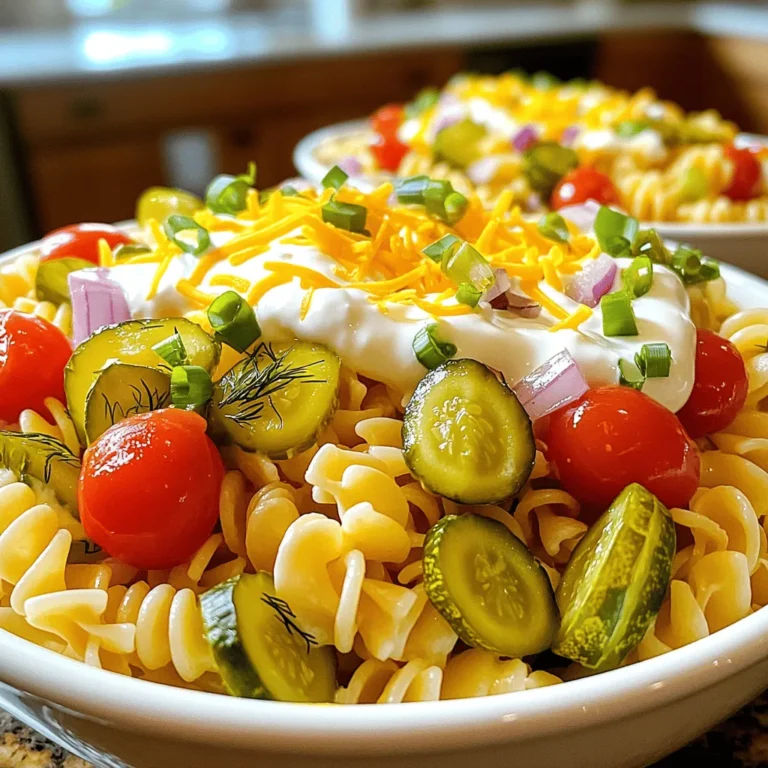
Pickle Ranch Pasta Bowls Delightful and Easy Meal
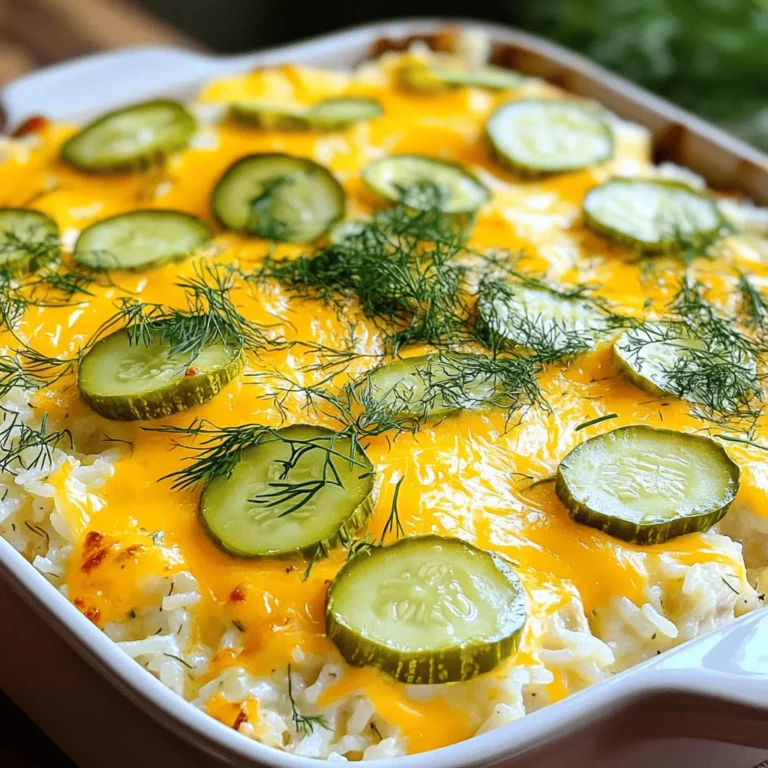
Pickle Ranch Chicken and Rice Bake Flavorful Dish
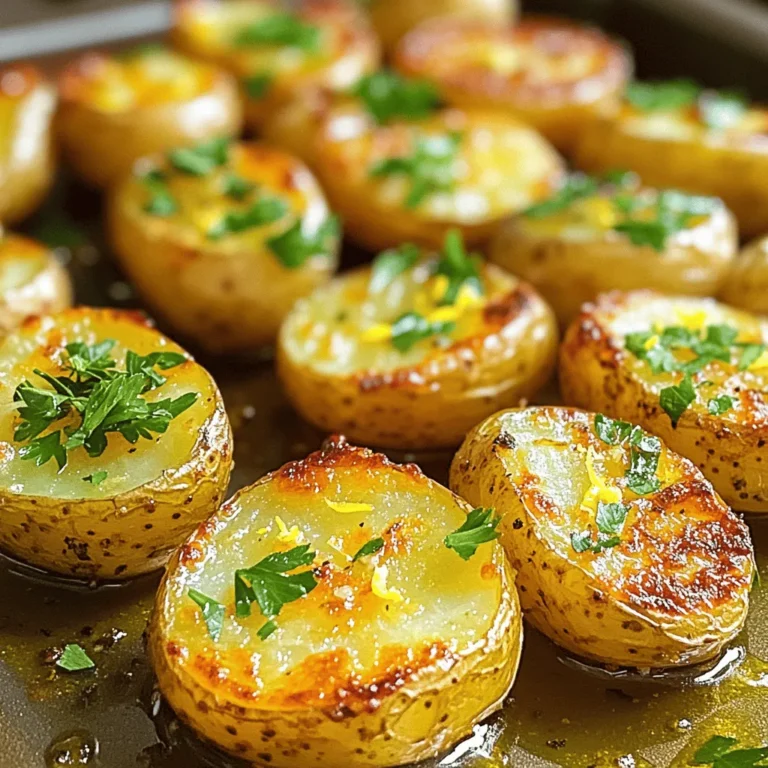
Lemon Herb Roasted Potatoes Savory and Simple Recipe
Avocado Cilantro Lime Rice Flavorful and Fresh Dish
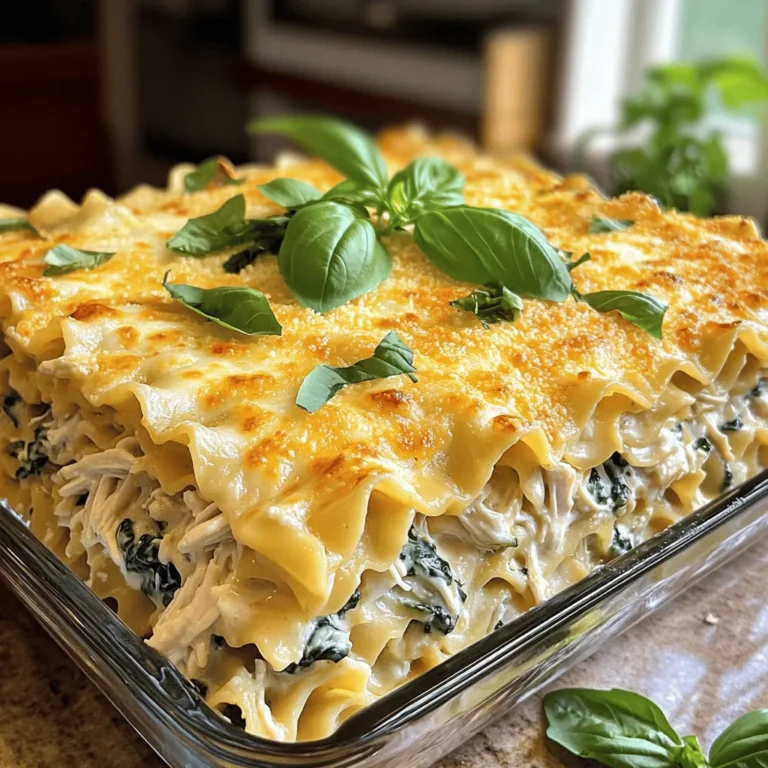
Chicken Alfredo Lasagna Comforting and Creamy Dish
Cheeseburger Tater Tot Casserole Simple and Tasty Meal
Roasted Garlic Sweet Potato Mash Creamy Comfort Dish
Page navigation
Previous Page
Previous
1
…
12
13
14
15
16
…
38
Next Page
Next
Home
Dinner
Appetizer
Desserts
Drinks
About
Contact
Privacy Policy
Toggle Menu Close
Search for:
Search

![- 1 lb chicken tenders - 1 cup dill pickle juice - 1 cup buttermilk - 1 cup all-purpose flour - 1 cup breadcrumbs (preferably panko) - Spices: garlic powder, onion powder, smoked paprika, black pepper, salt - 1 tablespoon ranch seasoning mix - Vegetable oil for frying To make the best Pickle Ranch Chicken Tenders, you need fresh and quality ingredients. The chicken tenders are the star of the dish. They are juicy and tender when cooked right. I love to use dill pickle juice for marinating. It adds a tangy flavor that makes the chicken taste amazing. Buttermilk also gives the chicken a rich taste and tender texture. The dry ingredients play a vital role. All-purpose flour creates a nice base for the coating. Panko breadcrumbs add extra crunch. The spices—garlic powder, onion powder, smoked paprika, black pepper, and salt—give depth to the flavor. Don't forget the ranch seasoning mix! It ties everything together with its creamy, zesty notes. Finally, vegetable oil is essential for frying. It creates that crispy outer layer we all love. For the full recipe, you can check the [Full Recipe]. First, grab a large mixing bowl. Add the chicken tenders and pour in the dill pickle juice. Make sure all the chicken is fully submerged. Cover the bowl tightly with plastic wrap. Place it in the fridge for at least one hour. If you want a stronger flavor, marinate overnight. In a separate medium bowl, whisk the buttermilk and ranch seasoning mix together. Mix until they blend well. This will be the soaking mixture that adds flavor to the chicken. Now, let’s set up your dredging station. In another bowl, combine the flour, garlic powder, onion powder, smoked paprika, black pepper, and salt. Stir well to mix everything together. This seasoned dry mixture is key for a tasty crust. Take your marinated chicken tenders. First, dredge each piece in the flour mixture. Shake off any extra flour to keep it from clumping. Next, dip the floured chicken into the buttermilk mixture. Let the excess buttermilk drip off. Finally, coat the chicken in breadcrumbs. Press down lightly so they stick well. Grab a large skillet and heat about an inch of vegetable oil over medium-high heat. When the oil is hot (but not smoking), carefully add the chicken tenders. Avoid overcrowding the pan; fry in batches if needed. Cook the tenders for about 4-5 minutes on each side. They should turn golden brown and be fully cooked. Use a meat thermometer to check that the internal temperature is at least 165°F. Once they are done, place the chicken tenders on a paper towel-lined plate. This helps soak up any extra oil. For the full recipe, refer to the earlier section. Marinating chicken tenders in dill pickle juice adds a great tang. I suggest marinating them for at least one hour. For stronger flavor, try overnight marination. If you don’t have dill pickle juice, you can use lemon juice or vinegar. These alternatives will still give you some nice acidity. Getting the oil to the right temperature is key. Heat the oil until it reaches about 350°F. You can test this by dropping a small piece of bread into the oil. If it bubbles and sizzles, it’s ready. When frying, avoid overcrowding the pan. This helps keep the oil hot and ensures even cooking. Fry in small batches to get that perfect crisp. For a lovely presentation, serve the chicken tenders on a wooden platter. Add some dill pickle slices around them. A side of creamy ranch dip always works well too. As for side dishes, crispy fries are a classic choice. You can also serve them with a fresh garden salad for a lighter meal. {{image_4}} You can add some heat to your pickle ranch chicken tenders. Mix in hot sauce or cayenne pepper with the marinade. The spicy kick will make each bite exciting. Adjust the heat to your taste. If you love spice, add more! For a milder flavor, use less hot sauce. Baking is a great way to make this dish a bit healthier. Preheat your oven to 425°F. After coating the chicken, place them on a baking sheet lined with parchment paper. Spray a bit of cooking oil on top for crispiness. Bake for 20-25 minutes. Flip halfway through for even cooking. This method gives you a crunchy texture without frying. Want a new crunch? Try using crushed cornflakes or other grains instead of breadcrumbs. They add a unique texture and flavor. You can even experiment with seasoned crackers for extra taste. Be creative! Mixing different coatings can surprise your taste buds and elevate your meal. To store leftover chicken tenders, let them cool first. Place them in an airtight container. You can also wrap them tightly in plastic wrap. Keep the container in the fridge. They stay fresh for about 3 to 4 days. Reheat them in the oven for the best taste. If you want to save your chicken tenders for later, freezing is a good option. First, let them cool completely. Then, wrap each tender in plastic wrap. Place the wrapped tenders in a freezer bag. Remove as much air as you can to avoid freezer burn. They can last in the freezer for up to 3 months. To reheat, bake them in the oven at 375°F until hot and crispy. For the best taste, eat your chicken tenders within the first few days. After that, they may lose some flavor. If you freeze them, remember to use them within 3 months for the best quality. Always check for any signs of spoilage before eating. Pickle ranch seasoning combines tangy dill pickle flavor with classic ranch herbs. It often includes dried dill, garlic powder, onion powder, and a hint of salt. This mix adds a zesty kick to your dishes. You can use it on chicken, veggies, or even popcorn for a fun twist. Yes, you can use chicken breasts. If you do, slice them into strips. This helps them cook evenly. Cook time may increase to about 6-7 minutes per side. Always check the internal temperature to reach 165°F for safety. Making ranch seasoning is easy! Mix these ingredients: - 1 tablespoon dried dill - 1 teaspoon garlic powder - 1 teaspoon onion powder - 1 teaspoon dried parsley - ½ teaspoon salt - ½ teaspoon black pepper Combine all ingredients and store in an airtight container. This mix will add flavor to many dishes, including the pickle ranch chicken tenders. You can serve these tenders with many sides. Some great choices are: - Crispy French fries - Fresh garden salad - Coleslaw - Roasted vegetables - Macaroni and cheese These sides complement the flavors and make a complete meal. Some popular brands include: - Hidden Valley - Primal Kitchen - Simply Organic These brands offer great flavor and are widely available. Check your local grocery store or online. In this post, we covered how to make crispy pickle ranch chicken tenders. We discussed key ingredients like chicken, dill pickle juice, and spices. I provided step-by-step instructions to marinate, coat, and fry the chicken. We also shared tips for flavor and serving suggestions. Remember, experimenting with variations can lead to tasty surprises. Try the spicy version or bake for a healthier choice. Enjoy your cooking journey, and savor every bite of your delicious homemade chicken tenders!](https://blissfulmeal.com/wp-content/uploads/2025/07/0296b92f-aeda-4421-9684-ac9b262a496d-768x768.webp)
![To make Avocado Cilantro Lime Rice, gather these simple ingredients: - 1 cup white rice (jasmine or basmati) - 2 cups vegetable broth (or water) - 1 ripe avocado, cut into bite-sized pieces - 1/4 cup fresh cilantro, finely chopped - 2 tablespoons lime juice (freshly squeezed) - 1 tablespoon extra virgin olive oil - 1/2 teaspoon garlic powder - Salt and freshly cracked pepper to taste - Zest of 1 lime Each ingredient plays a key role. The rice provides a fluffy base. The broth adds depth and flavor. Fresh avocado brings creaminess. Cilantro adds bright notes. Lime juice adds zing, while the garlic powder gives a hint of warmth. Using fresh ingredients makes a big difference. Fresh cilantro and lime juice enhance the dish's flavor. The avocado needs to be ripe for the best texture. I always recommend checking for ripeness by gently pressing the avocado; it should yield slightly. For the best results, use high-quality extra virgin olive oil. This will give your dish a lovely richness. The combination of flavors makes this rice a standout side or a base for your meals. Check out the Full Recipe for more details! To rinse rice, place it in a fine-mesh strainer. Run cold water over it. Move the rice around with your fingers. Keep rinsing until the water runs clear. Rinsing removes extra starch. This step is key for light, fluffy rice. First, combine the rinsed rice with vegetable broth in a medium pot. Bring the mixture to a boil over medium-high heat. Once it boils, turn the heat to low. Cover the pot with a lid. Let it simmer for 15 to 18 minutes. The rice will absorb the liquid and become tender. After cooking, let it sit covered for 5 more minutes. This helps the rice finish cooking. While the rice cooks, make the dressing. In a small bowl, whisk together olive oil, lime juice, garlic powder, salt, and pepper. Mix until smooth. Homemade dressing boosts flavor. It makes every bite taste fresh and zesty. After resting, fluff the rice gently with a fork. Transfer the rice to a large bowl. Drizzle the dressing on top. Toss the rice lightly to coat it evenly. Next, fold in the avocado, cilantro, and lime zest. Be gentle to keep the avocado pieces whole. This adds texture and freshness. Taste the rice mixture. Adjust the seasoning to your liking. Add more salt or lime juice if needed. A little tweak can enhance the flavor. Enjoy your flavorful and fresh dish of Avocado Cilantro Lime Rice! If you want the full recipe, check the section above. Cooking rice can be simple if you follow a few key steps. The best method for cooking rice is to rinse it first. Rinse under cold water until it runs clear. This step removes excess starch. It helps keep your rice fluffy and not sticky. Next, use a ratio of two cups of broth for every cup of rice. This gives great flavor. Bring the mixture to a boil, then reduce the heat to low. Cover the pot and let it simmer. This keeps the rice tender. Common mistakes include lifting the lid too often or not letting it rest. Keep the lid on while it cooks. After cooking, let the rice sit for five minutes. This allows it to finish steaming. For serving, choose a large bowl to showcase your Avocado Cilantro Lime Rice. Garnish with extra lime wedges and fresh cilantro leaves. This adds color and freshness. Pair this rice with grilled chicken or shrimp. Tacos or beans also work well. The bright flavors complement many dishes. This dish is not just tasty; it's also good for you. One serving contains about 250 calories. It provides good fats from avocado and vitamins from cilantro. Avocados are rich in healthy fats. They support heart health and provide fiber. Cilantro adds antioxidants and can help with digestion. This dish is a smart choice for a balanced meal. For the full recipe, click here: [Full Recipe]. {{image_4}} You can easily change the taste of avocado cilantro lime rice. Adding spices gives it more flair. Try a pinch of cumin or chili powder for warmth. Fresh herbs like mint or parsley can also brighten the dish. You can mix in vegetables for extra nutrition. Diced bell peppers or corn add color and crunch. You can even stir in some black beans for protein. These tweaks keep the dish exciting and flavorful. Making this recipe vegan is simple. Just use vegetable broth instead of chicken broth. You can also swap out the olive oil for avocado oil if you prefer. This dish is naturally gluten-free, so you don't need to worry there. If you have nut allergies, ensure any added toppings are safe. You can easily tailor this dish to fit various diets. Just think about what works best for you and your guests. You can serve avocado cilantro lime rice in many ways. It works well as a base for grain bowls, topped with grilled chicken or shrimp. You can serve it as a side dish with tacos or enchiladas. The rice also makes a great filling for wraps. If you have leftovers, use them in a stir-fry or salad. The fresh flavors will shine through, keeping meals fun and tasty. To keep your Avocado Cilantro Lime Rice fresh, store it in an airtight container. This method prevents moisture loss and keeps flavors intact. Place it in the fridge as soon as possible. Rice often stays good for about three to four days. If you want to keep the avocado from browning, sprinkle a bit of lime juice on it before storing. This trick helps maintain the bright color and fresh taste. Yes, you can freeze Avocado Cilantro Lime Rice! Freezing is a great way to save leftovers. First, let the rice cool down completely. Then, place it in a freezer-safe bag or container. Press out as much air as possible before sealing. It can last up to three months in the freezer. To reheat, simply take it out and let it thaw in the fridge overnight. You can also microwave it directly from the freezer. Just add a splash of water to keep it moist. Heat until warm, stirring occasionally. Enjoy your delicious rice even after freezing! For the full recipe, check out the Zesty Avocado Cilantro Lime Rice. You can make this rice dish ahead of time. Cook the rice and let it cool. Store it in a sealed container in the fridge for up to three days. When you are ready to serve, mix in the fresh ingredients like avocado and cilantro. This keeps the flavors bright and fresh. If you don’t have avocado, you can use cooked peas or diced mango. Both add creaminess and sweetness. The taste will change a bit, but it will still be tasty. Yes, this recipe works well for meal prep. You can batch cook the rice and keep it in the fridge. Portion out servings for lunches or dinners. Just add the fresh ingredients right before eating to keep them crisp. You can use brown rice, but it needs a little more time to cook. Use 2 and a half cups of broth and simmer for about 35 to 40 minutes. Brown rice has a nuttier flavor and adds more fiber. This rice goes well with grilled chicken, fish tacos, or black bean bowls. It also works as a side for any Mexican dish. The zesty flavor brightens up the entire meal. For more ideas, check the Full Recipe for inspiration. This article explored how to make Avocado Cilantro Lime Rice. We covered essential ingredients and detailed steps for perfect rice. You learned about cooking tips, fun variations, and how to store leftovers. Remember, making this dish is simple and enjoyable. It’s not just tasty; it’s also healthy. Try different flavors or incorporate more veggies for a unique twist. Enjoy your cooking and share this dish with others. Your kitchen adventures can be a delight for everyone!](https://blissfulmeal.com/wp-content/uploads/2025/07/b36f5d71-ba18-4df9-afd9-e48a468f3e19-768x768.webp)

![- Sweet Potatoes - Garlic - Olive Oil - Almond Milk (or milk of choice) - Butter (or vegan alternative) - Seasoning (Salt and Pepper) - Fresh Herbs (Rosemary or Parsley) To make roasted garlic sweet potato mash, you need some key ingredients. Sweet potatoes are the star here. They give a nice sweet taste and creamy texture. Garlic adds a rich, mellow flavor when roasted. Olive oil helps everything roast nicely and gives a smooth finish. You can choose almond milk or any milk you like for creaminess. Butter adds a rich taste, but you can switch it for vegan butter if you prefer. Salt and pepper are essential for flavor. Fresh herbs like rosemary or parsley add a pop of color and freshness to your dish. Gather these ingredients, and you're on your way! For the full recipe, continue exploring the steps to create your delicious mash. 1. Preheat Oven and Prepare Garlic Start by preheating your oven to 400°F (200°C). This heat will help brown your sweet potatoes and garlic well. Take your whole garlic bulb and cut off the top. This exposes the cloves. Drizzle one tablespoon of olive oil over the cloves. Make sure to coat them well. Wrap the garlic bulb tightly in aluminum foil and set it aside. 2. Coat and Season Sweet Potatoes Grab two large sweet potatoes. Peel them and cut them into cubes. In a large bowl, mix these cubes with one tablespoon of olive oil. Add a good amount of salt and pepper. Toss the sweet potatoes until they are fully coated. 3. Setup for Roasting Place the sweet potatoes on a large baking sheet in a single layer. This way, they cook evenly. Put both the baking sheet with sweet potatoes and the wrapped garlic bulb into the hot oven. 1. Cooking Time and Temperature Roast the sweet potatoes for about 25 to 30 minutes. They should be fork-tender and have a light caramel color. The garlic will roast alongside them. 2. Monitoring Garlic and Sweet Potatoes After about 30 minutes, check on the garlic. Carefully unwrap it from the foil. The cloves should be soft and sweet. Let it cool for a few minutes before handling. 1. Combining Ingredients In a big mixing bowl, combine the roasted sweet potatoes and squeeze the roasted garlic cloves into the bowl. They should pop out easily. 2. Achieving Creamy Consistency Pour in the almond milk and add the butter. Use a potato masher or fork to mash everything together. Keep mashing until the mix is creamy and smooth. 3. Adjusting Flavor Taste your mash and adjust the seasoning with more salt and pepper if needed. This will enhance the flavors even more. For the full recipe, check out the details above! Best Methods for Roasting Garlic Roasting garlic brings out its sweet, rich flavor. The best way is to cut off the top of a whole bulb. Drizzle it with olive oil and wrap it in foil. Place it in the oven with your sweet potatoes. Roast for about 30 minutes. The garlic will become soft and sweet. Choosing the Right Garlic When picking garlic, go for firm bulbs. Look for ones without any blemishes or sprouts. Fresh garlic will give the best taste to your dish. Cutting Techniques for Even Cooking For even cooking, cut sweet potatoes into uniform cubes. Aim for 1-inch pieces. This size helps them roast evenly and cook through. Alternative Ingredients for Variations You can switch things up by adding other root veggies. Carrots or parsnips work well. They add unique flavors and nutrients. You can also substitute almond milk for regular milk or coconut milk for a twist. Presentation Techniques To make your dish stand out, serve the mash in a deep bowl. Drizzle some olive oil on top and sprinkle extra herbs for color. These simple steps will make your dish look gourmet. Pairing Foods Roasted garlic sweet potato mash pairs well with many foods. Try it alongside grilled chicken, roasted vegetables, or a fresh salad. This mash can also complement rich dishes like braised meats or savory stews. For the full recipe, check out [Full Recipe]. {{image_4}} Additional Seasoning Options You can boost the flavor of your roasted garlic sweet potato mash easily. Try adding a pinch of nutmeg or cinnamon for warmth. A splash of lemon juice gives a nice zing. If you like heat, sprinkle in some cayenne pepper or chili flakes. Incorporating Other Vegetables Mixing in other roasted veggies can bring new tastes. Carrots or parsnips blend well with sweet potatoes. You can also add some roasted cauliflower for a creamy texture. Just make sure they are cooked until tender. Vegan and Dairy-Free Alternatives If you want a vegan version, swap butter with vegan butter. Use unsweetened almond milk or any plant-based milk. This keeps the dish creamy without dairy. Gluten-Free Options Good news! This recipe is naturally gluten-free. You don’t need to change a thing to enjoy it safely. Always check labels if you buy pre-made ingredients. Adding Spices from Different Cuisines Give your mash a global flair. Add cumin for a Middle Eastern touch. Try curry powder for an Indian spin. Each spice adds a unique layer of flavor. Cultural Variations of Sweet Potato Mash Many cultures have their spins on sweet potato mash. In South America, you might find it mixed with lime and cilantro. In the Caribbean, coconut milk can be used for a tropical twist. Explore these ideas to make the dish your own. For the full recipe, visit the Roasted Garlic Sweet Potato Mash section above. To keep your roasted garlic sweet potato mash fresh, start with proper cooling. Let the mash cool down to room temperature before storing. This helps prevent moisture buildup, which can make the mash soggy. For storage, I recommend using airtight containers. These keep the flavors locked in and prevent the mash from drying out. Resealable containers also work, but they may not seal as tightly as airtight ones. When it’s time to enjoy your mash again, reheating is key. The best way to reheat is in the oven. Preheat your oven to 350°F (175°C) and place the mash in an oven-safe dish. Cover it with foil to keep it moist. Heat for about 15–20 minutes, or until warmed through. If you need a quick option, use the microwave. Place the mash in a microwave-safe bowl and cover it. Heat in 30-second intervals, stirring in between. This helps heat evenly. For consistency, add a splash of almond milk or water while reheating. This will make the mash creamy again without drying it out. Want to save some for later? Freezing is a great option. First, let the mash cool completely. Then, scoop it into freezer-safe containers, leaving some space at the top. This allows for expansion as it freezes. To thaw, move it to the fridge overnight. If you need it fast, use the microwave. Just remember to stir it occasionally while thawing to keep it even. Following these tips will help you enjoy your roasted garlic sweet potato mash at its best! For the full recipe, check out the detailed instructions above. To make this dish vegan, simply swap out the butter and milk. Use vegan butter instead of regular butter. For the milk, unsweetened almond milk works well. You can also try oat milk or soy milk. These options keep the mash creamy and tasty without dairy. Yes, you can prepare this dish ahead of time. Cook the sweet potatoes and garlic as usual. Once mashed, let it cool. Store it in the fridge in a sealed container for up to three days. When you're ready to eat, reheat it gently. Add a splash of almond milk if it seems dry. Sweet potatoes are full of vitamins A and C. They also provide fiber and potassium, which are good for your heart. Garlic adds flavor and has many health benefits too. It can boost your immune system and has anti-inflammatory effects. Together, these ingredients make a healthy side dish. Sweet potatoes are done when they are fork-tender. You can poke them easily with a fork or knife. Look for a slight caramelization on the edges for extra flavor. If they are soft and golden, they are ready to mash. Enjoy the delicious results of your efforts! This blog post covered how to make delicious Roasted Garlic Sweet Potato Mash. We explored the key ingredients needed, like sweet potatoes, garlic, and olive oil. I shared step-by-step instructions, including tips for roasting and mashing for a creamy texture. You’ll find ways to customize the dish, with variations to suit different diets. Finally, we discussed how to store and reheat your mash for the best taste. Enjoy this dish as a tasty, healthy option that fits many meals!](https://blissfulmeal.com/wp-content/uploads/2025/07/30786a34-093c-4160-bf19-e90ff48f2e07-768x768.webp)