Skip to content
About
Contact
Cookie Policy
Copyright Policy
Disclaimer
Search
Home
Dinner
Appetizer
Desserts
Drinks
About
Contact
Privacy Policy
Toggle Menu
Home
/
Dinner
- Page 16
Dinner
Easy Broccoli Cheddar Soup Simple and Creamy Dish
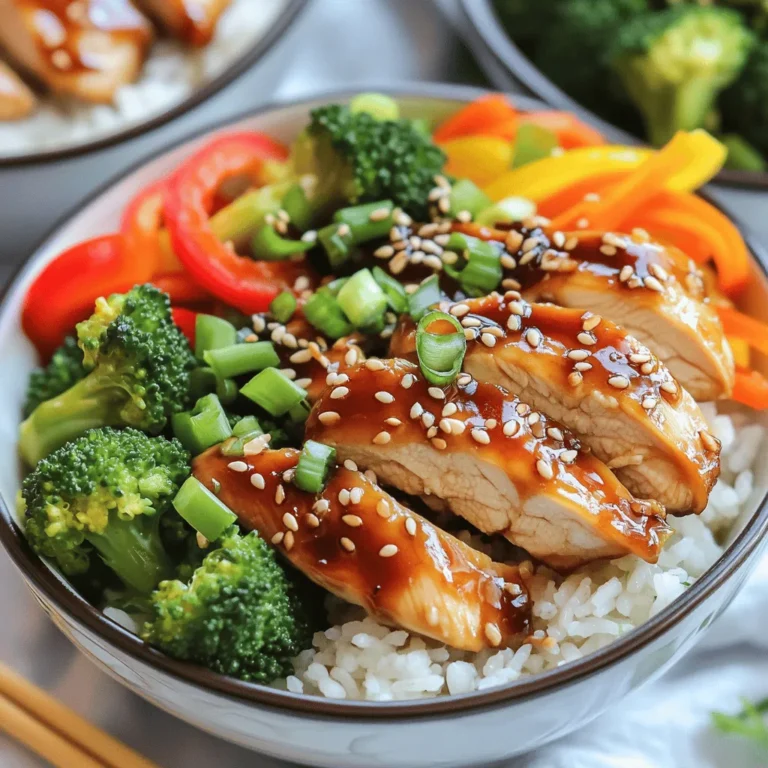
Teriyaki Chicken Bowls Flavorful and Easy Recipe
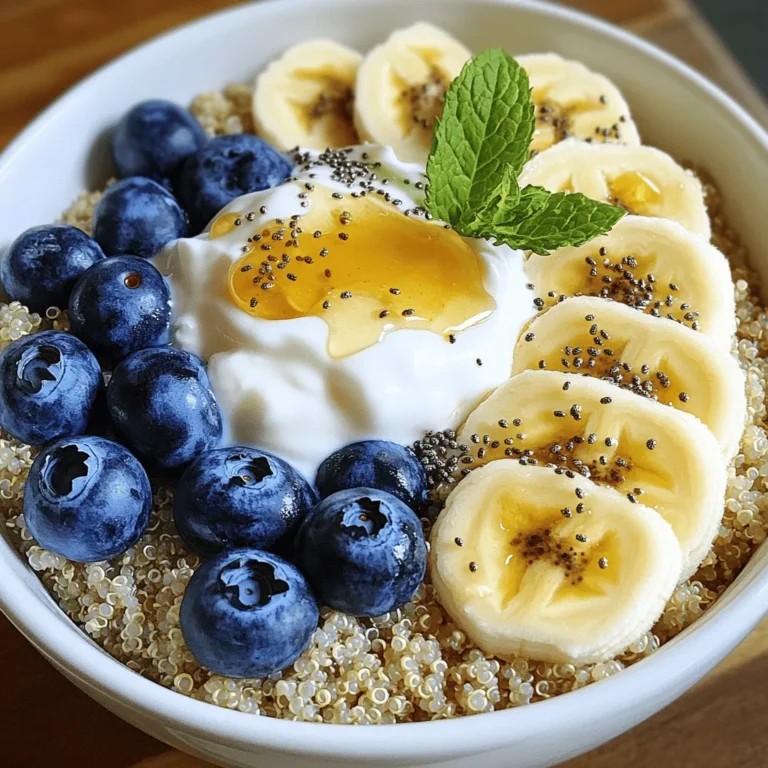
Healthy Quinoa Breakfast Bowl Nutritious Easy Meal
Turkey Taco Lettuce Wraps Easy Healthy Meal Option
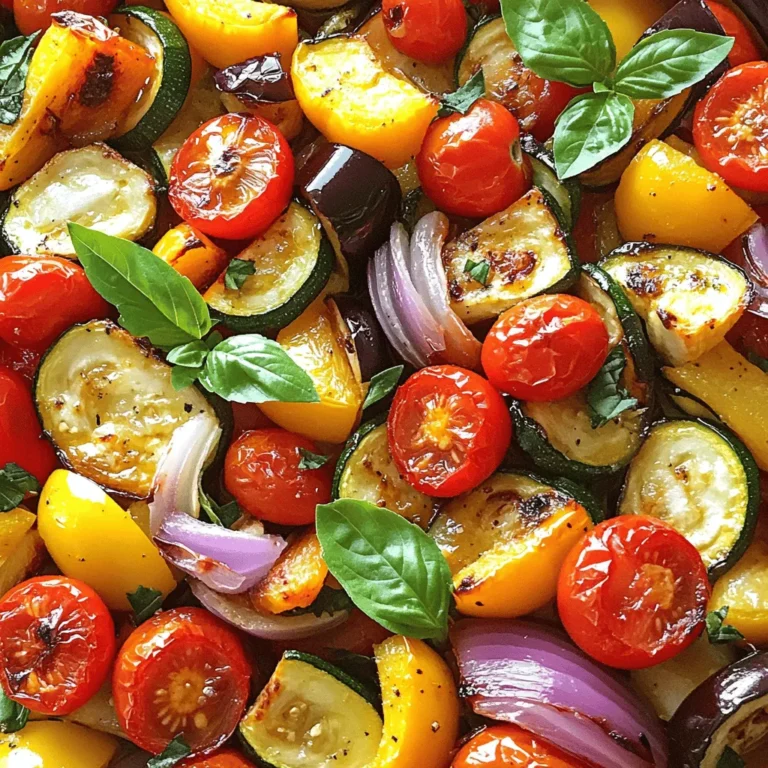
Roasted Mediterranean Vegetables Flavorful and Easy Recipe
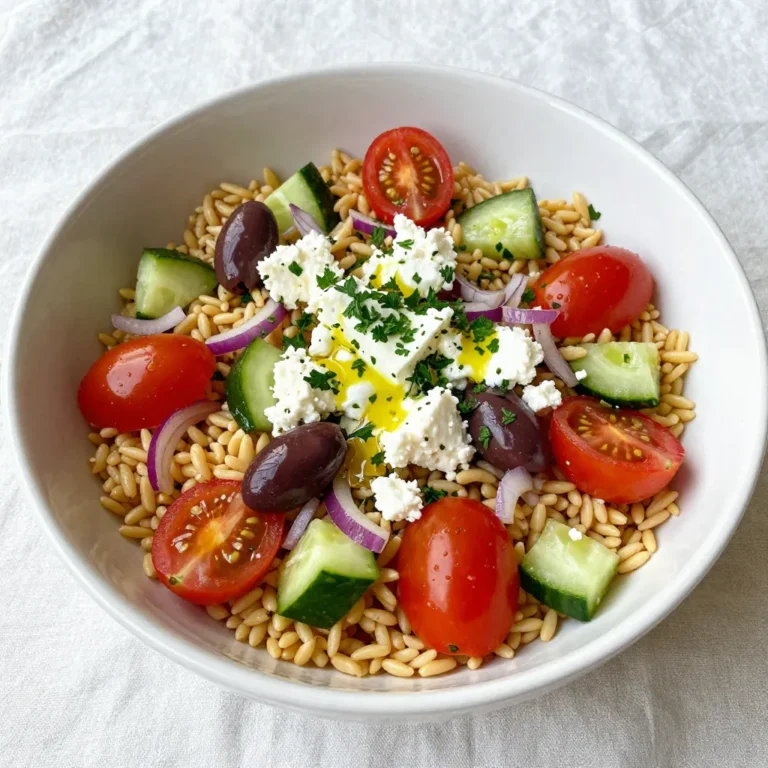
Greek Orzo Salad Flavorful and Fresh Recipe Guide
Green Goddess Pasta Salad Fresh and Flavorful Dish
Spicy Black Bean Tacos Flavorful and Easy Recipe
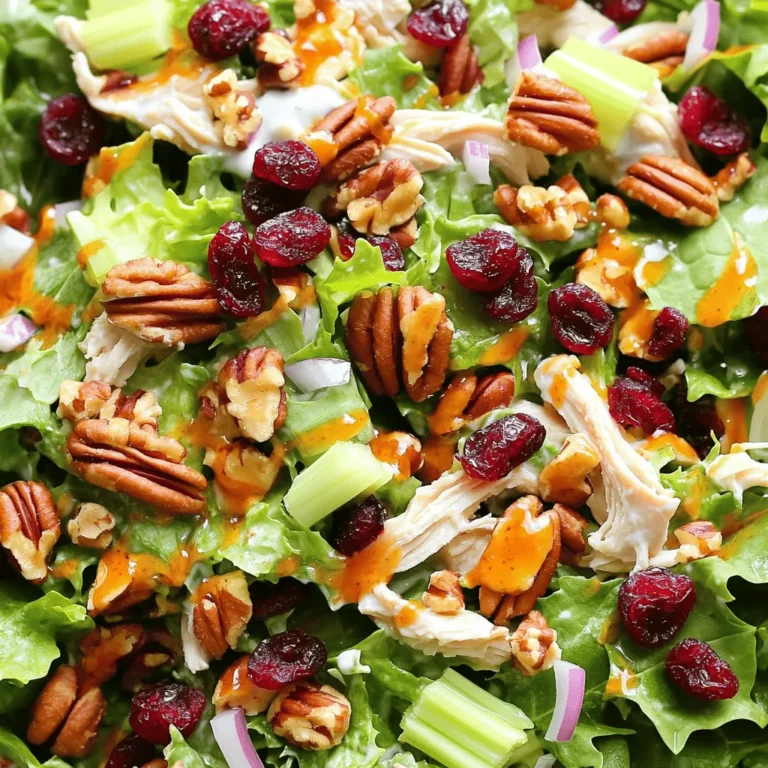
Cranberry Pecan Chicken Salad Fresh and Flavorful Mix
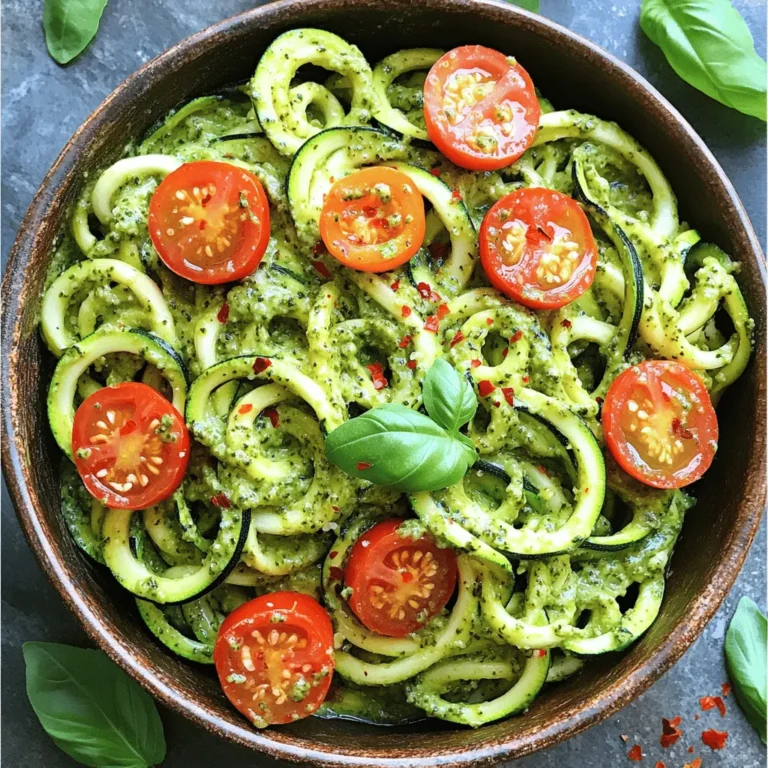
Pesto Zucchini Noodles Flavorful and Healthy Delight
Page navigation
Previous Page
Previous
1
…
14
15
16
17
18
…
38
Next Page
Next
Home
Dinner
Appetizer
Desserts
Drinks
About
Contact
Privacy Policy
Toggle Menu Close
Search for:
Search


![- 1 pound ground turkey - 1 head of iceberg or butter lettuce, leaves separated - 1 tablespoon chili powder - 1 teaspoon ground cumin - 1/2 teaspoon smoked paprika - 1 cup cherry tomatoes, halved - 1/2 cup corn (fresh or canned, drained if canned) - 1/4 cup fresh cilantro, chopped Turkey taco lettuce wraps are simple and fun to make. The main ingredient is ground turkey, which is lean and flavorful. It cooks quickly, making it perfect for busy nights. I love using either iceberg or butter lettuce for the wraps. Iceberg has a nice crunch, while butter lettuce is soft and buttery. For spices, I always use chili powder, ground cumin, and smoked paprika. These spices give the turkey a warm, savory flavor. Each spice adds depth without overpowering the dish. I also love adding fresh ingredients to brighten the wraps. Cherry tomatoes add sweetness and a pop of color. Corn gives a nice crunch, while cilantro adds freshness and aroma. These ingredients make the wraps not only tasty but also colorful and appealing. You can find the full recipe for turkey taco lettuce wraps above. Enjoy making a healthy meal that’s fun to eat! Start by gathering your ingredients and tools. You need: - 1 pound ground turkey - 1 tablespoon olive oil - 1 small onion, finely chopped - 2 cloves garlic, minced - 1 tablespoon chili powder - 1 teaspoon ground cumin - 1/2 teaspoon smoked paprika - Salt and pepper, to taste - 1 cup cherry tomatoes, halved - 1/2 cup corn - 1/4 cup fresh cilantro, chopped - Juice of 1 lime - 1 head of lettuce Make sure your skillet and spatula are clean and ready. This setup helps the cooking go smoothly. Begin cooking by heating the olive oil in a large skillet over medium heat. Once the oil is hot, add the finely chopped onion. Sauté it until it becomes soft and clear, about 3 to 4 minutes. Stir it often to keep it from sticking. Next, add the minced garlic to the skillet. Cook this for another minute. Stir often to avoid burning the garlic. Now, raise the heat to medium-high and add the ground turkey. Use your spatula to break the meat apart as it cooks. Keep cooking until the turkey is browned, about 5 to 7 minutes. Once the turkey is browned, mix in the chili powder, cumin, smoked paprika, salt, and pepper. Stir well to coat the turkey evenly with the spices. Let it cook for another 2 to 3 minutes. This lets the spices release their awesome flavors. Remove the skillet from the heat. Gently fold in the halved cherry tomatoes, corn, chopped cilantro, and lime juice. Mix everything together carefully, so you don’t mash the tomatoes. To assemble, take a leaf of lettuce and spoon a good amount of the turkey mix into the center. Wrap the sides of the lettuce around the filling to shape a taco. Repeat for the rest of the lettuce leaves and turkey filling. Check out the Full Recipe for more details and enjoy your tasty meal! To make the best turkey taco filling, cook the turkey until it is brown and fully done. This usually takes about 5 to 7 minutes over medium-high heat. Make sure you break up the meat as it cooks. This helps it brown evenly and prevents clumping. When it comes to spices, balance is key. Use chili powder, cumin, and smoked paprika for great flavor. Start with 1 tablespoon of chili powder, 1 teaspoon of cumin, and 1/2 teaspoon of smoked paprika. Adjust these amounts to fit your taste. Add salt and pepper to enhance the overall flavor, but start small and taste as you go. To assemble the wraps, take a lettuce leaf and fill it with the turkey mixture. Spoon a good amount right in the center. Next, fold the sides of the lettuce over the filling. This creates a taco shape and keeps everything inside. You can use a toothpick to secure it if needed. For garnishes, think about adding extra cherry tomatoes or corn on top. Chopped cilantro adds a fresh touch. You can also serve lime wedges on the side for a burst of flavor. A beautiful platter makes a big difference. Arrange your lettuce wraps neatly on a colorful plate. You can sprinkle some extra cilantro around the edges for a pop of color. Serving lime wedges adds a zest to your dish. Cut the limes into quarters and place them next to the wraps. This not only looks good but also allows guests to add their own lime juice. For the full recipe, check out [Full Recipe]. {{image_4}} You can switch up the protein in your turkey taco lettuce wraps! Ground chicken is a great option. It cooks similarly and has a mild flavor. You can also use ground beef for a richer taste. If you prefer plant-based meals, try crumbled tempeh or lentils. These vegetarian choices give a hearty texture and soak up flavors well. To change the flavor, use different spices. Taco seasoning packs a punch and adds depth. If you like heat, sprinkle in some cayenne pepper for a spicy kick. Another great addition is avocado. It adds creaminess and balances spice levels. Cheese is also a tasty option. Shredded cheddar or crumbled feta can enhance the dish’s richness. Toppings make your wraps even better! Consider adding sour cream for a cool and creamy finish. Salsa brings brightness and freshness. If you enjoy heat, jalapeños are a must. They add crunch and spice. You can also create a DIY taco bar. Set out various toppings, and let everyone build their own wraps. This makes the meal fun and interactive! For the full recipe, check out the Turkey Taco Lettuce Wraps. To keep your turkey filling fresh, place it in an airtight container. Make sure it cools before sealing. This helps avoid moisture buildup. Store it in the fridge for up to three days. For lettuce leaves, wrap them in a damp paper towel. Place them in a plastic bag. This keeps them crisp for about two days. When you want to enjoy leftovers, safely reheat the turkey filling. Place it in a skillet over medium heat. Stir occasionally until warmed through. You can also microwave it. Just use a microwave-safe bowl and heat for 30-second bursts. To keep your lettuce crisp, avoid reheating it. Instead, enjoy the filling in fresh lettuce leaves each time. Preparing ahead makes meals easy. Cook a batch of the turkey filling and store it. You can use it for lunches or quick dinners. Place it in portion-sized containers for easy access. Want to freeze it? Just let the filling cool completely. Store it in airtight containers or freezer bags. It can last up to three months in the freezer. This way, you always have a healthy meal option ready when you need it. For the complete recipe, check the Full Recipe section. To make turkey taco lettuce wraps, you start by cooking the turkey. Heat olive oil in a skillet over medium heat. Add chopped onion and cook until soft. Then, add minced garlic and cook for a minute. Increase heat and add ground turkey. Break it up and cook until browned. Mix in chili powder, cumin, smoked paprika, salt, and pepper. Stir for a few minutes. Remove from heat and add cherry tomatoes, corn, cilantro, and lime juice. Spoon this mixture into lettuce leaves. Wrap the lettuce around the filling like a taco. For the full recipe, refer to the earlier section. Yes, you can use different types of lettuce. Iceberg lettuce is crisp and refreshing. It holds the filling well. Butter lettuce is softer and has a mild flavor. It feels nice in your mouth. You can also try romaine for a crunchy bite. Each type brings a unique texture and taste. Choose based on your preference for crunch or softness. Turkey taco lettuce wraps last about 3 to 4 days in the fridge. Store the turkey filling separately from the lettuce. Keep the filling in an airtight container. Lettuce can wilt quickly, so it’s best to add it fresh. Look for signs of spoilage like off smells or discoloration. If the turkey looks or smells strange, don't eat it. Several side dishes pair well with turkey taco lettuce wraps. Mexican rice is a classic choice. You could also serve black beans for protein. A fresh corn salad adds sweetness and crunch. Try guacamole or salsa for extra flavor. For a light option, serve sliced cucumbers or a green salad. These sides will complement your wraps nicely. Turkey taco lettuce wraps are easy and fun to make. You mix tasty ground turkey with spices, fresh veggies, and lime for a delicious meal. Remember to try different proteins and toppings. It's all about your taste! Storing leftovers helps keep meals quick and simple. With this guide, you can create something great in your kitchen. Enjoy the process and share your tasty creations!](https://blissfulmeal.com/wp-content/uploads/2025/07/e6d00192-491d-449a-9ba3-06dccb953cfd-768x768.webp)
![The Green Goddess Pasta Salad is colorful and packed with flavor. Here’s what you need: - 8 oz whole grain pasta (fusilli or penne) - 1 cup cherry tomatoes, halved - 1 cucumber, diced - 1 bell pepper (any color), chopped - 1 cup frozen peas, thawed and drained - ½ cup red onion, finely diced - 1 ripe avocado, diced - ½ cup fresh parsley, roughly chopped - ½ cup fresh basil, roughly chopped - 1 tablespoon fresh lemon juice - ¼ cup plain Greek yogurt - ¼ cup extra virgin olive oil - 1 tablespoon Dijon mustard - Salt and freshly ground pepper to taste You can mix and match veggies based on what you like. Fresh herbs bring bright flavors. The creamy dressing makes the salad rich and satisfying. For the full recipe, check the instructions in the next section. Enjoy the fresh taste with every bite! To start, boil a large pot of salted water. Add 8 oz of whole grain pasta. Cook it according to the package instructions. This usually takes about 8 to 10 minutes. Once the pasta is al dente, drain it in a colander. Rinse the pasta under cold water. This cools it down and stops the cooking process. Next, prepare the dressing. In a high-speed blender, add ¼ cup of plain Greek yogurt, ¼ cup of extra virgin olive oil, 1 tablespoon of fresh lemon juice, and 1 tablespoon of Dijon mustard. Blend these ingredients until smooth. Then, add ½ cup of fresh parsley and ½ cup of fresh basil. Season the dressing with salt and pepper to taste. Now, it’s time to mix everything. In a large mixing bowl, add the cooled pasta. Then, add the vegetables: 1 cup of halved cherry tomatoes, 1 diced cucumber, and 1 chopped bell pepper. Don't forget 1 cup of thawed peas and ½ cup of finely diced red onion. Toss in 1 ripe diced avocado. Finally, pour the prepared dressing over the salad. Gently mix everything until the pasta and veggies are well coated. For the complete recipe, check [Full Recipe]. - Use fresh herbs for a more vibrant flavor. Fresh parsley and basil make a big difference. - Adjust seasoning to achieve the desired taste. Taste your dressing as you mix it. - Chill salad for enhanced flavor. Let it sit in the fridge for at least 30 minutes. - Garnish with extra herbs or avocado slices for presentation. A touch of green adds beauty. - Use pre-cut vegetables to save preparation time. Many stores offer these, making life easier. - Make dressing ahead of time for quick assembly. This way, you can mix the salad in minutes. Enjoy these tips to make your Green Goddess Pasta Salad even better! For the full recipe, check above. {{image_4}} You can boost your Green Goddess Pasta Salad with protein. Adding grilled chicken or shrimp gives it a tasty twist. If you prefer plant-based options, try chickpeas. They add great texture and flavor. For a vegan dressing, swap Greek yogurt for creamy avocado or cashews. This keeps it rich and delicious without dairy. The greens you use can change the salad's flavor. Spinach, arugula, or kale work well. Each green adds its own nutrients. You can also switch herbs based on your taste. Try dill or cilantro for a fresh twist. Mixing different greens makes the salad colorful and healthy. If you need a gluten-free option, use gluten-free pasta. It tastes just as good as regular pasta. You can also change the ingredient amounts. This helps if you need smaller or larger portions. Adjusting the recipe makes it fit your specific needs. Always feel free to make it your own! Store your Green Goddess Pasta Salad in an airtight container. It will stay fresh for up to 3 days. While it’s best enjoyed fresh, the flavors actually improve after chilling. I love letting it sit overnight. It gives the herbs time to blend and enhances the overall taste. Freezing this salad isn’t a great idea. It can change the texture of the fresh ingredients. The creamy dressing can separate, and the veggies may get mushy. Fresh ingredients are best when used right away. Enjoy them at their peak! If you need to serve it later, enjoy it cold or at room temperature. Avoid using a microwave, as this can ruin the texture and flavor. The salad is vibrant and tasty cold, making it a perfect dish for warm days or picnics. For the best experience, stick to serving it fresh or slightly chilled. Green Goddess dressing has a bright and fresh taste. It includes herbs, lemon juice, yogurt, and olive oil. The herbs often used are parsley and basil. These ingredients come together to make a creamy and zesty dressing. You can easily adjust it to taste. Add more herbs for a stronger flavor. Yes, you can make this salad ahead of time. It is actually ideal to chill it before serving. Chilling helps the flavors mix and develop. Aim to let it sit in the fridge for at least 30 minutes. If you make it a day before, the taste will be even better. If you don’t have Greek yogurt, don’t worry! You can use sour cream as a great substitute. Another option is dairy-free yogurt if you want a vegan choice. You can even use mashed avocado for a creamy texture. All these options work well with the dressing. When stored correctly, this salad stays fresh for up to 3 days. Make sure to keep it in an airtight container. The flavors will meld together, making it even tastier. However, it’s best to enjoy it fresh for the best texture and taste. If you notice any changes in smell or texture, it's best to toss it out. This pasta salad is fresh, healthy, and easy to make. We combined whole grain pasta with colorful veggies, creamy dressing, and vibrant herbs. Remember, you can add proteins or swap ingredients based on your taste. The salad stays fresh for three days but tastes even better after chilling. Enjoy creating your delicious twist on this recipe. This dish is perfect for any occasion, making it a great choice for meals and gatherings.](https://blissfulmeal.com/wp-content/uploads/2025/07/f9b14eb2-cf67-4800-8b6d-d5095eed8a38-768x768.webp)
![- 2 cans black beans - 1 tablespoon extra virgin olive oil - 1 small onion - 2 cloves garlic - 1 jalapeño - 1 teaspoon ground cumin - 1 teaspoon smoked paprika - 1 teaspoon chili powder - Salt and black pepper - 1 cup fresh corn kernels - 1 ripe avocado - 1 cup cherry tomatoes - Fresh cilantro - Lime wedges In this recipe, black beans are the star ingredient. I use two cans of black beans to create a hearty filling. First, rinse and drain the beans well to remove any excess sodium. This step keeps the dish healthy and flavorful. The olive oil adds richness and helps cook the onion and garlic. A small onion, finely chopped, brings sweetness and depth. The garlic, minced, adds an aromatic punch. I also include a jalapeño for a spicy kick. Make sure to deseed it if you want less heat. For spices, I choose ground cumin, smoked paprika, and chili powder. Each spice gives a unique flavor. A pinch of salt and black pepper balances the taste perfectly. Toppings make these tacos shine! Fresh corn adds sweetness and crunch. A ripe avocado provides creaminess. Cherry tomatoes add a burst of freshness. Finishing with fresh cilantro brightens the dish. And don’t forget lime wedges for that zesty squeeze! You can find the full recipe in the article. This will guide you step-by-step to create these tasty tacos. 1. Start by heating a large skillet over medium heat. Pour in the olive oil and let it warm for a moment. 2. Add the finely chopped onion. Sauté it until it turns translucent, about 3-4 minutes. The aroma will fill your kitchen! 3. Next, toss in the minced garlic and finely chopped jalapeño. Stir them for 1-2 minutes. This will give the mixture a nice kick. 4. Fold in the rinsed black beans, ground cumin, smoked paprika, chili powder, and a pinch of salt and black pepper. Cook for 5-7 minutes. Use a fork to mash some beans for different textures. 1. While the beans cook, take another skillet or use the microwave. Warm the corn tortillas until they are soft and pliable. This step is key for easy folding. 2. If using a skillet, heat each tortilla for about 30 seconds on each side. If using a microwave, wrap them in a damp paper towel and heat for about 20 seconds. 1. Grab a warm tortilla and spoon a generous amount of the black bean mixture onto it. 2. Top with fresh corn kernels, creamy avocado slices, halved cherry tomatoes, and chopped cilantro. 3. Serve with lime wedges on the side. Squeeze fresh lime juice over the tacos before eating for a burst of flavor. Enjoy your Spicy Black Bean Tacos! For the complete recipe, check out the [Full Recipe]. To kick up the heat in your spicy black bean tacos, add more jalapeños. Chop them finely and stir them into the bean mix. You can also use hot sauce. Just a few drops can make a big difference. If you want to adjust the spice level, taste as you go. Start with a little heat, then add more if you like. This way, you control the spice to match your taste. Make your tacos look as good as they taste. Arrange them on a bright platter. Use a mix of colors for a fun, festive vibe. Garnish your tacos with fresh cilantro and lime wedges. It adds a pop of color and makes them more inviting. You can also sprinkle some extra corn on the platter for a lovely touch. Pair your tacos with a fresh salsa. A fruity salsa can add a nice contrast to the spices. You can also serve them with a side of rice or a crisp salad for a complete meal. For drinks, try a light beer or a refreshing limeade. Both will balance the flavors and make your meal even better. For the full recipe, check out the detailed instructions! {{image_4}} You can easily make Spicy Black Bean Tacos vegan and gluten-free. Start by checking all your ingredients. Use corn tortillas, as they are naturally gluten-free. For toppings, try diced bell peppers, crunchy cabbage, or vegan sour cream. You can use cashew cream for a rich, creamy texture. Fresh lime juice adds a bright flavor. If you want to add protein, you can try chicken or beef. Simply cook your protein in the same skillet after the onion and garlic. You can also mix in other beans like pinto or kidney beans for variety. They add a different taste and texture. To customize your tacos, change the spices to fit your taste. If you like heat, add more jalapeños or a pinch of cayenne. For a smoky flavor, try adding chipotle powder. You can even add unexpected ingredients, like pineapple or mango, for a sweet twist. This will give your tacos a unique flavor profile. Enjoy experimenting with your own ideas! To keep your spicy black bean tacos fresh, follow these steps: - Wrap the tacos tightly in foil or plastic wrap. - Place them in an airtight container. - Store them in the fridge for up to three days. For the bean mixture, store it separately for the best flavor. - Place it in a sealed container. - Keep it in the fridge for up to five days. When it’s time to enjoy your leftovers, proper reheating is key. - To warm the tortillas, heat them in a skillet over low heat for 1-2 minutes. - You can also use a microwave for about 15-20 seconds. For the bean mixture, heat it in a skillet over medium heat. - Stir it often to keep it from sticking. - This helps maintain flavor and texture. If you want to save the bean mixture for later, freezing works great. - Place it in a freezer-safe container. - It can last up to three months in the freezer. When you’re ready to use it, thaw it overnight in the fridge. - Reheat it in a skillet over medium heat. - This keeps the flavors fresh for your next taco night. For the full recipe, check out the details above! Spicy black bean tacos are a tasty, plant-based dish. They feature black beans, spices, and fresh toppings. The base includes cooked black beans, sautéed onions, garlic, and jalapeños. You can customize them with toppings like corn, avocado, and tomatoes. These tacos are popular due to their flavor and ease of preparation. You can find many variations, like adding cheese or different sauces. Making spicy black bean tacos is quick and easy. The preparation time is about 10 minutes. Cooking the filling takes an additional 15 minutes. So, the total time is around 25 minutes. This makes them a fantastic option for busy weeknights or last-minute meals. Yes, you can prepare these tacos in advance. Make the bean mixture and store it in the fridge. It stays fresh for up to three days. You can also warm it up when you’re ready to eat. For the tortillas, warm them just before serving for the best texture. You can serve several tasty sides with your tacos. Consider fresh salsa, guacamole, or a side salad. Rice and beans are also great choices. For drinks, try a refreshing limeade or a cold cerveza. These pair well and complete the meal nicely. Spicy black bean tacos are tasty and easy to make. We covered key ingredients, how to prepare them, and tips for spicing them up or storing leftovers. You can adjust the recipe to fit your needs, whether adding meat or making it vegan. Feel free to explore different flavors or sides. Enjoy making this simple dish that brings great joy to your meals!](https://blissfulmeal.com/wp-content/uploads/2025/07/daf0e35a-1b29-4afd-a8e4-23f232447476-768x768.webp)