Skip to content
About
Contact
Cookie Policy
Copyright Policy
Disclaimer
Search
Home
Dinner
Appetizer
Desserts
Drinks
About
Contact
Privacy Policy
Toggle Menu
Home
/
Dinner
- Page 18
Dinner
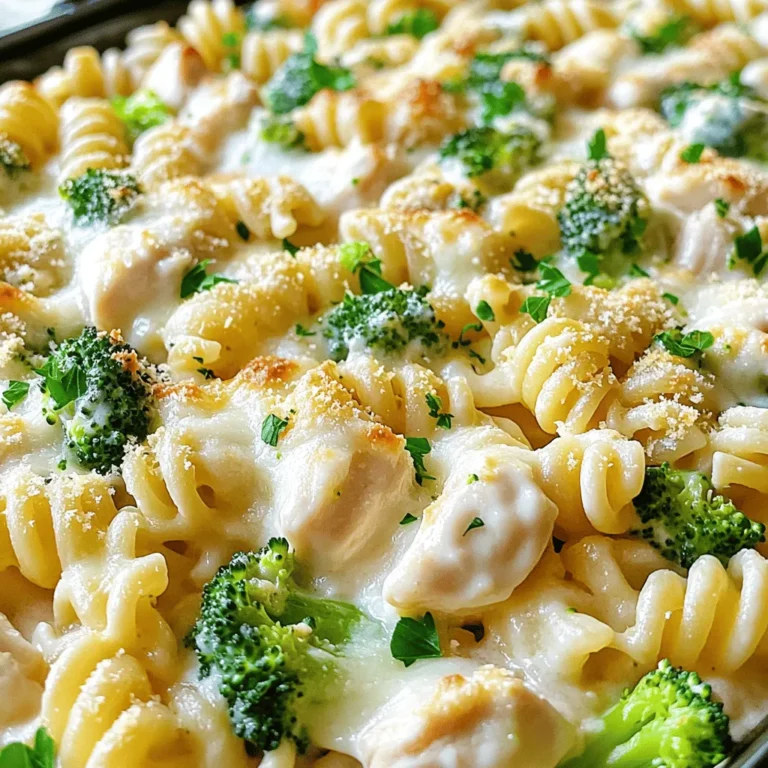
Easy Chicken Alfredo Bake Simple and Tasty Recipe
Spicy Black Bean Tacos Flavorful and Easy Meal
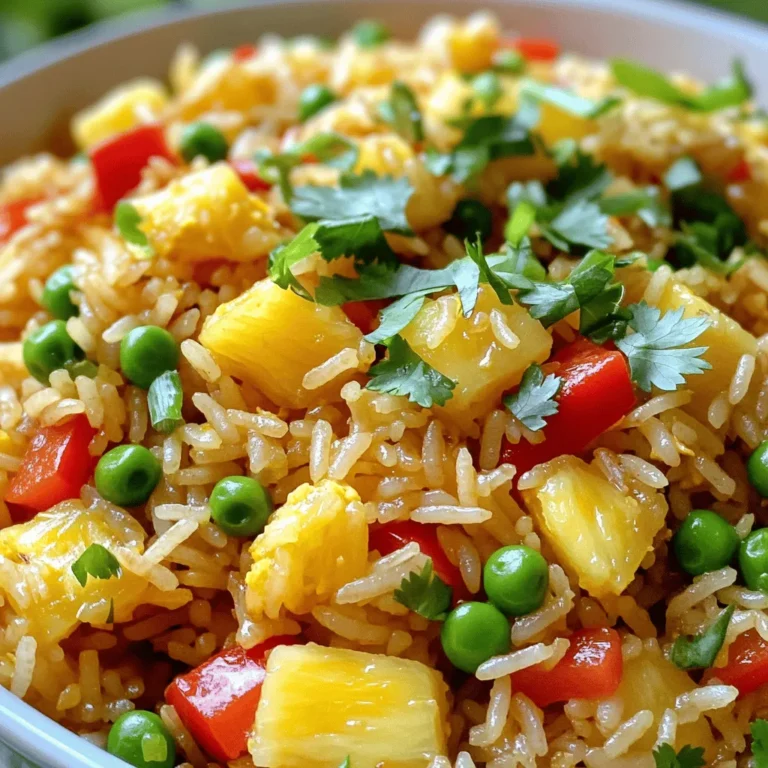
Pineapple Fried Rice Simple and Tasty Delight
Honey Garlic Glazed Salmon Flavorful and Easy Dish
One Pan Garlic Butter Chicken Delightful Dinner Dish
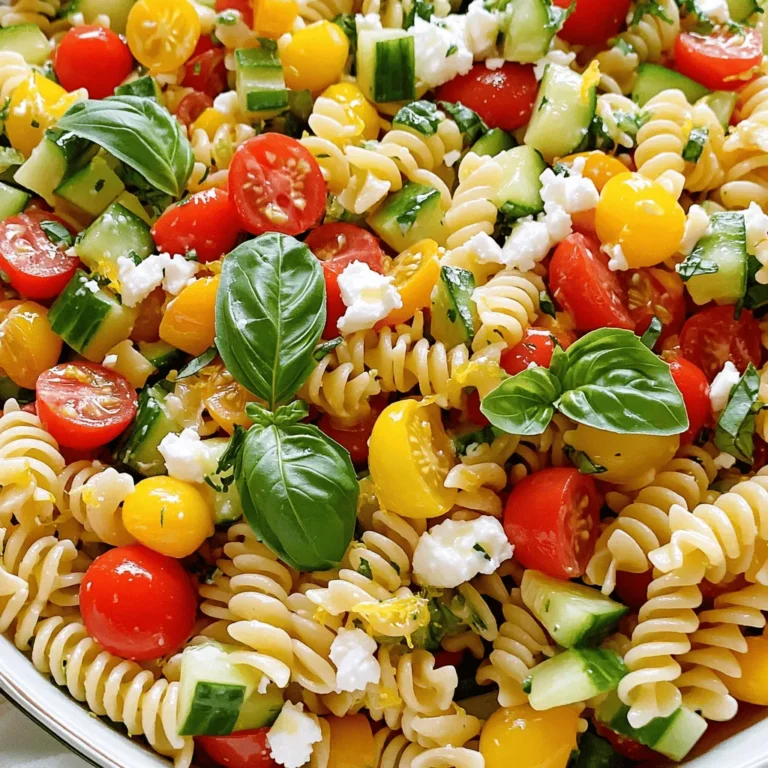
Lemon Basil Pasta Salad Fresh and Healthy Delight
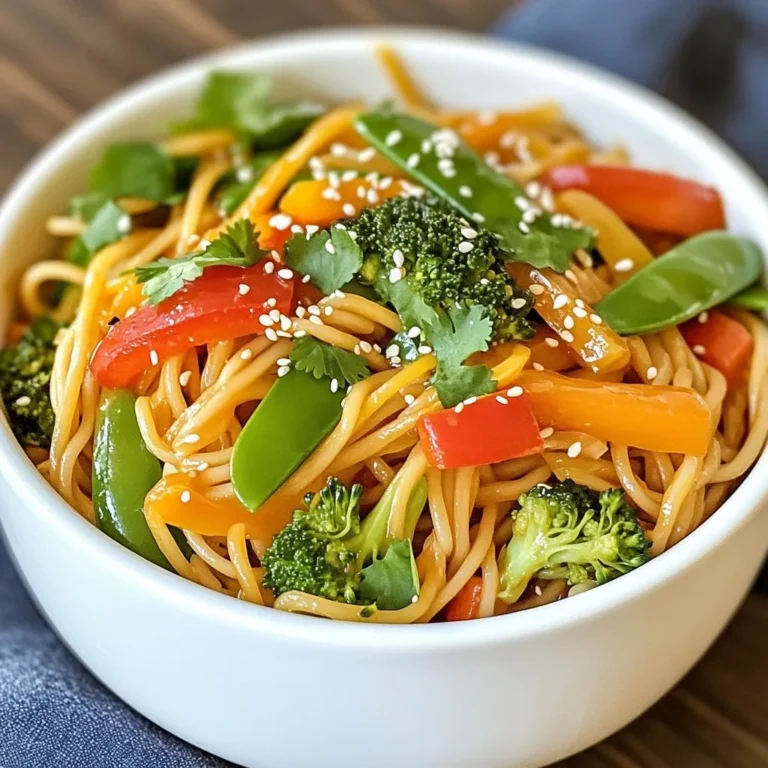
Sesame Ginger Noodle Bowl Flavorful and Healthy Meal
Cheesy Baked Ziti Flavorful Comfort Food Recipe
Easy Veggie Frittata Simple and Flavorful Recipe
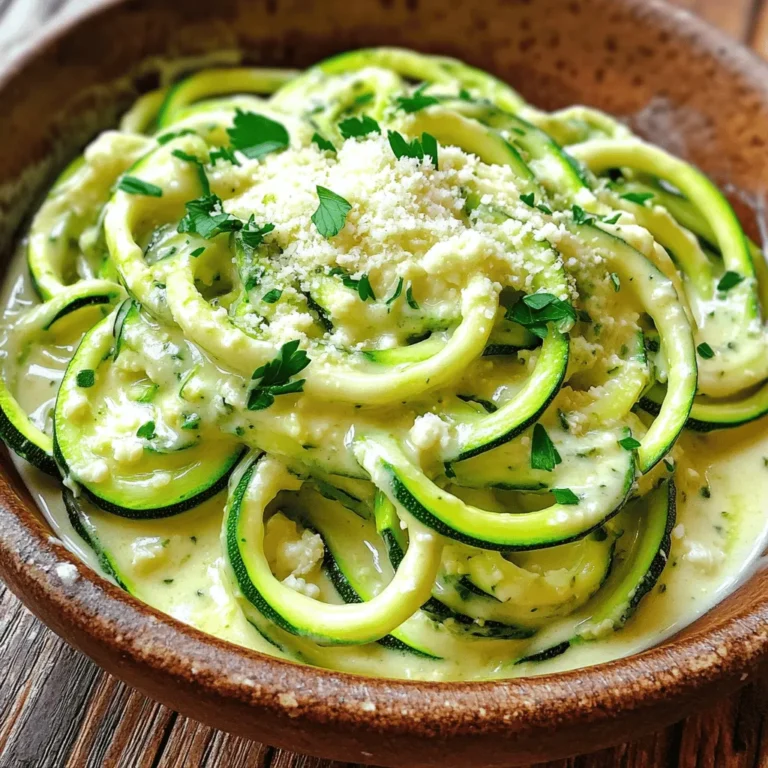
Zucchini Noodle Alfredo Creamy and Healthy Delight
Page navigation
Previous Page
Previous
1
…
16
17
18
19
20
…
38
Next Page
Next
Home
Dinner
Appetizer
Desserts
Drinks
About
Contact
Privacy Policy
Toggle Menu Close
Search for:
Search

![- 1 can (15 oz) black beans, thoroughly drained and rinsed - 1 tablespoon extra-virgin olive oil - 1 small onion, finely diced - 2 cloves garlic, minced - 1 jalapeño, seeds removed and minced - 1 teaspoon ground cumin - 1 teaspoon smoked paprika - 1/2 teaspoon cayenne pepper (adjust to control heat level) - Salt and freshly ground black pepper, to taste - 8 small corn tortillas - 1 cup fresh spinach, coarsely chopped - 1 ripe avocado, sliced into wedges - 1/2 cup crumbled feta cheese - Fresh cilantro sprigs, for garnish - Lime wedges, for serving Gather these simple ingredients for your spicy black bean tacos. Black beans are the star and provide protein. Using fresh veggies like onion, garlic, and jalapeño adds flavor and heat. Cumin and smoked paprika give depth to the dish. The tortillas hold everything together, while toppings like spinach, avocado, and feta add freshness. - For black beans, you can use pinto beans or kidney beans. - If you prefer flour tortillas, they work well too. - For a vegan option, substitute feta with nutritional yeast or dairy-free cheese. Feel free to mix and match based on what you have. This flexibility makes it easy to enjoy tacos any day! You can find the full recipe to guide you in making this delightful meal. - Sautéing the aromatics Start by heating 1 tablespoon of extra-virgin olive oil in a medium skillet over medium heat. When it shimmers, add 1 small, finely diced onion. Sauté for about 3-4 minutes. You want the onion to become soft and clear. Next, add 2 minced garlic cloves and 1 minced jalapeño (seeds removed). Cook for another 1-2 minutes. The garlic should smell great, and the jalapeño should be tender. - Cooking the black bean mixture After the aromatics are ready, it's time for the black beans. Add 1 can of drained and rinsed black beans to the skillet. Stir in 1 teaspoon of ground cumin, 1 teaspoon of smoked paprika, and 1/2 teaspoon of cayenne pepper. Sprinkle with salt and pepper to taste. Cook this mixture for 5-7 minutes, stirring often. You want everything heated through and the flavors to blend well. - Warming the tortillas While the black bean mixture cooks, you can warm the tortillas. Use a separate skillet over medium heat or place them over a low flame. Heat each tortilla for a few seconds on both sides until warm and soft. - Filling and garnishing Now comes the fun part! Take each warm tortilla and spoon a generous amount of the spicy black bean mixture into the center. Top with a handful of coarsely chopped spinach, a few slices of ripe avocado, and a sprinkle of crumbled feta cheese. Finish by adding fresh cilantro sprigs on top. Serve with lime wedges for a burst of fresh flavor. For the complete recipe, check out the Full Recipe section. To make your spicy black bean tacos shine, adjust the spice levels to suit your taste. I often start with half a teaspoon of cayenne pepper. This gives a nice kick without overwhelming the dish. If you prefer more heat, you can add more cayenne or even some hot sauce. For those who like milder flavors, reduce the cayenne to a pinch. Enhancing texture is also key. I love adding fresh spinach for a crunchy bite. You can also mix in some cooked corn or diced bell peppers. These give a nice contrast to the soft black beans and creamy avocado. For the best tortilla experience, I recommend frying them. Heat a skillet over medium heat and add a little oil. Fry each tortilla for about 30 seconds on each side. This makes them crispy and adds great flavor. If you prefer a less hands-on method, you can use the oven. Wrap the tortillas in foil and heat them at 350°F for about 10 minutes. This keeps them warm and soft, ready for filling. Remember to check out the Full Recipe to guide you through every step! {{image_4}} You can change up your tacos by adding different proteins. Chicken or shrimp can bring new flavors. Simply cook the protein in the skillet after the onion and garlic. This step adds a nice touch to your meal. Use about one pound of diced chicken or shrimp. Cook until they are golden brown and cooked through. If you prefer a vegetarian meal, just skip the meat. The black beans are filling and packed with protein. You can add more veggies to keep it hearty. Try mushrooms, zucchini, or bell peppers for extra taste and nutrition. Adding different vegetables boosts your taco's flavor. Try corn, diced tomatoes, or bell peppers. You can sauté these with the onion and garlic. This method brings out their natural sweetness. Incorporating salsas or sauces is another great idea. Fresh salsa adds a bright kick. You can also drizzle a tangy sauce on top. A spicy chipotle sauce can enhance the heat. Choose your favorites to make each bite exciting. For more ideas, check out the Full Recipe for inspiration! To keep your Spicy Black Bean Tacos fresh, store the leftovers properly. First, let the tacos cool down to room temperature. Then, place the black bean mixture in an airtight container. This helps lock in moisture and flavor. Store it in the fridge for up to three days. For the tortillas, keep them in a separate bag to avoid sogginess. If you want to store the black bean mixture longer, freezing is a great option. Transfer the mixture to a freezer-safe bag. Press out any air before sealing. You can freeze the mixture for up to three months. When ready to eat, thaw it in the fridge overnight before reheating. For the best taste, reheat the black bean mixture on the stove. Place it in a skillet over medium heat. Stir it often until it is hot. This keeps the beans from drying out. To reheat the tortillas, use a dry skillet or microwave. In a skillet, heat them for about 30 seconds on each side. If using a microwave, wrap them in a damp paper towel. Heat for about 15-20 seconds. This keeps them soft and fresh. Avoid reheating them too long, as this can make them hard. Enjoy your tacos warm and full of flavor! Spicy Black Bean Tacos last about three to four days in the fridge. Store them in an airtight container. This keeps the flavors fresh and the ingredients safe to eat. Yes, you can make the black bean mixture ahead of time. Prepare it and cool it before storing. You can also warm the tortillas just before serving. This keeps everything fresh and tasty. These tacos pair well with various sides. Here are some great options: - Fresh salsa - Guacamole - Mexican rice - Corn salad - Simple green salad You can easily adjust the spice level in this recipe. Use more or less cayenne pepper for heat. If you want it milder, skip the jalapeño or use only half. Adding toppings like avocado also helps balance the spice. You can find the full recipe for Spicy Black Bean Tacos here: [Full Recipe]. This will guide you through the steps and ingredients for this delicious meal. You now have all the tools to make delicious Spicy Black Bean Tacos. We covered key ingredients, including black beans, spices, and tortillas. You learned how to prepare, assemble, and store tacos for later. There are many ways to mix and match flavors, too. Use different proteins or veggies to suit your taste. Now, it’s time to gather your ingredients and start cooking. Enjoy your taco-making adventure!](https://blissfulmeal.com/wp-content/uploads/2025/07/acb247d9-debe-49d6-b037-8c4e3b93a3bd-768x768.webp)
![When making honey garlic glazed salmon, you need a few key items. Here’s the complete list of ingredients: - Salmon Fillets: 4 fillets, around 6 ounces each, are perfect for this dish. - Marinade Components: - 1/4 cup honey - 1/4 cup low-sodium soy sauce - 4 cloves garlic, finely minced - 1 teaspoon fresh ginger, finely grated - 1 tablespoon olive oil - Garnishes: - 1 tablespoon sesame seeds - 2 green onions, thinly sliced - Salt and freshly ground pepper to taste These simple ingredients combine to create a dish that is both flavorful and easy to prepare. The sweet honey pairs well with the savory soy sauce, while the garlic and ginger add depth. Using low-sodium soy sauce helps keep the dish balanced and not overly salty. For the best results, choose fresh salmon fillets. The quality of the fish makes a big difference in flavor. Enjoy the process of gathering these ingredients, knowing you’re on your way to a delightful meal. You can find the full recipe linked here for detailed steps on how to prepare this dish. To start, grab a medium mixing bowl. In it, whisk together the honey, low-sodium soy sauce, minced garlic, and grated ginger. You want this mix to be smooth and well combined. This marinade is sweet and savory, which gives the salmon its great flavor. Set it aside while you prep the salmon. Now, take your salmon fillets and pat them dry with paper towels. This step is key for achieving a nice sear. Generously sprinkle salt and freshly ground pepper on both sides of each fillet. Make sure every piece is coated evenly. This simple seasoning enhances the dish and balances the sweetness of the glaze. For cooking, use a large non-stick skillet. Heat the olive oil over medium-high heat until it shimmers. Carefully place the salmon fillets in the skillet, skin-side down. Sear them for about 4-5 minutes, letting the skin get golden and crispy. Then, flip the fillets gently using a spatula. Lower the heat to medium to avoid burning the sauce. Next, pour the prepared honey-garlic mixture over the salmon. Cook for another 4-5 minutes, spooning the glaze over the fillets often. This helps the salmon soak in all that flavor. Once the internal temperature reaches 145°F, remove the salmon from the skillet and let it rest for a minute on a plate. To thicken the sauce, increase the heat slightly and let the remaining sauce simmer for 2-3 minutes, stirring occasionally. Finally, place the salmon on serving plates, drizzle the thickened sauce over each fillet, and garnish with sesame seeds and green onions. This step adds a nice finish and color to your dish. For the full recipe, check out the delicious details! To make great salmon, start with fresh fillets. Look for bright, shiny skin with no brown spots. Always pat the fillets dry. This helps the skin crisp up. Cook your salmon skin-side down first. This gives it a nice golden color. Cook it for about 4-5 minutes on medium-high heat. Flip gently and lower the heat. This avoids burning while it cooks through. Your salmon should reach 145°F inside. A meat thermometer can help you check. The key to a tasty glaze is balance. Use equal parts honey and soy sauce. This gives the glaze sweetness and saltiness. Fresh garlic and ginger add a nice kick. Make sure to whisk the marinade well. This ensures all the flavors mix. When cooking, spoon the glaze over the salmon. This keeps the flavor strong and delicious. Let the sauce simmer to thicken. A thick glaze coats the fish nicely and adds a lovely shine. Honey garlic glazed salmon pairs well with many sides. Try it with steamed broccoli for a fresh crunch. Jasmine rice is another great choice; it soaks up the sauce well. You can also serve it with a salad. A light, citrus salad can brighten the meal. For drinks, a chilled white wine complements the honey flavor. You can also try sparkling water with lemon. These pairings enhance the dish and create a lovely dining experience. For the full recipe, click [Full Recipe]. {{image_4}} You can boost the flavor of your honey garlic glazed salmon by adding lemon zest. Lemon zest adds a bright, fresh taste that balances the sweetness of the honey. To use lemon zest, simply grate the outer peel of a lemon before mixing it into the marinade. A teaspoon is usually enough. This small addition can change the dish and make it stand out. If you want to swap the honey, there are great options. Maple syrup or agave nectar can work well. These sweeteners give a similar sweetness without changing the taste too much. Adjust the amount based on your sweetness level. Start with a 1/4 cup and taste. You might want more or less. This change can suit different diets and preferences. If you like spice, consider adding some heat to your salmon. You can mix in red pepper flakes or sriracha into the marinade. Start with a small amount, like a teaspoon, and taste it. You can always add more if you want extra spice. This variation creates a nice balance between sweet and spicy. It adds depth and excitement to your dish. Feel free to explore these variations to keep your meals fresh and interesting. For the full recipe, check the complete list above. Store leftover honey garlic glazed salmon in an airtight container. Place it in the fridge. It will stay fresh for up to three days. Make sure to let the salmon cool before sealing it. This helps keep moisture and flavor. To reheat, use a microwave or oven. If using a microwave, heat on low power. This avoids drying out the salmon. Cover it with a damp paper towel to retain moisture. If using the oven, place the salmon in a dish. Add a splash of water and cover. Heat at 275°F for about 10-15 minutes. This keeps the fish tender and tasty. You can freeze honey garlic glazed salmon for up to two months. Wrap each fillet tightly in plastic wrap. Then, place it in a freezer-safe bag. Remove as much air as possible. When you're ready to eat, thaw it in the fridge overnight. This keeps the flavor fresh and delightful. The best salmon for this dish is wild-caught salmon. It has rich flavor and firm texture. Sockeye and Coho are great choices. They hold up well to cooking. Farmed salmon can work too, but it may have a milder taste. Choose salmon that is fresh and bright in color. This will ensure a delicious meal. You can check if the salmon is done by looking for its color. It should be opaque and flake easily with a fork. The internal temperature should reach 145°F. You can use a meat thermometer for accuracy. If you do not have one, cook for about 8-10 minutes total on medium heat. The glaze will also help you know when it is ready. Yes, you can prepare the marinade in advance. Just store it in the fridge for up to 2 days. You can also season the salmon and keep it wrapped in the fridge. Just remember to cook it within 24 hours for the best taste. Cooked salmon can be stored too. Keep it in an airtight container for up to 3 days. Reheat gently to keep it moist and tasty. For the full recipe, check out the details above. This blog post shared how to make delicious honey garlic glazed salmon. We covered the key ingredients, from fresh salmon to tasty marinades and garnishes. I outlined step-by-step cooking methods, plus tips for cooking it just right. We explored fun variations to make this dish your own, and I provided storage tips for leftovers. In summary, making this salmon is easy and fun. With simple ingredients and methods, you can impress anyone at the dinner table. Enjoy your cooking adventure!](https://blissfulmeal.com/wp-content/uploads/2025/07/7e59e151-b23c-41a1-9487-05dbc7b00db7-768x768.webp)
![- 4 boneless, skinless chicken thighs - 4 tablespoons unsalted butter, divided - 8 cloves garlic, finely minced - 1 teaspoon dried thyme - 1 teaspoon smoked paprika - Salt and freshly ground black pepper, to taste - 1 cup cherry tomatoes, halved - 1 cup fresh baby spinach - 1 lemon, juiced (about 2 tablespoons) - Fresh parsley, chopped, for garnish Using these simple ingredients makes cooking easy and fun. Chicken thighs give you a juicy, tender bite. The garlic and butter blend creates a rich flavor that you will love. Fresh tomatoes and spinach add color and nutrition. - Calories per serving: About 350 calories - Macronutrient breakdown: Roughly 25 grams of protein, 20 grams of fat, and 10 grams of carbs - Health benefits of garlic and spinach: Garlic boosts your immune system while spinach offers iron and vitamins. This dish is not only tasty but also packed with health benefits. Garlic helps keep you healthy, and spinach supports your body with nutrients. Enjoy this dish guilt-free, knowing it's good for you! Check out the Full Recipe for detailed steps to make this delightful dish. - Prepare the skillet with butter: Start by heating 2 tablespoons of unsalted butter in a large skillet over medium-high heat. Wait until the butter melts and bubbles. - Season the chicken thighs: Take 4 boneless, skinless chicken thighs. Sprinkle salt, black pepper, dried thyme, and smoked paprika on both sides. Make sure to coat them well for great flavor. - Sear the chicken thighs: Place the seasoned thighs in the hot skillet. Sear for about 5-7 minutes on each side. They should look golden brown and reach 165°F inside. Once done, take them out and set aside. - Sauté the garlic and cook the vegetables: In the same skillet, add the rest of the butter and 8 minced garlic cloves. Sauté for 1 minute. Don’t let the garlic burn! Then, add 1 cup of halved cherry tomatoes and 1 cup of fresh baby spinach. Cook for 2-3 minutes until the spinach wilts and tomatoes soften. - Combine chicken with vegetables and lemon juice: Return the chicken to the skillet. Squeeze the juice of 1 lemon over everything. Let it simmer for 2 minutes to blend the flavors. - Adjust seasoning and serve: Taste the dish. If needed, add more salt and pepper. Once ready, remove from heat. Serve hot and enjoy this delightful meal straight from the pan. - Prep time: 10 minutes - Cook time: 20 minutes - Total time: 30 minutes - Servings: 4 For the full recipe, check out [Full Recipe]. Seasoning is key for great flavor. I always use fresh herbs, salt, and pepper. Make sure to season both sides of the chicken well. This helps lock in moisture and adds taste. For searing chicken, heat your skillet well before adding the meat. This creates a nice crust. Place the chicken in the pan gently, and avoid overcrowding. This ensures even cooking and browning. One big mistake is burning the garlic. Garlic cooks fast, so watch it closely. Remove it from heat as soon as it’s fragrant. This keeps your dish from tasting bitter. Another common issue is undercooked chicken. Use a meat thermometer to check the internal temperature. It should reach 165°F. This keeps your chicken juicy and safe to eat. I recommend using a heavy skillet or cast-iron pan. These types heat evenly and help with searing. A good spatula or tongs makes flipping the chicken easy. Also, keep a meat thermometer handy. It’s a great tool for ensuring perfect doneness. With the right tools, your cooking will be much smoother. For more details, you can check the Full Recipe. {{image_4}} You can switch the chicken for other proteins. Turkey thighs work well. Tofu is a great choice for a vegan option. It holds flavor and cooks nicely. Add different vegetables for variety. Consider bell peppers, zucchini, or broccoli. They all blend well with garlic and butter. Want more texture? Try adding cheese or nuts. Parmesan cheese melts beautifully over the chicken. Almonds or walnuts give a nice crunch. You can also play with seasonings. Try adding Italian herbs or a hint of cayenne. These spices can elevate the dish. If you need it gluten-free, check labels on butter and seasonings. Most are safe, but always verify. To make it low-carb, cut the tomatoes and focus on the chicken and spinach. This keeps it hearty and satisfying without extra carbs. How do you store One Pan Garlic Butter Chicken? First, let the dish cool down. Then, place it in an airtight container. This keeps the chicken moist and flavorful for later meals. You should store it in the fridge. It lasts for up to three days. For best results, use glass containers. They do not stain or retain odors. Plastic containers are also fine if they are food-safe and airtight. What are the best methods for reheating chicken? The oven works great for even heating. Preheat it to 350°F and place the chicken in a baking dish. Cover the dish with foil to keep it moist. You can also use the microwave. Place the chicken on a microwave-safe plate. Cover it with a damp paper towel. Heat for 1-2 minutes, checking often to avoid drying it out. To keep the flavor and texture, avoid using high heat. Slow and steady is the way to go! How do you freeze leftovers? First, let the chicken cool completely. Then, cut it into pieces if desired. Place the chicken in a freezer-safe bag or container. Remove as much air as possible to prevent freezer burn. To thaw, move the chicken from the freezer to the fridge. It takes about 24 hours. You can also use the microwave on defrost mode. Just be careful not to cook it. When ready to eat, you can reheat it as mentioned above. Enjoy your One Pan Garlic Butter Chicken straight from the freezer! How to make One Pan Garlic Butter Chicken? First, heat butter in a skillet. Sear seasoned chicken thighs until golden. Then, sauté garlic and add cherry tomatoes with spinach. Combine it all, add lemon juice, and simmer. This creates a rich, buttery flavor. You can find the full recipe above for detailed steps. Can I use chicken breasts instead of thighs? Yes, you can use chicken breasts. They are leaner but may dry out faster. Adjust the cooking time to ensure they stay juicy. Thighs are more forgiving and flavorful, though. What should I serve with this dish? Pair it with crusty bread to soak up the sauce. You can also serve over rice or pasta. A fresh salad adds a nice crunch and balance to the meal. Is this recipe suitable for meal prep? Yes, One Pan Garlic Butter Chicken is great for meal prep. Store leftovers in an airtight container in the fridge. They will stay fresh for up to three days. How can I lower the calorie count? To reduce calories, use less butter or opt for a light butter substitute. You can also add more vegetables. This keeps the dish filling without extra calories. What’s the best pan to use for this recipe? A large, heavy skillet works best. Cast iron or stainless steel pans are great options. They heat evenly and give a nice sear to the chicken. Can I cook this on a grill instead of a skillet? Yes, grilling is an option. Use a grill pan or direct heat. Keep an eye on the chicken to avoid drying it out. The smoky flavor will add a great twist! This blog post shared a tasty recipe for One Pan Garlic Butter Chicken. You learned about the ingredients, easy steps to prepare and cook, and helpful tips. Try making this dish with the suggested variations for more fun. Store leftovers properly to keep them fresh. Remember, this dish is quick and great for meal prep. Enjoy cooking and experimenting in your kitchen! It’s a simple way to impress friends and family. Keep exploring new flavors and enjoy your meals!](https://blissfulmeal.com/wp-content/uploads/2025/06/76dd704c-d34f-497d-836b-8788f4c0765d-768x768.webp)
![- 12 oz ziti pasta - 2 cups marinara sauce - 1 cup ricotta cheese - 2 cups shredded mozzarella cheese - 1 cup grated Parmesan cheese - 1 large egg - 1 teaspoon dried Italian herbs - Salt and pepper to taste - Fresh basil leaves for garnish To make Cheesy Baked Ziti, gather these ingredients. The ziti pasta gives the dish its shape. Marinara sauce adds a rich flavor. Ricotta brings creaminess, while mozzarella and Parmesan offer a cheesy delight. The egg helps bind the mixture together. - Alternatives for cheese: Use cottage cheese instead of ricotta. For a dairy-free option, try cashew cheese. - Gluten-free pasta options: Swap ziti for gluten-free pasta made from rice or quinoa. - Homemade marinara sauce recipe: Combine canned tomatoes, garlic, onion, and herbs for a quick sauce. These substitutions keep your Cheesy Baked Ziti tasty and fun. Adjust these ingredients based on your needs or preferences. This way, you can enjoy a comforting meal that suits everyone at your table. For the full recipe, check out the complete details! First, preheat your oven to 375°F (190°C). This step gets your oven ready for baking. Then, take a large pot and fill it with salted water. Bring the water to a boil. Add the ziti pasta and cook it according to the package instructions. You want it al dente, so keep an eye on the time. Once cooked, drain the pasta and set it aside. Next, grab a mixing bowl. In this bowl, combine the ricotta cheese, half of the mozzarella cheese, and half of the Parmesan cheese. Crack in the egg and add the dried Italian herbs, salt, and pepper. Mix it all together until it is smooth and creamy. Now, it's time to build your ziti dish. Pour a layer of marinara sauce into a spacious baking dish. This sauce will keep the ziti moist and add great flavor. Spread it evenly over the bottom. Next, layer half of the cooked ziti on top of the sauce. After that, use half of your ricotta mixture and spread it evenly over the pasta. Follow this with another layer of marinara sauce. Repeat these steps: add the remaining ziti, spread the last of the ricotta mixture, and finish with the last of the marinara sauce. Top it off by sprinkling the rest of the mozzarella and Parmesan cheese on the very top. This will create a delicious, cheesy crust. Now, cover the baking dish with aluminum foil. This helps to trap moisture, making the dish nice and creamy. Place the dish in your preheated oven and bake for 20 minutes. After 20 minutes, carefully remove the foil. Continue baking for another 15 to 20 minutes. Watch closely for the cheese to bubble and turn a lovely golden brown. Once it's baked perfectly, take it out of the oven. Let it cool for about 5 minutes. This resting time helps to set the layers. Before serving, add fresh basil leaves on top for a nice touch. Enjoy your cheesy baked ziti! For the full recipe, check out the details above. To get the best texture for your cheesy baked ziti, you want your pasta to be al dente. This means it should be firm when you bite it. Here are some tips: - Use plenty of water when boiling the ziti. - Add salt to the water for flavor. - Follow the package instructions, but check a minute early. The filling needs to be creamy for the perfect bite. To ensure this: - Mix ricotta cheese with egg and herbs well. - Add some of the mozzarella to the filling for added creaminess. When serving cheesy baked ziti, it pairs well with garlic bread or a light salad. The bread soaks up the sauce nicely. A fresh salad adds crunch and balance to the meal. For wine lovers, consider a nice red wine. A Chianti or a light Pinot Noir works well. These wines enhance the rich flavors of the dish. Storing your baked ziti right is key to keeping it fresh. Here are some best practices: - Let the dish cool completely before storing. - Use an airtight container to keep it fresh in the fridge. When reheating, follow these tips to avoid drying it out: - Cover the dish with foil to keep moisture in. - Heat at a low temperature, around 325°F (160°C) until warm. These tips will help you enjoy your cheesy baked ziti just like fresh out of the oven. For a complete guide, check the full recipe. {{image_4}} You can add meat to your cheesy baked ziti for extra flavor. Ground beef or sausage works well. Just cook the meat first, then mix it with the marinara sauce. If you want a vegetarian dish, try using mushrooms or zucchini instead. These options keep the dish hearty without meat. Adding vegetables can boost both flavor and nutrition. Spinach, bell peppers, or mushrooms mix well into the dish. They add great taste and color. You can also experiment with different cheese blends. Try using gouda or cheddar for a unique twist. Mixing cheeses creates layers of flavor. Many regions have their own take on baked ziti. You might try using pesto sauce instead of marinara for a fresh flavor. Some people even use a white sauce for a creamy touch. Additionally, you can draw inspiration from cuisines around the world. For example, adding spices like cumin gives it a fun kick. For a full recipe, check out the [Full Recipe]. To keep your Cheesy Baked Ziti fresh, follow these tips: - Refrigeration guidelines: Once the dish cools, cover it tightly with plastic wrap or aluminum foil. Store it in the fridge. It will stay good for up to 3 days. If you plan to eat it later, it’s best to keep it in an airtight container. - Freezing instructions: If you want to freeze it, let it cool completely first. Use a freezer-safe dish. Wrap the dish with plastic wrap, then cover it with foil. This helps prevent freezer burn. It can last up to 3 months in the freezer. When ready, thaw it overnight in the fridge before reheating. - How long it lasts in the fridge: Cheesy Baked Ziti stays fresh for about 3 days in the fridge. Always check for signs of spoilage before eating. - Signs of spoilage to watch out for: Look for changes in color or texture. If it smells sour or has mold, toss it out. If the cheese looks slimy, it is also a sign to discard it. Enjoy your delicious dish while it’s fresh! To make Cheesy Baked Ziti, you need simple ingredients. Here’s the breakdown: - 12 oz ziti pasta - 2 cups marinara sauce - 1 cup ricotta cheese - 2 cups shredded mozzarella cheese - 1 cup grated Parmesan cheese - 1 large egg - 1 teaspoon dried Italian herbs - Salt and pepper to taste - Fresh basil leaves for garnish Now, let’s go through the step-by-step process: 1. Preheat your oven to 375°F (190°C). 2. Boil salted water in a large pot. Cook the ziti pasta until al dente. Drain it and set aside. 3. In a bowl, mix ricotta cheese, half of the mozzarella, half of the Parmesan, the egg, herbs, salt, and pepper. Blend well. 4. Pour a layer of marinara sauce in a baking dish. 5. Add half of the cooked ziti over the sauce. Then, spread half of the ricotta mixture on top. 6. Add another layer of marinara sauce. 7. Repeat with the remaining ziti and ricotta mixture. Finish with the last of the marinara. 8. Top with the rest of the mozzarella and Parmesan cheese. 9. Cover with foil and bake for 20 minutes. 10. Remove the foil and bake for another 15 to 20 minutes until bubbly and golden. 11. Let it cool for 5 minutes. Garnish with fresh basil before serving. For the full recipe, check out the earlier sections of this article. Yes! You can prepare Cheesy Baked Ziti ahead of time. Here are the best ways to do it: - Assemble the dish: Follow the recipe steps up to the baking part. Cover the dish tightly with foil and place it in the fridge. - Bake later: When you are ready to eat, preheat the oven. Bake the dish straight from the fridge. You may need to add a few extra minutes to the baking time. Yes, Cheesy Baked Ziti freezes very well. Here are some tips and reheating instructions: - Freezing: After assembling, cover the dish tightly with foil or plastic wrap. Label it with the date. Freeze for up to 3 months. - Reheating: To reheat, thaw it in the fridge overnight. Bake in a preheated oven at 375°F (190°C) for about 30-40 minutes. Check that it is heated through and bubbly before serving. This blog offered a complete guide to making Cheesy Baked Ziti. We covered the ingredients, substitutions, and step-by-step instructions. I shared tips and variations to enhance your dish. Additionally, I provided storage info and answered common questions. Baked ziti is simple yet versatile. With easy steps and tasty options, you can create a meal for any occasion. Enjoy making this dish your own, and savor each bite!](https://blissfulmeal.com/wp-content/uploads/2025/06/7cd17b61-95fb-4820-bc34-f21da705f198-768x768.webp)