Skip to content
About
Contact
Cookie Policy
Copyright Policy
Disclaimer
Search
Home
Dinner
Appetizer
Desserts
Drinks
About
Contact
Privacy Policy
Toggle Menu
Home
/
Dinner
- Page 20
Dinner
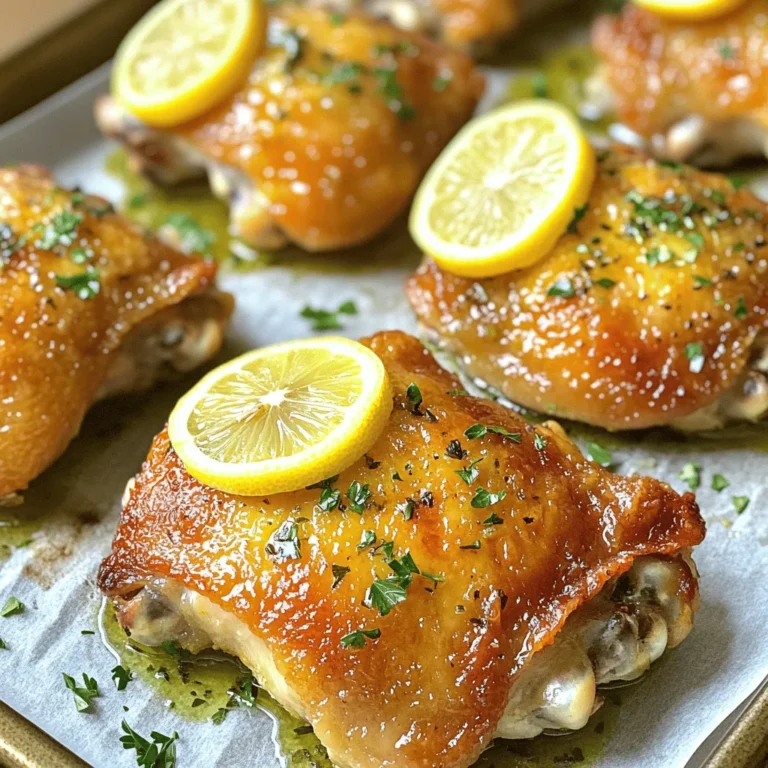
Baked Lemon Herb Chicken Thighs Easy and Tasty Meal
Maple Glazed Carrots Tasty Side Dish Recipe
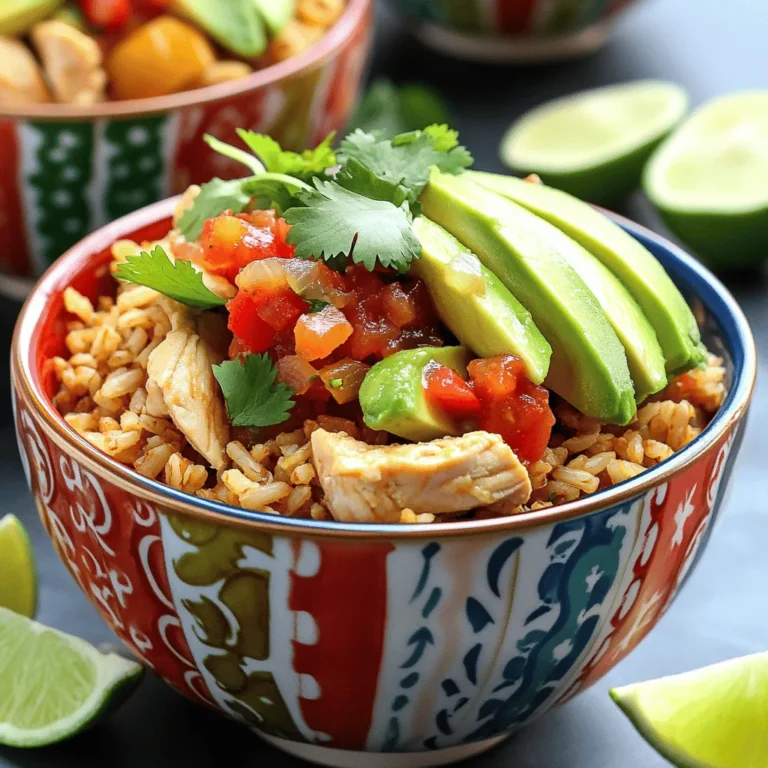
Delicious Chicken Burrito Bowls Simple and Filling Meal
Spicy Cajun Shrimp Pasta Flavorful and Easy Recipe
Balsamic Glazed Brussels Sprouts Flavorful Veggie Dish
Avocado Toast with Poached Egg Savory and Simple Meal
Roasted Sweet Potato Salad Flavorful and Nutritious Dish
Classic Cobb Salad Fresh and Flavorful Recipe Guide
Healthy Quinoa Salad Energizing and Flavorful Dish
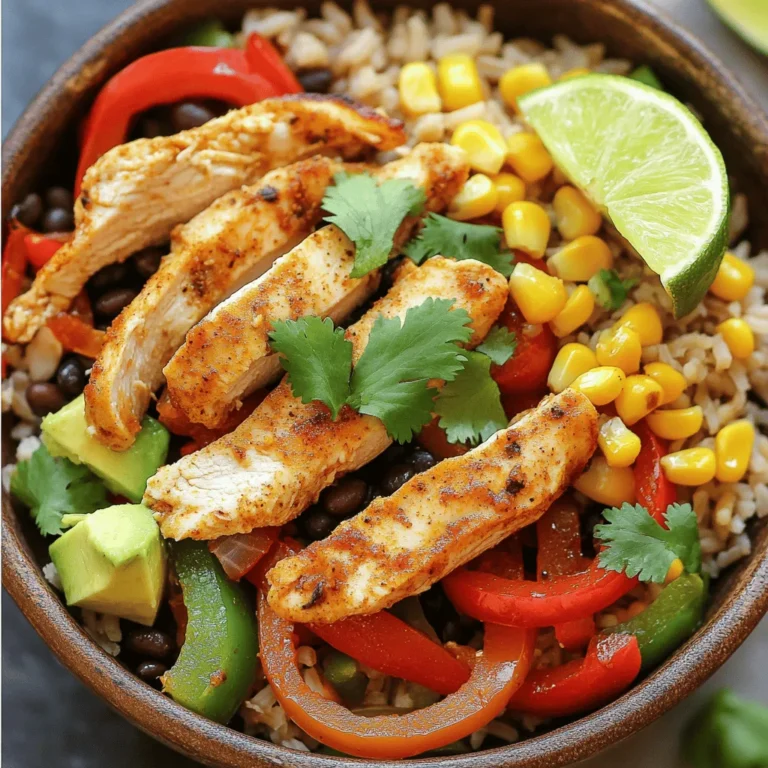
Easy Chicken Fajita Bowls Flavorful and Simple Meal
Page navigation
Previous Page
Previous
1
…
18
19
20
21
22
…
38
Next Page
Next
Home
Dinner
Appetizer
Desserts
Drinks
About
Contact
Privacy Policy
Toggle Menu Close
Search for:
Search

![- Baby Carrots (1 lb) - Unsalted Butter (3 tablespoons) - Pure Maple Syrup (1/4 cup) - Ground Cinnamon (1 teaspoon) - Sea Salt (1/4 teaspoon) - Fresh Thyme Leaves (1 tablespoon) - Freshly Ground Black Pepper You can use regular carrots instead of baby carrots. Just cut them into smaller pieces. If you need a sweet substitute for maple syrup, try honey or agave syrup. For thyme, fresh is best, but dried will work in a pinch. Use about one teaspoon of dried thyme if you go that route. Each serving of these maple glazed carrots contains about 90 calories. They are rich in fiber and vitamin A. Carrots are good for your eyes and skin. Maple syrup adds natural sweetness and some minerals, too. - Start by thoroughly washing the baby carrots under cool running water. - If you use larger carrots, peel and cut them into sticks or rounds. - This ensures even cooking and a nice bite. - Next, in a large skillet, melt the unsalted butter over medium heat. - Wait until the butter is bubbly and fragrant. - Add the prepared carrots to the skillet and sauté them for about 5 minutes. - Stir them occasionally to help soften them gently. - Now, pour the pure maple syrup over the carrots. - Sprinkle in the ground cinnamon and sea salt. - Use a spatula to mix everything well. - Ensure each carrot is evenly coated with the syrup and spices. - Continue cooking for another 10 minutes. - Stir occasionally until the carrots become fork-tender. - This means they should be soft enough to pierce easily. - As they near completion, sprinkle fresh thyme leaves on top. - Season with freshly ground black pepper to taste. - Stir again and let it cook for another minute. - This melds the flavors beautifully. - Remove the skillet from the heat and cool slightly before serving. For the complete process, refer to the Full Recipe for more details. - To get the perfect glaze, cook the carrots over medium heat. - Stir often to coat them well in the syrup. - Cook until they are tender but not mushy. - To avoid overcooked carrots, check their texture often. - They should be fork-tender but still firm. - Maple glazed carrots pair well with roasted chicken or pork. - They also complement hearty grain dishes like quinoa or rice. - For best results, use a large skillet to cook evenly. - A spatula helps mix the ingredients without breaking the carrots. - Serve the carrots in a shallow dish for a nice look. - Garnish with fresh thyme for a pop of color. - Drizzle extra maple syrup on top for added sweetness. - Use a sprinkle of black pepper for a touch of contrast. {{image_4}} You can boost the flavor of your maple glazed carrots in simple ways. Adding minced garlic gives a savory taste. Garlic pairs well with the sweetness of maple syrup. You can also try spices like nutmeg or ginger. Nutmeg brings warmth, while ginger adds a zesty kick. Just a pinch of either can change the whole dish. If you want a vegan version, swap out the butter for plant-based butter. This keeps the glaze rich and tasty. For those watching sugar, you can reduce the maple syrup. You might use a sugar substitute or just a smaller amount. Both options help keep your dish healthy. You can change the recipe based on the season. In spring, add fresh herbs like parsley or dill for a bright taste. These herbs add freshness and a pop of color. For autumn, think about mixing in apples or cranberries. Both fruits complement the carrots nicely and add a festive flair. You can customize this dish to match the time of year! For the full recipe and more tips, check out the [Full Recipe]. After enjoying your maple glazed carrots, store any leftovers in the fridge. Use an airtight container for best results. This keeps them fresh and tasty. They last about 3 to 5 days in the fridge. If you notice any off smells or changes in color, it’s best to toss them. You can reheat your carrots in two ways: the microwave or the stovetop. For the microwave, place them in a safe dish and cover with a damp paper towel. Heat for about 1-2 minutes, checking often. For stovetop, add them to a skillet over low heat. Stir gently to warm them through. To keep that great texture, avoid cooking them too long. You want them warm but not mushy. Yes, you can freeze maple glazed carrots! First, let them cool completely. Next, pack them in a freezer-safe bag or container. Remove as much air as you can. This helps prevent freezer burn. They can last up to 3 months in the freezer. When you’re ready to eat them, thaw in the fridge overnight. Reheat using the stovetop method for the best texture. Enjoy that sweet flavor all over again! Check out the Full Recipe for more tips. Maple glazed carrots are a sweet and savory side dish. They combine carrots with pure maple syrup, butter, and spices. The dish has a rich, sticky glaze that makes the carrots shine. The natural sweetness of the maple syrup enhances the carrots' flavor. This dish is simple, tasty, and great for any meal. People love it for its vibrant color and delicious taste. Yes, you can prep this recipe in advance. Wash and cut the carrots ahead of time. Store them in a sealed bag in the fridge. You can also cook the carrots earlier. Simply warm them up before serving. This way, you save time during busy meals. Just make sure to reheat them gently to keep the glaze nice. Maple glazed carrots pair well with many dishes. They complement roasted chicken or pork nicely. You can also serve them with grilled salmon for a fresh touch. For a vegetarian option, try them with quinoa or a hearty salad. To balance flavors, add a tangy sauce or citrus. These ideas will create a wonderful mix on your plate. For the full recipe, check out the details above. Maple glazed carrots are simple to make and delicious to eat. We covered key ingredients, preparation steps, and serving tips. You can adapt this recipe to fit your needs, whether you want a vegan version or new flavors. Storing and reheating the leftovers is easy, too. This dish not only tastes great but also provides many health benefits. Try this recipe next time you want a tasty side dish. Enjoy exploring all the ways to make these carrots your own!](https://blissfulmeal.com/wp-content/uploads/2025/06/effb0711-483e-4d3c-8f23-a15cece38217-768x768.webp)
![- 8 ounces fettuccine pasta - 1 pound large shrimp, peeled and deveined - 2 tablespoons Cajun seasoning - 2 tablespoons olive oil - 1 medium red bell pepper, sliced - 1 medium yellow onion, sliced - 3 cloves garlic, minced - 1 cup cherry tomatoes, halved - 1 cup heavy cream (or coconut cream for lighter option) - Salt and pepper to taste - 2 tablespoons fresh parsley, finely chopped - Juice of 1 lemon When I make Spicy Cajun Shrimp Pasta, I love how these ingredients come together. The fettuccine is perfect for holding the creamy sauce. The shrimp adds a nice protein boost and absorbs the Cajun flavor well. The red bell pepper and onion give a sweet crunch, while garlic adds a wonderful aroma. Cherry tomatoes pop with juice, bringing brightness to the dish. Cajun seasoning is key here. It gives the shrimp a bold kick. I often choose heavy cream, but coconut cream works too if you want a lighter touch. Fresh parsley and lemon juice at the end brighten the whole dish and make it look pretty. For the full recipe, check out the link. You'll find all the steps to make this delicious meal! To cook the fettuccine, start with a large pot of salted water. Bring it to a rolling boil. Add the fettuccine and cook it according to the package instructions. You want it to be al dente, which means it should be firm yet tender. This usually takes about 8-10 minutes. Once it's done, drain the pasta but save a cup of pasta water. You may need it later to adjust the sauce. Now, let’s season the shrimp. Take your peeled and deveined shrimp and place them in a mixing bowl. Sprinkle the Cajun seasoning over the shrimp. Toss the shrimp until they are fully coated in the spices. This step is key to packing in the flavor. Next, we move to the vegetables. Grab a large skillet and heat the olive oil over medium-high heat. When the oil is hot, add your sliced red bell pepper and yellow onion. Sauté these for about 4-5 minutes. Stir them occasionally until they turn tender and smell great. This process brings out their natural sweetness. After the vegetables are ready, shift them to one side of the skillet. Now, add the seasoned shrimp to the empty side. Cook the shrimp for about 2-3 minutes per side. They are done when they turn pink and opaque. This timing is crucial for perfectly cooked shrimp. Once the shrimp are cooked, add the minced garlic. Then, throw in the halved cherry tomatoes. Stir everything together and sauté for another 1-2 minutes. This allows the garlic to release its strong aroma and the tomatoes to soften. Next, pour in the heavy cream (or coconut cream) and bring it to a gentle simmer. Mix well to combine all the flavors into a creamy sauce. Finally, add the drained fettuccine to the skillet. Toss it gently to coat the pasta with the sauce. If the sauce seems thick, add a splash of the reserved pasta water. Finish with salt and pepper to taste. To make your Spicy Cajun Shrimp Pasta even tastier, try adding some extra spices. Here are a few ideas: - Smoked Paprika: This adds a nice depth to the dish. - Cayenne Pepper: If you want more heat, this is your go-to. - Oregano: A sprinkle can bring out more flavor in the sauce. - Thyme: Fresh or dried, it adds a nice herbal note. You can also use fresh herbs like basil or cilantro for a fresh twist. Cooking shrimp and veggies well can make or break your dish. Here are some tips: - High Heat: Always use medium-high heat for sautéing. This helps the shrimp cook quickly and stay juicy. - Don’t Crowd the Pan: If your skillet is too full, the shrimp will steam instead of sauté. Cook in batches if needed. - Veggie Order: Start with onions and peppers. They take longer to soften. Add garlic and tomatoes later for a fresher taste. Garnishing makes your dish look more inviting. Here are some ideas: - Chopped Parsley: This brightens the dish and adds color. - Lemon Wedge: A slice on the side gives a zesty kick when squeezed. - Grated Parmesan: A sprinkle on top can add a rich flavor. For sides, consider a simple green salad or garlic bread. Pair these with your pasta for a complete meal. For the full recipe, check out the Spicy Cajun Shrimp Pasta. {{image_4}} If you want a change from shrimp, chicken or tofu works well. Chicken can be diced and cooked like the shrimp. Season it the same way with Cajun spice. Tofu is a great plant-based option. Use firm tofu for the best results. Press it to remove excess water, then cut it into cubes. Toss it in the Cajun seasoning and sauté until golden. To make this dish gluten-free, swap the fettuccine for gluten-free pasta. Many brands offer great options that taste similar. For a dairy-free version, replace heavy cream with coconut cream. This will give your pasta a rich flavor without dairy. Always check labels for hidden gluten or dairy. Get creative with your sauces and spices! You can add a dash of hot sauce for an extra kick. Swap the Cajun seasoning for a different blend, like Italian herbs or lemon pepper. Experiment with smoked paprika for a smoky flavor. You can also try adding different vegetables, like spinach or zucchini, to change the taste and texture. To keep your Spicy Cajun Shrimp Pasta fresh, store it in an airtight container. Make sure it cools down first. Place the container in the fridge. It will stay good for up to three days. When you’re ready to eat, check for any signs of spoilage. To reheat your pasta, use a skillet over low heat. Add a splash of water or cream to keep it moist. Stir gently while heating. This will help maintain the sauce's rich flavor and creamy texture. Avoid using the microwave, as it can make the shrimp tough. Yes, you can freeze this dish! Just place the cooled pasta in a freezer-safe container. It will last for up to two months. When you’re ready to enjoy it, thaw it in the fridge overnight. Then, reheat it gently in a skillet for the best taste. Cajun seasoning is a mix of bold spices. Common spices include: - Paprika - Cayenne pepper - Garlic powder - Onion powder - Black pepper - Oregano - Thyme These spices create a warm and spicy flavor. You can adjust the heat by using more or less cayenne pepper. Yes, you can use different pasta types. Some great options are: - Penne - Linguine - Spaghetti - Whole wheat pasta Each type will change the texture a bit. Choose what you like best or what you have on hand. You can tell shrimp are done when they turn pink and opaque. Cook them for 2-3 minutes on each side. They should curl slightly but not be rubbery. The perfect shrimp are tender and juicy. Pair this dish with some tasty sides. Here are some ideas: - Garlic bread - Caesar salad - Roasted vegetables - Coleslaw These sides add freshness and balance to the meal. They’ll make your dinner even more delicious. For the detailed Spicy Cajun Shrimp Pasta recipe, check out the [Full Recipe]. Now you have all you need to make Spicy Cajun Shrimp Pasta. We discussed key ingredients, step-by-step cooking, and tips for success. You can even try alternatives or adjust for your diet. Remember, the joy of cooking comes from experimenting and discovering your flavors. Don't forget to save leftovers the right way and enjoy them later. Cooking doesn’t have to be hard; it can be fun and rewarding. Get in the kitchen and make this dish your own!](https://blissfulmeal.com/wp-content/uploads/2025/06/627ec57a-58e9-4e6d-b220-225632ad6133-768x768.webp)

![- Slices of whole-grain bread - Ripe avocado - Large eggs - Freshly squeezed lemon juice - Garlic powder - Salt and freshly ground black pepper - Extra virgin olive oil - Red pepper flakes (optional) - Fresh herbs for garnish Using fresh ingredients makes a big difference in taste. Whole-grain bread adds fiber and flavor to the meal. Choose ripe avocados, as they are creamy and easy to mash. When you pick avocados, gently press them. If they yield slightly, they are ripe. For the eggs, large eggs work best. They fit nicely on the toast and cook well. Freshly squeezed lemon juice adds a bright flavor to the avocado. Garlic powder gives a subtle kick, while salt and pepper enhance all the flavors. Extra virgin olive oil adds richness. It also makes the dish look tantalizing. If you like a bit of heat, red pepper flakes are a fun touch. Finally, use fresh herbs like cilantro or chives to bring color and freshness to your plate. For the complete process, check out the Full Recipe. Toasting the bread is the first step. I like to use whole-grain bread for its nutty flavor. You can toast it in a toaster or a skillet. Aim for 3-5 minutes until it’s golden brown. Check often to avoid burning. Next, let’s prepare the avocado. Cut it in half and remove the pit. Scoop the flesh into a bowl. Use a fork to mash it until creamy. I like to add a tablespoon of lemon juice and a pinch of garlic powder. This adds a nice flavor. Mix it well and season with salt and pepper. Now it's time to poach the eggs. Fill a medium saucepan with water and heat it until it simmers. Crack each egg into a small bowl. Use a spoon to stir the water and create a whirlpool. This helps the eggs stay together. Gently slide the eggs into the water. Poach them for 3-4 minutes for runny yolks. Once the eggs are done, it’s time to assemble. Take your toasted bread and spread the avocado mixture generously on top. Then, carefully place one poached egg onto each slice. Center the egg for a nice look. To finish, drizzle a bit of extra virgin olive oil over the eggs. You can sprinkle red pepper flakes for some heat. Finally, add freshly chopped herbs like cilantro or chives for a pop of color. Enjoy this simple yet tasty meal! For detailed ingredient lists and full instructions, check the Full Recipe. To make poached eggs, start with fresh eggs. Fresh eggs hold their shape better. Next, heat water in a saucepan until it simmers. Avoid boiling. Create a gentle whirlpool with a spoon. This helps the egg white wrap around the yolk. Gently slide the egg in. Cook for 3-4 minutes for runny yolks. For firmer yolks, cook a bit longer. Common mistakes include using water that is too hot. This can break apart the egg. Also, avoid adding salt to the water. Salt can cause the egg whites to spread out. A ripe avocado is key for creamy toast. Look for avocados that feel slightly soft when you press them. If they are hard, they need more time to ripen. You can speed this up by placing them in a brown paper bag. Once ripe, store them in the fridge to slow down the ripening. When cutting, use a sharp knife to slice down to the pit. Twist to separate the two halves. Use a spoon to scoop out the flesh easily. To complement your avocado toast, consider adding a side salad. A light green salad with lemon dressing works well. You can also serve it with fresh fruit like berries or melon. For drinks, a fresh juice or herbal tea pairs nicely. A light coffee can also complement the meal. The goal is to balance the rich flavors of the avocado and egg. For the complete recipe, check out the Full Recipe. {{image_4}} You can easily make avocado toast gluten-free. Start by choosing gluten-free bread. Many stores offer a variety of options. Look for bread made from almond flour or brown rice. These choices give you a nice texture. If you want a vegan version, skip the eggs. Use tofu instead. Silken tofu works well. It has a creamy texture. You can also add sliced tomatoes or radishes for a fresh taste. Another option is to use hummus as a spread. It adds flavor and protein. To make your toast even tastier, think about unique toppings. Feta cheese crumbles add a salty kick. Smoked salmon brings a rich flavor. You can also try seasonal toppings like sliced peaches in summer or roasted pumpkin in fall. Each topping offers a new twist to your avocado toast. For more ideas, check the Full Recipe. Storing leftover avocado toast can be tricky. Avocado turns brown quickly. If you have extra toast, wrap it tightly in plastic wrap. This helps to keep air out. You can also put it in an airtight container. Store it in the fridge for up to 24 hours. Toast may lose its crunch, but it remains tasty. Keeping avocados fresh requires some care. Choose avocados that are firm but yield slightly to pressure. To slow browning, use lemon juice. Coat the exposed flesh with lemon juice. You can also store halved avocados in an airtight container with the pit in. This method helps maintain freshness longer. If an avocado ripens too fast, store it in the fridge to slow down the process. Reheating avocado toast needs a gentle touch. To bring back some crispness, place the toast in a toaster for a minute. You can also use an oven. Preheat it to a low setting and warm the toast for a few minutes. Avoid the microwave, as it makes the toast soggy. If you want the egg warm, place it on the toast just before serving. This keeps the dish enjoyable without losing quality. For the full recipe, check out the [Full Recipe]. For avocado toast, whole-grain bread is my top choice. It offers a hearty texture and nutty flavor. Sourdough also works well. Its tang complements the avocado nicely. Rye bread adds a unique taste and is rich in fiber. You can even use gluten-free options if needed. Just look for bread with good structure. This helps support the toppings without getting soggy. To achieve firmer poached eggs, simply increase the cooking time. Aim for 5 to 6 minutes for a firmer yolk. Start by bringing water to a gentle simmer. Creating a whirlpool helps the egg whites wrap around the yolk. You can add a splash of vinegar to the water. This will help the egg whites set faster. If you desire a less runny yolk, keep a close eye on the clock. Yes, you can prep some parts of this recipe ahead of time. Toast the bread and store it in an airtight container. You can also mash the avocado and keep it in the fridge. Just squeeze some lemon juice over it to prevent browning. Poach the eggs right before serving. This keeps them warm and fresh. Enjoy your avocado toast with poached egg as a quick meal any time! For the full recipe, check out the earlier sections. This article covers everything you need to make perfect avocado toast. We discussed the key ingredients, from fresh avocados to poached eggs. You learned the step-by-step process for toasting bread, mashing avocados, and poaching eggs. We shared tips for selecting ripe avocados and achieving the perfect poached egg. Don't forget to explore variations and storage tips to keep your toast fresh. Whether you enjoy it vegan or with extra toppings, avocado toast can be tasty and satisfying. Enjoy creating your delicious meals!](https://blissfulmeal.com/wp-content/uploads/2025/06/ae816aa5-bf92-48ee-b058-6bfc78e3e470-768x768.webp)
![- 2 large sweet potatoes, peeled and diced into bite-sized cubes - 1 tablespoon olive oil - 1 teaspoon smoked paprika - Salt and pepper to taste - 1 cup quinoa, thoroughly rinsed under cold water - 2 cups vegetable broth (or water) - 1 cup black beans, rinsed and drained - 1 red bell pepper, diced - 1 cup corn kernels (can be fresh, frozen, or canned) - 1 ripe avocado, diced - 1/4 cup fresh cilantro, finely chopped - Juice of 1 lime - 1 tablespoon honey or agave syrup - Optional: Crumbled feta cheese for a flavorful topping You can change some ingredients if needed. For a lighter option, use less olive oil. Try using lime juice instead of honey for a fresh kick. If you don’t have black beans, chickpeas work well too. Want to skip quinoa? Try using farro or brown rice. For a vegan option, leave out the feta or use vegan cheese. This salad is packed with nutrients. Sweet potatoes give you vitamins A and C, which are great for your skin and eyes. Quinoa adds protein and fiber, helping you feel full longer. Black beans provide more protein and iron, which is important for your blood. Avocado brings healthy fats, which can help keep your heart healthy. This dish is not only tasty but also good for your body. Start by peeling the sweet potatoes. Then, dice them into bite-sized cubes. This helps them cook evenly. Place the diced sweet potatoes in a large bowl. Add olive oil, smoked paprika, salt, and pepper. Toss the cubes well to coat them with the oil and spices. This step adds great flavor to your salad. Now, preheat your oven to 400°F (200°C). Spread the seasoned sweet potatoes on a baking sheet in a single layer. Roast them for 25-30 minutes. Make sure to flip them halfway through. This will help them cook evenly and get that nice golden color. They should be tender when done. While the sweet potatoes roast, it’s time to cook the quinoa. In a medium saucepan, combine the rinsed quinoa and vegetable broth. Bring it to a boil over medium heat. Once boiling, lower the heat to a simmer. Cover the pot and let it cook for about 15 minutes. When the liquid is gone, fluff the quinoa with a fork. It should be light and fluffy, ready to mix into your salad. Follow the [Full Recipe] for a complete guide to making this delicious salad! Start by gathering your ingredients. First, mix the cooked quinoa, black beans, diced red bell pepper, and corn in a large bowl. Next, add the roasted sweet potatoes. Make sure they are still warm for the best flavor. The warm sweet potatoes will blend well with the other ingredients. This mix creates a colorful and tasty base for your salad. In a small bowl, whisk together the lime juice and honey or agave syrup. This dressing is simple but full of flavor. It adds a nice zing to the salad. Taste it to see if you want more sweetness. If you do, add a bit more honey or agave. A good dressing can make all the difference in your dish. Now, pour the dressing over the salad mix. Gently toss everything together so that the dressing coats each piece. Be careful not to mash the avocado when you add it later. After this, fold in the diced avocado and chopped cilantro. These fresh ingredients add a nice touch and brighten the flavors. Finally, taste your salad and adjust the seasoning with salt and pepper if needed. If you want, sprinkle crumbled feta cheese on top for extra flavor. Enjoy your Roasted Sweet Potato Salad, a dish that is both flavorful and nutritious! For the full recipe, check the [Full Recipe]. {{image_4}} When making roasted sweet potato salad, you want flavors that blend well. Here are some great pairings: - Spices: Use smoked paprika for warmth. Cumin adds earthiness, while chili powder gives heat. - Fruits: Apples or oranges can add a touch of sweetness. Dried cranberries also work well. - Nuts and Seeds: Adding pumpkin seeds or walnuts gives a nice crunch. They also add healthy fats. - Cheese: Feta cheese offers a salty contrast. Goat cheese is creamy and tangy, a great choice too. Roasting sweet potatoes is key for flavor. Here are some tips: - Cut Evenly: Dice sweet potatoes into uniform cubes for even cooking. - Use High Heat: Roasting at 400°F (200°C) helps caramelize the sugars. This brings out a deep, rich flavor. - Stir Occasionally: Flip sweet potatoes halfway through roasting. This ensures they brown nicely on all sides. - Cook Quinoa Right: Rinse quinoa well to remove bitterness. Cook it in vegetable broth for added flavor. Making your salad look good is just as fun as eating it. Here are some ideas: - Layering: Start with a base of quinoa. Then, add your roasted sweet potatoes and other veggies on top. - Garnishes: Add fresh cilantro for color. Lime wedges on the side give a fresh look and flavor. - Serving Bowl: Use a large, shallow bowl. This lets each layer show off its colors and textures. - Serving: For a family meal, serve the salad in the center of the table. This invites everyone to dig in. You can easily make this salad vegan. Simply skip the optional feta cheese. The salad stays tasty with the sweet potatoes, quinoa, and black beans. You can add more veggies, like spinach or kale, for extra nutrients. If you want more crunch, try adding nuts or seeds. Sunflower seeds or chopped walnuts work great here. To boost protein, you can add cooked chicken or shrimp. Grilled tofu is another great choice for a plant-based option. You can also use chickpeas or lentils for extra protein and flavor. These additions make the salad more filling. Each option pairs well with the sweet potatoes and dressing. If you want to switch up the dressing, try using tahini or a balsamic vinaigrette. A lemon-herb dressing can also brighten the flavors. Mix olive oil, vinegar, and herbs for a quick homemade option. Each dressing will give a new twist to the salad. Explore different flavors to find your favorite. For the full recipe, check out the details above! To store leftovers, let the salad cool first. Place it in an airtight container. You can keep it in the fridge for up to three days. If you don't want the avocado to brown, add it fresh when serving. This keeps your salad looking bright and fresh. I like to serve this salad chilled or at room temperature. This keeps the flavors bright. For a more appealing look, use a large bowl. Garnish with extra cilantro and lime wedges around the edges. This adds color and a fresh touch. You can also add crumbled feta just before serving for a tasty finish. This salad is perfect for meal prep. You can make it ahead of time for easy lunches. Prep the sweet potatoes and quinoa on the weekend. Store them separately in the fridge. Assemble the salad when you're ready to eat. This keeps everything fresh and tasty. If you want to switch things up, consider adding other veggies or proteins. You can check the Full Recipe for more ideas! Yes, you can make this salad ahead of time. I often prepare it a few hours before serving. Just keep the dressing separate until you are ready to eat. This way, the salad stays fresh and crisp. Store the salad in the fridge in an airtight container. This keeps the flavors bright and the texture nice. If you don't have quinoa, you can use rice or farro. Both options work well in this dish. You can even try couscous or bulgur for a fun twist. Each grain adds its own flavor and texture, so feel free to experiment. Just remember to adjust cooking times based on your substitute. Yes, this recipe is gluten-free. Sweet potatoes, beans, and quinoa are all gluten-free ingredients. You can enjoy this salad without worry if you follow a gluten-free diet. Always check any packaged ingredients, like vegetable broth, to ensure they are gluten-free. For the full recipe, check out the Roasted Sweet Potato Salad section above. Enjoy! This blog post covered everything you need for a tasty salad. We explored the ingredients, substitutions, and nutritional facts. You learned how to prep and roast sweet potatoes and cook quinoa. Mixing ingredients and making the dressing was fun. Tips for flavor and presentation added flair. We also shared vegan options and storage tips. In the end, this salad is easy, healthy, and versatile. You can enjoy it anytime!](https://blissfulmeal.com/wp-content/uploads/2025/06/ea5668ff-efec-4c56-a803-cd0984273557-768x768.webp)
![- 4 cups mixed salad greens (a blend of romaine, arugula, and spinach for varied textures) - 1 cup diced cooked chicken breast - 4 slices of crispy turkey bacon - 2 hard-boiled eggs - 1 ripe avocado - 1 cup cherry tomatoes - 1/2 cup crumbled blue cheese - 1/4 cup red onion - 1/4 cup balsamic vinaigrette dressing - Salt and pepper Classic Cobb Salad is all about fresh flavors and great textures. Each ingredient plays a key role. First, the mixed salad greens provide a nice crunch. I love using romaine, arugula, and spinach for this. Then, you have the diced cooked chicken breast, which adds protein and heartiness. Turkey bacon brings in a smoky flavor and crispness that everyone enjoys. Hard-boiled eggs add creaminess and richness to the mix. I like to slice them into rounds for a pretty look. The diced avocado gives the salad a smooth texture, while cherry tomatoes burst with sweetness. Crumbled blue cheese adds a bold flavor that contrasts nicely with the other ingredients. Don’t forget the red onion! It adds a mild sharpness that rounds out the dish. Finally, drizzle it all with balsamic vinaigrette for a tangy finish. Adding salt and pepper will enhance all those bright flavors. This mix creates a salad that's not just colorful but also packed with taste. For the complete recipe, check out the Full Recipe link. To make a Classic Cobb Salad, follow these steps closely. Each step builds flavor and texture. - Assemble the base with mixed greens: Start with 4 cups of mixed greens. I like using romaine, arugula, and spinach. This mix adds great texture and taste. - Layer chicken and bacon over the greens: Next, add 1 cup of diced cooked chicken breast. Spread it evenly over the greens. Then, sprinkle 4 slices of crumbled crispy turkey bacon on top. This adds a wonderful crunch. - Add hard-boiled eggs in a decorative pattern: Take 2 hard-boiled eggs and slice them into rounds. Place these slices around the salad for a lovely visual touch. - Distribute avocado and tomatoes across the salad: Now, chop 1 ripe avocado and halve 1 cup of cherry tomatoes. Scatter them over the salad. They provide creaminess and a burst of sweetness. - Sprinkle with blue cheese and red onions: Add 1/2 cup of crumbled blue cheese for a bold flavor. Then, sprinkle 1/4 cup of thinly sliced red onions. This adds a hint of sharpness. - Drizzle with dressing and seasoning before serving: Pour 1/4 cup of balsamic vinaigrette dressing over the salad. Feel free to add salt and pepper to taste. This enhances all the flavors. - Toss gently before serving to incorporate flavors: Just before serving, toss the salad gently. This mixes all the ingredients while keeping the layers intact. By following these steps, you'll create a beautiful and tasty salad. Don’t forget to check the Full Recipe for more details. - Use fresh ingredients for the best flavor Fresh ingredients make a big difference. Use crisp greens, ripe avocados, and juicy tomatoes. They add color and taste. Always choose what is in season. This ensures you get the best quality. - Recommended cheese and dressing pairings Blue cheese gives strong flavor to the salad. If you prefer a milder taste, try feta cheese instead. For dressings, balsamic vinaigrette works well. You can also use ranch for a creamier option. Both enhance the salad's taste. - How to achieve the perfect hard-boiled eggs To make hard-boiled eggs, place eggs in cold water. Bring it to a boil, then cover and turn off the heat. Let them sit for 10-12 minutes. After that, put them in cold water to stop cooking. This method gives you eggs that are firm and easy to peel. Feel free to explore more tips in the [Full Recipe]. {{image_4}} You can switch up the classic Cobb salad in many fun ways. If you're vegetarian or vegan, you can use plant-based proteins. Tofu or chickpeas are great options. They add protein and keep the salad filling and satisfying. When it comes to dressings, think outside the box. While balsamic vinaigrette is a classic, you might try ranch or a tangy vinaigrette blend. These can really change the flavor of your salad. For toppings, feel free to be creative! You can add roasted vegetables or nuts for extra crunch. Sunflower seeds or pumpkin seeds can also add a nice texture and flavor. These variations make the Cobb salad more personal. You can mix it up based on what you like or what you have at home. This way, every time you make it, you can enjoy something new. For the classic version, check out the Full Recipe. To keep your Classic Cobb Salad fresh, follow these easy steps: - Store toppings separately: Place chicken, bacon, eggs, and other toppings in separate containers. This keeps them crisp and fresh. - Best practices for refrigerating salad: Use an airtight container for greens and dressing. This prevents wilting and keeps flavors intact. - Reheating tips for chicken and bacon if needed: If you want to warm the chicken or bacon, heat them in a skillet over medium-low heat. This will restore their texture without making them tough. These simple steps help you enjoy your Cobb Salad for days! What is a Classic Cobb Salad? A Classic Cobb Salad is a hearty dish made with greens, protein, and toppings. It usually includes chicken, bacon, eggs, avocado, tomatoes, blue cheese, and dressing. Each ingredient adds a unique flavor and texture. Can I make it ahead of time? Yes, you can make it ahead. Prepare the salad but keep the dressing separate. This way, the greens stay crisp. You can mix in the dressing just before serving. What are the healthiest ingredients to include? Focus on fresh greens and lean proteins. Use grilled chicken, ripe avocado, and colorful veggies. Cherry tomatoes and red onion add vitamins and flavor. Choose a light dressing, like balsamic vinaigrette, for a healthier option. How do I customize my Cobb Salad to suit dietary needs? You can easily modify it. For a vegetarian dish, skip the chicken and bacon. Use chickpeas or tofu instead. For a low-carb option, replace the dressing with olive oil and lemon juice. Swap out blue cheese for a dairy-free option if needed. What are the typical serving sizes for a Cobb Salad? A Classic Cobb Salad usually serves four. Each serving is about one-fourth of the salad. For a larger group, you can double the recipe. Enjoy the full recipe for more guidance on servings! This blog post covered the classic Cobb salad, step-by-step. We explored key ingredients, from mixed greens to crumbled blue cheese. I shared tips for perfecting this dish and suggested variations, including vegan options. Proper storage methods can keep leftovers fresh. Remember, a great Cobb salad is about fresh ingredients and your personal touch. Enjoy making this dish your own!](https://blissfulmeal.com/wp-content/uploads/2025/06/aaaca96c-76c8-48da-89eb-15cc23ef099a-768x768.webp)
![- 1 cup quinoa, thoroughly rinsed - 2 cups vegetable broth (or water) - 1 cup cherry tomatoes, halved - 1 cup cucumber, diced - 1 cup black beans, rinsed and drained - ½ cup corn (fresh or frozen) - Juice of 1 lime - 3 tablespoons olive oil - 1 teaspoon ground cumin When making a healthy quinoa salad, the right ingredients make all the difference. Quinoa is a great base. It has protein and fiber. You start with 1 cup of quinoa. Make sure to rinse it well. This removes any bitterness. Next, you need liquid. Use 2 cups of vegetable broth or water. The broth adds flavor. Then, add 1 cup of halved cherry tomatoes. They add sweetness and color. Now for some crunch! Dice 1 cup of cucumber. It adds a fresh taste. Then, rinse and drain 1 cup of black beans. These beans provide protein and fiber. Lastly, add ½ cup of corn. Use fresh corn or frozen corn that you thaw. For the dressing, you need juice from 1 lime. This gives a zesty kick. Combine it with 3 tablespoons of olive oil. This makes the salad creamy. Lastly, add 1 teaspoon of ground cumin. It enhances all the flavors. This healthy quinoa salad is vibrant and full of life. You can find the Full Recipe for more details on how to prepare this dish! To start, bring your vegetable broth or water to a boil in a medium saucepan. This liquid will give your quinoa flavor. Next, add the rinsed quinoa. Stir gently and then reduce the heat to low. Cover the saucepan and let it simmer for about 15 minutes. The quinoa should become fluffy and absorb all the liquid. Once cooked, remove it from heat and set it aside to cool. While the quinoa cools, it's time to prepare the vegetables. In a large mixing bowl, combine all your diced vegetables. This includes halved cherry tomatoes, diced cucumber, black beans, red bell pepper, corn, finely chopped red onion, and chopped cilantro. Make sure to cut each veggie into uniform pieces. This helps the flavors mix together well, creating a tasty bite. Once your quinoa is cool, gently fold it into the vegetable mix. This is where the magic happens! Next, in a separate small bowl, whisk together lime juice, olive oil, ground cumin, salt, and pepper. This dressing adds depth and zest. Drizzle it over the quinoa and vegetable blend. Use a spatula or a large spoon to toss everything together until it's well coated. Taste the salad and adjust the seasoning if needed. Let the salad sit for at least 15 minutes before serving. This allows the flavors to meld beautifully. For the full recipe, check out the vibrant quinoa fiesta salad. To make your quinoa taste its best, start by rinsing it well. This removes any bitterness. Use cold water and swirl the quinoa in a fine mesh strainer. After rinsing, cook it in broth or water. Once cooked, let the quinoa cool completely. Cooling helps the flavors mix better. You can boost your salad’s taste by adding fresh herbs. Try using parsley or mint for a fresh kick. Also, adjust the lime juice to find the right tanginess. A little more can really make your salad pop! For a fun touch, use colorful bowls to serve your salad. Bright colors make food more appealing. You can serve the salad chilled or at room temperature. Both options are tasty and refreshing! To find the full recipe, check [Full Recipe]. {{image_4}} Want to boost your protein? You can add grilled chicken or shrimp. Both options make the salad heartier. If you prefer a vegetarian option, try crumbling feta cheese. It adds a creamy touch and a nice salty flavor. Feel free to switch out veggies based on what you have. In summer, add fresh zucchini or bell peppers. In colder months, roasted butternut squash is a great choice. Another creamy option is avocado. It gives the salad a rich texture and makes it even more filling. If you're looking to mix things up, try brown rice or farro instead of quinoa. Both grains offer unique flavors and textures. You can also mix different grains together for a fun taste experience. This makes your salad more interesting and satisfying. For a complete guide on making this delicious dish, check out the Full Recipe. Store your quinoa salad in an airtight container for up to 3 days. It tastes best fresh, but you can save it for leftovers. Just make sure to keep it sealed tight to maintain its flavor and texture. You can freeze the quinoa salad for longer storage. When you are ready to enjoy it, thaw it in the refrigerator overnight. This method keeps the salad's taste intact and makes it easy to eat. To reheat your quinoa salad, gently warm it on the stovetop with a splash of water. This step helps keep the texture nice. Avoid using the microwave, as it can make the salad soggy. If you follow these tips, your quinoa salad will stay tasty and fresh. For the full recipe, check out the vibrant quinoa fiesta salad. You can make quinoa taste better by using broth. Choose vegetable or chicken broth instead of plain water. This simple swap adds rich flavor. You can also add spices or herbs. Try cumin, paprika, or fresh parsley. These will enhance the overall taste and make your dish more exciting. Yes, quinoa salad can be made in advance. In fact, it tastes better when the flavors meld overnight. Let it sit in the fridge until you are ready to serve. This allows the ingredients to blend and develop a deeper flavor. Quinoa salad is perfect for meal prep. It is healthy and filling, making it a great choice. You can enjoy it throughout the week. Just remember to keep the dressing separate until serving. This helps maintain freshness and keeps your salad crisp. For the full recipe, check out the vibrant quinoa fiesta salad! This quinoa salad combines fresh ingredients and bright flavors. You start by rinsing quinoa and cooking it in broth. Then, mix in colorful veggies and a zesty dressing. Tips on rinsing and cooling quinoa ensure a tasty dish. Experiment with different proteins and grains for variety. Store leftovers in the fridge or freeze them. Overall, this salad is healthy, easy to make, and perfect for meal prep. Enjoy making it your own!](https://blissfulmeal.com/wp-content/uploads/2025/06/76f9b603-7932-4f23-8984-038a2f9145ec-768x768.webp)