Skip to content
About
Contact
Cookie Policy
Copyright Policy
Disclaimer
Search
Home
Dinner
Appetizer
Desserts
Drinks
About
Contact
Privacy Policy
Toggle Menu
Home
/
Dinner
- Page 28
Dinner
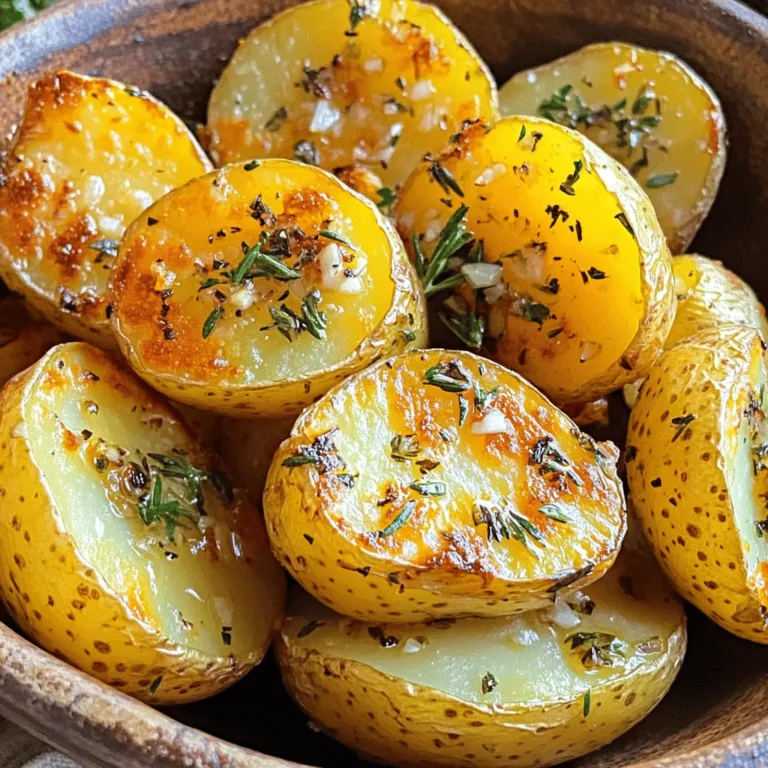
Garlic Roasted Potatoes Tasty and Easy Side Dish
Chicken Fajita Quesadillas Tasty and Easy Recipe
Crispy Chicken Parmesan Flavorful and Easy Recipe
Pea and Mint Soup Vibrant and Nourishing Delight
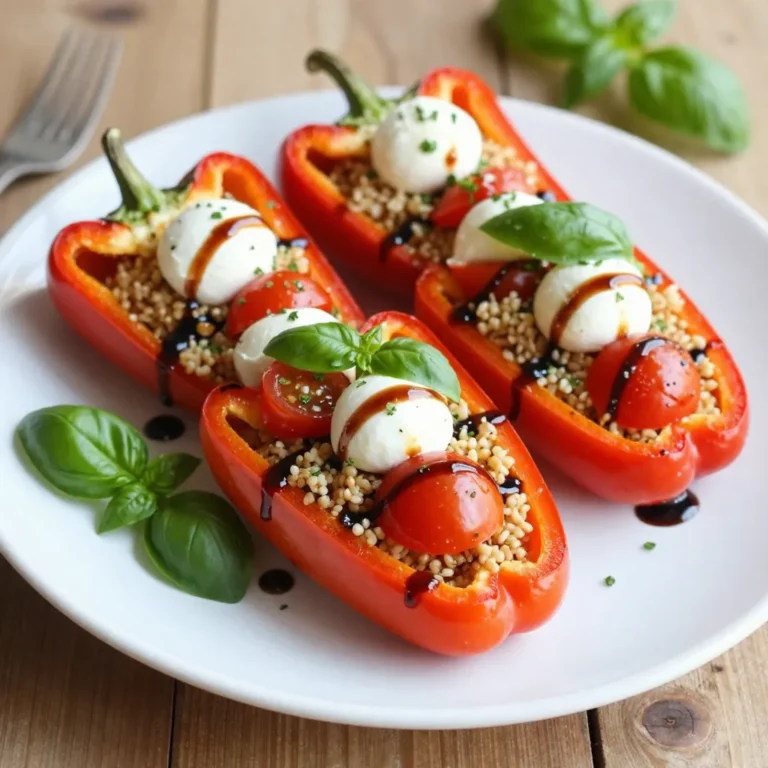
Caprese Quinoa Stuffed Peppers Flavorful and Nutritious
Crispy Chicken Sandwich Mouthwatering Flavor Awaits
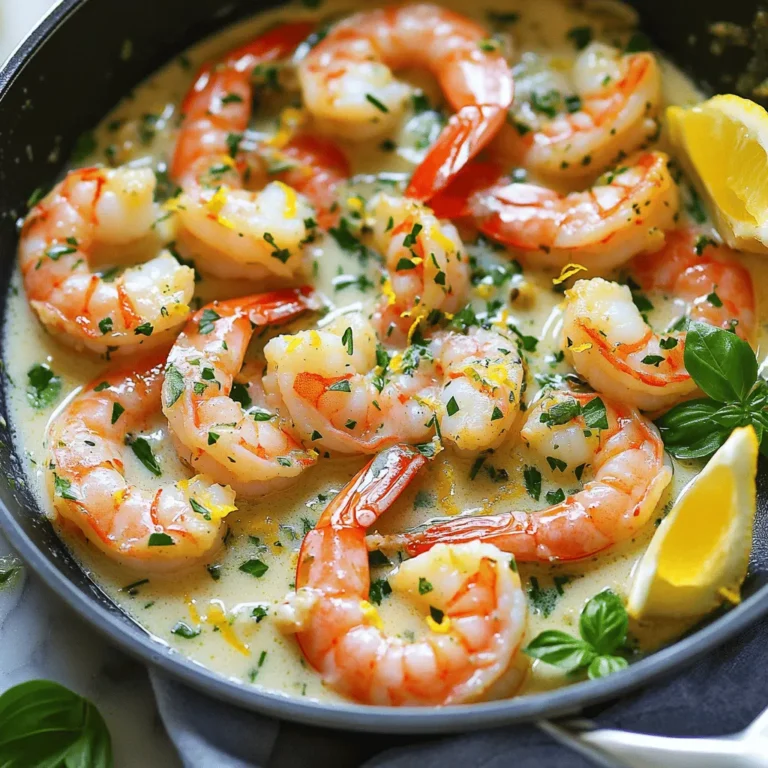
Garlic Butter Herb Shrimp Flavorful and Simple Dish
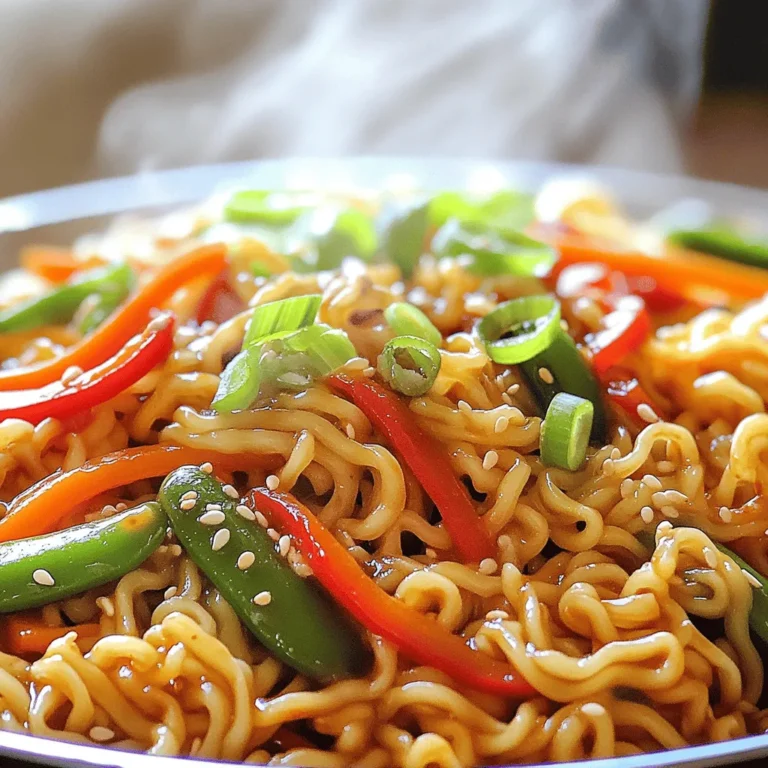
Spicy Szechuan Noodles Quick and Flavorful Recipe
Honey Garlic Glazed Carrots Great Side Dish Idea
Vegetable Lo Mein Savory and Simple Dinner Recipe
Page navigation
Previous Page
Previous
1
…
26
27
28
29
30
…
38
Next Page
Next
Home
Dinner
Appetizer
Desserts
Drinks
About
Contact
Privacy Policy
Toggle Menu Close
Search for:
Search


![- 2 boneless, skinless chicken breasts - 1 cup all-purpose flour - 2 large eggs, beaten - 1 cup Italian seasoned breadcrumbs - 1/2 cup grated Parmesan cheese - 1 cup marinara sauce - 1 cup shredded mozzarella cheese To make crispy chicken Parmesan, I start with fresh chicken breasts. They give the dish a great texture. Next, I use flour, eggs, and breadcrumbs to create a crunchy coating. The breadcrumbs are key for that crispy bite! I also add marinara sauce and cheeses. They melt beautifully on top of the chicken. - 1 teaspoon dried oregano - 1 teaspoon garlic powder - Salt and pepper, to taste - Fresh basil leaves, for garnish - Olive oil, for frying I love using dried oregano and garlic powder for flavor. They add a nice aroma to the dish. Salt and pepper are essential too; they enhance the taste. For a fresh touch, I add basil leaves as a garnish. A drizzle of olive oil is perfect for frying. It gives the chicken a golden color and rich flavor. For the full recipe, check out my detailed guide! 1. Preheating the Oven: First, set your oven to 400°F (200°C). This heat is perfect for crispy chicken. 2. Preparing Chicken Breasts: Take the chicken breasts and put them between two sheets of plastic wrap. Use a meat mallet or rolling pin to pound them to about 1/2 inch thick. This helps them cook evenly and stay juicy. 3. Setting Up the Breading Station: Create a three-part line for breading. In the first shallow dish, put the all-purpose flour. In the second dish, pour in the beaten eggs. In the last dish, mix breadcrumbs with Parmesan cheese, dried oregano, garlic powder, salt, and pepper. Blend well to spread the flavors. 1. Breading the Chicken Process: Start with each chicken breast. Dredge it in flour first, shaking off any extra. Next, dip it in the beaten eggs, making sure it’s coated fully. Finally, press it into the breadcrumb mix to cover it well. 2. Frying the Chicken Pieces: Heat about 1/4 inch of olive oil in a large skillet over medium heat. Once hot, add the breaded chicken. Cook each side for about 3-4 minutes until they are golden brown and crispy. After frying, place the chicken on a paper towel-lined plate to soak up any extra oil. 3. Assembling in the Baking Dish: In a baking dish, pour a thin layer of marinara sauce at the bottom. This helps to avoid sticking. Place the crispy chicken in the dish. Spoon more marinara sauce over the chicken, and sprinkle a good amount of shredded mozzarella cheese on top. 1. Baking Time and Temperature: Put the baking dish in your preheated oven. Bake for about 20 minutes until the cheese is bubbly and golden. 2. Recommended Garnish Techniques: After baking, take the dish out and add fresh basil leaves on top. This adds flavor and a nice pop of color. Serve hot for the best taste! You can check the [Full Recipe] to ensure you have every detail down. To get the best breading, ensure each piece gets an even coat. Start with flour, then eggs, and finish with the breadcrumb mix. This order helps the coating stick well. Press the breadcrumbs onto the chicken. This step makes the crust thick and crunchy. You can also let the breaded chicken rest for a few minutes before frying. This helps the coating set. You can choose to fry or bake your chicken. Frying gives a crispy outside and juicy inside. Use olive oil for frying. It adds a lovely flavor and holds up well to heat. If you prefer baking, use a thin layer of oil on the chicken. This will still give you a nice texture. Bake at 400°F for a golden finish. Pair your Chicken Parmesan with a fresh salad or pasta. A side of garlic bread works well too. For sauces, marinara is classic, but try a creamy alfredo for a twist. A sprinkle of extra cheese on top gives a nice touch. You can also add fresh basil to brighten the flavors. For a full guide, check the Full Recipe. {{image_4}} You can make your Chicken Parmesan a bit healthier. Here are two great options: - Baked Not Fried: Instead of frying, bake the breaded chicken. Place it on a baking sheet and spray with cooking oil. Bake at 400°F (200°C) for about 20 minutes. This cuts down on fat and calories while keeping it tasty. - Whole Wheat Breadcrumbs: Swap regular breadcrumbs for whole wheat ones. Whole wheat breadcrumbs add fiber and texture. They also give a nice, nutty flavor to your dish. You can change the flavor of your Chicken Parmesan easily. Try these fun ideas: - Adding Spices or Herbs: Mix your favorite spices or herbs into the breadcrumb mix. Paprika, Italian seasoning, or even a pinch of chili flakes can make it pop. Fresh herbs like parsley or basil can also add a fresh taste. - Different Cheese Combinations: While mozzarella and Parmesan are classic, you can mix it up. Try adding provolone or fontina cheese for a richer taste. A sprinkle of goat cheese adds a tangy twist. How you serve Chicken Parmesan can change the meal. Here are a couple of fun ideas: - Chicken Parmesan Sub Sandwiches: Turn your chicken into a tasty sub. Place the chicken in a hoagie roll with marinara sauce and extra cheese. Bake it until the cheese melts for a great sandwich. - Pasta Pairing Ideas: Serve your Chicken Parmesan with pasta. Spaghetti or fettuccine works well. Toss the pasta in marinara sauce for a complete meal. You can even layer the chicken on top for a beautiful presentation. For more details, check out the Full Recipe. To keep your Crispy Chicken Parmesan fresh, follow these steps: - Refrigeration: Place leftovers in an airtight container. This keeps moisture out and flavor in. Store in the fridge for up to three days. - Freezing: For long-term storage, freeze the chicken. Wrap each piece tightly in plastic wrap and then in foil. This helps prevent freezer burn. You can freeze it for up to three months. To enjoy your Chicken Parmesan again, reheating is key: - Optimal Methods: The best way to reheat is in the oven. Preheat it to 350°F (175°C). Place the chicken on a baking sheet. Cover it with foil to avoid drying out. - Time and Temperature: Heat for about 20 minutes or until it reaches 165°F (74°C). If you want extra crispiness, remove the foil for the last five minutes. For the complete cooking process, check the full recipe. To keep your breaded chicken crispy, store it in a single layer. Use a wire rack over a baking sheet to let air circulate. When reheating, place it in the oven at 375°F (190°C) for 10-15 minutes. This method helps regain that crunch. Avoid microwaving since it makes the chicken soggy. Yes, you can prep Chicken Parmesan ahead. Bread the chicken and store it in the fridge for up to 24 hours. You can also cook it fully and store it in the fridge. Just reheat in the oven before serving. This saves time on busy nights. For this recipe, use a thick marinara sauce. You can choose store-bought or homemade. If you like bold flavors, opt for a spicy marinara. For a milder taste, go with a classic tomato basil sauce. Both options work great! To ensure your chicken is fully cooked, use a meat thermometer. The internal temperature should reach 165°F (74°C). If you don’t have one, cut into the thickest part. The meat should be white, not pink. This ensures it’s safe to eat. In this blog, we explored how to make crispy Chicken Parmesan. We covered the main ingredients, seasonings, and cooking methods. I shared tips for achieving the perfect breading and provided ideas for serving and storing leftovers. You can even try healthier variations or add unique flavors. Remember, cooking is about having fun and experimenting. With these steps, you can create a delicious dish that everyone will love. Enjoy your cooking journey!](https://blissfulmeal.com/wp-content/uploads/2025/06/8b1d4144-5782-4ccb-bb1e-1ffdb9880c43-768x768.webp)
![- 4 cups fresh or frozen green peas - 1 medium onion, finely chopped - 2 cloves garlic, minced - 4 cups vegetable broth - 1 cup fresh mint leaves, lightly packed - 1 tablespoon olive oil - Salt and freshly ground black pepper, to taste - 1 tablespoon freshly squeezed lemon juice - Optional: Crème fraîche or yogurt for garnish The ingredients for pea and mint soup are simple yet full of flavor. Each one plays a key role. Green peas bring a burst of sweetness and a bright green color. They are packed with vitamins, making the soup not just tasty but also healthy. Onions and garlic add depth to the soup's flavor. They also offer many health benefits. Fresh mint is the star of this dish. It adds a refreshing taste and aroma. Lemon juice enhances the flavors while adding a tangy twist. I often use vegetable broth for a lighter touch, but chicken broth works too if you prefer. You can even use plant-based yogurt for a creamy finish, keeping it dairy-free. By combining these fresh ingredients, you create a vibrant and nourishing delight that warms the soul. Check the [Full Recipe] for easy steps to make this delicious soup! Making pea and mint soup is easy. You will sauté, stir, and blend. The steps come together fast, and the results are tasty. - Step 1: Sauté onions and garlic Heat olive oil in a large pot over medium heat. Add chopped onion and minced garlic. Sauté for about 5 minutes. You want the onion to turn soft and clear. - Step 2: Add peas and stir Next, toss in the green peas. Stir gently to mix them with the onion and garlic. Cook for 2-3 minutes. This warms the peas and brings out their sweet taste. - Step 3: Pour in vegetable broth and simmer Carefully add the vegetable broth. Bring the mixture to a boil. Once boiling, lower the heat and let it simmer for 10 minutes. The peas should be bright and tender. - Step 4: Incorporate mint leaves and blend Remove the pot from heat. Stir in the fresh mint leaves. Let the soup sit for a few minutes. This time helps the mint share its fresh flavor. Then, blend the soup until smooth. - Step 5: Season with lemon juice, salt, and pepper Add freshly squeezed lemon juice. Season with salt and pepper to taste. Adjust the flavors as needed for your palate. - Step 6: Serve and garnish Pour the soup into bowls. If you like, add a dollop of crème fraîche or yogurt on top. Garnish with a few mint leaves for a lovely touch. - Using fresh ingredients makes a big difference. Fresh peas and mint create the best taste. - Keep the heat on medium. Too high a heat can cook the peas too fast. This may affect their color and flavor. For the Full Recipe, check the details above and enjoy making your vibrant pea and mint soup. To make your pea and mint soup even better, try adding spices. Cumin and ginger can add warmth and depth. A touch of cumin gives a nutty flavor, while ginger adds a slight zing. Adjust the acidity with more lemon juice to brighten the dish. The lemon balances the sweet peas and fresh mint beautifully. This soup pairs well with crusty bread or a light salad. The bread soaks up the flavors and adds a nice texture. For a salad, choose something fresh, like a cucumber or mixed greens. To present the soup, use bowls that show off the bright green color. You can drizzle a little olive oil on top and sprinkle fresh mint leaves for a pop of color. For making this soup, I recommend using an immersion blender. They are easy to use and clean. If you prefer a traditional blender, ensure you let the soup cool a bit before blending. Use a heavy-bottomed pot to ensure even heat distribution while cooking. A wooden spoon is perfect for stirring and scraping the pot. For the best experience, check out my Full Recipe for more insights! {{image_4}} You can easily add proteins to this soup. Chicken or shrimp can make it heartier. Simply cook the protein before adding it to the soup. It adds flavor and makes the dish more filling. You can also turn this soup into a cold summer soup. After blending, chill it in the fridge. Serve it cold on a hot day. It’s refreshing and bright. If you want a twist, try using basil instead of mint. Basil gives a sweet and spicy note. You can also add other vegetables like zucchini or spinach. Both options make the soup more colorful and nutritious. This soup is easy to adapt for dietary needs. For vegan options, skip the crème fraîche and use plant-based yogurt instead. It keeps the creaminess without dairy. You can also make it gluten-free with no changes. For low-sodium options, use low-sodium broth. It keeps the flavor while being healthier. For the full recipe, check out the [Full Recipe]. To store your pea and mint soup, cool it first. Pour it into an airtight container. This keeps the soup fresh for a short time. Make sure to use it within three days. When you reheat, use a pot on low heat. Stir often to keep the flavors intact. You can also microwave it. Just cover the bowl and heat in short bursts. Freezing your soup extends its life. Use freezer-safe containers or bags. Leave space at the top, as the soup will expand. Label each container with the date. When it's time to eat, thaw it overnight in the fridge. For quick thawing, run warm water over the bag. Reheat it on the stove for best taste. In the fridge, the soup lasts about three days. If frozen, it can stay good for up to three months. Look for changes in color or smell to judge if it’s bad. If the soup looks dull or sour, it’s time to toss it. Keeping track of the date helps you enjoy your soup at its best. Can I use frozen peas instead of fresh? Yes, you can use frozen peas. They are often picked at their peak ripeness, making them sweet and tasty. Just add them directly to the pot. They will cook well alongside fresh peas. How can I thicken the soup if it's too thin? If your soup is too thin, you can blend in more peas. Simply take a cup of the soup and add it back after blending. You can also add a small amount of potato or cream for extra thickness. Is there a vegetarian version of this soup? The recipe is already vegetarian! It uses vegetable broth and no meat. Feel free to tweak it with your favorite veggies for added flavor. Can I make this soup ahead of time? Absolutely! You can make this soup a day ahead. Just store it in the fridge. Reheat it gently on the stove before serving. What are the best practices for blending hot soup? When blending hot soup, use an immersion blender. If you use a traditional blender, let the soup cool slightly. Blend in small batches to avoid spills. How can I adjust the recipe for more servings? To make more servings, simply double the ingredients. Adjust the broth, peas, and mint. This way, everyone can enjoy this vibrant delight! This blog post covered making a delicious pea and mint soup. We explored essential ingredients and their health benefits. You learned step-by-step cooking instructions and tips for better flavor. I shared ideas for variations and substitutions to suit your taste. Remember, fresh ingredients make a difference. Store your soup properly to enjoy it longer. Whether you serve it hot or cold, this soup can bring joy to your meal. Try making it, and savor the fresh flavors!](https://blissfulmeal.com/wp-content/uploads/2025/06/9a93a79d-eee0-4eb0-9e96-6dd470dee7cd-768x768.webp)

![To make Honey Garlic Glazed Carrots, you will need the following ingredients: - 1 lb baby carrots (or regular carrots, peeled and sliced evenly) - 3 tablespoons honey - 2 tablespoons extra virgin olive oil - 3 cloves garlic, finely minced - 1 tablespoon low-sodium soy sauce - 1 teaspoon fresh ginger, finely grated - Sea salt and freshly cracked black pepper, to taste - Fresh parsley, finely chopped (for garnish) These simple ingredients come together to create a sweet and savory glaze. The honey adds a touch of sweetness, while garlic and ginger give it depth. Using fresh ingredients makes a big difference in flavor. You can find the full recipe for these delicious carrots in the main article. Enjoy making this vibrant side dish that pairs perfectly with many meals! - First, wash the baby carrots well. - If using regular carrots, peel and slice them into even pieces. - In a large mixing bowl, mix together honey, olive oil, minced garlic, soy sauce, and grated ginger. - Whisk these ingredients until smooth and well combined. - Add the carrots to the bowl and coat them with the honey-garlic glaze. - Preheat your oven to 400°F (200°C). - Line a baking sheet with parchment paper for easy cleanup. - Spread the coated carrots in a single layer on the baking sheet. - Pour any leftover glaze over the carrots. - Place the baking sheet in the oven and roast for 25-30 minutes. - Toss the carrots halfway through to ensure even cooking. - After roasting, remove the carrots from the oven. - Season them with sea salt and freshly cracked black pepper. - Gently toss to mix the seasoning well. - Transfer the glazed carrots to a serving dish. - Garnish with finely chopped fresh parsley for a vibrant look. You can find the Full Recipe for these delicious honey garlic glazed carrots above. Enjoy every bite! To get the best caramelization, space the carrots well on the baking sheet. They need room to roast. If they are too close, they steam instead of roast. Toss them midway through cooking. This helps them brown evenly on all sides. You can add more flavor with spices or herbs. Try a pinch of cumin or thyme for a fresh twist. If you want it sweeter, add more honey. For a bit of heat, a dash of red pepper flakes works great too. Adjust the sweetness to what you like best. Use a heavy-duty baking sheet for even cooking. A rimmed sheet helps catch any glaze that may run off. A sturdy spatula is great for mixing the carrots with the glaze. These tools will make your cooking easier and more fun. For the full recipe, check out the Sweet & Sticky Honey Garlic Carrots. {{image_4}} Switching up ingredients can make this dish even more exciting. You can try different sweeteners like maple syrup or agave nectar. Each will give a unique taste. Citrus zest, like orange or lemon, adds a bright note. Just a little zest can lift the flavor and make your dish pop. You have choices for how to cook these carrots. Stovetop sautéing gives a quick, tasty option. Just cook them in a pan with the glaze until tender. Oven roasting works well for a sweet, caramelized finish. If you want a smoky flavor, grilling is perfect. Just toss them on the grill after glazing. These honey garlic glazed carrots pair well with many main dishes. They go great with roasted chicken or grilled fish. If you want something lighter, toss them in a salad or a grain bowl. Their sweet and savory taste adds a fun twist to any meal. Want the full recipe? Check out the [Full Recipe]. To keep your honey garlic glazed carrots fresh, store them in the fridge. Use an airtight container. This helps keep out moisture and air, which can spoil the dish. They stay good for about 3–4 days. When you are ready to eat them again, simply reheat in the microwave. Heat them for 1–2 minutes, stirring halfway to ensure even warmth. You can also warm them in a pan over low heat. Just add a little water to prevent sticking. If you want to save some for later, freezing is a great choice. Start by letting the carrots cool completely. Then, place them in a freezer-safe bag or container. Squeeze out as much air as possible to avoid freezer burn. They can last up to 3 months in the freezer. When you want to enjoy them, thaw in the fridge overnight. For quick thawing, you can use the microwave on the defrost setting. Once thawed, reheat them as you would with fresh leftovers. To make this dish vegan, you can substitute honey with maple syrup or agave nectar. These alternatives will still give you a sweet flavor. You can also use coconut aminos instead of soy sauce for a soy-free version. Just mix the new ingredients the same way as the original recipe. This keeps the taste delicious while making it plant-based. You can use frozen carrots, but the texture may change. Frozen carrots often turn softer when cooked. This means they might not get as tender as fresh carrots. You will also need to adjust the cooking time. Start with 15 to 20 minutes in the oven, checking for tenderness along the way. These carrots pair well with many dishes. You can serve them alongside grilled chicken or fish for a healthy meal. They also go great with rice or quinoa for a complete vegetarian dinner. Adding them to a salad can bring a nice sweetness too. This makes for a colorful and tasty plate. Check the Full Recipe for more details on making these tasty carrots! In this post, I shared tips for making Honey Garlic Glazed Carrots. We covered the key ingredients and step-by-step instructions for roasting. I also offered tips for perfect caramelization and flavor enhancement. Whether using stovetop methods or even grilling, you have many options. Remember to store leftovers properly for later enjoyment. With these ideas, you can make a tasty side dish that pairs well with many meals. Try it out and enjoy the boost of flavor in your cooking!](https://blissfulmeal.com/wp-content/uploads/2025/06/4c933864-ba3c-4acc-b8ae-e90987d0e241-768x768.webp)
![When making Vegetable Lo Mein, using fresh and colorful ingredients makes a big difference. Here’s what you need: - 8 oz lo mein noodles - 2 tablespoons vegetable oil - 1 cup broccoli florets - 1 bell pepper, thinly sliced (choose red, yellow, or green) - 1 cup snap peas, trimmed - 1 medium carrot, julienned - 3 green onions, chopped - 3 cloves garlic, minced - 1 tablespoon fresh ginger, grated - 3 tablespoons soy sauce - 1 tablespoon hoisin sauce - 1 teaspoon sesame oil - Salt and pepper to taste - Toasted sesame seeds for garnish Each ingredient adds its own flavor and texture. The lo mein noodles provide a nice base. Fresh veggies like broccoli and bell pepper add crunch. Garlic and ginger bring warmth and depth. The sauces tie everything together with savory goodness. You can find the full recipe above. Enjoy cooking! To start, bring a large pot of water to a boil. Add 8 oz of lo mein noodles. Cook according to the package directions, which usually take about 5-7 minutes. When done, drain the noodles in a colander. Then, toss them with a splash of vegetable oil to keep them from sticking. Set them aside for later. In a large wok or skillet, heat 2 tablespoons of vegetable oil over medium heat. Once hot, add 3 cloves of minced garlic and 1 tablespoon of grated ginger. Cook these for about 30 seconds. You want the garlic fragrant and golden, but be careful not to burn it. Now, it's time for the veggies! Start by adding 1 cup of broccoli florets. Sauté for 2-3 minutes until they soften. Next, toss in the thinly sliced bell pepper and stir in 1 cup of trimmed snap peas and 1 medium julienned carrot. Cook this mix for another 3-4 minutes. Aim for vibrant colors and a tender-crisp texture. In a small bowl, mix together 3 tablespoons of soy sauce, 1 tablespoon of hoisin sauce, and 1 teaspoon of sesame oil. Once well combined, pour this sauce over your sautéed vegetables. Stir well to coat everything in that tasty sauce. Gently add your cooked lo mein noodles to the wok. Toss all the ingredients together until the noodles are heated through, about 2-3 minutes. This is where you get to taste. Adjust the flavor with a sprinkle of salt and pepper if needed. Remove the wok from the heat. Sprinkle 3 chopped green onions and some toasted sesame seeds on top. This adds a nice crunch and flavor. For a beautiful presentation, serve the Vegetable Lo Mein in wide, shallow bowls. Add extra green onions and a light dusting of sesame seeds on top to make it pop. Enjoy your tasty dish! For the complete recipe, check out the [Full Recipe]. - Ensuring noodle texture: Cook the lo mein noodles just until soft. This usually takes about 5-7 minutes. Drain them well. Toss with a bit of oil to stop them from sticking. This keeps them light and fluffy. - Avoiding overcooked vegetables: Sauté each vegetable for just a few minutes. You want them crisp, not mushy. Broccoli should be bright green, and bell peppers should stay crunchy. This gives your dish a fresh look and taste. - Adjusting sauce levels: Taste your sauce mix before adding it to the vegetables. If you like it saltier, add more soy sauce. For sweetness, add a bit more hoisin sauce. This helps you customize the flavor to your liking. - Suggested seasoning tweaks: Add a pinch of red pepper flakes for heat. You can also sprinkle some ground black pepper or even a squeeze of lime for a zesty kick. Experimenting with spices can elevate your dish. - Prepping vegetables in advance: Chop all your veggies before you start cooking. This saves time and keeps your cooking flow smooth. It also helps you avoid burning your garlic while waiting for veggies to chop. - Organizing workspace: Keep your workspace tidy. Arrange your ingredients in the order you will use them. This makes cooking more fun and less stressful. A clean space helps you focus on making a delicious meal. For the Full Recipe, check the recipe section above. {{image_4}} You can make your Vegetable Lo Mein heartier by adding protein. Tofu is a great choice. Choose firm tofu for best results. Just cube it, then sauté it until golden brown. For meat lovers, chicken or shrimp works well too. Slice chicken thinly and cook until no longer pink. If using shrimp, cook until they turn pink and opaque. Adding these proteins boosts flavor and texture. Sometimes, you may not have all the veggies on hand. No worries! You can swap in seasonal vegetables. Zucchini, mushrooms, or baby corn can work nicely. If you want more crunch, add water chestnuts. For a sweet touch, try baby carrots or sugar snap peas. This flexibility keeps your dish fresh and exciting. For those avoiding gluten, you can easily substitute the noodles. Try rice noodles or zoodles (zucchini noodles). Both options work well and taste great. When it comes to sauces, look for gluten-free soy sauce. Brands like tamari or coconut aminos are excellent substitutes. These swaps ensure everyone can enjoy this tasty meal. For the full recipe, check out the details above! To store your leftover Vegetable Lo Mein, let it cool first. Place it in an airtight container. This will keep the dish fresh. Store it in the fridge for up to three days. When you're ready to eat, simply reheat it in a pan or microwave. If you want to freeze your Vegetable Lo Mein, follow these steps: - Safe freezing methods: Cool the dish completely. Use a freezer-safe container or bag. Remove as much air as possible before sealing. This helps prevent freezer burn. You can freeze it for up to three months. - Reheating guidelines: Thaw the dish in the fridge overnight. Reheat it on the stove over medium heat. Add a splash of water or soy sauce to help it heat evenly. Stir often until it’s hot. When stored correctly, Vegetable Lo Mein can last: - In the fridge: Up to three days. - In the freezer: Up to three months. Enjoy your Vegetable Lo Mein, fresh or reheated! For the full recipe, check out the [Full Recipe]. To make Vegetable Lo Mein vegan, you need to replace some ingredients. Use vegetable oil instead of animal fat. Choose soy sauce that has no added fish sauce. Hoisin sauce is often vegan, but check the label. For protein, use tofu or tempeh instead of meat. These swaps keep your dish tasty and plant-based. Yes! You can use different noodles if you want. Here are some great options: - Rice noodles: These are gluten-free and soak up flavors well. - Soba noodles: Made from buckwheat, they add a nutty taste. - Udon noodles: Thick and chewy, they offer a hearty texture. Each type brings a unique taste and feel to your dish. Pair your Vegetable Lo Mein with tasty sides. Here are some ideas: - Spring rolls: These crispy bites add a nice crunch. - Dumplings: Stuffed with veggies or meat, they are a great match. - Soup: A light broth can balance the meal well. These dishes complement the flavors and make for a full dining experience. This blog post covered a simple and tasty Vegetable Lo Mein recipe. We explored all the ingredients, like lo mein noodles and various fresh veggies. I shared step-by-step instructions for cooking noodles and sautéing vegetables, along with tips for flavor and presentation. Remember, you can add proteins or adjust veggies to suit your taste. Store leftovers properly to enjoy them later, as the dish can last a while. Enjoy making this dish and get creative with your own twists!](https://blissfulmeal.com/wp-content/uploads/2025/06/6d50b5c3-4ee8-4e19-8b85-54282e3e60a6-768x768.webp)