Chocolate Covered Strawberry Bites Delightful Treats
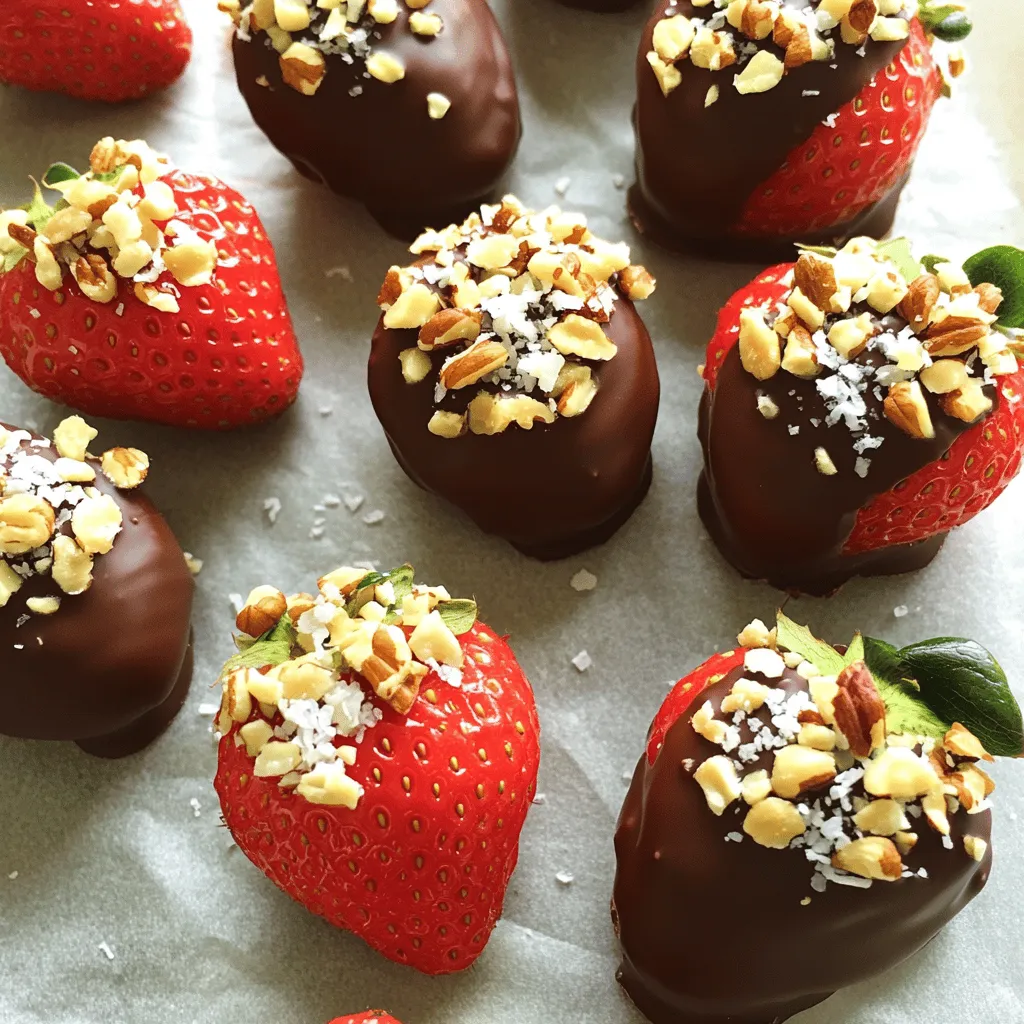
Craving a sweet treat that’s both easy and delicious? Chocolate Covered Strawberry Bites are the perfect answer! With juicy strawberries dipped in rich dark chocolate, these bites are a crowd-pleaser for any occasion. Plus, they’re just as fun to customize with your favorite toppings and variations. Join me as I guide you step-by-step to create these delightful treats that will wow your friends and family!
Ingredients
Essential Ingredients for Chocolate Covered Strawberry Bites
– 12 large fresh strawberries, washed and thoroughly dried
– 1 cup high-quality dark chocolate chips
– 1 tablespoon coconut oil
To make chocolate-covered strawberry bites, you need fresh strawberries. I love using large strawberries. They hold up well and make a nice bite. Make sure to wash them and dry them well. Any water can make the chocolate not stick.
Next, you’ll need dark chocolate chips. Choose a high-quality brand. This will give you a smoother, richer taste. Coconut oil is key too. It helps the chocolate melt nicely. It also gives a great shine to your bites.
Optional Toppings
– 1/4 cup crushed nuts (choose between almonds or walnuts)
– 1/4 cup unsweetened shredded coconut
– Sea salt for garnish
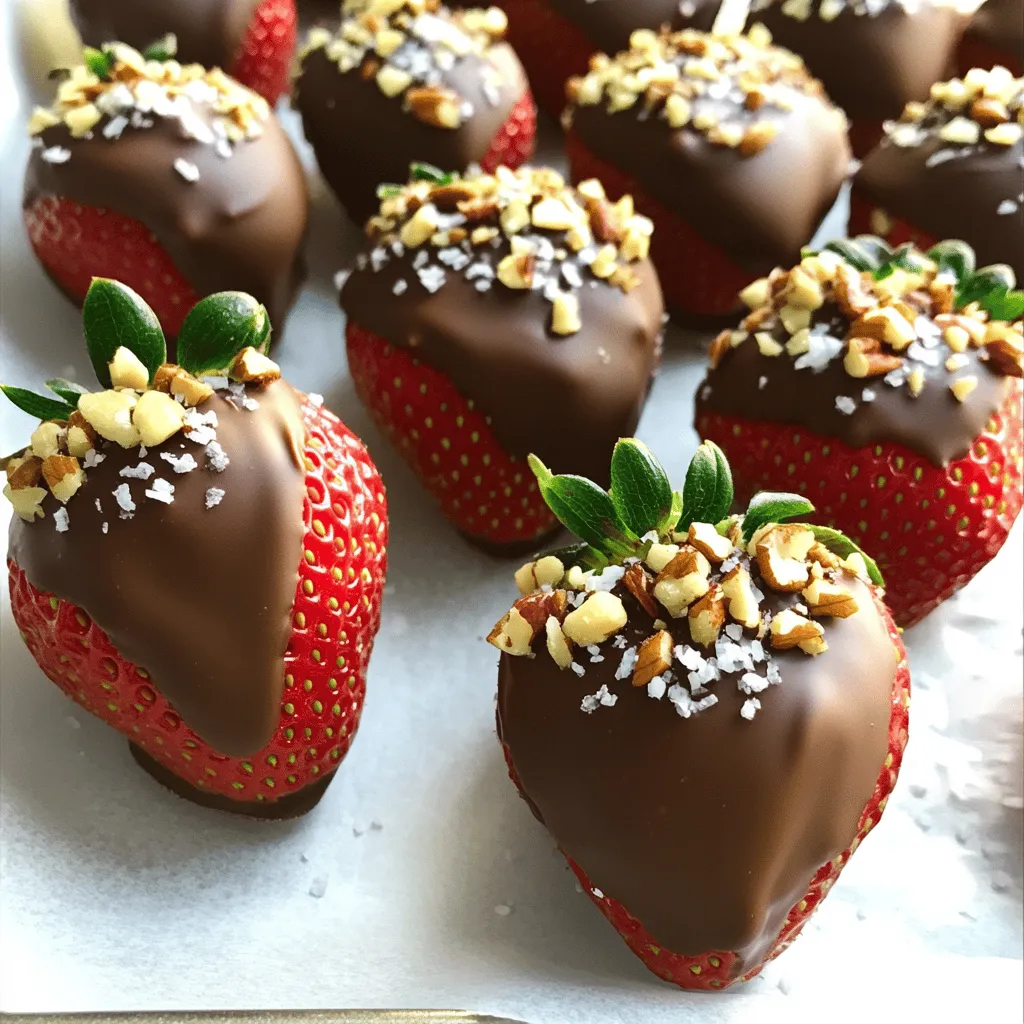
You can add fun toppings to your chocolate-covered strawberries. Crushed nuts like almonds or walnuts add crunch. They also give a nice flavor contrast. Shredded coconut is another tasty option. It adds sweetness and texture.
A pinch of sea salt makes a big difference. It brings out the sweetness of the chocolate. Each topping adds its own twist. Feel free to mix and match. You can even skip the toppings if you prefer pure chocolate!
Step-by-Step Instructions
Preparation and Melting Chocolate
First, line a baking sheet with parchment paper. This step keeps the chocolate from sticking to the pan. It also makes cleanup a breeze. Next, grab a microwave-safe bowl. Add 1 cup of dark chocolate chips and 1 tablespoon of coconut oil. Heat this mixture in the microwave. Use 30-second intervals and stir well each time. Keep going until the chocolate is smooth and melted. This should take about 1 to 1.5 minutes total.
Dipping the Strawberries
Now, it’s time for the fun part! Take each large strawberry by its green stem. Dip it into the warm melted chocolate. Make sure the strawberry is coated well. You want a nice, even layer. After dipping, hold it over the bowl. Let any excess chocolate drip off. This helps keep your bites from being too messy.
Adding Toppings and Cooling
While the chocolate is still warm, it’s time to add toppings. Sprinkle crushed nuts or shredded coconut over the chocolate-covered strawberries. This will help the toppings stick better. After topping them, place the strawberries on your lined baking sheet. Make sure they are spaced apart. This keeps them from sticking together as they cool. Finally, chill the baking sheet in the refrigerator. Wait about 15 to 30 minutes until the chocolate sets. Your chocolate-covered strawberry bites are now ready to enjoy!
Tips & Tricks
Choosing the Right Strawberries
To make chocolate-covered strawberry bites, pick fresh strawberries. Look for bright red ones with green leaves. They should feel firm and not have any bruises. The best ones are in season and smell sweet.
Drying strawberries is a must. After washing, pat them with a paper towel. Any water will make the chocolate slide off. A dry berry will hold chocolate better and look nicer.
Achieving the Perfect Chocolate Consistency
Melted chocolate should be smooth for dipping. Use high-quality chocolate chips for the best taste. Mix in a tablespoon of coconut oil to help it melt evenly. Heat it in the microwave in short bursts. Stir well after each burst. This will help avoid burning.
If your chocolate seizes, don’t panic. Add a small amount of coconut oil to fix it. Stir until it becomes smooth again. Keeping the bowl dry will also help prevent seizing.
Enhancing Presentation
For a beautiful display, think about garnishes. You can drizzle more chocolate over the bites. This adds an artistic touch. Fresh mint leaves can also add a pop of color.
When serving, consider a decorative platter. Arrange the bites in a fun pattern. This will impress your guests. Chocolate-covered strawberry bites are perfect for special occasions like birthdays or anniversaries.
Variations
Flavor Combinations
You can make chocolate-covered strawberry bites even better by adding flavors. Try mixing in a dash of vanilla or almond extract with your chocolate. This small addition can change the taste in a big way. If you want to switch up the chocolate type, you can use milk chocolate or white chocolate. Each type brings a unique taste, so feel free to experiment!
Different Toppings
Toppings are where you can really get creative. You can use crushed cookies like Oreos or candy like M&Ms for a fun crunch. These will add a new texture to your bites. You can also try different nuts, like hazelnuts or pecans, for a rich flavor. Shredded coconut can bring a tropical twist too. Mix and match to find your favorite combination!
Seasonal Adaptations
Chocolate-covered strawberry bites are great for any season. For holidays, you can decorate them to match the theme. For Valentine’s Day, you could use pink or red sprinkles. At parties, you can arrange them in fun shapes or colors to match your theme. These ideas make your treats not only tasty but also visually appealing.
Storage Info
How to Store Chocolate Covered Strawberry Bites
To keep chocolate covered strawberry bites fresh, store them in a cool place. Use an airtight container to prevent moisture. This helps maintain their texture and flavor. I recommend placing a piece of parchment paper between layers if stacking them. This avoids sticking.
Freezing Options
Can you freeze chocolate-covered strawberries? Yes, you can freeze them! Freezing is a great way to save these treats for later.
To freeze, place the strawberries on a baking sheet. Make sure they are not touching each other. Once frozen, transfer them to a freezer-safe bag or container. This keeps them safe from freezer burn.
To thaw, take them out of the freezer. Let them sit at room temperature for about 30 minutes. This will help restore their texture and flavor. Enjoy your chocolate-covered strawberry bites anytime!
FAQs
How do you make chocolate-covered strawberries shiny?
To make chocolate-covered strawberries shiny, use high-quality chocolate. Choose chocolate with at least 60% cocoa. You can add a little coconut oil when melting. This helps create a smooth, glossy finish.
– Melt the chocolate carefully in intervals to avoid overheating.
– Stir often to keep the chocolate smooth and even.
– Dip the strawberries quickly; don’t let them sit in the chocolate too long.
Can I use other types of chocolate for this recipe?
Yes, you can use other types of chocolate! Milk chocolate offers a sweeter taste. White chocolate adds a creamy flavor. Just make sure to adjust the melting times.
– Dark chocolate gives a rich, bold taste.
– Experiment with flavored chocolates, like mint or orange.
– Each type will change the overall flavor of your bites.
What can I do if the chocolate seizes?
If your chocolate seizes, don’t worry! This can happen if water gets in the chocolate. To fix it, try adding a small amount of coconut oil.
– Stir the oil in slowly over low heat.
– If that doesn’t work, add a splash of warm cream or milk.
– For next time, keep all bowls and utensils dry to prevent this issue.
In this post, we explored how to make delicious chocolate-covered strawberry bites. We covered essential ingredients, step-by-step instructions, and tips for best results. You can customize these treats with flavors and toppings to make them special. Remember, fresh ingredients lead to better taste. Follow these steps for a fun, sweet treat that stands out. Enjoy making them for yourself or sharing them with friends!