
Crispy Chicken Tenders Flavorful and Easy Recipe

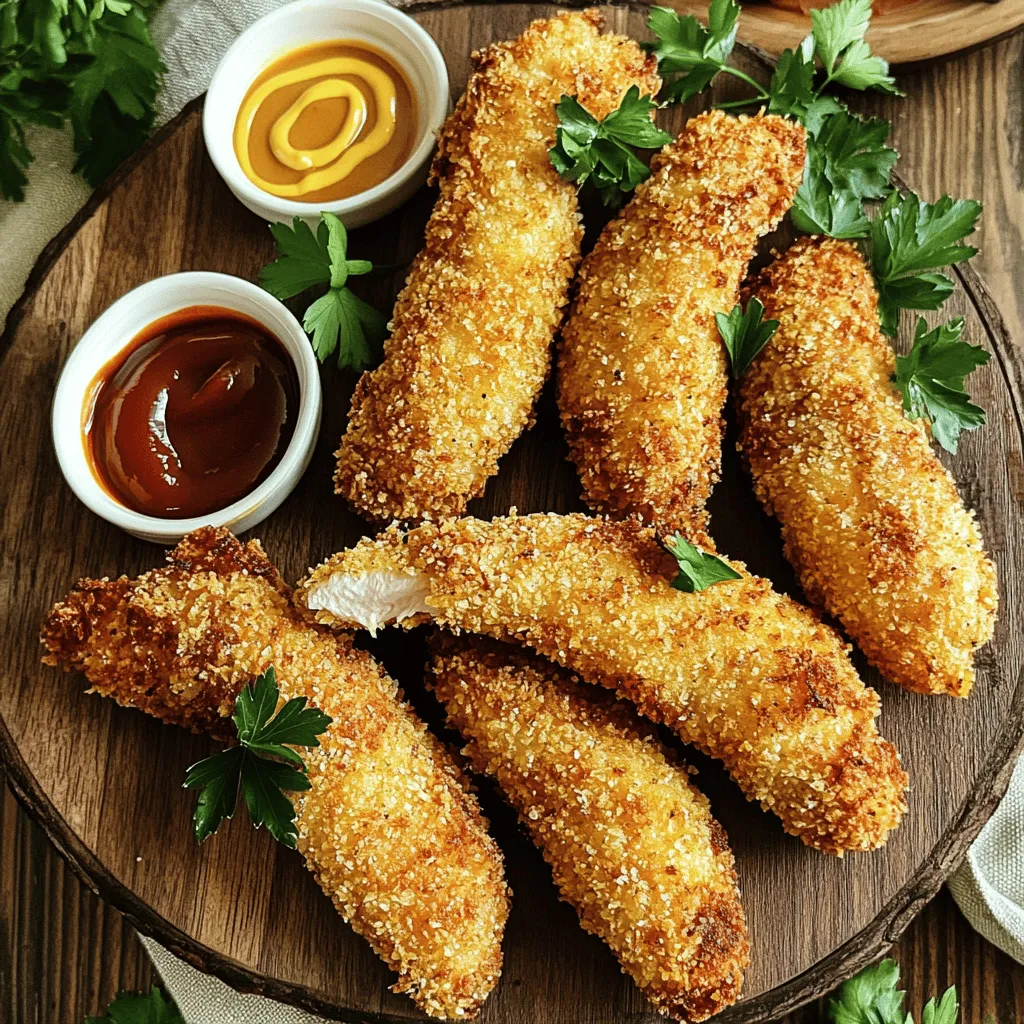
If you’re craving something crunchy and delicious, you’ve found the right recipe! My Crispy Chicken Tenders are full of flavor and simple to make. In this post, I’ll guide you through every step, from marinating the chicken to achieving that perfect golden crisp. Whether you choose to bake or fry, these tenders will impress your family and friends. Let’s dive in and get cooking!
Ingredients
List of Ingredients
– Chicken and Marinade Essentials
– 1 pound boneless, skinless chicken breasts, sliced into strips
– 1 cup buttermilk (or milk mixed with 1 tablespoon vinegar for a DIY buttermilk)
– Seasoning and Coating Components
– 1 cup all-purpose flour
– 1 teaspoon paprika
– 1 teaspoon garlic powder
– 1 teaspoon onion powder
– 1 teaspoon sea salt
– 1/2 teaspoon freshly ground black pepper
– 1/2 teaspoon cayenne pepper (optional, for a spicy kick)
– 2 large eggs, beaten until smooth
– 1 cup panko breadcrumbs
– Oil and Cooking Supplies
– Vegetable oil (for frying)
I love using fresh ingredients for my crispy chicken tenders. The chicken needs to be fresh and cut into strips. Soaking the chicken in buttermilk makes it juicy and tender. It also helps the coating stick better.
For the coating, I mix flour with spices. This blend adds flavor. I use paprika, garlic powder, and onion powder. Salt and pepper are key too. If you want spice, add cayenne.
Panko breadcrumbs give the tenders a great crunch. They are lighter and crispier than regular breadcrumbs.
When cooking, I recommend using vegetable oil. It heats well and gives a nice fry.
Step-by-Step Instructions
Preparation Overview
Marinating the Chicken for Full Flavor
Marinating chicken in buttermilk makes it juicy and tender. Start by cutting your chicken into strips. Soak them in a bowl with buttermilk. Cover the bowl and chill it in the fridge for at least 30 minutes. This soak helps the chicken absorb flavor and moisture.
Preparing the Coating Mixture
Next, you’ll create the coating. In a separate bowl, mix flour, paprika, garlic powder, onion powder, sea salt, black pepper, and cayenne pepper. Stir well to blend the spices evenly. This mix will give the chicken a tasty crunch.
Tips for Egg Dipping and Breadcrumb Application
Once the chicken is marinated, it’s time to coat it. First, remove a chicken strip from the buttermilk, letting excess drip off. Then, dip it in the seasoned flour. Make sure it’s fully covered, then shake off any extra flour. Next, dip the floured chicken into the beaten eggs. This step helps the breadcrumbs stick. Finally, roll the chicken in panko breadcrumbs, pressing lightly to ensure they adhere well.
Cooking Methods
Oven-Fried Crispy Chicken Tenders
For a healthier option, you can bake these tenders. Preheat your oven to 425°F (220°C). Place the coated chicken strips on a baking sheet lined with parchment paper. Spray them lightly with cooking oil. Bake for about 20-25 minutes, flipping halfway through, until golden and crispy.
Deep-Fried vs. Air-Fried Options
You can also choose to deep-fry or air-fry the chicken tenders. Deep-frying gives a classic, crispy texture. Heat vegetable oil in a deep skillet. For air-frying, preheat your air fryer to 400°F (200°C). Cook the tenders for about 10-12 minutes, flipping halfway for even cooking.
Cooking Times and Temperature Guidelines
Regardless of the method, ensure the chicken reaches an internal temperature of 165°F (74°C). This will guarantee your chicken is safe and juicy. If frying, cook each side for 4-5 minutes until they turn golden brown.
Tips & Tricks
Achieving Perfect Crispiness
A buttermilk soak is key for juicy chicken. It adds flavor and helps keep the meat moist. Soak your chicken strips for at least 30 minutes. This step is crucial for the best results.
For frying, heat the oil to the right temperature. Use a deep skillet and fill it with vegetable oil. You want about 1/4 inch deep. Test the oil by dropping in breadcrumbs. They should sizzle immediately. This shows the oil is hot enough.
To prevent a soggy coating, avoid overcrowding the pan. Fry in small batches. This helps each piece stay crispy. Once cooked, place the tenders on paper towels to absorb extra oil.
Serving Suggestions
Pair your crispy chicken tenders with tasty dipping sauces. Honey mustard, BBQ sauce, and ranch dressing work great. Each sauce adds a unique twist to your meal.
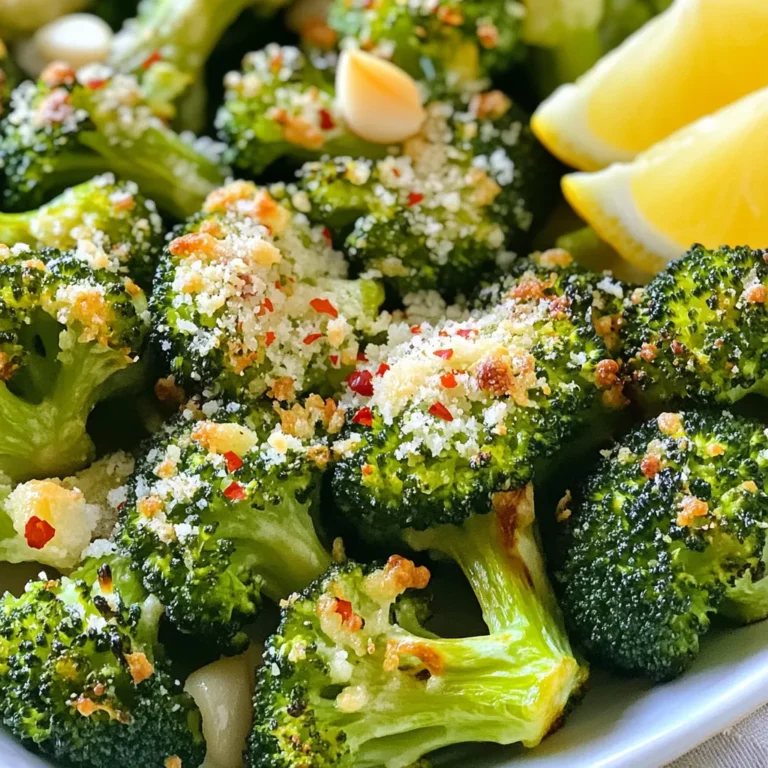
For side dishes, consider fries, coleslaw, or a fresh salad. These sides balance the meal well. You can also serve the tenders with a light dipping sauce for a refreshing taste.
Presentation matters too! Arrange the chicken tenders nicely on a platter. Add a sprinkle of fresh parsley for color. This makes your dish look as good as it tastes.
Variations
Flavor Enhancements
Spicy Versions: Adding Heat
If you love heat, try adding cayenne pepper. You can also mix in hot sauce with the buttermilk. This gives the chicken a nice kick. You can adjust the spice level based on your taste.
Herb Variations for Unique Flavor
Fresh herbs make a big difference. Try adding dried oregano, thyme, or basil to the flour mix. This gives the tenders a fresh taste. You can also use Italian seasoning for a different twist.
Gluten-Free Alternatives
If you need a gluten-free option, swap the all-purpose flour for almond flour or rice flour. Use gluten-free breadcrumbs instead of panko. This way, everyone can enjoy crispy chicken tenders.
Cooking Style Adaptations
Air Fryer Method for Healthier Tenders
Using an air fryer is a great choice. It gives you crispy chicken with less oil. Just coat the chicken as usual and air fry. Set it at 400°F for about 10-12 minutes. Flip halfway for even cooking.
Baking Techniques for a Light Option
For a lighter option, bake the tenders. Preheat the oven to 425°F. Place the coated chicken on a baking sheet lined with parchment paper. Bake for 20-25 minutes, flipping halfway through. This keeps them crispy and healthy.
Creative Usage in Other Dishes
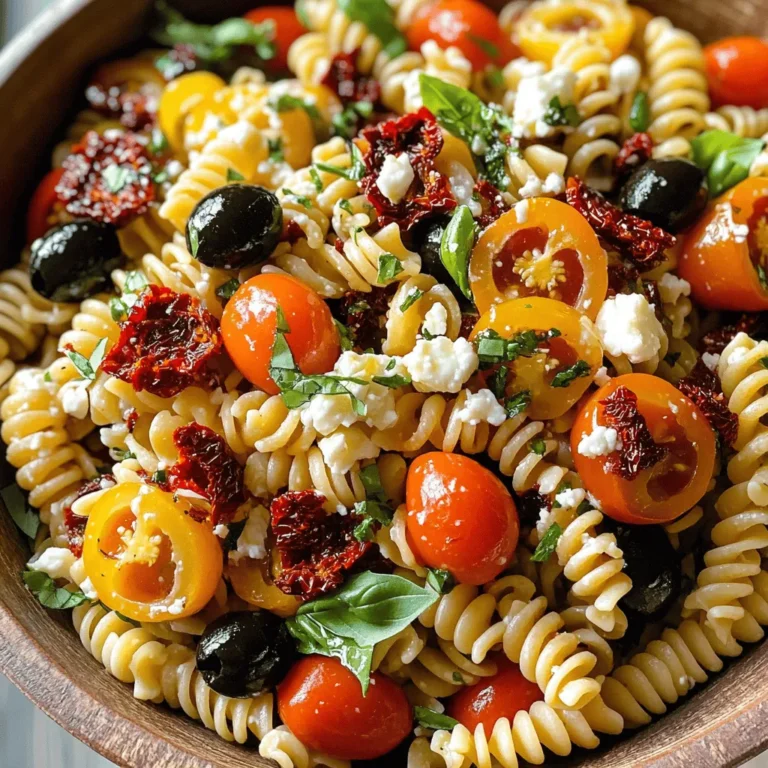
You can use these chicken tenders in many ways. Slice them for salads, wraps, or sandwiches. They also make a great topping for pasta dishes. Get creative and enjoy the flavors in new meals.
Enjoy making these easy variations!
Storage Info
Storing Leftovers
To keep your crispy chicken tenders fresh, store them in the fridge. First, let them cool to room temperature. Place them in an airtight container. This helps keep them crispy and safe to eat. They stay good for about three days in the fridge.
When you want to reheat them, use an oven or an air fryer. Preheat your oven to 375°F (190°C). Place the tenders on a baking sheet. Heat them for about 10-15 minutes or until they are hot and crispy again. An air fryer works well too. Set it to 350°F (175°C) and heat for about 5-7 minutes.
Freezing Tips
You can also freeze crispy chicken tenders for later. To freeze them, let the cooked tenders cool completely. Arrange them in a single layer on a baking sheet. Freeze them for about an hour. This keeps them from sticking together. After that, transfer the tenders to a freezer bag or airtight container. They stay good for up to three months in the freezer.
When you’re ready to eat, thaw them in the fridge overnight. For reheating, use the oven as before. This will help maintain their crispy texture. You can also use the air fryer for quick reheating. Enjoy your flavorful crispy chicken tenders anytime!
FAQs
Common Questions About Crispy Chicken Tenders
Can I use frozen chicken for this recipe?
Yes, you can use frozen chicken. However, make sure to thaw it first. This helps the chicken cook evenly. Frozen chicken tends to have more moisture, so pat it dry with paper towels.
What temperature is best for frying chicken tenders?
The best frying temperature is around 350°F (175°C). This ensures the chicken cooks through and gets crispy. Use a thermometer to check the oil. If it’s too hot, the coating may burn.
How do I make them healthier?
To make crispy chicken tenders healthier, try baking instead of frying. Use whole wheat breadcrumbs or skip the coating. Marinate the chicken in yogurt instead of buttermilk for a lighter option.
Additional Recipe Inquiries
What is the best way to season chicken tenders?
A mix of paprika, garlic powder, and onion powder works great. Also, add sea salt and black pepper for flavor. You can customize the spices according to your taste.
How long can I keep the cooked tenders in the fridge?
Cooked chicken tenders can last 3 to 4 days in the fridge. Store them in an airtight container to keep them fresh. Reheat them properly before serving.
Can I make crispy chicken tenders without eggs?
Yes, you can skip the eggs. Use a mixture of milk and flour as a binder instead. This will help the breadcrumbs stick to the chicken. You can also use a plant-based milk for a vegan option.
In this post, we explored how to make the best crispy chicken tenders. We covered essential ingredients, step-by-step cooking methods, and helpful tips for perfect results. Remember the importance of a buttermilk soak for crispiness and the best frying practices. You can also try fun variations, like adding spices or trying healthier cooking styles. By following these methods, you can store and enjoy your tenders later. With these insights, you’re ready to make crispy chicken tenders a hit at your table. Enjoy your cooking!


![- Ripe avocado - Large eggs - Greek yogurt - Dijon mustard - Fresh lemon juice - Fresh dill - Green onion - Salt and black pepper - Calories per serving: About 200 calories - Breakdown of macronutrients: - Protein: 10g - Carbohydrates: 6g - Fat: 15g This avocado egg salad gives you plenty of healthy protein and fats. Each serving is balanced and satisfying. The ripe avocado adds creaminess, while the eggs provide solid protein. Greek yogurt brings in extra protein and tang. The Dijon mustard and lemon juice add a zesty kick. With this dish, you enjoy a nutrient-rich meal that keeps you full. It's perfect as a lunch or snack, and you can feel good about what you're eating. You can find the full details of this recipe in the Full Recipe section. To start, place the eggs in a medium pot. Cover them with cold water, with about an inch above the eggs. Turn the heat to medium. Bring the water to a gentle boil. Once it boils, cover the pot and take it off the heat. Let the eggs cook in the steam for 12-14 minutes. This method gives you the perfect hard-boiled egg. Next, prepare an ice bath. Fill a large bowl with cold water and ice. This will help cool the eggs quickly and stop the cooking. After the resting time, move the eggs to the ice bath. Let them sit for 5-10 minutes. This step makes peeling easy. Once cooled, tap each egg on a hard surface to crack the shell. Carefully peel off the shell. Then chop the eggs into small pieces. In a large bowl, take your ripe avocado. Use a fork to mash it until smooth and creamy. You can leave some small chunks for texture if you want. Now, add flavorings to the mashed avocado. Mix in the Greek yogurt, Dijon mustard, fresh lemon juice, finely chopped dill, and a pinch of salt and pepper. Stir this mixture until it becomes a creamy, flavorful base. It’s time to combine everything. Gently fold the chopped eggs into the avocado mixture. Use a spatula to mix, but be careful to keep the eggs intact. You want them evenly coated in the creamy avocado mix. After combining, taste your egg salad. Adjust the seasoning with more salt or pepper if needed. This step ensures your dish is just right. For the full recipe, check the detailed instructions above. Enjoy your protein-packed avocado egg salad! Cooking eggs perfectly is key for this recipe. Timing matters a lot. For hard-boiled eggs, let them sit in hot water for 12-14 minutes. This gives you firm yolks without a grey ring. Peeling eggs can be tricky. To make it easy, chill the eggs in an ice bath right after boiling. This stops the cooking and helps the shells come off smoothly. Tap each egg gently on a hard surface to crack the shell. Then, peel it under running water. The water helps remove any stubborn bits of shell. Add some spice to your egg salad! Try mixing in a pinch of smoked paprika or a dash of cayenne. These spices give a nice kick without overpowering the dish. You can also adjust the texture. Want it creamier? Add more Greek yogurt. For a chunkier salad, leave some avocado pieces intact. This creates a fun contrast in the dish. Serving this egg salad is all about style. You can pile it on toasted whole grain bread for a hearty snack. Or, scoop it into crisp lettuce cups for a light option. To make it look even better, garnish with extra dill or sliced green onions. These touches add a pop of color and freshness. For more ideas, check the Full Recipe for tips on how to present your dish beautifully. {{image_4}} You can swap Greek yogurt for other ingredients. For a creamier base, try sour cream. If you want a lighter option, use plain yogurt. For vegan lovers, mashed silken tofu works great. It adds creaminess without eggs or dairy. Want to kick up the flavor? Add in some veggies! Diced bell peppers or cucumbers add crunch. You can also toss in some diced celery for a fresh taste. For a protein boost, mix in shredded chicken or canned tuna. This adds protein and makes the salad heartier. You have many ways to serve this salad. For wraps, spread it in a tortilla. Roll it up with some greens, and you have a tasty lunch. If you prefer sandwiches, use whole grain bread or a bagel. You can also scoop it into lettuce leaves for a low-carb option. Each style offers a fun twist! To keep your avocado egg salad fresh, start by placing it in an airtight container. This helps to prevent air from getting in and keeps it tasty. Store the salad in the fridge right after making it. It’s best to eat it within 3 days. After that, the avocado may brown and the eggs could lose their texture. Can you freeze avocado egg salad? No, I don’t recommend freezing it. The avocado will change in texture when thawed. Instead, enjoy it fresh. If you do have leftovers, eat them within a few days for the best flavor. If you want to reuse any leftovers, just take the salad out of the fridge. Give it a good stir before serving. You can also add a splash of lemon juice to brighten the flavors again. To make the best avocado egg salad, follow these steps: - Cook the eggs: Start with large eggs. Use the boiling method for perfect hard-boiled eggs. After boiling, cool them in an ice bath for easy peeling. - Mash the avocado: Use a ripe avocado. Mash it until smooth, but leave some chunks for texture. - Mix in flavor: Add Greek yogurt, Dijon mustard, fresh lemon juice, dill, salt, and pepper to the mashed avocado. This creates a creamy and flavorful base. - Fold in eggs: Chop the cooled eggs into small pieces. Gently fold them into the avocado mixture. Be careful to keep the eggs intact. - Taste and adjust: Always taste your salad. Adjust with more salt, pepper, or lemon juice as needed. These steps ensure rich flavor and a great texture in your salad. Yes, you can make egg salad ahead of time! - Best timeline: For optimal flavor and freshness, prepare it no more than one day ahead. - Storage: Store the salad in an airtight container in the fridge. This keeps it fresh and safe to eat. - Serving tip: Stir it again before serving. This helps mix the flavors that may have settled. Making it ahead saves time for busy days! You can serve avocado egg salad with many tasty options: - Toast: Spread it on whole grain or sourdough toast. - Lettuce wraps: Use crisp lettuce leaves for a low-carb option. - Veggies: Serve with sliced cucumbers or bell peppers. They add crunch and freshness. - Chips: Pair with tortilla chips for a fun twist. These sides create a complete and satisfying meal. For the full recipe, check out the [Full Recipe]. In this blog post, I shared how to make a tasty avocado egg salad. You learned about the key ingredients, like ripe avocados and eggs, plus their healthy benefits. I covered step-by-step instructions for cooking eggs and preparing the mix. You also got helpful tips for perfecting flavors and presentation. Remember, you can customize this salad with different ingredients and serve it in various ways. Experiment to find your favorite version. Enjoy your delicious creation, and make it your own!](https://blissfulmeal.com/wp-content/uploads/2025/07/eee5fc4b-395f-4a18-8285-720c3b171f78-768x768.webp)