Crispy Kale Chips Easy Recipe for Healthy Snacking
![To make crispy kale chips, start with fresh kale. Look for kale that is bright green and free from brown spots. You will need one bunch of kale. Remove the tough stems and tear the leaves into bite-sized pieces. This helps them bake evenly and get nice and crispy. Next, you will need some olive oil and seasonings. Use two tablespoons of high-quality olive oil. This adds flavor and helps the kale crisp up nicely. For seasoning, you will need: - 1 teaspoon of garlic powder - 1 teaspoon of smoked paprika - Sea salt, to taste - Freshly cracked pepper, to taste These spices give the kale chips a tasty kick. Feel free to add more or less based on your taste. If you want a cheesy flavor, consider adding nutritional yeast. Use one teaspoon as an optional ingredient. It adds a nice flavor boost and is great for those who want a plant-based option. You can also experiment with other spices or herbs to make the chips your own. Follow the [Full Recipe] for a step-by-step guide to making these tasty snacks. Start with a bunch of fresh kale. Remove the tough stems. Tear the leaves into bite-sized pieces. Rinse them well under cool water. This step removes dirt and any grit. Drain the kale thoroughly using a salad spinner or by patting it dry with a clean towel. Dry leaves help achieve crispiness. In a large mixing bowl, add the torn kale. Drizzle two tablespoons of olive oil over it. Next, sprinkle one teaspoon of garlic powder and smoked paprika. If you like a cheesy taste, add one teaspoon of nutritional yeast. Season with sea salt and freshly cracked pepper to your liking. Use clean hands to massage the kale gently for about two to three minutes. This helps the flavors blend well and softens the leaves. Preheat your oven to 350°F (175°C). Line a baking sheet with parchment paper. Spread the seasoned kale evenly on the sheet. Make sure the leaves are not overlapping. This ensures they bake evenly and become crisp. Bake for 10 to 15 minutes, checking often. The edges should turn crispy and slightly brown. Once they are done, let the chips cool on the baking sheet. They will become crunchier as they cool. Taste the chips and adjust seasoning if needed. Enjoy your crispy kale chips as a healthy snack or garnish! You can find the full recipe [here](#). To get the best crispiness from your kale chips, follow a few key steps. First, make sure your kale is very dry. Any water left on the leaves can lead to soggy chips. After washing, use a salad spinner or carefully pat the leaves dry with a towel. Next, don't overcrowd the baking sheet. Spread the kale pieces out in a single layer. This allows hot air to circulate around each leaf, creating that perfect crunch. If your batch is big, split it into two sheets. When it comes to seasoning, less is more. Start with a light drizzle of olive oil. Too much oil can make the chips greasy. I usually use about two tablespoons for one bunch of kale. Sprinkle your spices evenly. I like using garlic powder and smoked paprika. They add great flavor without being overpowering. You can mix the seasonings in a bowl before adding them to the kale for even coverage. One common mistake is baking at too high a temperature. Keep your oven at 350°F (175°C). Baking at a higher heat can brown the chips too quickly, leading to burnt edges. Another mistake is not keeping an eye on the kale as it bakes. Check them around the 10-minute mark. The chips can go from perfect to burnt in just a minute. Finally, avoid using kale that is wilted or brown. Fresh, vibrant leaves will give you the best results. For more details on making these tasty snacks, refer to the Full Recipe. {{image_4}} You can make your kale chips even more fun by trying different flavors. Here are a few ideas: - Spicy: Add cayenne pepper or chili powder for heat. Start with a small amount and taste it. - Cheesy: Use nutritional yeast for a cheesy taste. It adds great flavor without dairy. - Sweet: Try a sprinkle of cinnamon and a bit of maple syrup. This gives a nice twist. Mix and match these flavors to find your favorite! You can cook kale chips in different ways. Here are some options: - Air Fryer: Set your air fryer to 300°F (150°C) and cook for about 5-7 minutes. Check often to avoid burning. - Dehydrator: This method takes longer but keeps the nutrients. Set it to 125°F (52°C) for 1-2 hours. Each method gives a unique texture and flavor. You can experiment to see which you like best! Kale chips are great on their own, but you can add some flair: - Serve them in a bright bowl for a fun look. - Pair them with dips like hummus or guacamole for extra flavor. - Use them as a garnish on soups or salads. Feel free to get creative! You can use these ideas to make your kale chips stand out at your next snack time. For the full recipe, check out the Kale Crunchies section above. To keep your homemade kale chips fresh, let them cool completely. Once cool, place them in a container. You can use a jar, a zip-top bag, or a food storage container. Make sure to seal the container tightly to keep air out. Air can make your chips lose their crispness. Homemade kale chips can last about 5 to 7 days. After that, they may become stale. For the best taste, eat them within the first few days. If you store them well, you can enjoy their crunchy goodness for a week. Choose containers that are airtight. Glass jars work well and look nice on your shelf. Zip-top bags are also great, especially if you want to take them on the go. Just remember to squeeze out as much air as you can before sealing. This helps keep your kale chips crispy longer. For the full recipe of crispy kale chips, check out the detailed instructions above! To make crispy kale chips, follow these steps. First, preheat your oven to 350°F (175°C). Line a baking sheet with parchment paper. Next, tear the kale leaves into bite-sized pieces and place them in a bowl. Add 2 tablespoons of olive oil, 1 teaspoon of garlic powder, 1 teaspoon of smoked paprika, and optional nutritional yeast for a cheesy flavor. Season with sea salt and pepper. Now, massage the kale with your hands for 2-3 minutes. This helps the leaves absorb the oil and spices. Spread the kale on the baking sheet in a single layer. Bake for 10-15 minutes. Keep a close eye on them to avoid burning. The edges should turn crispy and slightly brown. Let them cool for a few minutes before enjoying. This method gives you a tasty and healthy snack. Yes, kale chips are healthy! They are low in calories and high in nutrients. Kale is packed with vitamins A, C, and K. It also has fiber and antioxidants. When you make them at home, you control the oil and salt. This allows you to make a healthier snack than most store-bought options. Kale chips are a great way to enjoy greens. They satisfy your crunch cravings without the guilt. Plus, they are a good source of plant-based nutrients. Eating kale chips can help you feel full and happy. Yes, you can buy ready-made kale chips. Many stores offer them in various flavors. However, check the ingredient list. Some brands add preservatives or extra salt. Homemade kale chips allow you to use fresh ingredients and control the flavor. If you're short on time, store-bought chips can be a quick option. But, for the best taste and health benefits, I recommend making your own. For the full recipe, refer back to the recipe section. This blog post covered how to make great kale chips. We looked at fresh kale, olive oil, and seasonings. I shared steps to prepare, season, and bake for crispness. You learned tips for maximum crunch and common mistakes. We explored tasty flavor variations and cooking methods. Lastly, I provided storage tips to keep your chips fresh. Kale chips are easy and fun to make. With these steps, you can enjoy them anytime. Enjoy your crispy, healthy snack!](https://blissfulmeal.com/wp-content/uploads/2025/07/ce738ab0-af54-4965-961d-726e0a4f794d.webp)
Looking for a fun and healthy snack? You’ve found it! Crispy kale chips are easy to make and super tasty. With just a few simple ingredients, I will guide you through each step. Whether you want them spicy or cheesy, I’ve got you covered. Plus, I’ll share tips to make sure your chips come out perfect every time. Let’s dive in and satisfy those snack cravings!
Ingredients
Fresh Kale
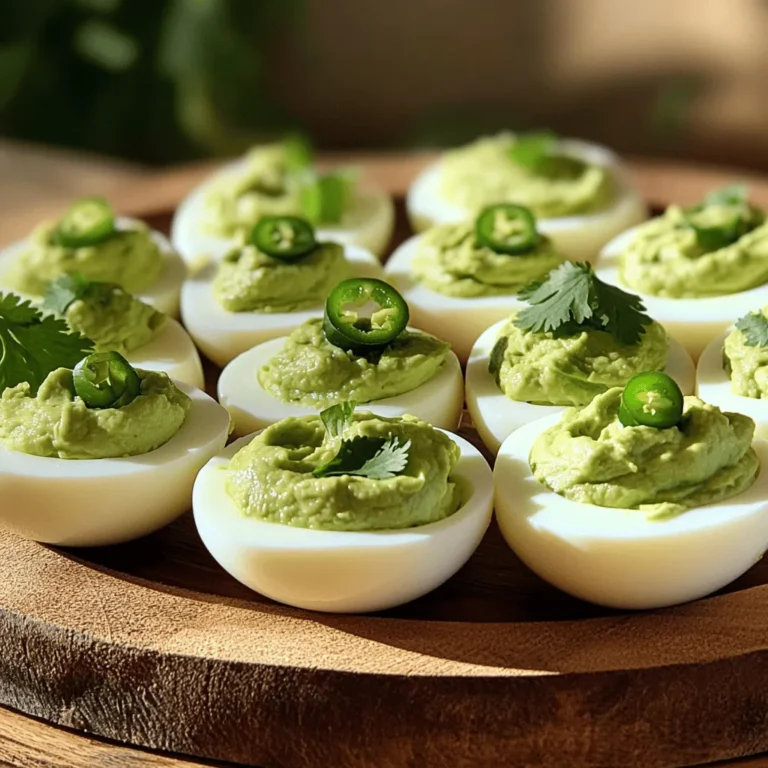
To make crispy kale chips, start with fresh kale. Look for kale that is bright green and free from brown spots. You will need one bunch of kale. Remove the tough stems and tear the leaves into bite-sized pieces. This helps them bake evenly and get nice and crispy.
Olive Oil and Seasonings
Next, you will need some olive oil and seasonings. Use two tablespoons of high-quality olive oil. This adds flavor and helps the kale crisp up nicely. For seasoning, you will need:
– 1 teaspoon of garlic powder
– 1 teaspoon of smoked paprika
– Sea salt, to taste
– Freshly cracked pepper, to taste
These spices give the kale chips a tasty kick. Feel free to add more or less based on your taste.
Optional Nutritional Additives
If you want a cheesy flavor, consider adding nutritional yeast. Use one teaspoon as an optional ingredient. It adds a nice flavor boost and is great for those who want a plant-based option. You can also experiment with other spices or herbs to make the chips your own.
Step-by-Step Instructions
Preparation of Kale
Start with a bunch of fresh kale. Remove the tough stems. Tear the leaves into bite-sized pieces. Rinse them well under cool water. This step removes dirt and any grit. Drain the kale thoroughly using a salad spinner or by patting it dry with a clean towel. Dry leaves help achieve crispiness.
Seasoning Process
In a large mixing bowl, add the torn kale. Drizzle two tablespoons of olive oil over it. Next, sprinkle one teaspoon of garlic powder and smoked paprika. If you like a cheesy taste, add one teaspoon of nutritional yeast. Season with sea salt and freshly cracked pepper to your liking. Use clean hands to massage the kale gently for about two to three minutes. This helps the flavors blend well and softens the leaves.
Baking for the Perfect Crispness
Preheat your oven to 350°F (175°C). Line a baking sheet with parchment paper. Spread the seasoned kale evenly on the sheet. Make sure the leaves are not overlapping. This ensures they bake evenly and become crisp. Bake for 10 to 15 minutes, checking often. The edges should turn crispy and slightly brown. Once they are done, let the chips cool on the baking sheet. They will become crunchier as they cool. Taste the chips and adjust seasoning if needed. Enjoy your crispy kale chips as a healthy snack or garnish!
Tips & Tricks
Ensuring Maximum Crispiness
To get the best crispiness from your kale chips, follow a few key steps. First, make sure your kale is very dry. Any water left on the leaves can lead to soggy chips. After washing, use a salad spinner or carefully pat the leaves dry with a towel.
Next, don’t overcrowd the baking sheet. Spread the kale pieces out in a single layer. This allows hot air to circulate around each leaf, creating that perfect crunch. If your batch is big, split it into two sheets.
Best Practices for Seasoning
When it comes to seasoning, less is more. Start with a light drizzle of olive oil. Too much oil can make the chips greasy. I usually use about two tablespoons for one bunch of kale.
Sprinkle your spices evenly. I like using garlic powder and smoked paprika. They add great flavor without being overpowering. You can mix the seasonings in a bowl before adding them to the kale for even coverage.
Common Mistakes to Avoid
One common mistake is baking at too high a temperature. Keep your oven at 350°F (175°C). Baking at a higher heat can brown the chips too quickly, leading to burnt edges.
Another mistake is not keeping an eye on the kale as it bakes. Check them around the 10-minute mark. The chips can go from perfect to burnt in just a minute.
Finally, avoid using kale that is wilted or brown. Fresh, vibrant leaves will give you the best results.
Variations
Flavor Combinations
You can make your kale chips even more fun by trying different flavors. Here are a few ideas:
– Spicy: Add cayenne pepper or chili powder for heat. Start with a small amount and taste it.
– Cheesy: Use nutritional yeast for a cheesy taste. It adds great flavor without dairy.
– Sweet: Try a sprinkle of cinnamon and a bit of maple syrup. This gives a nice twist.
Mix and match these flavors to find your favorite!
Alternative Cooking Methods
You can cook kale chips in different ways. Here are some options:
– Air Fryer: Set your air fryer to 300°F (150°C) and cook for about 5-7 minutes. Check often to avoid burning.
– Dehydrator: This method takes longer but keeps the nutrients. Set it to 125°F (52°C) for 1-2 hours.
Each method gives a unique texture and flavor. You can experiment to see which you like best!
Serving Suggestions
Kale chips are great on their own, but you can add some flair:
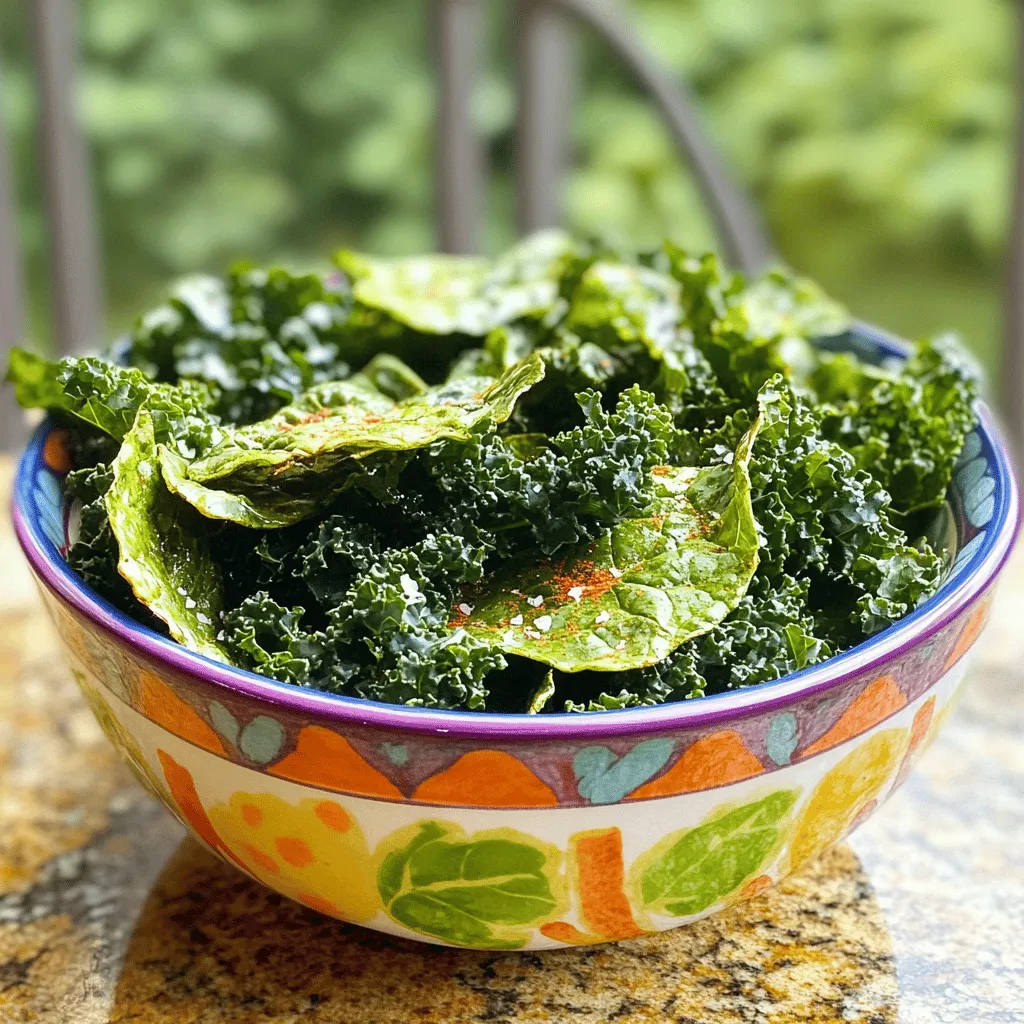
– Serve them in a bright bowl for a fun look.
– Pair them with dips like hummus or guacamole for extra flavor.
– Use them as a garnish on soups or salads.
Feel free to get creative! You can use these ideas to make your kale chips stand out at your next snack time.
Storage Info
How to Store Homemade Kale Chips
To keep your homemade kale chips fresh, let them cool completely. Once cool, place them in a container. You can use a jar, a zip-top bag, or a food storage container. Make sure to seal the container tightly to keep air out. Air can make your chips lose their crispness.
Shelf Life of Kale Chips
Homemade kale chips can last about 5 to 7 days. After that, they may become stale. For the best taste, eat them within the first few days. If you store them well, you can enjoy their crunchy goodness for a week.
Best Containers for Storage
Choose containers that are airtight. Glass jars work well and look nice on your shelf. Zip-top bags are also great, especially if you want to take them on the go. Just remember to squeeze out as much air as you can before sealing. This helps keep your kale chips crispy longer.
FAQs
How do I make crispy kale chips?
To make crispy kale chips, follow these steps. First, preheat your oven to 350°F (175°C). Line a baking sheet with parchment paper. Next, tear the kale leaves into bite-sized pieces and place them in a bowl. Add 2 tablespoons of olive oil, 1 teaspoon of garlic powder, 1 teaspoon of smoked paprika, and optional nutritional yeast for a cheesy flavor. Season with sea salt and pepper.
Now, massage the kale with your hands for 2-3 minutes. This helps the leaves absorb the oil and spices. Spread the kale on the baking sheet in a single layer. Bake for 10-15 minutes. Keep a close eye on them to avoid burning. The edges should turn crispy and slightly brown. Let them cool for a few minutes before enjoying. This method gives you a tasty and healthy snack.
Are kale chips healthy?
Yes, kale chips are healthy! They are low in calories and high in nutrients. Kale is packed with vitamins A, C, and K. It also has fiber and antioxidants. When you make them at home, you control the oil and salt. This allows you to make a healthier snack than most store-bought options.
Kale chips are a great way to enjoy greens. They satisfy your crunch cravings without the guilt. Plus, they are a good source of plant-based nutrients. Eating kale chips can help you feel full and happy.
Can I buy kale chips ready-made?
Yes, you can buy ready-made kale chips. Many stores offer them in various flavors. However, check the ingredient list. Some brands add preservatives or extra salt. Homemade kale chips allow you to use fresh ingredients and control the flavor. If you’re short on time, store-bought chips can be a quick option. But, for the best taste and health benefits, I recommend making your own.
This blog post covered how to make great kale chips. We looked at fresh kale, olive oil, and seasonings. I shared steps to prepare, season, and bake for crispness. You learned tips for maximum crunch and common mistakes. We explored tasty flavor variations and cooking methods. Lastly, I provided storage tips to keep your chips fresh.
Kale chips are easy and fun to make. With these steps, you can enjoy them anytime. Enjoy your crispy, healthy snack!
![To make crispy kale chips, start with fresh kale. Look for kale that is bright green and free from brown spots. You will need one bunch of kale. Remove the tough stems and tear the leaves into bite-sized pieces. This helps them bake evenly and get nice and crispy. Next, you will need some olive oil and seasonings. Use two tablespoons of high-quality olive oil. This adds flavor and helps the kale crisp up nicely. For seasoning, you will need: - 1 teaspoon of garlic powder - 1 teaspoon of smoked paprika - Sea salt, to taste - Freshly cracked pepper, to taste These spices give the kale chips a tasty kick. Feel free to add more or less based on your taste. If you want a cheesy flavor, consider adding nutritional yeast. Use one teaspoon as an optional ingredient. It adds a nice flavor boost and is great for those who want a plant-based option. You can also experiment with other spices or herbs to make the chips your own. Follow the [Full Recipe] for a step-by-step guide to making these tasty snacks. Start with a bunch of fresh kale. Remove the tough stems. Tear the leaves into bite-sized pieces. Rinse them well under cool water. This step removes dirt and any grit. Drain the kale thoroughly using a salad spinner or by patting it dry with a clean towel. Dry leaves help achieve crispiness. In a large mixing bowl, add the torn kale. Drizzle two tablespoons of olive oil over it. Next, sprinkle one teaspoon of garlic powder and smoked paprika. If you like a cheesy taste, add one teaspoon of nutritional yeast. Season with sea salt and freshly cracked pepper to your liking. Use clean hands to massage the kale gently for about two to three minutes. This helps the flavors blend well and softens the leaves. Preheat your oven to 350°F (175°C). Line a baking sheet with parchment paper. Spread the seasoned kale evenly on the sheet. Make sure the leaves are not overlapping. This ensures they bake evenly and become crisp. Bake for 10 to 15 minutes, checking often. The edges should turn crispy and slightly brown. Once they are done, let the chips cool on the baking sheet. They will become crunchier as they cool. Taste the chips and adjust seasoning if needed. Enjoy your crispy kale chips as a healthy snack or garnish! You can find the full recipe [here](#). To get the best crispiness from your kale chips, follow a few key steps. First, make sure your kale is very dry. Any water left on the leaves can lead to soggy chips. After washing, use a salad spinner or carefully pat the leaves dry with a towel. Next, don't overcrowd the baking sheet. Spread the kale pieces out in a single layer. This allows hot air to circulate around each leaf, creating that perfect crunch. If your batch is big, split it into two sheets. When it comes to seasoning, less is more. Start with a light drizzle of olive oil. Too much oil can make the chips greasy. I usually use about two tablespoons for one bunch of kale. Sprinkle your spices evenly. I like using garlic powder and smoked paprika. They add great flavor without being overpowering. You can mix the seasonings in a bowl before adding them to the kale for even coverage. One common mistake is baking at too high a temperature. Keep your oven at 350°F (175°C). Baking at a higher heat can brown the chips too quickly, leading to burnt edges. Another mistake is not keeping an eye on the kale as it bakes. Check them around the 10-minute mark. The chips can go from perfect to burnt in just a minute. Finally, avoid using kale that is wilted or brown. Fresh, vibrant leaves will give you the best results. For more details on making these tasty snacks, refer to the Full Recipe. {{image_4}} You can make your kale chips even more fun by trying different flavors. Here are a few ideas: - Spicy: Add cayenne pepper or chili powder for heat. Start with a small amount and taste it. - Cheesy: Use nutritional yeast for a cheesy taste. It adds great flavor without dairy. - Sweet: Try a sprinkle of cinnamon and a bit of maple syrup. This gives a nice twist. Mix and match these flavors to find your favorite! You can cook kale chips in different ways. Here are some options: - Air Fryer: Set your air fryer to 300°F (150°C) and cook for about 5-7 minutes. Check often to avoid burning. - Dehydrator: This method takes longer but keeps the nutrients. Set it to 125°F (52°C) for 1-2 hours. Each method gives a unique texture and flavor. You can experiment to see which you like best! Kale chips are great on their own, but you can add some flair: - Serve them in a bright bowl for a fun look. - Pair them with dips like hummus or guacamole for extra flavor. - Use them as a garnish on soups or salads. Feel free to get creative! You can use these ideas to make your kale chips stand out at your next snack time. For the full recipe, check out the Kale Crunchies section above. To keep your homemade kale chips fresh, let them cool completely. Once cool, place them in a container. You can use a jar, a zip-top bag, or a food storage container. Make sure to seal the container tightly to keep air out. Air can make your chips lose their crispness. Homemade kale chips can last about 5 to 7 days. After that, they may become stale. For the best taste, eat them within the first few days. If you store them well, you can enjoy their crunchy goodness for a week. Choose containers that are airtight. Glass jars work well and look nice on your shelf. Zip-top bags are also great, especially if you want to take them on the go. Just remember to squeeze out as much air as you can before sealing. This helps keep your kale chips crispy longer. For the full recipe of crispy kale chips, check out the detailed instructions above! To make crispy kale chips, follow these steps. First, preheat your oven to 350°F (175°C). Line a baking sheet with parchment paper. Next, tear the kale leaves into bite-sized pieces and place them in a bowl. Add 2 tablespoons of olive oil, 1 teaspoon of garlic powder, 1 teaspoon of smoked paprika, and optional nutritional yeast for a cheesy flavor. Season with sea salt and pepper. Now, massage the kale with your hands for 2-3 minutes. This helps the leaves absorb the oil and spices. Spread the kale on the baking sheet in a single layer. Bake for 10-15 minutes. Keep a close eye on them to avoid burning. The edges should turn crispy and slightly brown. Let them cool for a few minutes before enjoying. This method gives you a tasty and healthy snack. Yes, kale chips are healthy! They are low in calories and high in nutrients. Kale is packed with vitamins A, C, and K. It also has fiber and antioxidants. When you make them at home, you control the oil and salt. This allows you to make a healthier snack than most store-bought options. Kale chips are a great way to enjoy greens. They satisfy your crunch cravings without the guilt. Plus, they are a good source of plant-based nutrients. Eating kale chips can help you feel full and happy. Yes, you can buy ready-made kale chips. Many stores offer them in various flavors. However, check the ingredient list. Some brands add preservatives or extra salt. Homemade kale chips allow you to use fresh ingredients and control the flavor. If you're short on time, store-bought chips can be a quick option. But, for the best taste and health benefits, I recommend making your own. For the full recipe, refer back to the recipe section. This blog post covered how to make great kale chips. We looked at fresh kale, olive oil, and seasonings. I shared steps to prepare, season, and bake for crispness. You learned tips for maximum crunch and common mistakes. We explored tasty flavor variations and cooking methods. Lastly, I provided storage tips to keep your chips fresh. Kale chips are easy and fun to make. With these steps, you can enjoy them anytime. Enjoy your crispy, healthy snack!](https://blissfulmeal.com/wp-content/uploads/2025/07/ce738ab0-af54-4965-961d-726e0a4f794d-300x300.webp)
![To make Air Fryer Honey Sriracha Cauliflower, you need some fresh and simple ingredients. Here’s what you'll need: - Cauliflower - Olive Oil - Honey - Sriracha Sauce - Soy Sauce - Garlic Powder - Smoked Paprika - Salt and Pepper - Garnishes (Green Onions and Sesame Seeds) These ingredients work together to create a tasty, crispy delight. The cauliflower gives a nice texture, while honey and Sriracha add sweet and spicy flavors. Olive oil helps the cauliflower crisp up nicely in the air fryer. Make sure to choose fresh cauliflower to get the best taste. For a full recipe with step-by-step instructions, check out the Full Recipe. The combination of these ingredients makes a perfect dish. You can enjoy it as a snack, appetizer, or side. To start, gather your ingredients. You need olive oil, honey, Sriracha, soy sauce, garlic powder, smoked paprika, salt, and pepper. In a large bowl, whisk these ingredients together. Mix until you get a smooth marinade. It should look shiny and well-blended. This step is key to getting great flavor on your cauliflower. Now it’s time to add the cauliflower. Toss the florets into the bowl with the marinade. Make sure each piece gets a good coat. This helps the flavors soak in. Let the marinated florets sit for about 15-20 minutes at room temperature. This short wait makes a big difference in taste. While the cauliflower marinates, preheat your air fryer. Set it to 375°F (190°C) and let it warm up for about 5 minutes. Once hot, arrange the marinated florets in the basket. Lay them out in a single layer. Avoid overcrowding; this ensures they cook evenly. Air fry the cauliflower for 12-15 minutes. Halfway through, shake the basket to help them brown. You're aiming for a nice crispy texture. When done, carefully move the golden-brown cauliflower to a dish. Finish with a sprinkle of chopped green onions and sesame seeds for a pop of color and crunch. Enjoy this crispy delight as an appetizer or side. For the full recipe, check the previous section! To get the best crispy cauliflower, follow these tips: - Use enough oil: A good amount of olive oil helps the cauliflower crisp up nicely. - Preheat the air fryer: Always preheat your air fryer for even cooking. - Don’t overcrowd: Lay the florets in a single layer. If they touch, they won’t crisp up. Cook in batches if needed. You can tweak the flavors to fit your taste: - Adjust Sriracha: Want more heat? Add more Sriracha. For milder taste, use less. - Try new ingredients: Swap honey for maple syrup for a different sweet taste. Add lime juice or ginger for a fresh twist. Pair your Honey Sriracha Cauliflower with tasty dips: - Ranch dressing: This creamy dip contrasts with the heat. - Greek yogurt: It adds a cool, creamy touch. For sides, consider serving with: - Rice or quinoa: These grains balance the spice. - A fresh salad: A crunchy salad adds freshness to the meal. For the complete recipe, check out the [Full Recipe]. {{image_4}} You can easily make this dish vegan and gluten-free. For honey, use maple syrup or agave nectar. Both give a sweet taste and work well with Sriracha. For soy sauce, choose tamari. Tamari is a great gluten-free option that adds rich flavor. These swaps keep your Honey Sriracha Cauliflower tasty and inclusive. Want to mix things up? Add other veggies to the air fryer. Broccoli, bell peppers, and carrots pair well with cauliflower. Cut them into small pieces and toss them in the same marinade. This way, you get more colors and flavors in your dish. Plus, it makes your meal more nutritious and fun. If you love heat, try different hot sauces. A chili garlic sauce or a spicy taco sauce can add a new kick. For a milder taste, use a chipotle sauce. You can also play with spices. Add cumin for a warm flavor or curry powder for a touch of exotic. Experimenting with these options makes each batch unique and exciting. To keep your air fryer honey sriracha cauliflower fresh, use an air-tight container. This helps prevent moisture from making the cauliflower soggy. You can store leftovers in the fridge for up to three days. If you plan to eat them later, let them cool first before sealing. To reheat your cauliflower and keep that crispiness, the best method is the air fryer. Set it to 350°F (175°C) and cook for about 5 minutes. This method brings back the crunch you love. You can also use an oven. Just place the cauliflower on a baking sheet and heat it at 350°F for about 10 minutes. If you want to freeze the honey sriracha cauliflower, first let it cool completely. Then, place it in a freezer-safe bag or container. Be sure to remove as much air as possible to avoid freezer burn. You can freeze it for up to a month. When you want to enjoy it, thaw it in the fridge overnight. Then, reheat it using the air fryer for the best results. Yes, you can use frozen cauliflower. Frozen cauliflower saves time. It cooks faster than fresh cauliflower. Here are some tips: - Thaw first: Let the cauliflower thaw completely for even cooking. - Pat dry: Remove excess moisture with a paper towel. This helps achieve crispiness. - Adjust cooking time: Cook for about 10-12 minutes instead of 12-15 minutes. Check for doneness. Yes, grilling cauliflower is a great option. It adds a smoky flavor. Here are some steps: - Prepare the marinade: Use the same marinade as for the air fryer. - Preheat grill: Set the grill to medium heat. - Skewer the florets: Thread cauliflower onto skewers for easy handling. - Grill time: Cook for about 8-10 minutes, turning occasionally, until tender. You can serve Honey Sriracha Cauliflower with many dishes. Here are some tasty ideas: - Rice or quinoa: These make a great base for the spicy cauliflower. - Salads: Pair it with a fresh green salad for a light meal. - Dips: Serve with ranch dressing or Greek yogurt for added creaminess. For detailed instructions, check out the [Full Recipe](#). This blog post covered how to make Honey Sriracha Cauliflower from scratch. You learned about the key ingredients, plus marinating and cooking tips. I shared how to get that perfect crispy texture, spice adjustments, and tasty serving suggestions. Don't forget to try different vegetables or hot sauces for a unique twist. Follow proper storage tips for leftovers so you can enjoy this dish later. Remember, cooking should be fun and flexible, so feel free to experiment!](https://blissfulmeal.com/wp-content/uploads/2025/07/de29001b-160a-4cd4-ab1b-d1e7a333e0a6-768x768.webp)
![- 10 rice paper wrappers - 1 cup shredded carrots - 1 cup red cabbage, finely sliced - 1 cup cucumber, julienned - 1 red bell pepper, thinly sliced - 1 avocado, thinly sliced - 1 cup fresh mint leaves - 1 cup fresh cilantro leaves - 1 tablespoon soy sauce - 1 tablespoon sesame oil - Salt to taste - Optional: Thai chili sauce for dipping To make fresh vegetable spring rolls, you need a few key items. First, rice paper wrappers form the base. They are light and flexible. Next, fresh vegetables add crunch and color. Carrots, cabbage, cucumber, bell pepper, and avocado work great. Each adds its unique taste. Finally, flavor enhancers like soy sauce and sesame oil bring everything together. You can switch out some veggies if needed. Try using lettuce or spinach instead of cabbage. If you don't have a red bell pepper, use a yellow or green one. For a gluten-free option, ensure you pick gluten-free soy sauce. This keeps your rolls safe for all diets. Feel free to get creative with your rolls. Add fresh herbs like basil or cilantro for extra flavor. You can also try spices like ginger or garlic. For dipping, consider peanut sauce or sweet chili sauce. These will add a fun twist to each bite. For the full recipe, don't forget to check out the [Full Recipe]. - Washing and cutting vegetables Start by washing all your vegetables. This step is key for fresh spring rolls. Use cold water to clean them well. After washing, chop the veggies. Shred the carrots, slice the cabbage, julienne the cucumber, and thinly slice the bell pepper and avocado. Place each cut veggie in its own bowl. This makes it easier to grab when assembling. - Soaking rice paper wrappers For the rice paper, grab a shallow dish and fill it with warm water. Dip one rice paper wrapper into the water. Let it soak for about 10-15 seconds. You want it soft, but not too mushy. Carefully lift it out and place it flat on a clean surface. Repeat this for each wrapper as you go. - Layering ingredients effectively Place the rice paper so one edge is closest to you. On the lower third of the wrapper, add a handful of shredded carrots. Next, layer in the red cabbage, cucumber, bell pepper, and avocado. Add a few mint and cilantro leaves on top. A pinch of salt enhances flavor. Drizzle a bit of soy sauce and sesame oil across the veggies for an extra kick. - Rolling techniques for a secure wrap Now for the fun part—rolling! Lift the edge closest to you and fold it over the filling. Tuck in the sides tightly. This way, nothing spills out. Continue rolling away from you until the spring roll is fully wrapped. Make sure it’s snug. Repeat this until you use up all the wrappers and fillings. - Plating ideas for an appealing presentation Arrange the completed spring rolls on a bright platter. For a pop of color, add extra mint and cilantro leaves around them. Place a small bowl of Thai chili sauce in the center for dipping. This makes the dish look inviting and tasty. - Chilling versus room temperature serving You can serve the spring rolls right away or chill them in the fridge. Chilled rolls offer a refreshing bite. If you prefer them at room temperature, they still taste great. Either way, enjoy your delicious creation! For the complete recipe, check the [Full Recipe]. To avoid tearing rice paper, keep a few things in mind: - Soak briefly: Submerge the rice paper in warm water for just 10-15 seconds. It should feel soft but not too mushy. - Use a clean surface: Lay the rice paper on a dry, flat surface to prevent sticking. - Layer lightly: Don’t overload the wrapper with too many veggies. A small handful works best. Maintaining freshness of the rolls is also key: - Wrap tightly: After filling, roll the rice paper snugly to keep the ingredients inside. - Serve with care: Arrange the rolls on a platter and cover them with a damp cloth until ready to eat. - Chill for a crisp bite: If you have time, refrigerate them for about 30 minutes before serving. The best dipping sauces for spring rolls include: - Thai chili sauce: This adds a sweet and spicy kick. - Peanut sauce: Creamy and rich, it pairs well with fresh veggies. - Soy sauce: A classic choice, it adds a salty depth to each bite. When pairing with beverages, consider: - Green tea: Its light flavor enhances the fresh taste of the rolls. - Coconut water: This adds a refreshing, tropical touch. - Sparkling water: It cleanses the palate between bites. To store leftover spring rolls: - Refrigerate: Place them in an airtight container, separated by parchment paper. This keeps them fresh. - Use within 2 days: For the best taste, enjoy them quickly. For reheating instructions: - Avoid the microwave: It can make the rice paper chewy. - Oven method: Preheat the oven to 350°F. Place rolls on a baking sheet and heat for about 10 minutes or until warm. Following these tips will help you enjoy your vegetable spring rolls at their best! If you want full details on how to make them, check out the Full Recipe. {{image_4}} You can easily adapt vegetable spring rolls to fit your diet. - Vegan variations: All the ingredients in this recipe are plant-based. You can use tofu for added protein. Just cube it and sauté it lightly. This adds flavor and texture. - Low-carb options: For a low-carb version, skip the rice paper. Instead, use lettuce leaves. They wrap well and give a nice crunch. Changing flavors can make these spring rolls exciting. - Spicy versions with chili: If you love heat, add sliced chili peppers. You can mix them with the veggies or use them as a topping. This gives your spring rolls a nice kick. - Sweet versions with fruits: For a fun twist, use fruits like mango or pineapple. Slice them thinly and add them to the filling. They bring a refreshing sweetness. Serving spring rolls differently can impress your guests. - Spring roll salads: Chop your spring rolls into bite-sized pieces and toss them in a salad. Add your favorite dressing for a unique dish. - Spring roll bowls: Place the rolled spring rolls in a bowl with rice or quinoa. Add a drizzle of sauce and top with fresh herbs. This makes a hearty meal. You can explore these variations and create your own unique rolls. Check the Full Recipe for more details! Vegetable spring rolls stay fresh in the fridge for about three days. To keep them from getting soggy, place a damp paper towel in the container. This helps keep the rice paper soft yet not wet. Also, store them in an airtight container to prevent drying out. You can freeze spring rolls for up to two months. To do this, lay them flat on a baking sheet. Freeze them for about one hour, then transfer them to a freezer bag. This helps keep them from sticking together. When it’s time to enjoy, thaw the rolls overnight in the fridge. You have options when reheating. For a crispier finish, use the oven. Preheat it to 350°F (175°C), then bake the rolls for about 10 minutes. If you prefer a quick method, the microwave works too. Just heat them for 30 seconds but be careful; this can make them soft. Always check that the rice paper stays crispy for the best bite. To keep your vegetable spring rolls crispy, avoid over-soaking the rice paper. Dip it in warm water for just 10-15 seconds. Use fresh, dry vegetables. If you prepare them ahead of time, store them in an airtight container with a damp paper towel. This keeps moisture at bay and helps maintain crunch. Yes, you can make vegetable spring rolls ahead of time. Prepare them a few hours before serving. To keep them fresh, place them in a single layer on a plate. Cover them with a damp cloth. This helps prevent them from drying out. However, it’s best to eat them within a day for optimal taste. Serve your spring rolls on a colorful platter. This makes them look inviting. You can chill them in the fridge or serve them at room temperature. Pair them with a bowl of Thai chili sauce for dipping. You can also add hoisin or peanut sauce for extra flavor. Yes, store-bought dips work well with vegetable spring rolls. Look for sweet chili sauce, hoisin sauce, or peanut sauce. Each adds a unique twist. Make sure to choose a dip that balances the fresh flavors of the rolls. Enjoy experimenting with different dips! In this article, we explored how to make fresh and delicious spring rolls. We looked at essential ingredients, possible substitutions, and optional additions to enhance flavor. The step-by-step instructions made preparation easy, from washing veggies to perfect rolling techniques. I shared tips for serving and storing your rolls, along with various tasty variations. Spring rolls are fun and simple to make. With the right tips, you can enjoy fresh rolls anytime. Try new flavors and enjoy your creations!](https://blissfulmeal.com/wp-content/uploads/2025/06/43dc254c-4e59-4d22-bcd3-66be98d8c99d-768x768.webp)