No-Bake Key Lime Pie Easy and Refreshing Dessert


Looking for a dessert that’s both easy and refreshing? You’ve found it! This No-Bake Key Lime Pie is perfect for hot days or any time you crave a zesty treat. With a creamy filling and a crunchy crust, this pie mixes sweet and tart flavors beautifully. Plus, you don’t need to heat your kitchen! Let’s dive into the simple ingredients and steps that will make this pie your new favorite.
Why I Love This Recipe
- Refreshing Flavor: This pie brings a bright and zesty taste that perfectly balances sweetness and tartness, making it a delightful dessert for any occasion.
- No-Bake Convenience: As a no-bake recipe, it’s incredibly easy to prepare, requiring minimal effort and no oven time, perfect for hot days.
- Coconut Twist: The addition of coconut flakes in the crust adds a unique flavor and texture, enhancing the overall experience of this classic dessert.
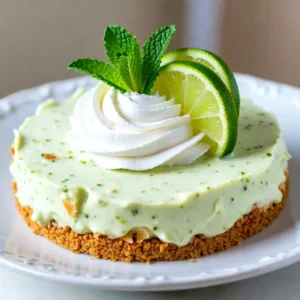
- Beautiful Presentation: With its vibrant green filling and elegant garnish of lime slices and mint, this pie is as visually appealing as it is delicious.
Ingredients
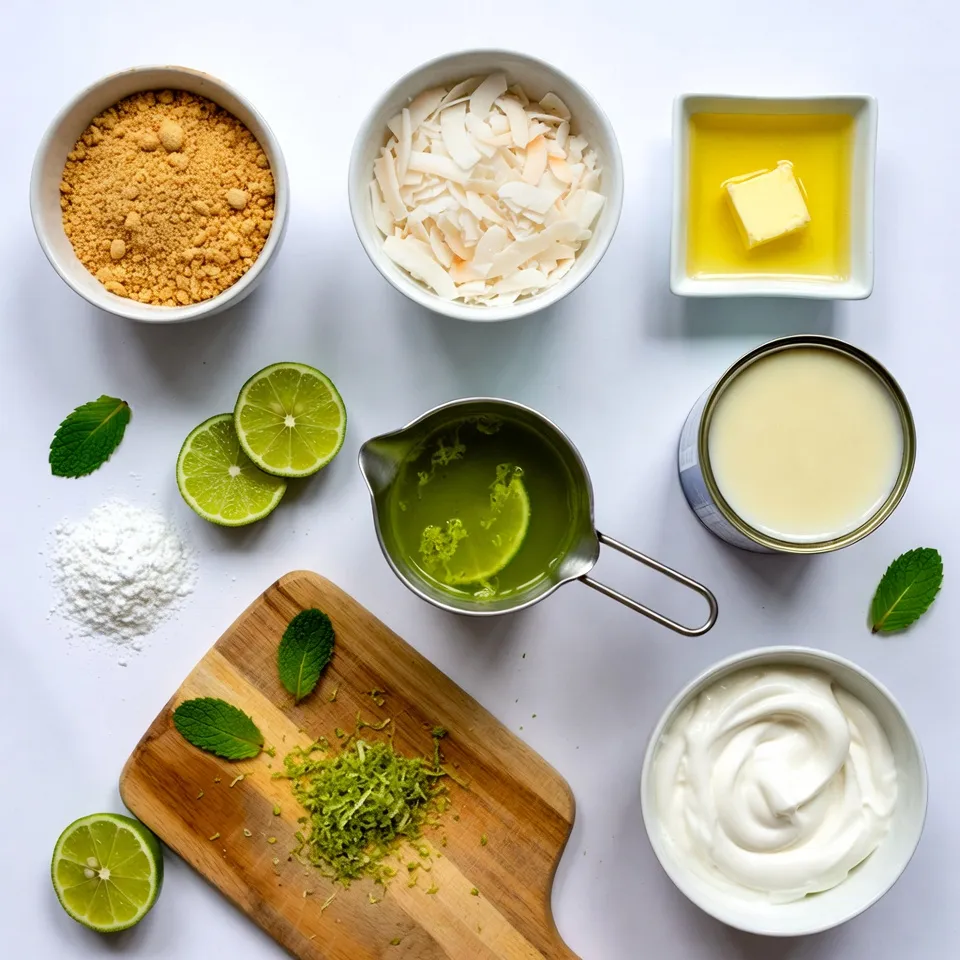
The key to a great no-bake key lime pie lies in its fresh and simple ingredients. Here’s what you need:
– 1 cup graham cracker crumbs
– 1/4 cup unsweetened coconut flakes
– 1/2 cup unsalted butter, melted
– 1 can (14 ounces) sweetened condensed milk
– 1/2 cup fresh key lime juice
– Zest of 2 key limes
– 1 cup heavy whipping cream
– 1/4 cup powdered sugar
– Lime slices and fresh mint leaves for garnish
Each ingredient plays a special role. The graham cracker crumbs and coconut flakes create a crunchy crust. The sweetened condensed milk adds creaminess and sweetness. Fresh key lime juice and zest give that zingy flavor. Finally, whipped cream makes the filling light and airy. Using fresh ingredients enhances the taste and makes your pie shine.
Step-by-Step Instructions
Preparing the Crust
To start, mix the graham cracker crumbs and coconut flakes in a large bowl. The coconut adds a nice twist to the classic crust. Next, pour in the melted butter. Stir until all the crumbs look shiny and coated. Now, take a 9-inch pie plate and press the crumb mixture firmly into the bottom and sides. Make sure it’s even all around. This step is key for a good crust. Then, place the crust in the fridge to chill while you make the filling.
Making the Filling
In a separate bowl, combine the sweetened condensed milk, fresh key lime juice, and zest. Whisk these together until smooth. This mixture will bring a bright, zesty flavor to your pie. Now, let’s whip the cream. In a clean mixing bowl, use an electric mixer to whip the heavy cream on medium speed. When soft peaks form, gradually add the powdered sugar. Keep whipping until stiff peaks form. This cream will give the pie a light and airy texture.
Assembling and Refrigerating the Pie
Next, gently fold the whipped cream into the lime mixture. Use a spatula and be careful not to deflate the cream. Mix until there are no white streaks left. Pour this filling into the chilled crust, spreading it evenly. Smooth the top with your spatula for a clean look. Cover the pie with plastic wrap. It needs to chill in the fridge for at least 4 hours, but overnight is best for a firm pie. This waiting time allows all the flavors to meld together perfectly.
Tips & Tricks
Perfecting Your Crust
To make the crust, press the mixture firmly. Use your fingers or a measuring cup. Start at the bottom and work your way up the sides. This gives you a nice, even crust. If you want a fun twist, try using crushed cookies instead of graham crackers. Chocolate or vanilla wafers can add a unique flavor.
Achieving the Ideal Filling Consistency
Whipping the cream is key to a great filling. Start by using cold cream and a clean bowl. Whip on medium speed until soft peaks form. Then, slowly add powdered sugar. Keep whipping until you see stiff peaks. This makes your filling light and airy. When mixing the whipped cream into the lime mixture, fold gently. This keeps the filling fluffy and avoids any white streaks.
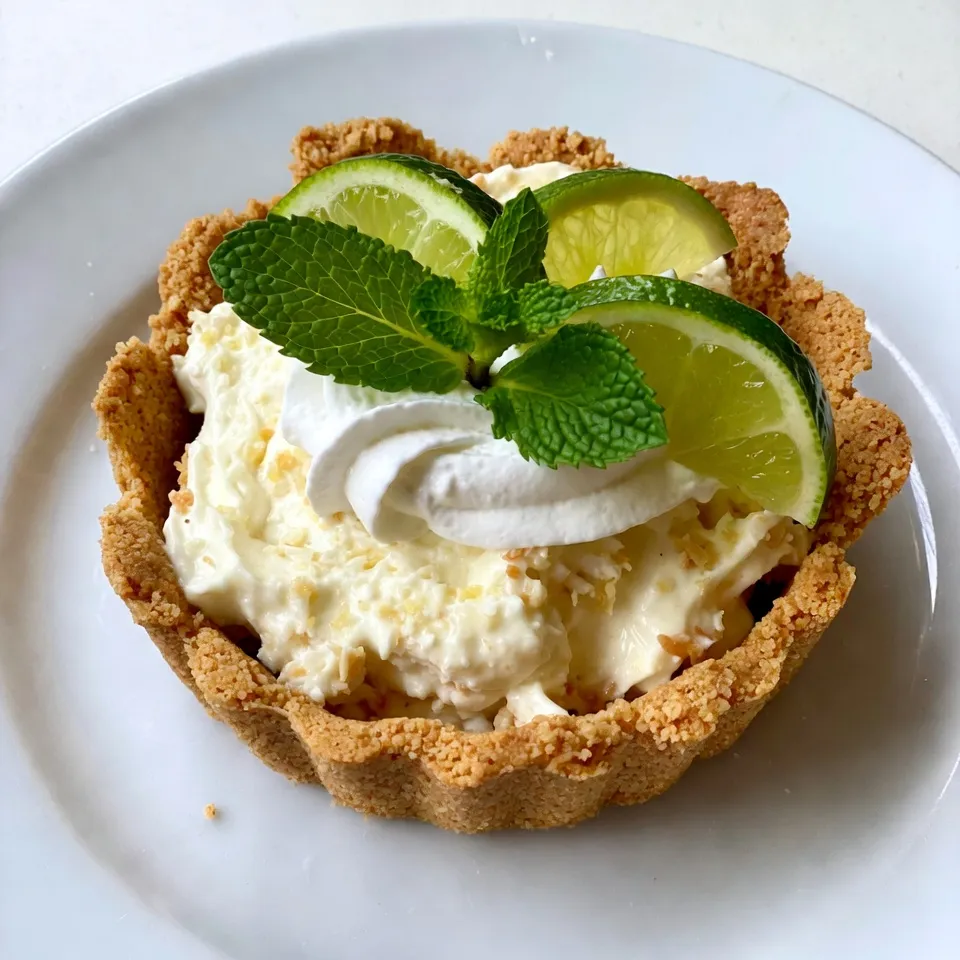
Serving Suggestions
For a beautiful presentation, serve each slice on a chilled plate. You can drizzle a little lime juice on top for extra flavor. Garnish with fresh lime slices and mint leaves. These touches make your pie look stunning and fresh. If you want to add more coconut flavor, sprinkle coconut flakes on top right before serving. Your guests will love this refreshing treat!
Pro Tips
- Chill the Mixing Bowls: For a lighter filling, chill your mixing bowls and beaters before whipping the cream. This helps achieve a fluffier texture.
- Use Fresh Limes: Fresh key limes provide the best flavor. If they’re not available, regular limes are a good substitute, but fresh juice is key to the pie’s zesty taste.
- Don’t Overmix: When folding the whipped cream into the lime mixture, be gentle. Overmixing can deflate the whipped cream, leading to a denser pie.
- Allow Extra Chill Time: For the best texture, allow the pie to chill overnight. This enhances the flavor and ensures the pie is perfectly set.
Variations
Flavor Variations
You can switch up the flavor of your no-bake key lime pie easily. If you want a different taste, use regular lime juice or lemon juice instead of key lime juice. Both options bring their unique twist. You can also add extracts, like vanilla or almond, for extra flavor. These small changes can make a big difference in taste and keep things fun!
Dietary Adjustments
Making a gluten-free version is simple. Just swap graham cracker crumbs for gluten-free crumbs. Many brands offer these, and they taste great! If you want to reduce sugar, you can use alternatives like honey or agave syrup. These sweeteners still provide that yummy taste without extra calories. You can make this pie fit any diet while keeping it delicious!
Storage Info
Proper Storage Techniques
To keep your no-bake key lime pie fresh, store it in the fridge. Use an airtight container or cover the pie with plastic wrap. This helps prevent the pie from drying out. If you have leftovers, make sure to chill them quickly.
You can also freeze the pie for longer storage. Wrap it tightly in plastic wrap, then cover with aluminum foil. This helps keep out air and moisture. You can freeze it for up to two months. When ready to eat, thaw it in the fridge overnight.
Shelf Life
In the fridge, your no-bake key lime pie stays fresh for about 3 to 4 days. Make sure to check for signs of spoilage. If the pie looks dry or has an off smell, it’s best to toss it.
If you freeze the pie, it can last up to two months. However, for the best flavor and texture, eat it within a month. Always check for any signs of freezer burn. If the pie has ice crystals on it, the texture may be affected.
FAQs
How long does it take to set?
This pie needs at least 4 hours in the fridge. For the best texture, let it chill overnight. The longer it sets, the firmer it becomes.
Can I use regular limes instead of key limes?
Yes, you can use regular limes. However, key limes taste more tart and aromatic. They have a unique flavor that sets the pie apart. The acidity level also differs, making key limes a better choice for this recipe.
Can this pie be made in advance?
Absolutely! This pie is perfect for making ahead. You can prepare it a day or two before serving. Just keep it covered in the fridge until you’re ready to enjoy it. This way, the flavors meld together beautifully.
You now know how to make a tasty key lime pie. We covered essential ingredients, from graham cracker crumbs to fresh key lime juice. Step-by-step, I guided you through making the crust, filling, and assembling the pie. You also learned tips to perfect your crust and filling. Plus, I shared ways to store leftovers and keep your pie fresh.
This dessert is fun to make and enjoy. Try different flavors and dietary options to fit your taste. Happy bakin
Zesty No-Bake Key Lime Pie
Ingredients
- 1 cup graham cracker crumbs
- 1 4 cup unsweetened coconut flakes
- 1 2 cup unsalted butter, melted
- 1 can sweetened condensed milk (14 ounces)
- 1 2 cup fresh key lime juice
- 1 2 zest of key limes
- 1 cup heavy whipping cream
- 1 4 cup powdered sugar
- to taste lime slices and fresh mint leaves for garnish
Instructions
- Prepare the Crust: In a large mixing bowl, combine the graham cracker crumbs and unsweetened coconut flakes, mixing well.
- Pour in the melted butter and stir until all the crumbs are evenly coated in butter.
- Using your fingers or the back of a measuring cup, firmly press the crumb mixture into the bottom and up the sides of a 9-inch pie plate, forming an even crust. Place the crust in the refrigerator to chill while you prepare the filling.
- Make the Filling: In a separate bowl, whisk together the sweetened condensed milk, freshly squeezed key lime juice, and the zest of 2 key limes until the mixture is smooth and well combined.
- In another clean mixing bowl, use an electric mixer to whip the heavy cream on medium speed until soft peaks form. Gradually add the powdered sugar, continuing to whip until stiff peaks form.
- Carefully fold the whipped cream into the lime mixture using a spatula, mixing gently until all white streaks are gone, being cautious to maintain the airy texture of the whipped cream.
- Assemble the Pie: Pour the key lime filling into the chilled crust, spreading it evenly and smoothing the top with the spatula.
- Cover the pie with plastic wrap and refrigerate for a minimum of 4 hours, or for best results, overnight, until it is fully set and firm.
- Garnish and Serve: Once set, remove the pie from the refrigerator. Garnish the top with fresh lime slices and mint leaves for a refreshing touch and an attractive presentation.