
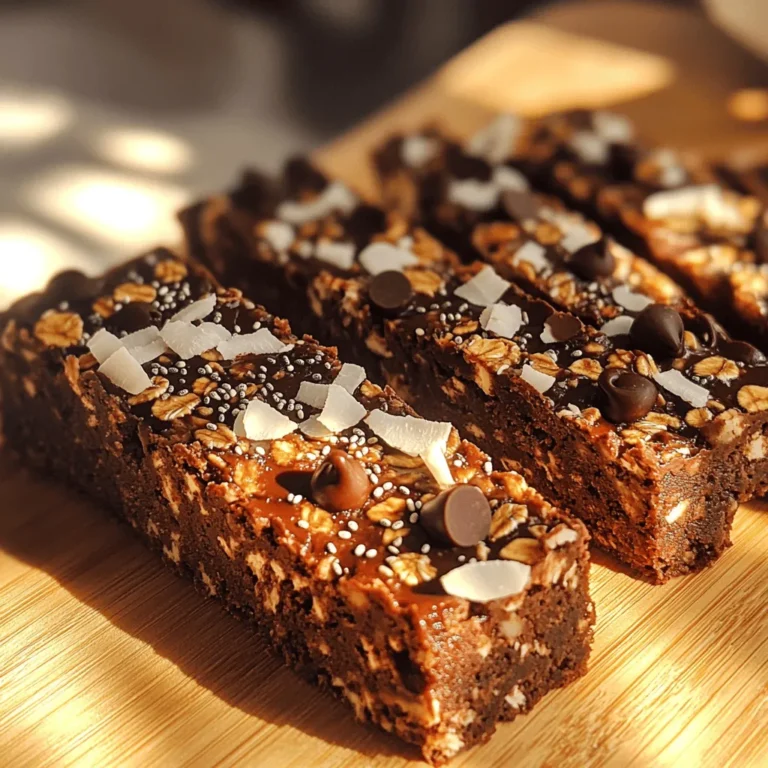
No Bake Peanut Butter Bars Tasty and Easy Recipe
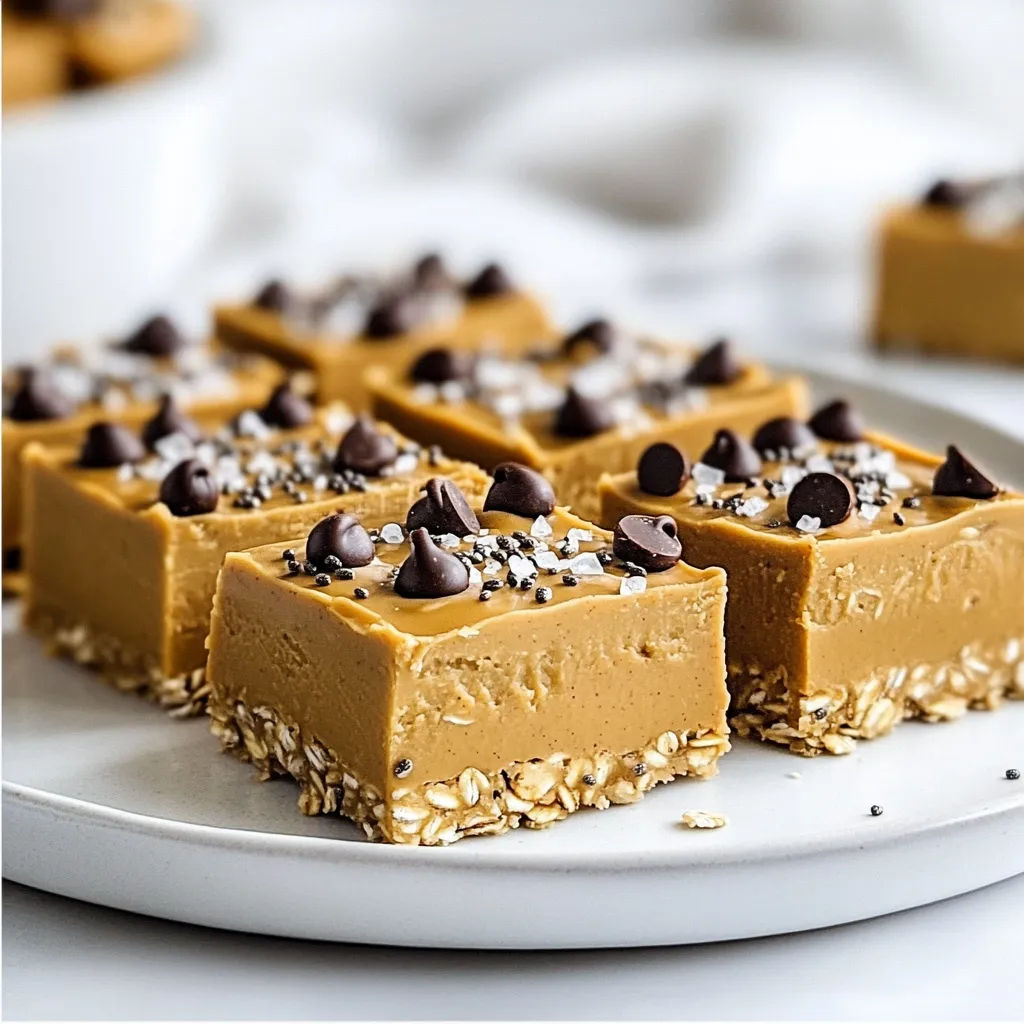

Looking for a quick and tasty treat? These No Bake Peanut Butter Bars are perfect for you! With just a few simple ingredients, you can whip up a sweet snack in no time. No baking means less fuss and more fun! In this easy recipe, I’ll share step-by-step instructions, tips for the best texture, and tasty variations. Let’s dive into this delicious adventure!
Why I Love This Recipe
- Quick and Easy: This recipe requires no baking, making it a hassle-free option for a delicious treat.
- Nutritious Ingredients: Packed with protein, oats, and chia seeds, these bars are a healthy snack choice.
- Customizable: You can easily modify the recipe by adding your favorite mix-ins or adjusting the sweetness.
- Perfect for Meal Prep: These bars store well in the fridge or freezer, making them ideal for on-the-go snacking.
Ingredients
List of Ingredients
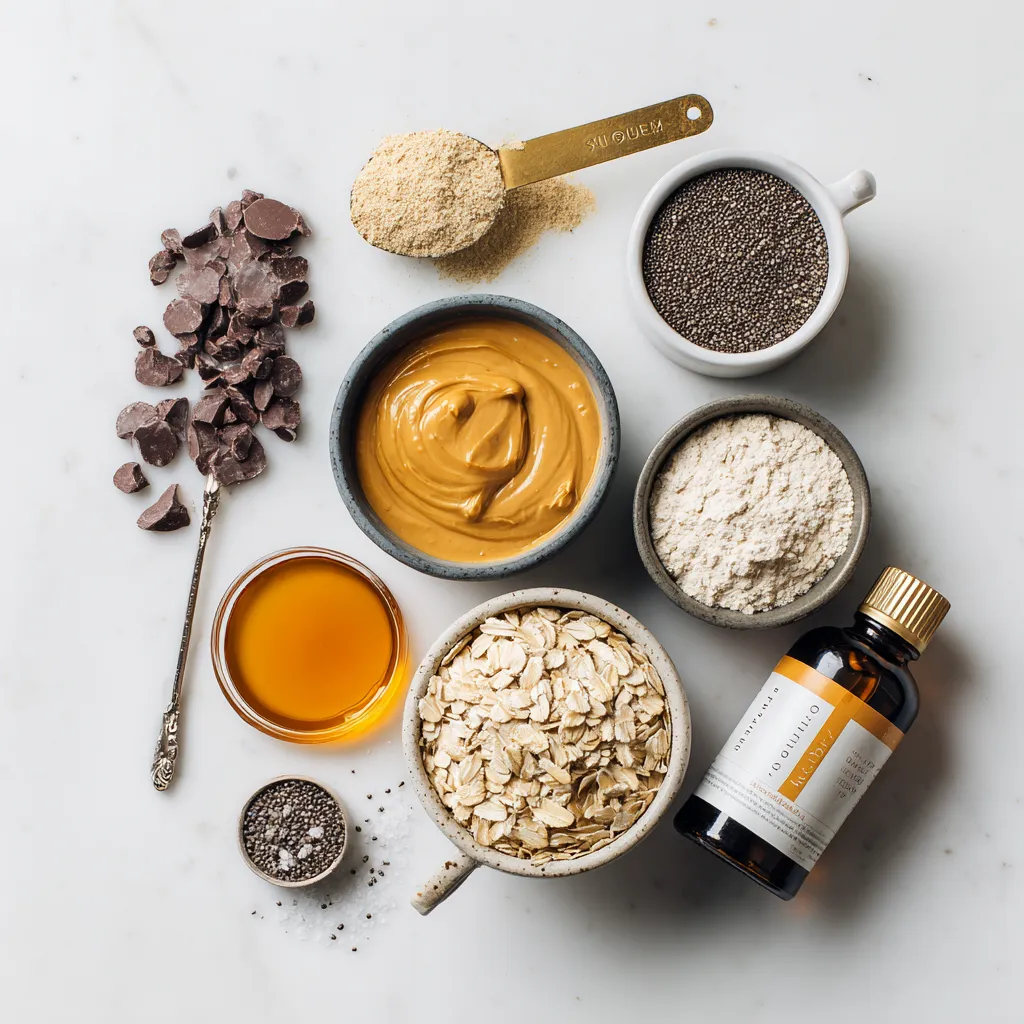
To make No Bake Peanut Butter Bars, you will need the following ingredients:
– 1 cup creamy peanut butter
– 1/2 cup honey or maple syrup
– 2 cups rolled oats
– 1/2 cup protein powder (vanilla or chocolate)
– 1/4 cup chia seeds
– 1/2 teaspoon vanilla extract
– 1/2 cup dark chocolate chips (optional for topping)
– A pinch of sea salt
Substitutions for Key Ingredients
You can easily swap some of these ingredients. Here are a few ideas:
– Peanut Butter: Use almond butter or sunflower seed butter for a nut-free option.
– Honey or Maple Syrup: Agave nectar can work well if you prefer a vegan sweetener.
– Protein Powder: If you want to skip protein powder, increase oats to 2 1/2 cups.
– Chia Seeds: Flaxseeds can be a great alternative.
– Dark Chocolate Chips: Use white chocolate or leave them out for a healthier version.
Nutritional Information
Each bar has a good mix of nutrients. Here’s a simple breakdown for one bar (assuming 12 servings):
– Calories: Approximately 180
– Protein: 6 grams
– Carbohydrates: 24 grams
– Fat: 8 grams
– Fiber: 3 grams
– Sugar: 5 grams
These bars are great for a quick snack or a post-workout treat. They pack energy and nutrients to fuel your day.
Step-by-Step Instructions
Preparation Overview
First, gather all your ingredients. You need creamy peanut butter, honey or maple syrup, rolled oats, protein powder, chia seeds, vanilla extract, and dark chocolate chips if you like. Make sure you have a mixing bowl and a spatula ready. This will make the process smoother.
Mixing the Ingredients
In a large mixing bowl, add the creamy peanut butter and honey or maple syrup. Use your spatula to blend them well. You want a smooth mix. Next, add the rolled oats, protein powder, chia seeds, and vanilla extract. Don’t forget a pinch of sea salt! Stir everything together until it forms a thick dough. It should be sticky but firm.
Pressing and Setting the Mixture
Now it’s time to prepare your baking dish. Take an 8×8-inch square dish and line it with parchment paper. Leave some paper hanging over the edges. This will help you lift the bars out later. Transfer your peanut butter mixture into the dish. Use the spatula to spread it evenly. Press down hard to make it level. If you want, melt the dark chocolate chips in the microwave and drizzle it on top. Place the dish in the refrigerator for 1 to 2 hours. This makes the mixture harden. After chilling, lift the bars out using the parchment paper. Cut them into squares or rectangles. Enjoy your delicious no-bake peanut butter bars!
Tips & Tricks
Achieving the Perfect Texture
To get the best texture, mix the peanut butter and honey well. Use a spatula to ensure they blend smoothly. Next, add the oats and protein powder slowly. This helps keep the mixture thick and doughy. Press the mixture firmly into the baking dish. A well-pressed base leads to a better bite.
Common Mistakes to Avoid
Don’t skip lining your baking dish with parchment paper. This step makes it easy to lift the bars out later. Avoid using too much liquid. If the mixture feels too wet, it will not set well. Also, be sure to chill the bars long enough. If they are not cold enough, they may fall apart when cut.
Recommended Tools and Equipment
You will need a large mixing bowl for easy stirring. A spatula is key for mixing and spreading the mixture. An 8×8-inch baking dish lined with parchment paper is essential. A microwave-safe bowl will help melt chocolate, if you choose to use it. Having a cutting board handy will make slicing the bars easier.
Pro Tips
- Choose Your Sweetener: Feel free to experiment with different sweeteners like agave syrup or coconut nectar for a unique flavor profile.
- Texture Matters: Press the mixture firmly into the baking dish to ensure your bars hold their shape and have a nice, dense texture.
- Chilling Time: For best results, allow the bars to chill longer than 2 hours if you want an even firmer texture.
- Storage Tips: Wrap individual bars in wax paper for easy grab-and-go snacks, and store them in the fridge or freezer for longer freshness.

Variations
Flavors and Add-ins
You can change the flavor of your bars easily. Try using almond butter instead of peanut butter for a nutty twist. Add cinnamon or cocoa powder for extra flavor. Mix in chopped nuts, like walnuts or pecans, for a crunchy texture. You can also add dried fruits, such as raisins or cranberries, for a sweet surprise. This keeps your bars exciting and new every time you make them!
Healthier Alternatives
If you want a lighter version, use less honey or maple syrup. You can replace the rolled oats with quinoa flakes for a different texture. To boost protein, consider using vanilla or chocolate protein powder. For a sugar-free option, use a sugar substitute like stevia in place of honey. These changes make the bars fit your dietary needs while still tasting great.
Serving Suggestions
Serving these bars can be fun! Wrap each bar in parchment paper for a nice touch. You can also stack them on a colorful platter for a party. Drizzle some melted chocolate on top for a sweet finish. If you want, sprinkle extra chia seeds or crushed nuts for a decorative look. These ideas will impress your friends and family!
Storage Information
Best Practices for Storing Bars
To keep your no bake peanut butter bars fresh, store them in an airtight container. This keeps moisture out and maintains their texture. You can place parchment paper between layers of bars. This prevents them from sticking together. Make sure to store them in the refrigerator. This helps them stay firm and tasty.
Freezing Tips
If you want to save some bars for later, you can freeze them. First, cut the bars into squares or rectangles. Wrap each piece in plastic wrap or foil. Then, place them in a freezer-safe bag or container. Make sure to label the bag with the date. You can freeze them for up to three months. To enjoy, thaw them in the fridge overnight before serving.
Shelf Life of No Bake Peanut Butter Bars
When stored properly in the fridge, these bars last about one week. If frozen, they can last much longer. Keeping track of storage times helps you enjoy them at their best. If you notice any changes in texture or smell, it’s best to toss them. Always trust your senses when it comes to food safety.
FAQs
Can I use natural peanut butter?
Yes, you can use natural peanut butter. It adds a great taste. Just make sure it is smooth and creamy. Natural peanut butter has oil, so the bars might be a bit softer. You may need to adjust the oats to get the right texture. Remember to stir the peanut butter well before use to mix the oil.
How do I make these bars vegan?
You can make these bars vegan easily. Replace honey with maple syrup. It gives a sweet taste and is plant-based. Ensure the protein powder is vegan too. Some protein powders have dairy, so check the label. Also, skip the chocolate chips or use vegan ones to keep it all plant-based.
What can I use instead of oats?
If you need a substitute for oats, try crushed nuts or seeds. You can use almond flour or coconut flakes too. These add a nice crunch and flavor. You can also try puffed rice for a lighter texture. Just remember to adjust the amount to keep the bars firm.
We covered the key ingredients for no-bake peanut butter bars and their substitutes. You learned how to mix and set these bars for great texture. I shared tips to avoid common mistakes and recommendations for tools. We explored fun variations for flavors and healthier choices. Lastly, we discussed storage tips and answered some common questions.
Try making these bars yourself to enjoy a tasty, easy treat. You might find your go-to snac

No Bake Peanut Butter Bars
Ingredients
- 1 cup creamy peanut butter
- 0.5 cup honey or maple syrup
- 2 cups rolled oats
- 0.5 cup protein powder (vanilla or chocolate)
- 0.25 cup chia seeds
- 0.5 teaspoon vanilla extract
- 0.5 cup dark chocolate chips (optional for topping)
- a pinch sea salt
Instructions
- In a large mixing bowl, combine the creamy peanut butter and honey (or maple syrup). Use a spatula or a whisk to blend them together until the mixture is smooth and well combined.
- Next, incorporate the rolled oats, protein powder, chia seeds, vanilla extract, and a pinch of sea salt into the bowl. Stir the mixture thoroughly until all the ingredients are evenly distributed, resulting in a thick, dough-like consistency.
- Prepare a square baking dish, approximately 8x8 inches. Line it with parchment paper, ensuring there is an overhang on the edges. This will help you lift the bars out easily later.
- Transfer the peanut butter mixture into the prepared dish. Use a spatula to spread it evenly, pressing down firmly to create a smooth, level surface. This step is crucial for achieving the right texture.
- Optional: To add a chocolatey finish, place the dark chocolate chips in a microwave-safe bowl. Heat them in 30-second intervals, stirring in between, until melted and smooth. Drizzle the melted chocolate over the pressed mixture or spread it evenly using a spatula for a delightful layer of chocolate.
- Place the dish in the refrigerator and chill for at least 1 to 2 hours until the mixture hardens. After refrigeration, carefully lift the bars out of the dish using the parchment paper overhang and transfer them to a cutting board.
- Cut the chilled mixture into squares or rectangles based on your desired serving size. Store any leftover bars in an airtight container in the refrigerator for up to a week or freeze them for future enjoyment.

![- 3 ripe bananas, finely mashed - 1/2 cup unsalted butter, melted until slightly cool - 1/2 cup light brown sugar, packed - 1/4 cup granulated sugar - 2 large eggs, at room temperature - 1 teaspoon pure vanilla extract - 1 teaspoon baking soda - Pinch of fine salt - 1 1/2 cups all-purpose flour, spooned and leveled - 1 cup semi-sweet chocolate chips, plus extra for topping - 1/2 cup chopped walnuts (optional) Choosing the right ingredients is key for great chocolate chip banana bread. Use ripe bananas for the best flavor. The butter should be melted but not hot. This helps the other ingredients mix well. Brown sugar adds moisture and a rich taste. Granulated sugar gives sweetness and a nice texture. Eggs should be at room temperature to blend easier. Make sure to use pure vanilla extract. It makes a big difference in flavor. Baking soda helps the bread rise. Always add a pinch of salt to enhance the sweetness. For the flour, spoon and level it to avoid packing. Too much flour makes the bread heavy. Chocolate chips are a must for that sweet burst with every bite. If you like nuts, walnuts add a nice crunch. Each slice of this banana bread offers a balance of flavors and nutrients. One slice contains about 200 calories. It has 8 grams of fat, 30 grams of carbs, and 3 grams of protein. This makes it a tasty treat, but enjoy it in moderation. Here’s what you need to make this delicious treat: - Mixing bowls - Measuring cups - Loaf pan - Whisk - Spatula These tools help you mix, measure, and bake easily. Using the right equipment makes your baking experience smooth and fun. You can find the full recipe in my Choco-Banana Delight guide. Preheat your oven to 350°F (175°C). This step warms the oven for even baking. While your oven heats, prepare a 9x5-inch loaf pan. You can grease it lightly with butter or use parchment paper. This will help your bread come out easily. Start by combining the ingredients. In a large bowl, mash three ripe bananas until smooth. Add half a cup of melted butter to the bananas. Mix them well. Then, stir in half a cup of light brown sugar and a quarter cup of granulated sugar. Make sure the sugars dissolve completely. Next, add two large eggs and one teaspoon of pure vanilla extract. Beat the mixture until it is smooth. Now, let's incorporate the dry ingredients. In another bowl, whisk together one teaspoon of baking soda, a pinch of fine salt, and one and a half cups of all-purpose flour. Slowly add the dry mix to the wet mix. Fold gently with a spatula until just combined. Be careful not to over-mix, as that can make the bread tough. Finally, fold in one cup of semi-sweet chocolate chips. If you like, add half a cup of chopped walnuts too. Pour the batter into the prepared loaf pan. Use a spatula to smooth the top. If you want, sprinkle a few extra chocolate chips on top for a nice look. Bake in the oven for 60-65 minutes. To check if it’s done, insert a toothpick into the center. It should come out clean or with a few moist crumbs. Once baked, remove the loaf from the oven. Let it cool in the pan for about 10 minutes. Then, transfer the bread to a wire rack to cool completely. For the full recipe, you can refer back to the ingredients section. To get the best texture in your chocolate chip banana bread, pay close attention to how you mix. Start with ripe bananas that are soft. This helps them blend easily. Use melted butter that is cool, not hot. If the butter is too hot, it can cook the eggs. Mix the wet ingredients first. Then add the dry ones slowly. Fold gently to combine. This keeps your bread light and fluffy. Over-mixing can make it dense, so be careful. To make your banana bread even tastier, try adding spices. Cinnamon adds warmth and depth to the flavor. Nutmeg brings a nice touch of sweetness. You could also add a splash of almond extract for a unique twist. If you want a hint of zest, a little lemon or orange zest can brighten the taste. Each of these ideas can elevate the classic recipe. Serving your chocolate chip banana bread can be fun! Slice it warm and place it on a nice platter. You can sprinkle powdered sugar on top for a sweet finish. For a special treat, spread some butter or peanut butter on each slice. Pair it with coffee or tea for a delightful snack. This makes it not just tasty but also visually appealing. Enjoy sharing it with friends and family! {{image_4}} To make this delicious banana bread gluten-free, you can swap all-purpose flour for gluten-free flour. Brands like Bob's Red Mill and King Arthur Flour work well. Use a 1:1 gluten-free flour blend for easy results. This keeps the taste and texture close to the classic version. If you want a vegan twist, replace the eggs with flaxseed meal. Mix 1 tablespoon of flaxseed meal with 2.5 tablespoons of water for each egg. Let it sit for a few minutes to thicken. You can also use applesauce or mashed banana as a binder. This keeps your banana bread moist and tasty. You can make your banana bread even more fun with mix-ins! Try adding dried fruit, like raisins or cranberries, for a sweet touch. Shredded coconut adds a tropical flair. If you love crunch, chop up some pecans or almonds. These extras make each bite exciting and unique. For the best results, mix in about 1/2 cup of your chosen add-ins. To keep your chocolate chip banana bread fresh, follow these steps: - Let the bread cool completely before storing. - Wrap it tightly in plastic wrap or aluminum foil. - Place it in an airtight container to seal in moisture. This method helps maintain its soft texture and rich flavor. If you have many slices, you can layer them with parchment paper to prevent sticking. Want to save some for later? You can freeze banana bread easily. Here’s how: - First, cool the bread completely. - Wrap it well in plastic wrap, then in foil. - Label it with the date to track how long it’s in the freezer. To defrost, simply take it out and leave it at room temperature for a few hours. You can also microwave a slice for about 15-30 seconds for a quick treat. How long does chocolate chip banana bread last? - At room temperature, it stays fresh for about 3-4 days when stored properly. - In the fridge, it can last up to a week. - If frozen, it can keep its quality for about 3 months. Using these tips, you can enjoy this delicious treat longer! For the full recipe, check out the [Full Recipe]. Yes, you can use frozen bananas! Just thaw them first. Frozen bananas work well because they become very soft. This makes them easy to mash. When you use them, they add extra moisture to your bread. This keeps the banana bread tender. Make sure to drain any excess liquid after thawing. This way, your batter will not be too wet. Dense banana bread can happen for a few reasons. First, you may have over-mixed the batter. This can develop too much gluten, making the bread heavy. Second, using too much flour can lead to density. Always spoon and level flour instead of scooping directly. Lastly, old baking soda may not rise the bread well. Check the expiration date before using. Overripe bananas have many uses beyond banana bread. You can make smoothies or pancakes with them. They are also great in oatmeal or yogurt. Try mashing them and adding to muffins or cookies. You can even freeze them to use later. Just peel them and store in a bag. This way, you can enjoy their sweetness anytime! If you want the full recipe for chocolate chip banana bread, check out the recipe above. You learned the key ingredients for chocolate chip banana bread. We discussed how to mix the batter, bake it, and achieve the right texture. You now have tips for storage, variations, and even answers to common questions. Banana bread is an easy treat you can make your own. Enjoy experimenting with flavors and save your leftovers easily. Happy baking!](https://blissfulmeal.com/wp-content/uploads/2025/07/f052e6f1-d196-44d4-ab03-fd8d7f66889a-768x768.webp)
