
Peanut Butter Banana Smoothie Power Boost Drink
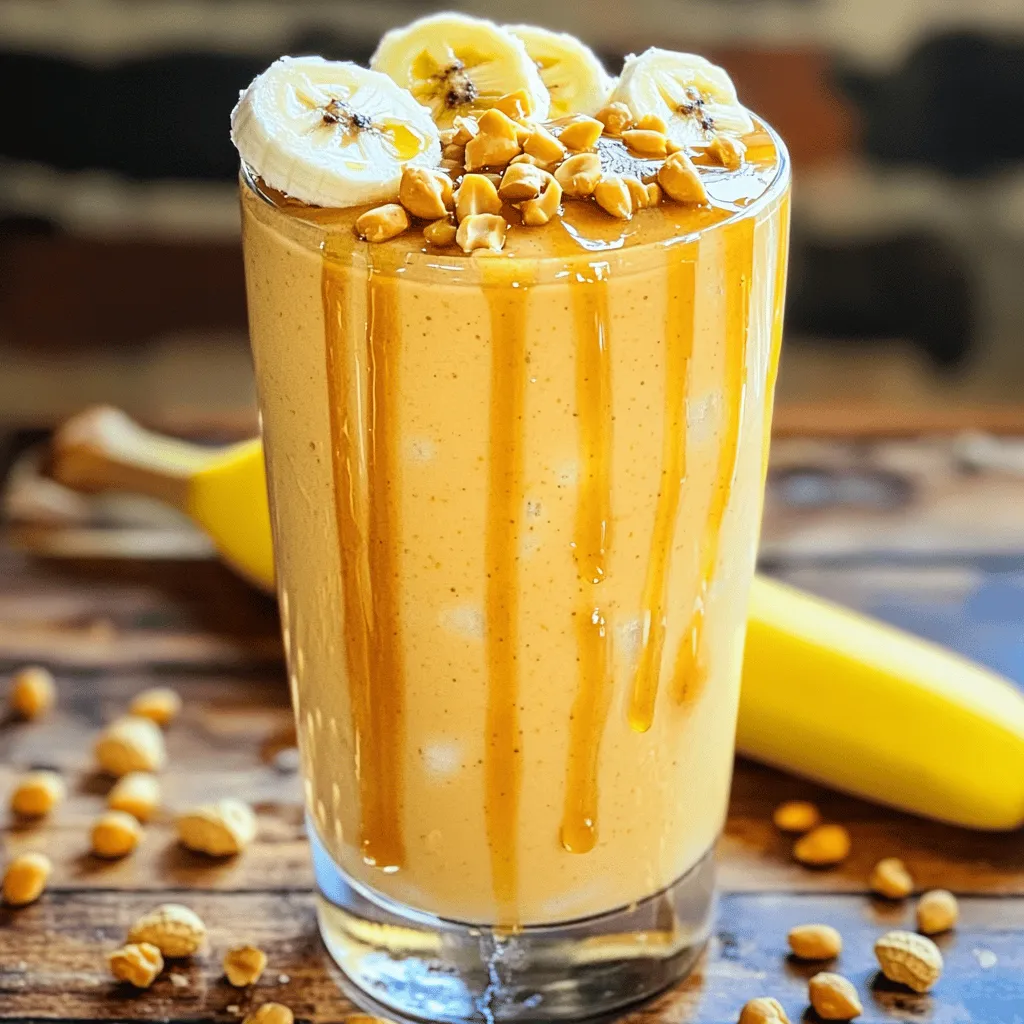
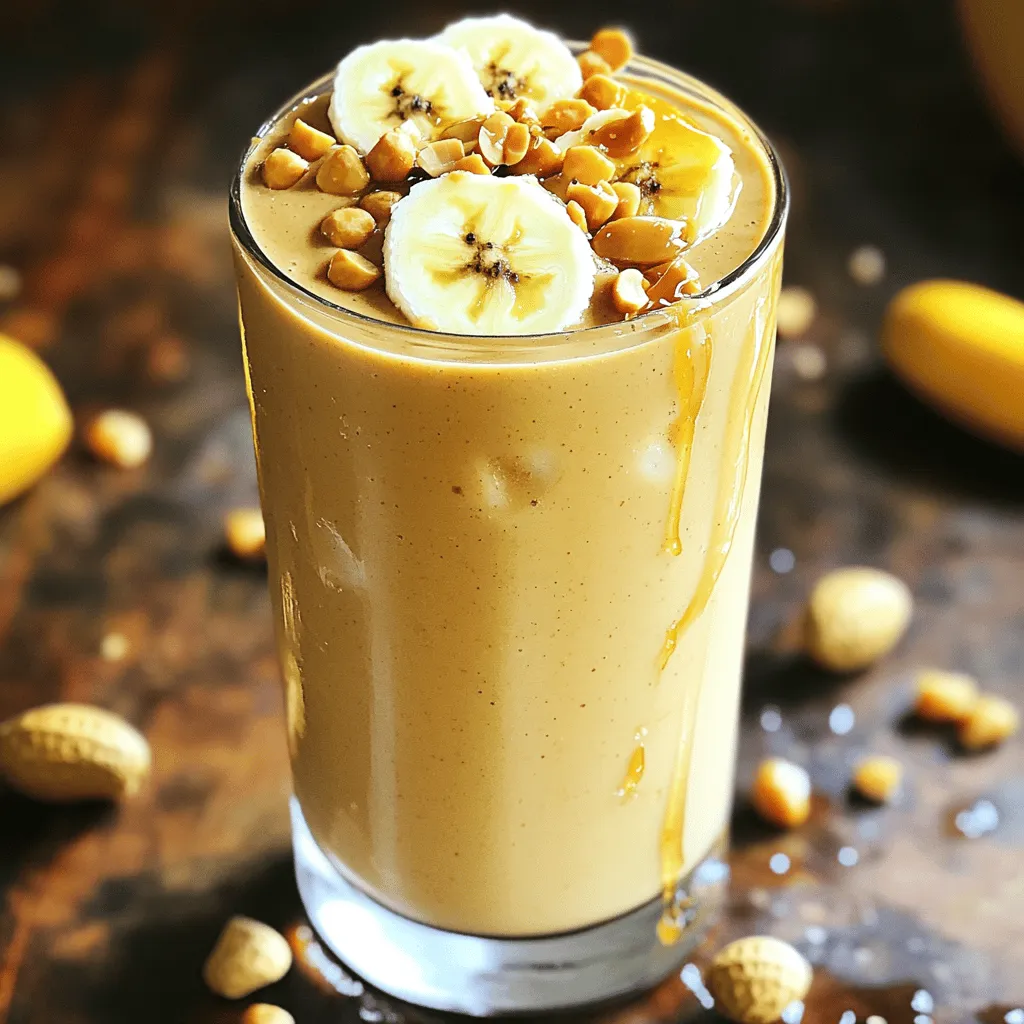
Are you ready to boost your energy with a delicious Peanut Butter Banana Smoothie? This creamy drink is more than just tasty; it’s packed with nutrients that fuel your day. With ripe bananas, creamy peanut butter, and simple steps, you’ll make a smoothie that is both easy and satisfying. Let me guide you through the ingredients, preparation, and tips to create your perfect power boost drink!
Ingredients
To make a Peanut Butter Banana Smoothie, you need a few simple ingredients. Here’s what you’ll need:
– Ripe banana
– Creamy peanut butter
– Almond milk (or milk alternative)
– Honey or maple syrup (optional)
– Vanilla extract
– Greek yogurt (optional)
– Ice cubes
– Garnishes (chopped peanuts and banana slices)
Each ingredient plays an important role in creating a tasty smoothie. The ripe banana adds natural sweetness and creaminess. Creamy peanut butter gives a rich nutty flavor and healthy fats. Almond milk keeps it light and smooth.
If you want a sweeter drink, add honey or maple syrup. A splash of vanilla extract enhances the flavor. Greek yogurt makes the smoothie extra creamy and adds protein.
Ice cubes chill the drink and give it a refreshing texture. Finally, garnishing with chopped peanuts and banana slices makes it look pretty.
Step-by-Step Instructions
Preparation Steps
– Preparing the Ingredients
Start by gathering your ingredients. You need one ripe banana, two tablespoons of creamy peanut butter, and one cup of almond milk. Add a tablespoon of honey or maple syrup if you want sweetness. Don’t forget the half teaspoon of vanilla extract and the optional Greek yogurt for creaminess. Lastly, grab some ice cubes.
– Blending the Smoothie
Place the sliced banana, peanut butter, almond milk, honey, vanilla extract, and Greek yogurt into the blender. Toss in the ice cubes for a chill. Blend everything on high speed until it’s smooth and creamy. Stop to scrape down the sides if needed.
– Adjusting Sweetness
After blending, taste your smoothie. If you want it sweeter, add more honey or maple syrup. Blend again for a few seconds to mix it well.
Serving Suggestions
– Pouring into Glasses
Carefully pour the smoothie into two glasses. Make sure to serve it right away for the best taste.
– Garnishing Options
For a fun touch, garnish each glass with chopped peanuts and banana slices. It adds a nice look and extra flavor. Enjoy your tasty Peanut Butter Banana Smoothie!
Tips & Tricks
Achieving the Perfect Consistency
Blending Techniques
To get that smooth texture, start with your liquids first. Pour in the almond milk. Then, add the banana and peanut butter. This order helps blend better. Blend on high until it’s creamy. If you notice lumps, stop and scrape the sides of the blender. Blend again until smooth.
Ice Considerations
Ice adds chill and thickness. Use a handful of ice cubes for a cold drink. If you prefer a thicker smoothie, add more ice. Just remember, too much ice can make it watery.
Flavor Enhancements
Adding More Nut Butter
Want a stronger nutty taste? Add more peanut butter. Just one extra tablespoon can elevate the flavor. It also boosts the creaminess. If you want variety, try almond or cashew butter.
Incorporating Spices
Spices can make your smoothie pop. A pinch of cinnamon adds warmth and depth. You could also try nutmeg or even cocoa powder for a chocolatey twist. Experiment with what you like.
Nutritional Benefits
Health Advantages of Ingredients
Each ingredient brings benefits. Bananas provide potassium, which helps with muscle function. Peanut butter offers healthy fats and protein. Almond milk is low in calories, and Greek yogurt adds probiotics for gut health.
Protein Boost with Greek Yogurt
Adding Greek yogurt increases protein content. This helps keep you full longer. If you want a thicker texture, Greek yogurt is perfect. It makes your smoothie creamy and delicious, while also being nutritious.
Variations
Dairy-Free Options
Using Alternative Milk
If you want a dairy-free smoothie, almond milk works great. You can also try oat milk or coconut milk. Each one adds a unique flavor. They help keep the smoothie creamy and smooth.
Alternatives for Yogurt
For a dairy-free yogurt option, use coconut yogurt. It gives a nice texture and taste. You can also skip yogurt if you prefer. The smoothie will still taste amazing!
Add-Ins for Extra Nutrition
Spinach or Kale
Adding spinach or kale boosts your smoothie’s nutrients. Just a handful blends right in. You won’t even taste it! This is a smart way to add vitamins without changing the flavor.
Protein Powder or Seeds
You can add protein powder to keep you full longer. Flaxseeds or chia seeds are also great choices. They add healthy fats and fiber. Just mix them in with the other ingredients.
Flavor Combinations
Chocolate Peanut Butter Banana Smoothie
For a sweet twist, add cocoa powder to the mix. It creates a chocolate peanut butter delight. This combination satisfies your chocolate cravings!
Berry-Blended Variations
Try adding berries like strawberries or blueberries. They add a fruity flavor and bright color. It’s a fun way to switch up your smoothie while keeping it healthy.
Storage Info
Storing Leftover Smoothies
– Refrigeration Tips: If you have leftover smoothie, store it in a sealed jar. It stays good for up to 24 hours in the fridge. Give it a shake before drinking. This helps mix any settled ingredients.
– Freezing for Later Use: For longer storage, freeze the smoothie. Pour it into ice cube trays or freezer-safe bags. This way, you can blend it again later. Smoothies can last up to three months in the freezer.
Best Practices for Ingredient Storage
– Keeping Bananas Fresh: To keep bananas fresh, store them at room temperature. Avoid putting them in the fridge until they are very ripe. If you want to slow down ripening, separate them. This helps prolong their life.
– Storing Peanut Butter: Store peanut butter in a cool, dry place. If you buy natural peanut butter, keep it in the fridge to prevent spoilage. Stir well before using, as oil may separate.
FAQs
Common Questions
How long can I store a Peanut Butter Banana Smoothie?
You can store your smoothie in the fridge for up to 24 hours. After that, it may lose its creamy texture. For best taste, drink it fresh.
Can I use frozen bananas for this recipe?
Yes, frozen bananas work great! They make your smoothie colder and creamier. Just blend them straight from the freezer.
What can I substitute for almond milk in this smoothie?
You can use any milk you like. Options include cow’s milk, soy milk, or oat milk. Each will give a slightly different flavor.
Nutritional Inquiries
Is this smoothie healthy for weight loss?
Yes, this smoothie can be part of a weight loss plan. It’s full of protein and healthy fats. These keep you full longer and help curb cravings.
How much protein is in a Peanut Butter Banana Smoothie?
A typical serving contains about 15 grams of protein. This comes from the peanut butter and Greek yogurt, which are great sources.It takes just 5 minutes to make!
In this blog post, we explored how to make a delicious Peanut Butter Banana Smoothie. You learned about the key ingredients, step-by-step mixing instructions, and tips for creating the perfect texture. We also reviewed variations and storage tips to keep smoothies fresh. Remember, this smoothie offers health benefits and can be adjusted to fit your taste. Try different flavors or add-ins to make it your own. Enjoy crafting a nutritious treat that fuels your day!


![To make a tasty Coconut Lime Coconut Water Smoothie, you need these main ingredients: - 1 cup coconut water - 1 ripe banana, peeled and sliced - 1/2 cup Greek yogurt (or dairy-free alternative like coconut yogurt) - 1/2 cup fresh pineapple chunks - Zest and juice of 1 lime These ingredients blend together to create a creamy and refreshing drink. The coconut water adds hydration, while the banana gives a smooth texture. Pineapple adds sweetness and a tropical twist. The lime zest and juice give it a bright, tangy flavor. You can enhance your smoothie with these optional ingredients: - 1 tablespoon honey or agave syrup (for added sweetness) - 1/4 teaspoon vanilla extract - Ice cubes (for a refreshing chilled smoothie) Adding honey or agave syrup can make your smoothie sweeter. Vanilla extract brings a warm flavor that pairs well with the other fruits. Ice cubes can make the smoothie icy and more refreshing, especially on hot days. To make this smoothie, you will need: - A blender - Measuring cups - A cutting board - A knife - Glasses for serving A good blender is key to mixing everything smoothly. Measuring cups help ensure you get the right amounts. A cutting board and knife are needed to prep the banana and pineapple. Finally, have some glasses ready to enjoy your delicious treat. For the full recipe, check out the Coconut Lime Bliss Smoothie. To make this Coconut Lime Coconut Water Smoothie, start by gathering your ingredients. You will need: - 1 cup coconut water - 1 ripe banana, peeled and sliced - 1/2 cup Greek yogurt (or coconut yogurt) - 1/2 cup fresh pineapple chunks - Zest and juice of 1 lime - 1 tablespoon honey or agave syrup (optional) - 1/4 teaspoon vanilla extract - Ice cubes (optional) Make sure your banana is ripe. A ripe banana adds natural sweetness. Cut it into slices for easy blending. If you use fresh pineapple, chop it into chunks. The zest from the lime brings extra flavor, so don’t skip it. Now, it’s time to blend! Add coconut water, banana slices, Greek yogurt, and pineapple chunks to your blender. Next, sprinkle in the lime zest and squeeze in the lime juice. If you like it sweet, add honey or agave syrup along with the vanilla extract. Blend on high speed. Keep blending until it is smooth and creamy. If you want a chilled smoothie, throw in some ice cubes. Blend again until everything is fully mixed and frosty. Taste your smoothie. If it needs more sweetness, add a bit more honey or agave and blend briefly. Pour your smoothie into chilled glasses. For a fun touch, garnish each glass with a slice of lime on the rim. You can also sprinkle a little lime zest on top for color. This adds a nice aroma too. Enjoy your Coconut Lime Coconut Water Smoothie! For the full recipe, check out the recipe section above. To get a smooth drink, blend your ingredients well. Start with the coconut water and yogurt. Then, add the banana and pineapple. Blend until it is creamy. If you like it colder, toss in some ice cubes. Blend again until smooth. This helps to make the drink light and frothy. Some may want a sweeter taste. After blending, take a sip. If it needs more sweetness, add honey or agave syrup. Start small, maybe a teaspoon. Blend it again and taste. You can always add more, but you can’t take it out once it’s in. This way, you’ll find the perfect balance for your taste. You can easily boost the health benefits. Add a handful of spinach or kale for extra greens. They blend well and you won’t taste them. You can also sprinkle in some chia seeds or flaxseeds. These add fiber and omega-3s. Just a tablespoon goes a long way. This smoothie can be a tasty way to pack in nutrients. For the full recipe, check out the details above. {{image_4}} You can make the Coconut Lime Coconut Water Smoothie even better with fruits! Try adding a handful of mango or a cup of strawberries. These fruits add natural sweetness and color. You can also use papaya or kiwi for a unique twist. Each new fruit brings its own flavor, making your smoothie exciting. Mix and match fruits to find your favorite combination. If you want a dairy-free version, switch the Greek yogurt for coconut yogurt. This keeps the smooth texture while adding a hint of coconut flavor. You can also use almond milk or cashew yogurt if you prefer. These options still give you creaminess without dairy. It’s a great way to enjoy this smoothie if you have dietary needs. Want to add some extra health benefits? Toss in a scoop of spinach or kale. They blend well and add nutrients without changing the taste. You can also add chia seeds or flaxseeds for fiber and omega-3s. These superfoods make your smoothie even more nourishing. They help keep you full and energized throughout the day. Explore the [Full Recipe] for the Coconut Lime Coconut Water Smoothie to see how to make this refreshing treat. If you have leftover Coconut Lime Coconut Water Smoothie, store it in a sealed container. Place it in the fridge. It stays fresh for up to 24 hours. The smoothie may separate, so stir it before drinking. This way, you keep the great taste and texture. You can freeze the smoothie for later. Pour it into ice cube trays or freezer-safe bags. This keeps it fresh for up to three months. When you want to enjoy it again, thaw it in the fridge overnight. You can also blend frozen cubes for a quick, icy drink. To keep your smoothie fresh, use ripe fruits and fresh yogurt. Choose organic if you can, as they taste better. Always check the expiration date on yogurt. Store ingredients in a cool place. This ensures that you have the best flavor when you make your smoothie. Yes, you can make the smoothie without yogurt. If you skip yogurt, use a banana for creaminess. This keeps the smoothie thick and smooth. You can also add avocado or extra coconut water for a rich texture. Dairy-free options like coconut yogurt work well too. To thicken your smoothie, add frozen fruits like bananas or mangoes. They create a thicker texture without changing the taste much. You can also use oats or chia seeds. These ingredients soak up liquid and add fiber. Another option is to use less coconut water than the recipe suggests. Coconut water is low in calories and has natural sugars. It hydrates your body well since it’s rich in electrolytes. It helps with digestion due to its high potassium content. Coconut water also supports heart health as it may lower blood pressure. Overall, it’s a great choice for a refreshing drink. You can store the smoothie in the fridge for up to 24 hours. It tastes best when fresh, but if you need to save it, use an airtight container. Stir well before drinking. If it separates, that’s normal. Just give it a good shake or stir to mix it back together. We covered how to make a coconut lime smoothie from start to finish. You learned about the best ingredients and tools to use. I shared easy steps for blending and serving. Remember the tips for the right texture and sweetness. You can also try fun variations and know how to store your smoothie. Embrace creativity in your smoothie-making. Enjoy your tasty drink now and feel good about it!](https://blissfulmeal.com/wp-content/uploads/2025/06/b18096e9-d46f-4642-82fe-42792921ee0e-768x768.webp)
![To make a refreshing Peach Iced Green Tea, you need a few simple ingredients. Here's what you'll need: - Green tea bags - Ripe peaches - Honey or sweetener alternatives - Fresh lemon juice - Fresh mint leaves - Ice cubes - Water Using ripe peaches is key. They add natural sweetness and flavor. Honey or your favorite sweetener lets you control how sweet your drink is. Fresh lemon juice gives a nice zing that balances the tea's taste. Mint leaves not only look pretty but also add a fresh aroma. For the best taste, use high-quality green tea bags. They have great flavor and health benefits. The water should be fresh and clean, as it makes a big difference in your drink. With these ingredients ready, you're set to create a delicious summer drink. For the complete recipe, check out the Full Recipe. How to boil water for tea Start by filling a large saucepan with 4 cups of water. Heat it on high until it reaches a rolling boil. This is crucial for making the tea taste great. Correct steeping time for the best flavor Once the water boils, take it off the heat. Add 4 green tea bags. Let them steep for 3-4 minutes. For a stronger flavor, steep for a few extra minutes. Remove the bags carefully when you finish steeping. Blending peaches for a smooth puree While your tea cools, take 2 ripe peaches. Slice them and remove the pits. Place the slices in a blender. Blend on high speed until you have a smooth puree. Check for any chunks to ensure a silky texture. Mixing ingredients perfectly In a large pitcher, combine the cooled green tea, peach puree, 1/4 cup honey, and 1 tablespoon of fresh lemon juice. Use a long spoon or whisk to mix well until the honey dissolves. This creates a deliciously sweet and fruity drink. Best practices for serving Fill each glass with ice cubes before pouring in the tea mixture. Leave space at the top for garnish. This keeps your drink cold and refreshing. Recommended glassware for presentation Use clear glasses to show off the lovely color of the peach iced green tea. Tall glasses work well, making your drink look fancy and inviting. Garnishing ideas for enhanced aesthetics Garnish each glass with fresh mint leaves and a slice of peach on the rim. This adds a nice touch and makes your drink look even more appealing. The mint also gives it a fresh aroma as you sip. For the complete recipe, check out the [Full Recipe]. Using fresh ingredients makes all the difference. Fresh peaches give the best taste. They are juicy and sweet, perfect for your drink. Adjust the sweetness to what you like. Start with 1/4 cup of honey, then taste. Add more if you want it sweeter. For the best tea balance, steep the green tea correctly. A 3-4 minute steep is ideal. This gives a nice flavor without bitterness. One big mistake is over-steeping green tea. If you steep too long, the tea tastes bitter. Keep an eye on the clock! Another mistake is using unripe peaches. They lack sweetness and flavor. Always choose ripe peaches for the best results. Also, blending techniques matter. Blend the peaches until smooth. No chunks should remain. This ensures a silky texture in your drink. For the full recipe, check out the Peach Iced Green Tea section. {{image_4}} You can make your peach iced green tea even more exciting! Here are some fun ideas: - Mango or Berries: Add diced mango or fresh berries to the mix. They give a nice sweet twist. - Herbs: Try tossing in some basil or rosemary. These herbs add a fresh and unique taste. - Additional Flavors: You can infuse the tea with ginger or vanilla for a warm touch. Just a small amount can change the whole drink. If you want to change up the sweetness in your drink, consider these options: - Natural Sweeteners: Use honey, agave, or maple syrup. These give a pure sweetness and are often healthier. - Low-Calorie Options: If you watch your calories, try stevia or monk fruit. They add sweetness without extra calories. - Flavored Syrups: For a fun twist, use flavored syrups, like peach or raspberry. These can add a new layer of flavor to your drink. Don't forget to check out the Full Recipe for detailed steps and tips! Store your peach iced green tea in the fridge. Use a clean glass pitcher with a lid. This keeps the tea fresh and tasty. It lasts about 3-5 days in the fridge. If you have leftover peach puree, save it in a sealed container. Use it in smoothies or yogurt for a quick treat. You can freeze peach iced green tea for later use. Pour the tea into ice cube trays or freezer-safe bags. Freezing makes it easy to enjoy later on hot days. When you want to drink it, take out what you need. Thaw in the fridge overnight or at room temperature. Serve it over ice for a quick and refreshing drink. How do I make peach iced green tea from scratch? To make peach iced green tea from scratch, you need a few simple steps. Start by boiling 4 cups of water. Then, steep 4 green tea bags in the hot water for 3-4 minutes. While the tea cools, blend 2 ripe peaches into a smooth puree. Mix the cooled tea with the peach puree, 1/4 cup of honey, and 1 tablespoon of lemon juice in a pitcher. Finally, serve over ice and garnish with mint leaves. You can find the full recipe for better clarity. Can I use bottled green tea instead? Yes, you can use bottled green tea. However, it may not taste as fresh. If you do, make sure it is unsweetened. This way, you can control the sweetness by adding honey or your favorite sweetener. What are the health benefits of green tea? Green tea is packed with antioxidants. It can help boost your metabolism and support heart health. Drinking green tea also improves brain function and may lower the risk of certain diseases. It’s a great choice for hydration, too. How do I make my peach iced green tea less sweet? To make your tea less sweet, reduce the amount of honey. You can start with 2 tablespoons and taste. If it needs more sweetness, add a little more. Also, fresh peaches add natural sweetness, so choose them wisely. Can I use frozen peaches instead of fresh? Yes, frozen peaches work well too! They can add a nice chill to your drink. Just let them thaw a bit before blending. This way, you still get a smooth texture without losing flavor. In this blog post, we explored how to make delicious peach iced green tea. We discussed key ingredients like ripe peaches and fresh mint leaves. You learned step-by-step how to prepare and serve this refreshing drink. I shared tips to enhance flavor and avoid common mistakes. We also looked at fun variations and how to store your tea for later. Remember, fresh ingredients make all the difference. Try new flavors and sweeteners to find what you love best. Enjoy your thirst-quenching creation!](https://blissfulmeal.com/wp-content/uploads/2025/07/5811f612-8d74-4071-8268-59c3944be6ef-768x768.webp)