
Baked Garlic Herb Chicken Tasty and Simple Recipe
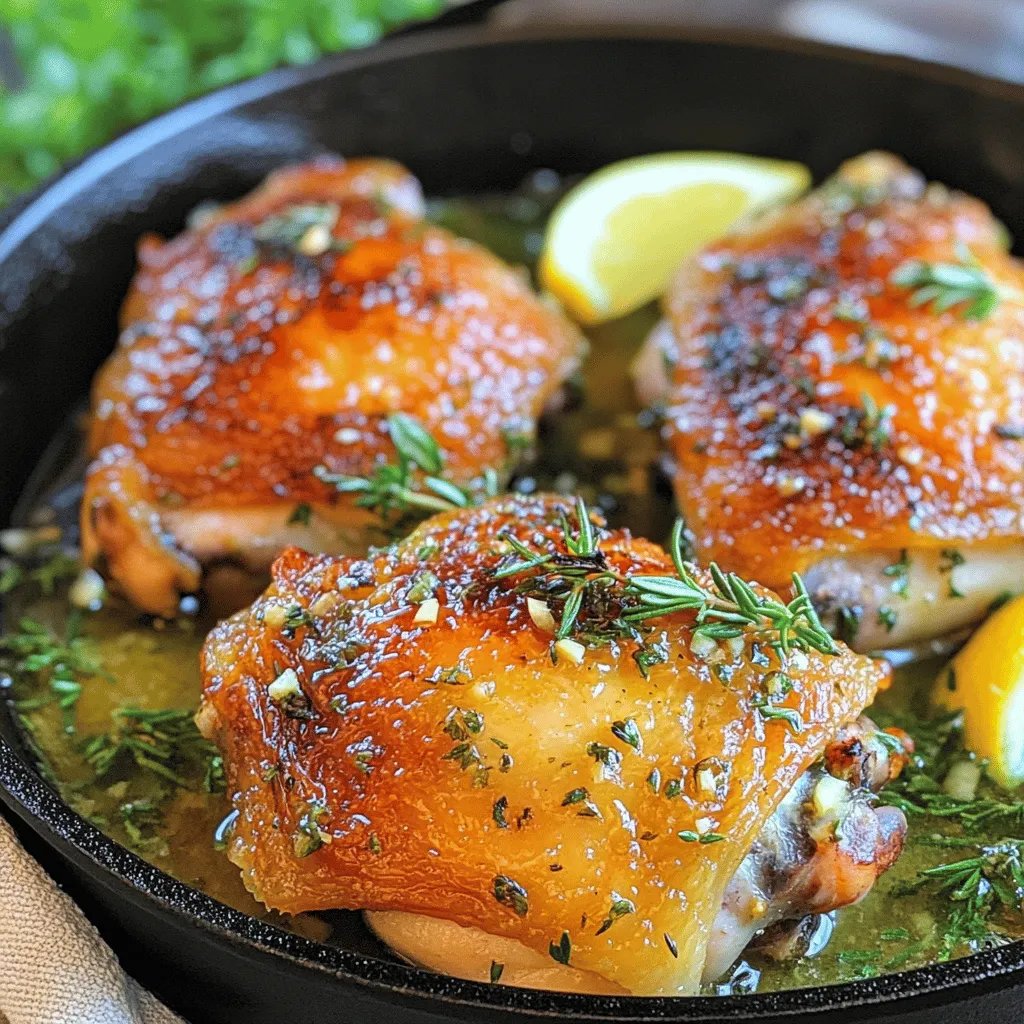
Do you want a delicious meal that’s also easy to make? You’re in the right place! This Baked Garlic Herb Chicken recipe is perfect for busy weeknights or special occasions. With just a few simple ingredients and steps, you’ll have a juicy, flavorful dish that everyone will love. Ready to impress your friends and family? Let’s dive into the tasty details that make this chicken a must-try!
Ingredients
Main Ingredients for Baked Garlic Herb Chicken
To make baked garlic herb chicken, you need these main ingredients:
– 4 bone-in, skin-on chicken thighs
– 4 cloves of garlic, finely minced
– 2 tablespoons fresh rosemary, finely chopped
– 2 tablespoons fresh thyme, finely chopped
– 1 lemon (zested and juiced)
– 3 tablespoons extra virgin olive oil
– Sea salt and freshly cracked black pepper, to taste
– 1 teaspoon smoked paprika
– ½ cup low-sodium chicken broth
– Fresh parsley, chopped (for garnish)
These ingredients work together to create a tasty and fragrant dish. The garlic and herbs add depth, while the lemon gives it a bright touch.
Optional Ingredients to Enhance Flavor
You can add these optional ingredients to make the dish even better:
– 1 teaspoon Dijon mustard for a tangy kick
– ½ teaspoon red pepper flakes for some heat
– 1 tablespoon honey for a hint of sweetness
These extras can bring new flavors and make the chicken even more special.
Tools and Equipment You’ll Need
To cook this dish, gather these tools:
– Large mixing bowl or resealable ziplock bag
– Oven-safe skillet or baking dish
– Whisk for mixing the marinade
– Meat thermometer to check chicken doneness
– Paper towels to dry the chicken
Having the right tools makes cooking easier. You’ll enjoy the process and the results even more.
Step-by-Step Instructions
Preparing the Marinade
Start by making the marinade. In a small bowl, mix these ingredients:
– 4 cloves of garlic, finely minced
– 2 tablespoons fresh rosemary, finely chopped
– 2 tablespoons fresh thyme, finely chopped
– Zest and juice of 1 lemon
– 3 tablespoons extra virgin olive oil
– Sea salt and freshly cracked black pepper, to taste
– 1 teaspoon smoked paprika
Whisk these together until smooth. This mix adds flavor and moisture to your chicken.
Marinating the Chicken
Next, get your chicken thighs ready. Pat them dry with paper towels. This helps the skin get crispy when baking. Place the chicken in a large bowl or a ziplock bag. Pour the marinade over the chicken. Make sure each piece is covered well. For the best taste, let the chicken sit. If you can, marinate it for at least 30 minutes at room temperature or 2 hours in the fridge.
Cooking Techniques for Perfectly Baked Chicken
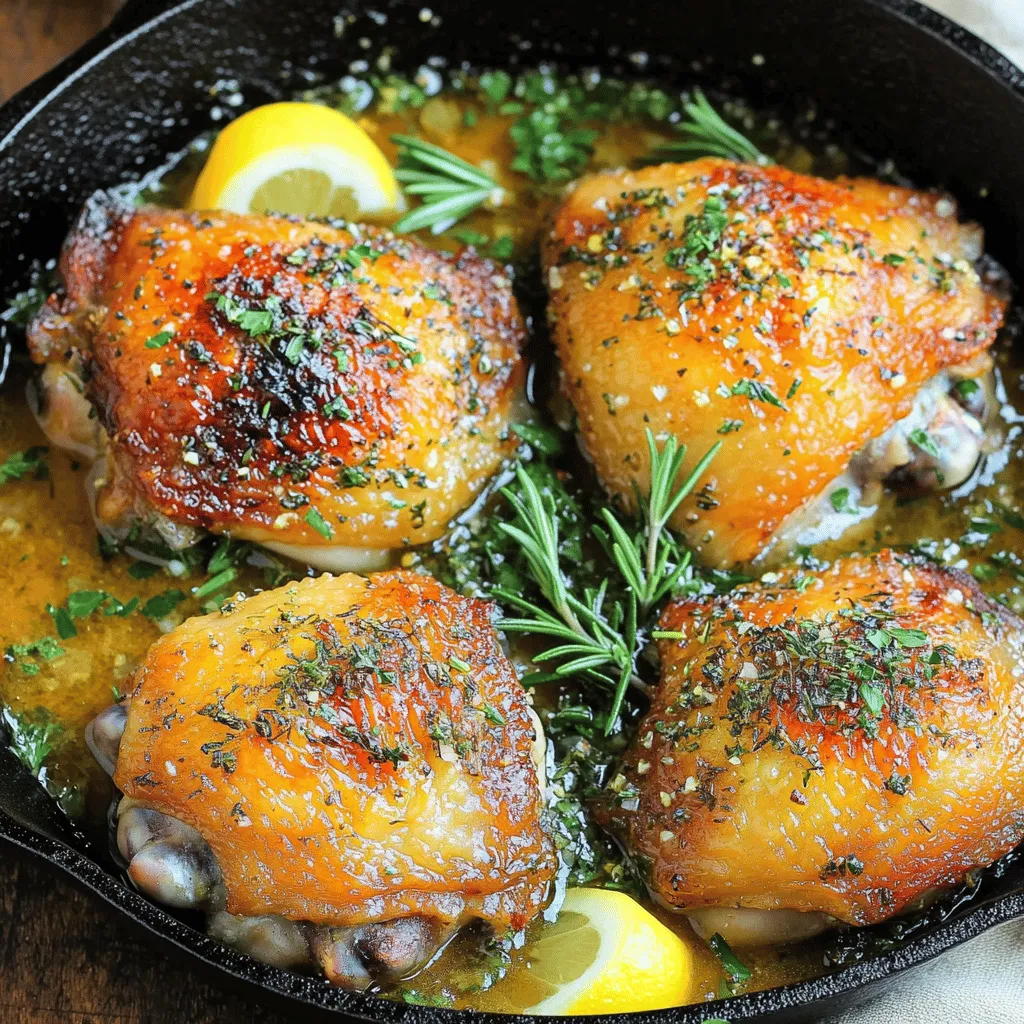
Now it’s time to cook! Preheat your oven to 400°F (200°C). Heat a drizzle of olive oil in an oven-safe skillet over medium-high heat. Once hot, add the chicken thighs skin-side down. Sear them for about 5-7 minutes until the skin is golden brown. Then, flip the chicken over. Pour ½ cup of low-sodium chicken broth around the chicken. Do not pour it over the skin.
Move the skillet into the preheated oven. Bake for 25-30 minutes. The chicken should reach 165°F (75°C) inside. When it’s done, take it out and let it rest for 5 minutes. This helps keep it juicy. Finally, garnish with some freshly chopped parsley before serving.Enjoy your tasty dish!
Tips & Tricks
How to Achieve Crispy Skin
To get crispy skin on your chicken, start with dry thighs. Pat them with paper towels. This helps remove moisture, which is key for crispiness. Next, sear the chicken skin-side down in a hot skillet. Cook it for about 5-7 minutes until golden brown. The hot oil and direct heat will give you that crunchy texture. Finally, bake the chicken in the oven. This method keeps the skin crispy while cooking the meat evenly.
Variations on the Marinade
You can mix up the marinade to suit your taste. Try adding different herbs like oregano or basil. For a spicy kick, include red pepper flakes. You can swap lemon juice for lime juice for a fresh twist. If you want a smoky flavor, add a bit more smoked paprika. Don’t hesitate to experiment. Each variation can make your chicken unique and delicious.
Best Side Dishes to Serve with Baked Garlic Herb Chicken
Baked garlic herb chicken pairs well with many sides. Here are some ideas:
– Roasted vegetables like carrots, broccoli, or Brussels sprouts
– Creamy mashed potatoes or garlic mashed cauliflower
– A fresh green salad with a light vinaigrette
– Garlic bread or crusty French bread
– Steamed rice or quinoa for a healthy touch
These sides will balance the flavors and make your meal complete. Enjoy your cooking experience and feel free to explore!
Variations
Herb Substitutions
You can change the herbs in this recipe to suit your taste. If you don’t have rosemary or thyme, try using:
– Oregano
– Basil
– Sage
– Dill
Mix and match to find your favorite blend. Each herb adds a unique flavor to the chicken. Fresh herbs work best, but dried herbs can work too. Just use less, as dried herbs are stronger.
Spicy Garlic Herb Chicken Recipe
For a kick, add some heat. Mix in red pepper flakes for spice. You can also use:
– Jalapeños
– Chipotle powder
– Hot paprika
Adjust according to your spice level. For a spicy twist, marinate the chicken overnight. This lets the flavors soak in deeply.
Oven vs Air Fryer Cooking Methods
You can cook the chicken in two ways: the oven or an air fryer. Both methods work well but give different results.
– Oven: This method gives juicy chicken with a crispy skin. Bake at 400°F (200°C) for about 25-30 minutes.
– Air Fryer: This method cooks faster. Set your air fryer to 375°F (190°C) and cook for 20-25 minutes. The air fryer makes the skin extra crispy.
Choose the method that fits your needs. For a quick meal, the air fryer is great. For a cozy family meal, the oven works best. Enjoy experimenting with both!
Storage Info
Proper Storage Techniques
To keep your baked garlic herb chicken fresh, let it cool first. Once cooled, place it in an airtight container. This helps prevent moisture loss. You can store it in the fridge for up to three days. If you plan to eat it later, consider slicing the chicken for easier serving.
Reheating Instructions for Leftovers
When you’re ready to enjoy your leftovers, preheat the oven to 350°F (175°C). Place the chicken in an oven-safe dish. Add a splash of chicken broth to keep it moist. Cover the dish with foil to prevent drying. Heat for about 15-20 minutes or until the chicken reaches 165°F (75°C). You can also reheat in the microwave, but the oven gives better results.
Freezing Options for Baked Chicken
If you want to freeze your baked garlic herb chicken, wrap each piece tightly in plastic wrap. Then place them in a freezer-safe bag or container. This method helps avoid freezer burn. You can freeze the chicken for up to three months. To thaw, move it to the fridge overnight before reheating. Enjoy your tasty meal anytime with these easy storage methods!
FAQs
How long to cook chicken thighs in the oven?
You should cook chicken thighs in the oven for 25-30 minutes at 400°F (200°C). This time ensures that the chicken is juicy and tender. Always check that the internal temperature reaches 165°F (75°C) to ensure it is safe to eat.
Can I use boneless chicken for this recipe?
Yes, you can use boneless chicken for this recipe. Boneless chicken cooks faster, so reduce the cooking time to about 20-25 minutes. Keep an eye on the temperature to avoid overcooking.
What can I substitute for fresh herbs?
If you don’t have fresh herbs, you can use dried herbs. Use about one-third of the amount since dried herbs are stronger. For rosemary and thyme, this works well. You can also try Italian seasoning as a mix.
Is this recipe suitable for meal prep?
Yes, this recipe is great for meal prep. You can cook multiple servings and store them in the fridge. Just let the chicken cool before you pack it in airtight containers. This way, you can enjoy tasty meals all week!
Baked garlic herb chicken is simple and tasty. We covered key ingredients, tools, and step-by-step instructions. You learned how to marinate, cook, and achieve crispy skin. Plus, I shared tasty variations and storage tips. Cooking can be fun and rewarding. With these tips, you can impress family and friends. Enjoy your cooking journey, and don’t forget to share your great results!

![- 1 lb chicken breast, cut into 1-inch cubes - 1 cup fresh pineapple, cut into 1-inch cubes - 1 bell pepper (red or yellow), cut into 1-inch pieces - 1 medium red onion, cut into wedges - 1/2 cup BBQ sauce (store-bought or homemade) - 2 tablespoons olive oil - 1 teaspoon garlic powder - 1 teaspoon smoked paprika - Salt and pepper to taste - Skewers - Grill or grill pan When I gather the ingredients for Pineapple BBQ Chicken Kabobs, I start by choosing fresh items. Fresh chicken breast is key for moist kabobs. I prefer ripe pineapples for the best flavor. Bell peppers give a nice crunch and color. Red onion adds a sweet bite. For the BBQ sauce, choose your favorite brand or make your own. Next, I prepare the marinade. I mix olive oil with garlic powder and smoked paprika. This mix is simple but packs a punch. A dash of salt and pepper balances all the flavors. I coat the chicken pieces in this marinade, letting them soak up the goodness. For cooking, I use skewers. Wooden skewers need soaking in water first. This prevents them from burning on the grill. I heat my grill to medium-high. This ensures the kabobs cook evenly. Gathering these ingredients and tools makes the cooking process fun and easy. Check out the Full Recipe for detailed steps to create this mouthwatering dish! To start, you need to marinate the chicken. In a large mixing bowl, combine the chicken cubes with the BBQ sauce, olive oil, garlic powder, smoked paprika, salt, and pepper. This mix gives the chicken great flavor. Stir well until the chicken is fully coated. Cover the bowl and refrigerate it for at least 30 minutes. For the best taste, let it marinate for up to 2 hours. This step is key to making your kabobs delicious. After marinating, it's time to prepare the skewers. Take your skewers and start threading the ingredients. Alternate the marinated chicken with pieces of fresh pineapple, bell pepper, and red onion. Aim to have 3-4 pieces of chicken on each skewer, separated by a chunk of pineapple and either bell pepper or onion. This mix not only looks good but also tastes amazing. It adds sweet and savory flavors to each bite. Next, you need to grill the kabobs. Preheat your grill to medium-high heat. If you are using a grill pan, heat it over medium heat and lightly brush it with oil to prevent sticking. Once the grill is hot, place the skewers on the grates. Grill the kabobs for about 10-12 minutes. Turn them every few minutes for even cooking. The chicken is done when it reaches 165°F (75°C) and has nice grill marks. For the last 2-3 minutes of grilling, brush more BBQ sauce on the kabobs. This makes them extra tasty and gives a nice caramelized look. After grilling, carefully remove the kabobs and let them rest for a minute before serving. This helps keep the juices inside. Enjoy your Pineapple BBQ Chicken Kabobs! For the complete recipe, check out the Full Recipe section. To get great grill marks, heat your grill to medium-high. Use a meat thermometer to check the chicken. Aim for 165°F (75°C). This ensures your chicken is safe to eat. To avoid overcooking, turn the kabobs every few minutes. This helps them cook evenly without drying out. You can mix up the marinade for more flavor. Try adding soy sauce or ginger for a twist. If you want a spicy kick, add hot sauce to the BBQ sauce. For the best BBQ sauce, choose one with a balance of sweet and tangy. This will complement the pineapple well. When serving, place the kabobs on a large platter. Add extra pineapple slices for color and taste. For a nice touch, sprinkle chopped cilantro or parsley on top. This adds freshness and vibrancy. Pair the kabobs with fluffy rice or a crisp salad to complete your meal. Don't forget to check out the Full Recipe for more details! {{image_4}} You can switch up the meat in these kabobs. Shrimp works great for a quick cook. Just marinate them the same way as chicken. You can also use tofu for a vegetarian option. Cut the tofu into cubes and press it to remove extra water. Then, marinate it like the chicken. This gives you a tasty, meat-free kabob. Adding more fruits and veggies can take these kabobs to the next level. Try using mango or zucchini for a twist. You can even toss in cherry tomatoes for a burst of flavor. If you like heat, add jalapeños or a spicy marinade. This will bring a nice kick to your kabobs. While grilling is classic, you can also bake these kabobs in the oven. Preheat your oven to 400°F (200°C). Place the skewers on a baking sheet and cook for about 20 minutes. Turn them halfway for even cooking. Air frying is another option. Set your air fryer to 400°F (200°C) and cook for 10-12 minutes. Both methods will give you juicy kabobs. Check the [Full Recipe] for more details! To store leftovers, place kabobs in an airtight container. This keeps them fresh and tasty. You can store them in the fridge for up to three days. If you want to enjoy them later, freezing is a great option. When reheating kabobs, keep the texture in mind. The best way to reheat is on the stove or grill. This helps maintain their juiciness. You can use a microwave too, but it may not keep them as tasty. If you use the microwave, heat in short bursts to avoid overcooking. You can freeze kabobs for up to three months. To freeze, wrap them tightly in plastic wrap. Then, place them in a freezer bag. For best results, thaw them in the fridge overnight before reheating. This step helps them maintain their flavor and texture. Marinate the chicken for at least 30 minutes. If you have more time, go for 2 hours. This longer marination helps the chicken soak up the BBQ flavor. The more time it sits, the better it tastes. Yes, you can use wooden skewers. Make sure to soak them in water for about 30 minutes. This prevents burning while they grill. You can also use metal skewers if you have them. These kabobs go great with fluffy rice, fresh salads, or grilled veggies. You can also serve them with corn on the cob or a tangy coleslaw. These sides balance the sweet and savory flavors. Use a meat thermometer to check the chicken's internal temperature. It should reach 165°F (75°C). This ensures the chicken is safe to eat and juicy. Cook the kabobs on medium-high heat for even cooking. Yes, it is safe to eat frozen kabobs. Just make sure to thaw them in the fridge before grilling. This helps ensure they cook evenly. Always check that they reach the safe temperature. You can add shrimp, beef, or tofu instead of chicken. Mix in different veggies like zucchini or mushrooms. Experiment with fruits like peaches or mango for added sweetness. To make BBQ sauce, mix ketchup, brown sugar, vinegar, and spices. Simmer the mix on low heat for 20 minutes. Adjust flavors to your taste by adding more sugar or spices. This sauce will add a personal touch to your kabobs. For the full recipe, check the [Full Recipe]. Pineapple BBQ chicken kabobs are a tasty and fun dish to make. We covered key ingredients, like chicken and pineapple, and important steps, like marinating and grilling. I shared tips for perfect grill marks and flavor boosts. You can even try new proteins or cooking methods. Leftover kabobs can be stored easily, too. With these insights, you're ready to impress at your next cookout. Enjoy cooking and tasting!](https://blissfulmeal.com/wp-content/uploads/2025/06/c01b5364-0b9a-46af-bb16-414e11ec00cf-768x768.webp)

![- 1 cup rice noodles - 1 cup shredded carrots - 1 cup red cabbage, finely sliced - 1 cucumber, peeled and julienned - 1 bell pepper (your choice of color), julienned - 1 ripe avocado, sliced - 1 cup cooked shrimp or cubed tofu (optional) These main ingredients form the base of your rainbow spring roll bowls. The rice noodles bring a nice chew, while the fresh veggies add crunch and color. Feel free to mix and match your favorite vegetables. You can even add more colors if you like. - 3 tablespoons soy sauce or tamari - 1 tablespoon sesame oil - 1 tablespoon fresh lime juice The dressing ties everything together. Soy sauce gives a salty kick, while sesame oil adds a nutty flavor. Lime juice brings a refreshing zing that wakes up your taste buds. You can adjust the amounts based on your taste. - 1/4 cup fresh cilantro, roughly chopped - 1/4 cup fresh mint leaves, roughly chopped - 1/4 cup peanuts, crushed (for garnish) Garnishes make your bowls pop! Fresh herbs like cilantro and mint add brightness. Crushed peanuts give a lovely crunch. These garnishes enhance both the look and taste of your dish. For the full recipe, check out [Full Recipe]. To start, fill a medium pot with water. Bring it to a rolling boil. Add 1 cup of rice noodles. Cook them for about 3 to 5 minutes. You want them tender but not mushy. When they are done, drain the noodles well. Rinse them under cold water. This stops the cooking. Set the noodles aside for now. While the noodles cook, wash all your vegetables. Use fresh and crisp ones for the best taste. I like to peel the cucumber first, then julienne it into thin strips. For the carrots, you can use a grater or a knife. Slice the red cabbage finely. Take a large bowl and mix the shredded carrots, sliced cabbage, julienned cucumber, and bell pepper. Toss them gently to combine. You want a colorful mix that looks great. Grab a small bowl for the dressing. Whisk together 3 tablespoons of soy sauce (or tamari), 1 tablespoon of sesame oil, and 1 tablespoon of fresh lime juice. Make sure to mix it well. Taste it and add a pinch of salt and pepper if needed. Adjusting seasoning helps bring out the flavors. Now, it’s time to build your bowls. Take individual serving bowls. Start with a layer of noodles at the bottom. Next, add a generous amount of the mixed vegetables on top. Then, lay down some slices of avocado. If you want protein, sprinkle cooked shrimp or tofu evenly across the bowls. Finally, top with fresh cilantro and mint leaves. They add a nice aroma and flavor. For a beautiful presentation, use clear or brightly colored bowls. This way, all the vibrant hues shine. For extra zest, place lime wedges on the side. Guests can squeeze them over their bowls before digging in. To roll spring rolls well, start with fresh rice paper. Dip it in warm water briefly until soft. Lay it flat on a clean surface. Place your ingredients close to the edge. Fold the edge over the filling. Tuck it in tight. Then, roll the paper away from you, folding in the sides. This creates a tight roll. To avoid tearing, don’t soak the rice paper too long. If it feels fragile, let it sit for a moment. You can also layer the filling for extra support. If a roll tears, use it as a guide for your next one. To boost the taste of your bowls, try adding crunchy toppings. Toasted sesame seeds or sliced jalapeños can add a nice crunch. You can also mix in edamame or bean sprouts for extra texture. Adjust the dressing to your liking. If you want more zing, add lime juice. For a richer taste, use more sesame oil. Always taste before you pour it over the bowls. This way, you can find the perfect balance for you. Rainbow Spring Roll Bowls are packed with fresh ingredients. Fresh veggies provide vitamins and minerals. Carrots, for instance, are great for your eyes. Cabbage offers fiber and antioxidants. In terms of calories, this bowl is light but filling. Each serving has around 300 calories, depending on your toppings. This makes it a good choice for lunch or dinner. Plus, the healthy fats from avocado keep you satisfied. Eating fresh is not just tasty; it’s good for your body too! {{image_4}} You can make Rainbow Spring Roll Bowls vegetarian by adding tofu or chickpeas. Tofu gives a nice texture, while chickpeas add protein. For veggies, switch up the mix! Try using sweet bell peppers, zucchini, or snap peas for a fresh taste. You can even add cooked quinoa for extra nutrients. These choices keep your meal colorful and fun! If you need gluten-free options, use gluten-free soy sauce or tamari instead of regular soy sauce. This keeps your sauce flavorful without the gluten. You can also swap rice noodles for rice paper wraps or spiralized veggies. This creates a light and fun meal without losing any taste. In summer, load your bowls with fresh fruits like mango or pineapple. These add a sweet touch that brightens up each bite. For winter, consider using roasted root vegetables like sweet potatoes or beets. They add warmth and depth to your bowls. Mixing in seasonal ingredients makes your bowls exciting all year round. To store your Rainbow Spring Roll Bowls, keep the fresh ingredients separate. This helps maintain their crunch and flavor. Use airtight containers for the rice noodles and veggies. For best results, store them in the fridge. They can stay fresh for about 2-3 days. If you have leftover dressing, place it in a small jar. It will keep well sealed in the fridge too. I love preparing ingredients in advance. Chop your veggies a day early and store them in the fridge. This makes it quick to assemble bowls when you are ready to eat. You can also cook the rice noodles ahead of time. Just make sure to rinse them in cold water to stop the cooking process. Assemble your bowls right before serving. This keeps everything fresh and colorful. If you need to reheat the noodles, do it gently. Place them in a microwave-safe bowl and add a bit of water. Heat for 30 seconds, then stir. This helps avoid sogginess. If you want to keep the textures nice, try not to overheat them. Serve the noodles warm, but enjoy the fresh veggies cold. This contrast makes each bite delightful. Yes, you can prep your Rainbow Spring Roll Bowls in advance. Start by cooking the rice noodles and letting them cool. You can chop all the veggies and store them in an airtight container. This keeps them fresh and crunchy. Mix the dressing and keep it in a separate jar. Assemble the bowls just before you serve. This way, the colors stay bright, and the veggies stay crisp. If you want to switch up the noodles, try using soba or glass noodles. They offer a nice texture and flavor. You can even use zucchini noodles for a low-carb option. Just remember to adjust your cooking time based on what you choose. Each type of noodle brings its own taste to the dish. Leftovers from your Rainbow Spring Roll Bowls will last about three days in the fridge. Store them in an airtight container to keep them fresh. The veggies might soften over time, so it’s best to eat them quickly. If you have leftovers, you can also use them in stir-fries or salads. You now have all the key steps to create delicious Rainbow Spring Roll Bowls. From selecting fresh ingredients like rice noodles and vibrant veggies to crafting a flavorful dressing, everything is at your fingertips. Remember to store your leftovers properly and follow meal prep tips for easy weeknight meals. These bowls are not just tasty; they are also a healthy choice. Get creative with seasonal variations and toppings to suit your taste. Enjoy the process and share the joy of cooking with others!](https://blissfulmeal.com/wp-content/uploads/2025/07/ff6bcafe-2a83-4847-80a2-ea869bc38522-768x768.webp)
