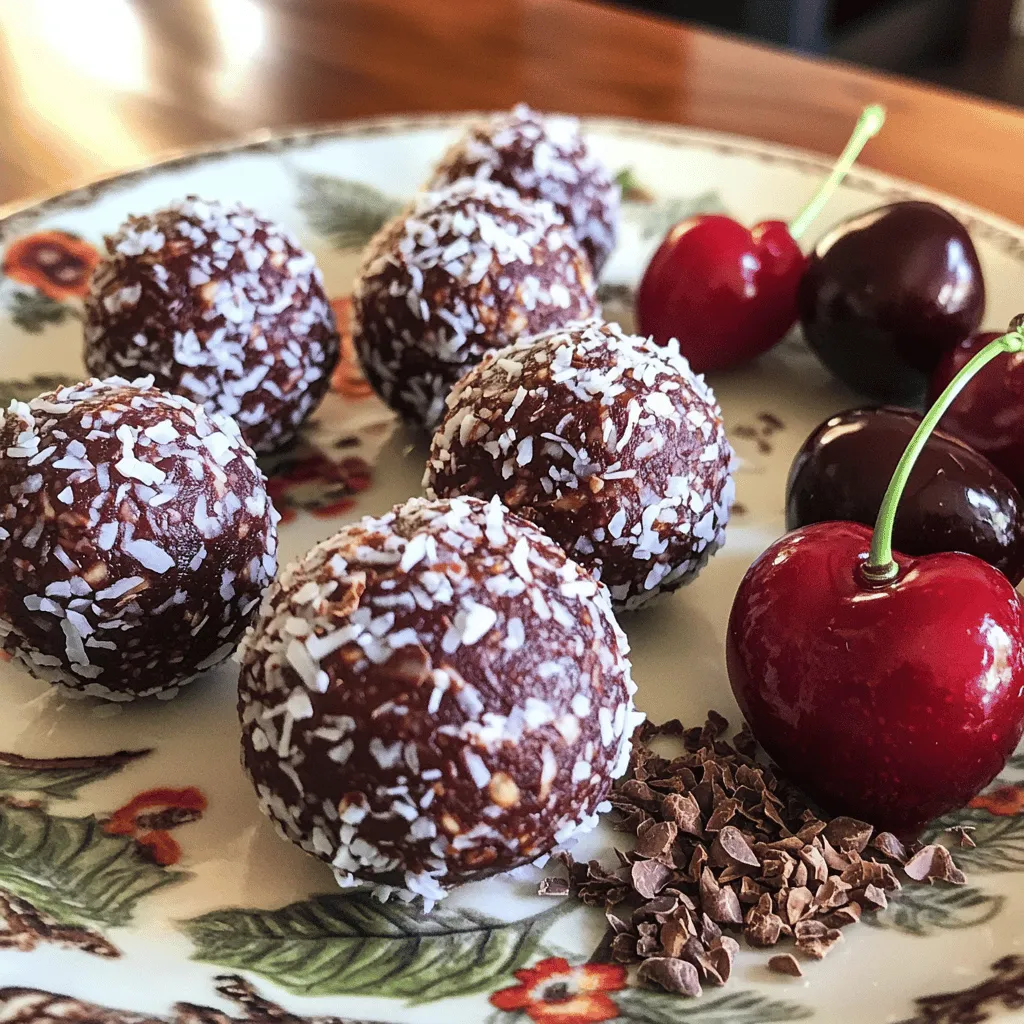
Cherry Chocolate Bliss Balls Delightful and Easy Recipe

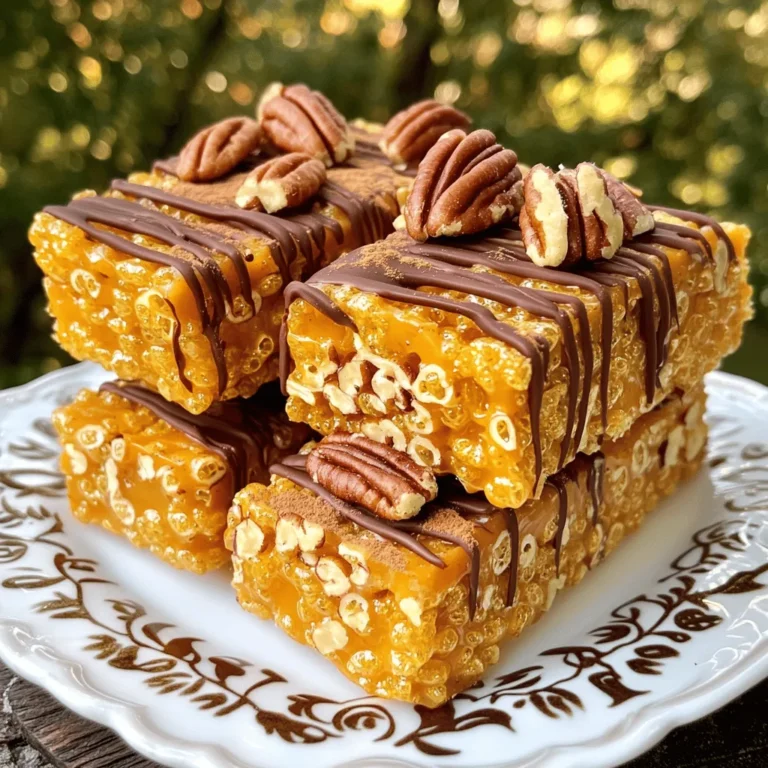
Are you ready to indulge in a tasty treat that’s both easy to make and delightfully healthy? Cherry Chocolate Bliss Balls combine the rich flavors of chocolate and cherries into one irresistible snack. In this guide, I’ll walk you through simple steps to create these energy-packed wonders. Whether you’re a busy parent or a health nut, you’ll find joy in making these delicious bites. Let’s dive in!
Ingredients
Complete List of Ingredients
– 1 cup fresh or frozen cherries
– 1 cup Medjool dates
– 1 cup rolled oats
– ¼ cup unsweetened cocoa powder
– 1 tablespoon almond butter
– ½ teaspoon pure vanilla extract
– A pinch of salt
– ¼ cup shredded coconut (for coating)
Gather these ingredients first. The cherries give a bright taste. Medjool dates add sweetness and stickiness. Rolled oats provide fiber and texture. Cocoa powder brings rich chocolate flavor. Almond butter adds creaminess. Vanilla extract enhances all the flavors. The salt balances sweetness. Finally, shredded coconut creates a nice coating.
Optional Ingredient Substitutions
– You can use peanut butter instead of almond butter. This change will give a different nutty taste.
– For extra sweetness, you can add agave syrup or honey. These will make the bliss balls even sweeter.
These substitutions help you customize the recipe to your taste. Whether you like almond or peanut butter, both work well. Sweeteners can be adjusted too, depending on your preference.
Nutritional Breakdown
– Each bliss ball has roughly 100 calories.
– Key vitamins and minerals include vitamin C from cherries and fiber from oats.
This recipe not only tastes great but is also good for you. Cherries are rich in antioxidants. Medjool dates provide energy. Oats help with digestion. Overall, these bliss balls are a healthy treat that satisfies your sweet tooth.
Step-by-Step Instructions
Preparation Process
To start, gather all your ingredients and tools. You will need:
– 1 cup fresh or frozen cherries, pitted
– 1 cup Medjool dates, pitted and roughly chopped
– 1 cup rolled oats
– ¼ cup unsweetened cocoa powder
– 1 tablespoon almond butter
– ½ teaspoon pure vanilla extract
– A pinch of salt
– ¼ cup shredded coconut (for coating)
Place your food processor on a stable surface. This will help you blend smoothly. Before blending, make sure to pit the cherries and chop the dates. This step helps ensure even mixing.
For efficient blending, pulse in short bursts. This way, you can monitor the mixture closely. Stop and scrape down the bowl as needed. If the dough feels dry, add a tablespoon of water. Blend again until it forms a sticky dough.
Making the Dough
Now, let’s combine the ingredients. Add your pitted cherries, chopped dates, rolled oats, cocoa powder, almond butter, vanilla extract, and salt into the food processor. Pulse until everything mixes well. You want a sticky dough that holds together.
After blending, chilling the dough is crucial. Transfer it to the refrigerator for about 20 minutes. Chilling makes it easier to roll into balls later.
Rolling and Coating Bliss Balls
Once chilled, it’s time to roll the bliss balls. Use a tablespoon to scoop out portions of the dough. Roll each portion between your palms until they form small balls.
For coating, pour the shredded coconut onto a plate. Roll each bliss ball in the coconut to cover it evenly. This step adds a nice texture and flavor.
After coating, place the bliss balls on a lined baking sheet or serving platter. Return them to the fridge for another 30 minutes. This helps them firm up before you enjoy them.
Now, you have your Cherry Chocolate Bliss Balls ready to indulge!
Tips & Tricks
Common Mistakes to Avoid
– Over-blending or under-blending the mixture: Blend just until the dough comes together. If you blend too long, you’ll lose texture. If you don’t blend enough, your bliss balls won’t hold together.
– Not chilling the dough adequately: Chilling helps the dough firm up. If you skip this step, the balls can be too sticky to roll. Always chill for at least 20 minutes.
Enhancing Flavor and Texture
– Adding spices like cinnamon or nutmeg: A pinch of cinnamon adds warmth. Nutmeg gives a nice twist too. Both spices can elevate the taste.
– Mixing in nuts or seeds for crunch: Chopped almonds or sunflower seeds add a nice crunch. They also make your bliss balls more filling.
Serving Suggestions
– Pairing with beverages: These bliss balls go well with tea or coffee. Try them with almond milk for a great snack.
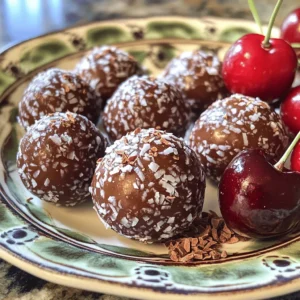
– Presentation ideas for gatherings: Arrange bliss balls on a pretty plate. Sprinkle coconut around them for a fun look. Add fresh cherries for a colorful touch.
Variations
Flavor Modifications
You can switch up the flavors in your cherry chocolate bliss balls. Try using raspberries or blueberries instead of cherries. These fruits bring a new taste and color to your treats. You can also experiment with flavored nut butters, like cashew or hazelnut. This small change adds a unique twist to your bliss balls.
Health-Conscious Variants
If you’re looking for a sugar-free version, use alternative sweeteners like stevia or monk fruit. These options keep the sweetness without the sugar. For those who need gluten-free options, choose certified gluten-free oats. This way, everyone can enjoy these tasty bites without worries.
Seasonal Twists
Adding seasonal flavors or spices can elevate your bliss balls. In fall, try mixing in pumpkin spice. In winter, a hint of peppermint can make them festive. You can also create holiday-themed bliss balls using colors or shapes that match the season. These variations make your treats fun and special for any occasion.
Storage Info
Best Practices for Storing Bliss Balls
To keep your Cherry Chocolate Bliss Balls fresh, store them in an airtight container. Place them in the fridge for a quick snack or the freezer for longer storage. Glass jars or plastic containers work great. If you want to keep them for a while, the freezer is best.
Shelf Life
In the fridge, these bliss balls last about one week. This makes them perfect for meal prep! If you freeze them, they can last up to three months. Just make sure they are in a sealed bag or container.
Rejuvenating Stored Bliss Balls
After being in the fridge, bliss balls can be a bit firm. To refresh them, let them sit at room temperature for a few minutes. If they are frozen, take them out and let them thaw completely. You can also roll them in some extra shredded coconut for a fresh look before serving. Enjoy the deliciousness!
FAQs
How long does it take to make Cherry Chocolate Bliss Balls?
Making Cherry Chocolate Bliss Balls is quick and easy.
– Prep Time: 10 minutes
– Chill Time: 50 minutes
– First, chill for 20 minutes.
– Then chill again for 30 minutes.
This means you can make these tasty treats in just under an hour.
Can I use dried cherries instead of fresh or frozen?
Yes, you can use dried cherries. However, it changes the texture and taste.
– Texture: Dried cherries are chewier.
– Taste: They are sweeter and less tart.
Using dried cherries makes the bliss balls denser and sweeter. If you prefer a softer bite, stick with fresh or frozen cherries.
What can I use instead of a food processor?
If you don’t have a food processor, don’t worry! You can mix by hand.
– Mixing Bowl: Use a large bowl.
– Fork or Masher: Mash the cherries and dates.
– Stir: Add oats, cocoa, and nut butter with a spoon.
This method takes more time, but it works well. Just make sure everything blends nicely.
Making Cherry Chocolate Bliss Balls is simple and fun. You gather your ingredients, blend them, shape into balls, and coat with coconut. Remember, you can swap ingredients for your taste. This snack is healthy and tasty, rich in vitamins and minerals.
Enjoy your bliss balls with friends, or store them for later. They can stay fresh in the fridge or freezer. With these tips, you’ll make delicious snacks everyone will love. Try different flavors to keep it exciting. Enjoy your time making these treats!
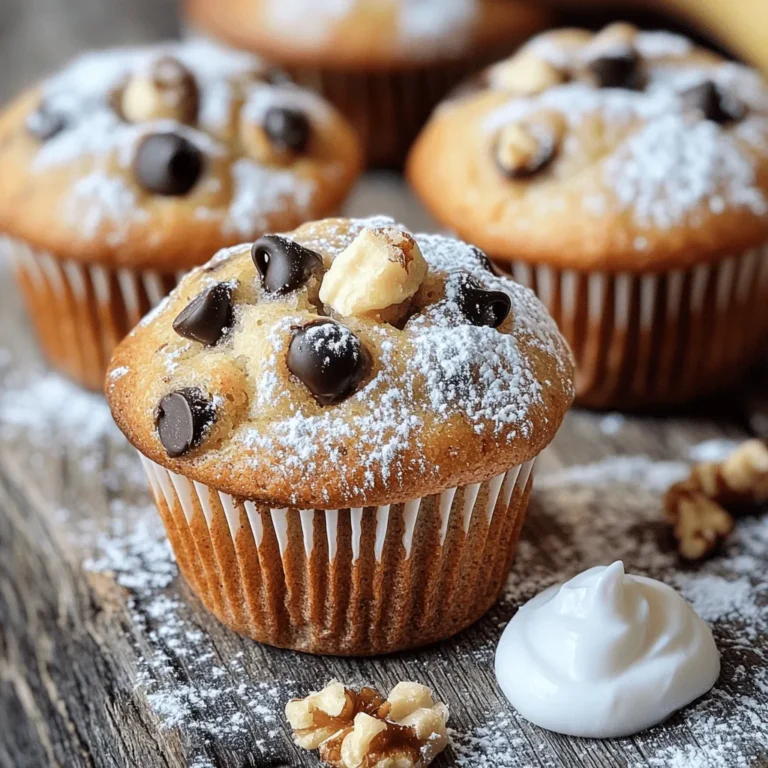
![To make these brown butter pumpkin blondies, you need a mix of simple and tasty ingredients. Here’s what you will need: - 1 cup unsalted butter - 1 cup packed brown sugar - 1/2 cup granulated sugar - 2 large eggs - 1 teaspoon pure vanilla extract - 1 cup pumpkin puree - 2 cups all-purpose flour - 1 teaspoon baking powder - 1 teaspoon baking soda - 1 teaspoon ground cinnamon - 1/2 teaspoon ground nutmeg - 1/2 teaspoon sea salt - Optional: 1 cup white chocolate chips, 1/2 cup chopped walnuts or pecans These ingredients come together to create a warm and cozy treat. The brown butter gives the blondies a rich, nutty flavor. Pumpkin puree adds moisture and a hint of fall spice. You can also add white chocolate chips or nuts for extra texture and sweetness. For the full recipe, check the section above. - Preheat the oven to 350°F (175°C). - Prepare a 9x13 inch baking pan by greasing it lightly. Line the bottom with parchment paper for easy removal. - Melt 1 cup of unsalted butter in a medium saucepan over medium heat. - Stir constantly and watch for browning. It takes about 5-7 minutes. - The butter will foam and turn a golden-brown color. - Remove it from heat and let cool slightly before using. - In a large bowl, pour in the cooled brown butter. - Add 1 cup packed brown sugar and 1/2 cup granulated sugar. - Whisk together until smooth. - Add 2 large eggs one at a time, whisking well after each. - Stir in 1 teaspoon pure vanilla extract and 1 cup pumpkin puree. - Mix until the batter is creamy and smooth. - In a separate bowl, sift together 2 cups all-purpose flour, 1 teaspoon baking powder, 1 teaspoon baking soda, 1 teaspoon ground cinnamon, 1/2 teaspoon ground nutmeg, and 1/2 teaspoon sea salt. - Gradually fold this dry mix into the wet mixture. - Be careful not to overmix; stir just until combined for a tender texture. - If you like, fold in 1 cup white chocolate chips and 1/2 cup chopped walnuts or pecans. - Carefully pour the batter into the prepared baking pan. - Use a spatula to smooth the top. - Place the pan in the preheated oven and bake for 25-30 minutes. - Check doneness with a toothpick; it should come out clean. - Let the blondies cool in the pan for about 15 minutes. - Then, transfer them to a wire rack to cool completely. - Once cool, slice into squares and serve. - For extra flair, dust the tops with powdered sugar or serve with whipped cream. For the full recipe, click [Full Recipe]. To make your blondies soft, mix gently. Overmixing makes them tough. Stir until the flour disappears. If you use a glass pan, lower the oven to 325°F. This helps your blondies bake evenly. Want more autumn vibes? Add spices! A pinch of ginger or allspice boosts the flavor. You can also mix in chopped apples or dried cranberries. For toppings, think about adding nuts or drizzling caramel sauce. For a lovely presentation, dust the tops with powdered sugar. Pair each piece with whipped cream. You can also create a dessert platter. Add cookies, fruit, or mini pastries for a fun spread. Try out the full recipe for an easy way to impress your guests! {{image_4}} You can make these blondies gluten-free. Just swap the all-purpose flour for a gluten-free flour blend. Look for blends that work well in baking. They usually mix well and keep the texture nice. This change will still give you that lovely, soft bite. Want a vegan treat? You can replace the eggs with flax eggs. To make a flax egg, mix one tablespoon of ground flaxseed with three tablespoons of water. Let it sit until it thickens. For the butter, use a plant-based butter. This will keep your blondies rich and tasty without any animal products. Get creative with spices! Adding ginger or cloves can give a fun twist to the flavor. You can also try using different types of chocolate. Dark chocolate chips can add a deeper taste, while milk chocolate offers sweetness. Consider adding nuts like pecans or almonds for extra crunch. Each change can make your blondies special and unique. To keep your Brown Butter Pumpkin Blondies fresh, store them in an airtight container. This helps them stay moist and flavorful. Avoid stacking them if possible, as that can make them stick together. If you want to gift them, use a decorative box lined with parchment paper. This adds a nice touch and keeps them safe during transport. Freezing blondies is simple. Start by slicing them into squares. Place each square on a baking sheet in a single layer. Freeze them for about an hour until solid. Then, wrap each blondie in plastic wrap and place them in a freezer bag. This method prevents freezer burn. To reheat, remove a blondie from the bag and let it thaw at room temperature for about 30 minutes. For a warm treat, heat it in the microwave for about 10-15 seconds. Brown Butter Pumpkin Blondies can last up to five days at room temperature. Keep them in a cool, dry place. If you refrigerate them, they can last up to seven days. The cool air helps keep them fresh for longer. Just remember, blondies may dry out slightly in the fridge, so enjoy them sooner for the best taste! For the full recipe, check out the details above. To cut blondies cleanly, use a sharp knife. Here are some tips: - Cool completely: Let the blondies cool in the pan. - Use a ruler: Measure to make even squares. - Wipe the knife: Clean the knife between cuts to reduce crumbs. - Score before cutting: Lightly mark where you will cut. These steps help you get neat, beautiful blondies. Yes, you can make blondies ahead of time. Here’s how: - Bake and cool: Bake as usual and let them cool completely. - Store in an airtight container: This keeps them fresh. - Refrigerate or freeze: They last longer when stored this way. You can enjoy your blondies for days! To check if your blondies are done, look for these signs: - Golden edges: The edges should be lightly browned. - Set center: The center should not jiggle when you shake the pan. - Toothpick test: Insert a toothpick in the center; it should come out clean. If you see these signs, your blondies are ready! Yes, you can substitute pumpkin puree. Here are some options: - Applesauce: Use the same amount for moisture. - Sweet potato puree: This gives a different flavor but works well. - Mashed banana: This adds sweetness and moisture. Choose based on your taste! Blondies can be both! Here’s how to get each texture: - For chewy blondies: Use less flour and don’t overmix the batter. - For cakey blondies: Add a bit more flour and mix well. Experiment to find your favorite texture! For the full recipe, check out the Brown Butter Pumpkin Blondies. This blog post covered everything you need to make delicious pumpkin blondies. We explored key ingredients, step-by-step instructions, and tips for achieving the perfect texture. You can even try variations for gluten-free and vegan options. In closing, these blondies are perfect for any fall gathering. Use the techniques shared to impress your friends and family. Enjoy baking, experimenting, and sharing these delightful treats!](https://blissfulmeal.com/wp-content/uploads/2025/07/e40eac7c-6e96-4c1b-88f9-4ac0da3c90ba-768x768.webp)
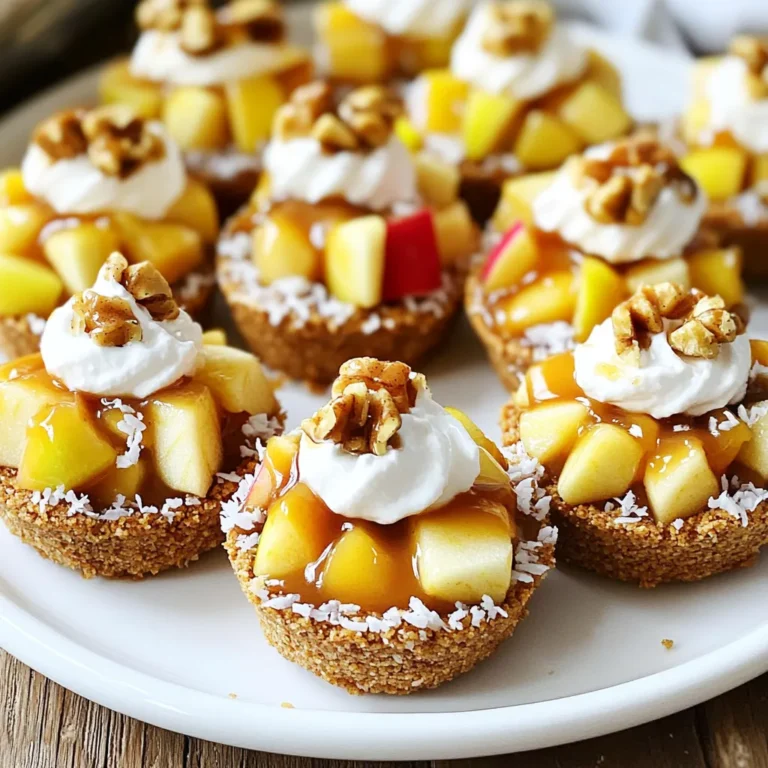
![To make peach tartlets, gather these key items: - 1 cup all-purpose flour - 1/4 cup unsalted butter, softened - 1/4 cup granulated sugar - 1/4 teaspoon salt - 1/4 teaspoon vanilla extract - 1 tablespoon ice-cold water - 2 ripe peaches, pitted and thinly sliced - 1 tablespoon brown sugar - 1 teaspoon ground cinnamon - 1 tablespoon cornstarch - 1 tablespoon freshly squeezed lemon juice These ingredients create a sweet and flaky crust, paired with juicy peaches. You can add a few fun touches to your tartlets: - Fresh mint leaves - A dusting of powdered sugar - A scoop of vanilla ice cream Each garnish adds flavor and looks great on your plate. Here are the tools you will need: - Mixing bowls - Pastry cutter or your fingers - Mini tartlet pans - Spoon for filling - Wire rack for cooling Having the right tools makes the process easy and fun. For the full recipe, check out the detailed instructions. Start by preheating your oven to 375°F (190°C). This step helps the crust bake evenly. In a medium bowl, mix the all-purpose flour, softened unsalted butter, granulated sugar, and salt. Use a pastry cutter or your fingers to blend the mix until it looks like coarse crumbs. Next, add the vanilla extract for flavor. Slowly mix in ice-cold water, one tablespoon at a time. Keep mixing until the dough forms a ball. If it feels dry, add a bit more water. Now, divide the dough into 6 equal parts. Roll each part into a small ball. Press each ball into the bottom and sides of mini tartlet pans. Make sure the crust is even all around. In a separate bowl, take your ripe peaches and slice them thinly. Combine the peach slices with brown sugar, ground cinnamon, cornstarch, and lemon juice. Gently toss the mixture, ensuring each peach slice is coated. This mix adds sweetness and flavor to your tartlets. Fill each tartlet crust with the peach mixture. Distribute the slices evenly for a nice look. Place the tartlet pans in the oven. Bake for 20 to 25 minutes. Keep an eye on them! When the crust is golden brown and the peaches are bubbling, they are ready. Once baked, take the tartlets out and let them cool for about 5 minutes in the pans. Then, carefully move them to a wire rack. Let them cool completely. If you like, add fresh mint leaves on top before serving for a pop of color. Enjoy your peach tartlets! Get the dough right for perfect tartlets. Start with cold butter. Your dough should feel soft but not sticky. Mix the flour, butter, and sugar until it looks like crumbs. If it crumbles too much, add a bit of cold water. Add just one tablespoon at a time. This keeps your crust flaky and light. Choose ripe peaches for the best flavor. Look for peaches that are slightly soft when you press them. They should smell sweet and fragrant. If they are too hard, let them sit on the counter for a few days. Use ripe peaches to get that juicy goodness in every bite. Baking temperature is key for a golden crust. Always preheat your oven to 375°F (190°C). Bake your tartlets for 20-25 minutes. Keep an eye on them. The crust should be golden brown, and the peaches should bubble. This shows they are cooked perfectly. For the full recipe, you can check the detailed instructions above. {{image_4}} You can switch peaches for other fruits in tartlets. Try using ripe strawberries, sweet cherries, or tart apples. Each fruit brings its unique taste. For example, strawberries add a bright flavor. Cherries offer a deep, rich sweetness. Apples give a nice crunch. Just remember to adjust the sugar based on the fruit's sweetness. While the classic crust is tasty, you can explore new options. Use almond flour for a nutty twist. A graham cracker crust can add a sweet crunch. For a gluten-free option, try a crust made from oats. Mix oats with coconut oil and a touch of honey for a simple base. These crusts will give your tartlets a fresh feel. Spices and extracts can elevate your peach tartlets. Add a dash of nutmeg or ginger for warmth. You can also mix in a bit of almond extract for depth. Vanilla extract enhances the natural sweetness. Don’t be afraid to experiment! A little spice can change your dessert into something special. Check out the Full Recipe for more ideas on enhancing flavors. Store your leftover peach tartlets in a cool place. Use an airtight container to keep them fresh. If you plan to eat them within two days, leave them at room temperature. For longer storage, place them in the fridge. They will stay tasty for up to four days in the fridge. You can freeze peach tartlets for later enjoyment. First, let them cool completely. Then, wrap each tartlet in plastic wrap tightly. Place the wrapped tartlets in a freezer-safe bag or container. They can last up to three months in the freezer. When you're ready to eat, just thaw them in the fridge overnight. To enjoy your peach tartlets warm, preheat your oven to 350°F (175°C). Place the tartlets on a baking sheet. Heat them for about 10 to 15 minutes, or until they are warm all the way through. This method keeps the crust crispy. You can also use a microwave, but this may make the crust softer. Enjoy your delightful peach tartlets from the [Full Recipe] any time! Yes, you can prepare Peach Tartlets ahead of time. You can make the crust and filling in advance. Store the dough wrapped in plastic in the fridge for up to two days. The peach filling can stay fresh in the fridge for one day. On the day you want to serve them, simply assemble and bake. The best peaches for tartlets are ripe, juicy, and sweet. Look for yellow peaches or freestone peaches. They have great flavor and are easy to slice. Avoid peaches that are hard or have blemishes. They won’t taste as good in your tartlets. Serve Peach Tartlets on a pretty platter for special occasions. You can dust them with powdered sugar for a fancy touch. Add a scoop of vanilla ice cream on the side to make it even better. Fresh mint leaves can also add color and flavor. This makes your dessert look and taste amazing! For the full recipe, check out the details above. Making peach tartlets is fun and rewarding. We covered ingredients, tools, and the complete process. You learned tips for perfect consistency and how to choose ripe peaches. Variations allow you to get creative with flavors and crusts. Always store leftovers right to keep them fresh. Remember, these tartlets shine at any gathering. Enjoy experimenting and sharing your tasty creations!](https://blissfulmeal.com/wp-content/uploads/2025/06/1d8c01cb-eb34-4ace-8ddc-9e4e1742b134-768x768.webp)