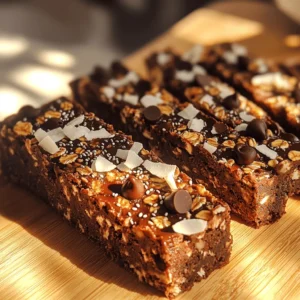
Chocolate Coconut Granola Bars
Looking for a delicious and healthy snack? Try these irresistible Chocolate Coconut Granola Bars! Made with wholesome ingredients like rolled oats, almond butter, and shredded coconut, they are perfect for on-the-go munching. In just 40 minutes, you can enjoy a batch of 12 tasty bars that are great for breakfast or an afternoon pick-me-up.